A carbon filter will reduce a meaningful share of the VOCs coming off a styrenic or engineering filament, but it is a partial measure, not a fix. Working out how to filter VOCs with a carbon filter comes down to the equipment, the sizing math, and the airflow steps, and this guide covers all three. Budget a weekend for the build and an hour every month or so to check it.
Worth saying up front: the most common advice in maker forums is to run an extractor out a window or through a wall, and for a print farm or a shared workshop that is usually right. A carbon stage is the better option when you cannot duct outside, when the enclosure recirculates, or when you want to keep styrene and formaldehyde out of an occupied room without opening a window in January. Do both when you can.
Table of Contents
- 1What You Need
- 2Step-by-Step: How to Filter VOCs with a Carbon Filter
- 31. Identify the printer, the materials, and the real emission load
- 42. Measure the enclosure and the airflow through it
- 53. Choose an activated-carbon system with adequate contact time
- 64. Install particulate prefiltration ahead of the carbon
- 75. Seal every bypass path
- 86. Direct contaminated air through the carbon stage, not around it
- 97. Test the setup and keep a baseline
- 10Choose the right activated-carbon stage
- 11Verify airflow and maintain the filter
- 12Common mistakes when you filter VOCs with a carbon filter
- 13Frequently Asked Questions
- 14Can a carbon filter remove all VOCs from 3D-printer emissions?
- 15Will an activated-carbon filter protect me from ABS and ASA fumes?
- 16Is a HEPA filter the same as a carbon filter for VOCs?
- 17How often should a carbon filter used with a 3D printer be replaced?
- 18Does a carbon filter work for resin 3D printing?
- 19Should I still ventilate a room if I use a carbon filter?
- 20Conclusion
What You Need
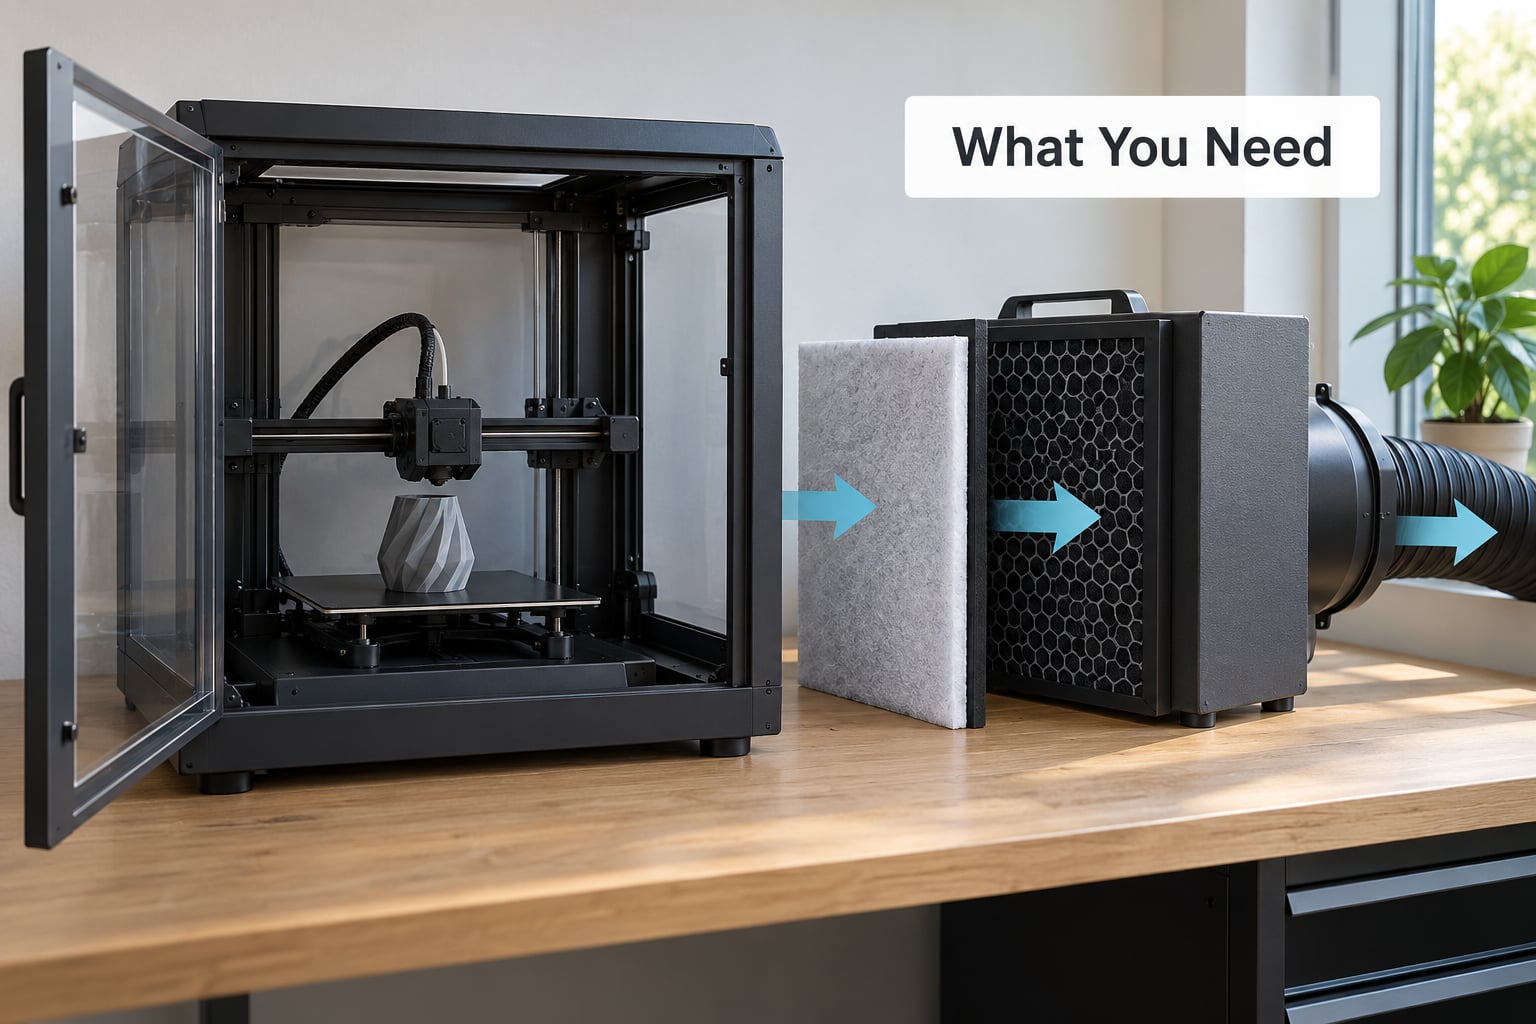
Two different jobs sit inside that filter housing, and confusing them is the single most common reason a setup feels like it is working when it is not. Particle filtration catches dust, powder and the ultrafine particles that come off a nozzle. Activated-carbon VOC filtration traps gas-phase molecules such as styrene and formaldehyde. Neither stage substitutes for the other, and most consumer air purifiers only give you the first one.
To filter VOCs with a carbon filter you need five things:
- A purpose-built activated-carbon unit or replacement cartridge, sized to the volume of the air it will actually see. Not a thin carbon sheet and not a carbon-flavoured panel in an acrylic box.
- A particulate prefilter upstream of the carbon bed if the unit does not include one. Print dust clogs the pores and you will have replaced the carbon long before it saturated.
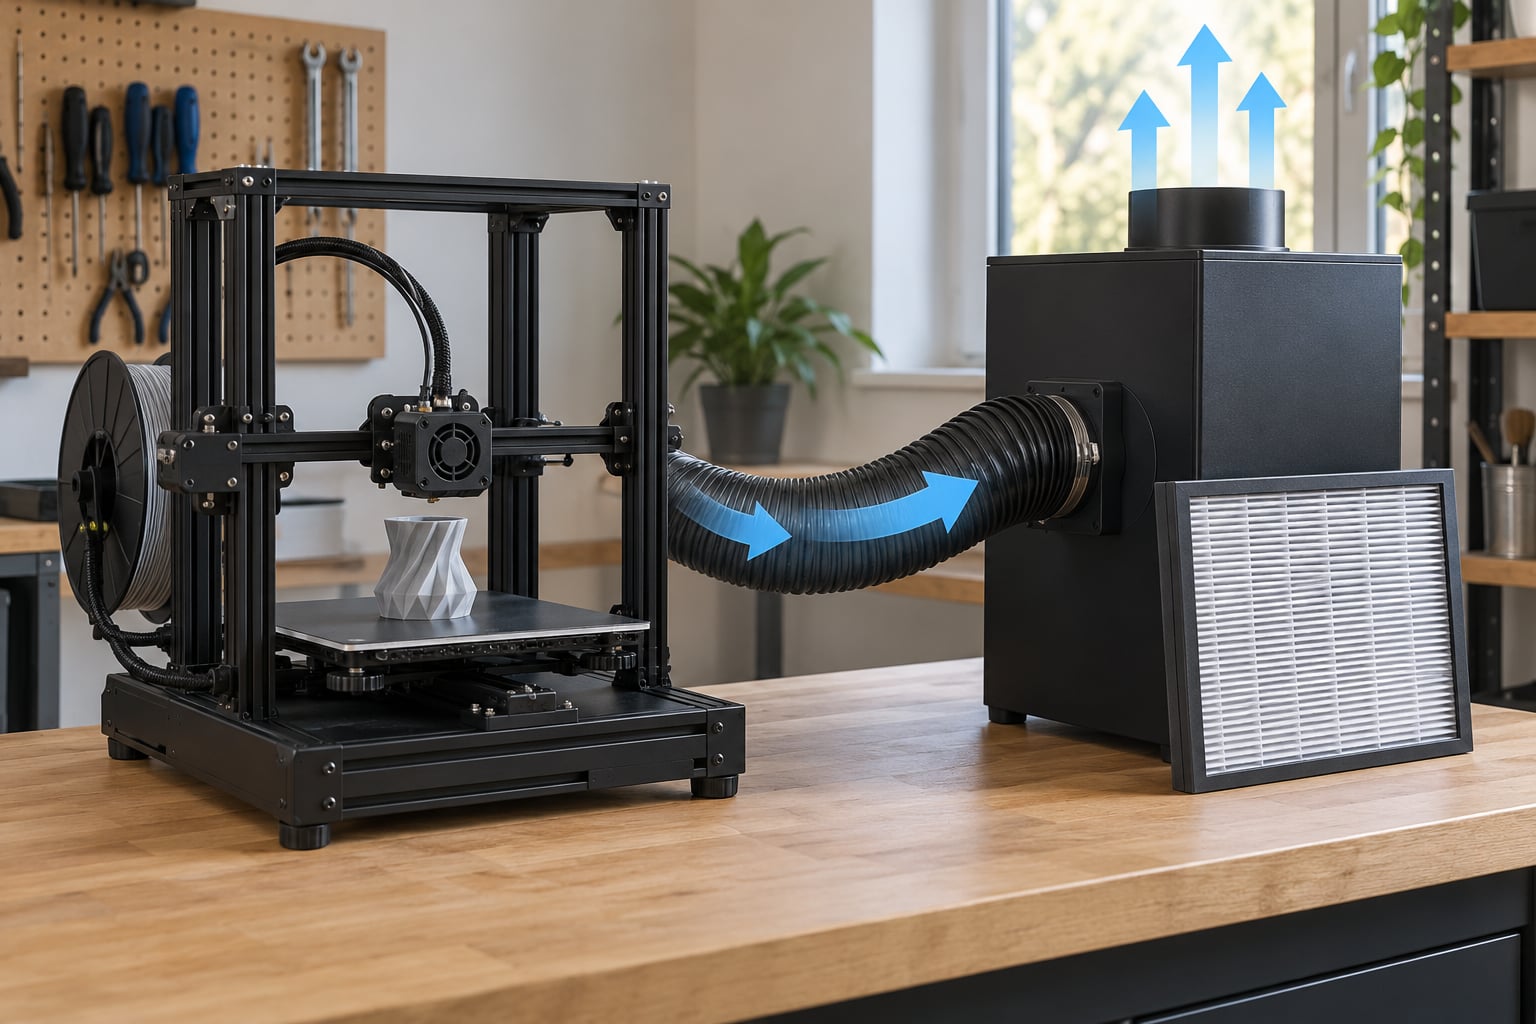
- An enclosure or extraction setup that actually captures emissions at the source, close to the nozzle where the plume forms.
- A rigid, sealed cabinet to hold the bed so air cannot short-circuit around the media through a gap.
- A way to verify airflow — at minimum a tissue held at the outlet, at best a small TVOC sensor so you have a before-and-after number rather than a guess.
One thing to be clear about before you buy anything: carbon adsorption is material-specific. Activated carbon traps a given molecule well or badly depending on the carbon’s pore structure, the contaminant’s size and polarity, the humidity, and how long the molecule has to sit in the bed. There is no carbon bed that removes every VOC. A media that does a decent job on styrene from ABS is not automatically good with formaldehyde, and neither touches carbon monoxide or carbon dioxide.
Step-by-Step: How to Filter VOCs with a Carbon Filter
Work through these in order. Each one is a precondition for the next, and skipping the airflow checks in the middle is what produces a filter that sits in a cabinet doing very little.
1. Identify the printer, the materials, and the real emission load
Write down what you actually run: filament type, brand, and roughly how many hours a month you print. ABS and ASA give styrene. Nylon and polycarbonate add ultrafine particles and a sharp chemical smell. Resin printing is a different emission profile from a filament machine and is handled further down.
The result to look for is a number you can work with: estimated print hours per month and grams of styrenic filament consumed. Those two numbers replace the calendar guess most people use when they decide to swap a filter.
2. Measure the enclosure and the airflow through it
Measure the internal volume of the enclosure in cubic feet, then figure out how many air changes per hour the fan and filter combination actually deliver. A common mistake is sizing the carbon bed for the room rather than for the enclosure, which over-specifies the media and leaves you paying to swap a very large cartridge.
Test airflow before you add any carbon. A sheet of tissue held at the intake should pull in firmly and hold there. If it flutters weakly or falls away, your fan is not moving enough air for any gas-phase media to work properly.
3. Choose an activated-carbon system with adequate contact time
Air needs to spend time inside the bed, not just pass across it. Contact time, also called residence time, is the gap between the air entering the carbon and leaving it. Deep beds and lower face velocities both buy you more of it, which is why a small fan pushing hard through a thin bed underperforms a larger fan moving the same volume through a deeper one.
A rough starting point for a desktop enclosure is a bed at least 2 to 3 inches deep, and for a multi-printer setup, deeper still. The result to look for is a manufacturer rating that states airflow at a given pressure drop, not just a fan wattage.
4. Install particulate prefiltration ahead of the carbon
Put a coarse prefilter or G4-grade stage on the intake side, before the carbon. Its job is to catch the powder and plastic dust that would otherwise lodge in the carbon’s micropores and block the very surface area you are paying for.
Result to look for: a prefilter that catches visible dust within the first hour of printing. If it stays spotless while the printer runs for a day, your intake is probably short-circuiting past it.
5. Seal every bypass path
This is where most homemade builds fail. Air always takes the path of least resistance, so a 6 mm gap beside the filter face will carry most of the volume while the carbon sees a fraction of it. Gasket the door, seal the filter face against its frame with closed-cell foam or neoprene, and make sure the plenum cannot short-circuit from the intake side to the outlet side around the media.
Result to look for: with the fan running, the cabinet holds negative pressure slightly and the door gasket visibly resists opening. If air pours out of every seam, the bed is not participating.
6. Direct contaminated air through the carbon stage, not around it
Capture the plume close to the nozzle chamber rather than at the far wall of the enclosure, then route that airstream through the prefilter and into the carbon bed. Many desktop units do a whole-room recirculation pass instead, which is slower but is the reason carbon loads up so quickly in a print farm.
Keep the hot end area at a workable temperature and keep the intake clear of the recirculation fan, or the fan fights the extraction and you get eddies with dead air pockets. The result to look for is an even pull at the bed face and no dust visible downstream of the prefilter.
7. Test the setup and keep a baseline
Run a print, and take a TVOC or PID sensor reading outside the enclosure with the fan off, then again with the carbon stage running. Some simple sensors give a relative index rather than a concentration in parts per million, so treat the number as a trend, not a measurement. If you have access to a formaldehyde test strip or a pumped spectrometer, use one; a lab number is worth more than any number a cheap sensor produces.
Result to look for: a consistent drop with the filter running, and a baseline you can re-measure in a few months. If the sensor barely moves, your problem is almost always contact time or bypass rather than the carbon itself.
Choose the right activated-carbon stage
Activated carbon works by adsorption, not absorption. The distinction matters: absorb means the gas dissolves into a bulk liquid, adsorb means molecules stick to a surface. A sponge soaking up paint is absorbing. Carbon is a dry solid with a surface area that can run between roughly 800 and 1,200 square metres per gram, and VOC molecules diffuse into that pore network and are held by weak van der Waals forces until the sites fill up.
Think of it as a very fine sponge with a narrow door. A molecule that fits the pore geometry goes in easily; a molecule of the wrong size or polarity has a harder time finding a compatible site, and once the easy sites are full, performance falls off a cliff — that drop is called breakthrough. This is why media type, mass, and contact time all matter at once, and why a saturated bed can be a problem even when it looks clean.
| Carbon format | Strength | Weakness | Best fit |
|---|---|---|---|
| Granular activated carbon | Highest surface area, good for heavy vapour loads | High pressure drop, dust generation, can block a small fan | Enclosures with a decent fan, workshop extraction |
| Pelletized carbon | Lower pressure drop, less dust, stable airflow | Slightly lower surface area per gram | Compact units and print farms where several units share a fan |
| Honeycomb carbon | Very low pressure drop, keeps a face velocity high | Less mass per unit volume than loose fill | Thin cabinet builds, recirculating purifiers |
| Impregnated carbon | Adds chemisorption for formaldehyde and acidic organics | More expensive, media must be handled as a chemical product | Formaldehyde-heavy sources, formaldehyde test strips still needed |
For ABS and ASA, coconut-shell-based carbons are the usual pick because their micropore structure suits styrene reasonably well. Coal-based carbon is cheaper and heavier for the same mass, which works fine when your airflow is robust. Small decorative carbon panels sold as odour panels hold very little media with a very short contact time; on a printer running eight hours a day they will load up in a few weeks and tell you almost nothing about the air in the room.
Humidity works against you. Water vapour competes for adsorption sites and blocks micropores, so a garage in a wet climate will need more frequent changes than a dry heated room even at identical print hours. Temperature has a smaller effect, but adsorption is a surface process, so very cold media simply works more slowly.
Verify airflow and maintain the filter
Verification is a monthly job, not a one-time setup task. The single hardest thing about a carbon bed in a printer enclosure is that saturation is invisible. Media does not change colour, clog, or raise the fan’s static pressure noticeably, so a filter that is functionally dead can look identical to a brand-new one. Owners comparing an old filter against a fresh spare are essentially looking at two identical objects.
Use replacement triggers rather than a calendar date. The first trigger is a measurable TVOC rise at your baseline sensor, measured at the same point and the same time of day as your original reading. The second is a return of noticeable odour at the printer, which is a late signal, not an early one. The third is your own print-hour and filament-gram count crossing a threshold you have set based on the sensor trend. Hobby use on ABS and ASA typically exhausts a small cartridge in a couple of months; a print farm cycling several machines will see it far faster, and rotation matters because you cannot check every unit’s saturation directly.
Do not wash or regenerate a spent bed at home. There is no home method that reliably clears micropores, and a rinsed-out carbon bed gives you the appearance of a filter with none of the capacity. Replace it.
Watch for the bypass failure in a different way: if your measured TVOC stays flat and low while your sensor reading with the fan switched off has climbed sharply, air is reaching the room without passing through the media. Reseal the cabinet before you order any replacement carbon.
Common mistakes when you filter VOCs with a carbon filter
Treating carbon as a universal VOC remover is the first one, and it is expensive in terms of false confidence. Fix: name the specific contaminants in your setup and choose media for them, then keep test strips or a sensor to check the ones you are guessing about.
Confusing carbon with a HEPA particle filter is the second. A HEPA-rated stage is built from fibres with gaps sized for particles, and gas molecules are far smaller than those gaps, so they pass straight through. Fix: run the two stages in series, particles first, carbon second.
Undersizing or leaving a leaky system chokes airflow or wastes it, and both hurt. Too small a bed saturates almost immediately; too large a bed with a weak fan starves the media of air. Overpacking is the same failure from the other side: cramming in more carbon than the design allows raises the pressure drop until the fan moves a fraction of its rated flow. Fix: follow the design’s stated airflow figure and check the tissue test after every rebuild.
Putting the filter where it captures nothing is common. A beautiful carbon unit mounted in the corner of the room is not connected to the printer’s emissions, so it does nothing except clean general ambient air. Fix: capture at the source, inside or directly at the enclosure.
Neglecting prefilter replacement is a quiet killer. A loaded prefilter cuts flow, the bed sees less air, and effective contact time falls without any visible sign. Fix: check it on the same schedule as the carbon, and treat it as a consumable rather than a one-time install.
Sealing a system with no exhaust path is the mistake that worries me most. Once you seal the enclosure and recirculate, the heat and the carbon dioxide your own body produces build up. Recirculating filtration is not ventilation. Fix: keep a controlled exhaust, a gap, or a scheduled air change in the room alongside the filtered recirculation, and never run a sealed enclosure in a small unventilated space.
Finally, using odour as the only safety test. Your nose detects a tiny fraction of what a sensor detects, and it adapts within minutes, so a filter that stopped working an hour ago still smells fine. Fix: a sensor, a test strip, or a periodic lab reading instead.
A few standing safety habits for any of this: follow the printer manufacturer’s own ventilation and safety instructions, keep enclosure temperatures within the filament’s stated range, and if you have any respiratory condition, do not rely on a DIY carbon build as your control measure.
Frequently Asked Questions
Can a carbon filter remove all VOCs from 3D-printer emissions?
No. Activated carbon traps specific molecules well and others poorly, so a bed sized for styrene will not automatically handle formaldehyde, and nothing in the carbon category removes carbon monoxide or carbon dioxide. What a filter does is lower the concentration of the contaminants it is matched to. It needs a prefilter for particles, enough contact time to work, and it has to be replaced once it saturates.
Will an activated-carbon filter protect me from ABS and ASA fumes?
It reduces them, and the reduction is meaningful if the bed is correctly sized and sealed. Styrene is one of the better-adsorbed VOCs on coconut-shell carbon, so a properly built stage can drop styrene levels substantially inside an enclosure. It is not elimination, and it leaves formaldehyde and the ultrafine particles from the nozzle largely untouched. Ventilation still belongs in the plan.
Is a HEPA filter the same as a carbon filter for VOCs?
No, they remove different things entirely. A HEPA filter is a fibre medium sized to trap particles, including the ultrafine ones, and gas molecules pass through it almost freely. Activated carbon is a porous solid that adsorbs gases on its internal surface. Running the two in series, prefilter first and carbon second, is the arrangement that handles both. If you want to filter VOCs with a carbon filter, the carbon stage has to be there.
How often should a carbon filter used with a 3D printer be replaced?
Tie replacement to your print hours, filament consumption, and a sensor reading rather than a calendar date. A small cartridge on a hobby printer running ABS or ASA every week typically runs two to three months; a print farm cycling several machines will need it far sooner and should rotate units. Saturation leaves no visible sign, so a rising TVOC reading at the same measurement point is your earliest reliable trigger.
Does a carbon filter work for resin 3D printing?
It can help, but resin emissions are a different problem and often need source control. Resin prints are usually not enclosed, so the carbon stage can only be as effective as the capture hood, the workflow, and how much uncured resin is being handled near it. A carbon filter paired with a proper extraction hood is a reasonable combination, though curing in a ventilated cabinet and washing prints promptly often does more for the room than extra carbon mass.
Should I still ventilate a room if I use a carbon filter?
Yes. A carbon filter is not ventilation and does not remove carbon dioxide or excess heat, both of which accumulate when a room is sealed and recirculating. Treat the filter as an addition to good ventilation, not a replacement for it. Where you cannot duct outdoors, keep a controlled exhaust, a window crack, or a scheduled air change running alongside the filtered recirculation.
Conclusion
Start with the source. Identify what your printer is actually emitting, measure the enclosure and the airflow, and only then size a purpose-built activated-carbon system to the air it will really see. If you want to filter VOCs with a carbon filter and get a result you can see on a sensor, the carbon stage must be sealed, fed by a prefilter, and given enough contact time to do its work.
The strongest setup is the one that layers: capture the emissions at the nozzle, exhaust a share of the air outdoors or through a controlled change, and use the carbon stage for what recirculation alone would push back into the room. And check it with a measurement, not your nose. Odour disappearing is not evidence that the air is clean.