A resin printer screen usually does not need replacing, and most of the time it does not even need opening up. If resin sits on the glass, scratches cloud the image, or the panel has faded, you can usually recover it in an afternoon; only a crack, a dead backlight, or a damaged ribbon cable means a real teardown. Here is how to repair a damaged LCD screen on a resin printer, and how to tell which of those problems you actually have before you spend money.
The single most common mistake I see is buying a panel first and diagnosing later. A screen covered in cured resin looks exactly like a dead screen from across the room, and owners swap out a perfectly good LCD when all they needed was a plastic scraper and fifteen minutes of patience. Work the diagnosis in order, from cheapest to most invasive.
Before anything else, home the Z axis while the printer still has power. Several guides, including the Anycubic wiki for the Photon Mono 4, tell you to run Tools then Move Z so the platform ends up above the vat. Skip that and the build plate can drop onto the screen while you are working underneath it. Then finish or cancel any exposure in progress, power the printer off, and pull the mains cable from the wall.
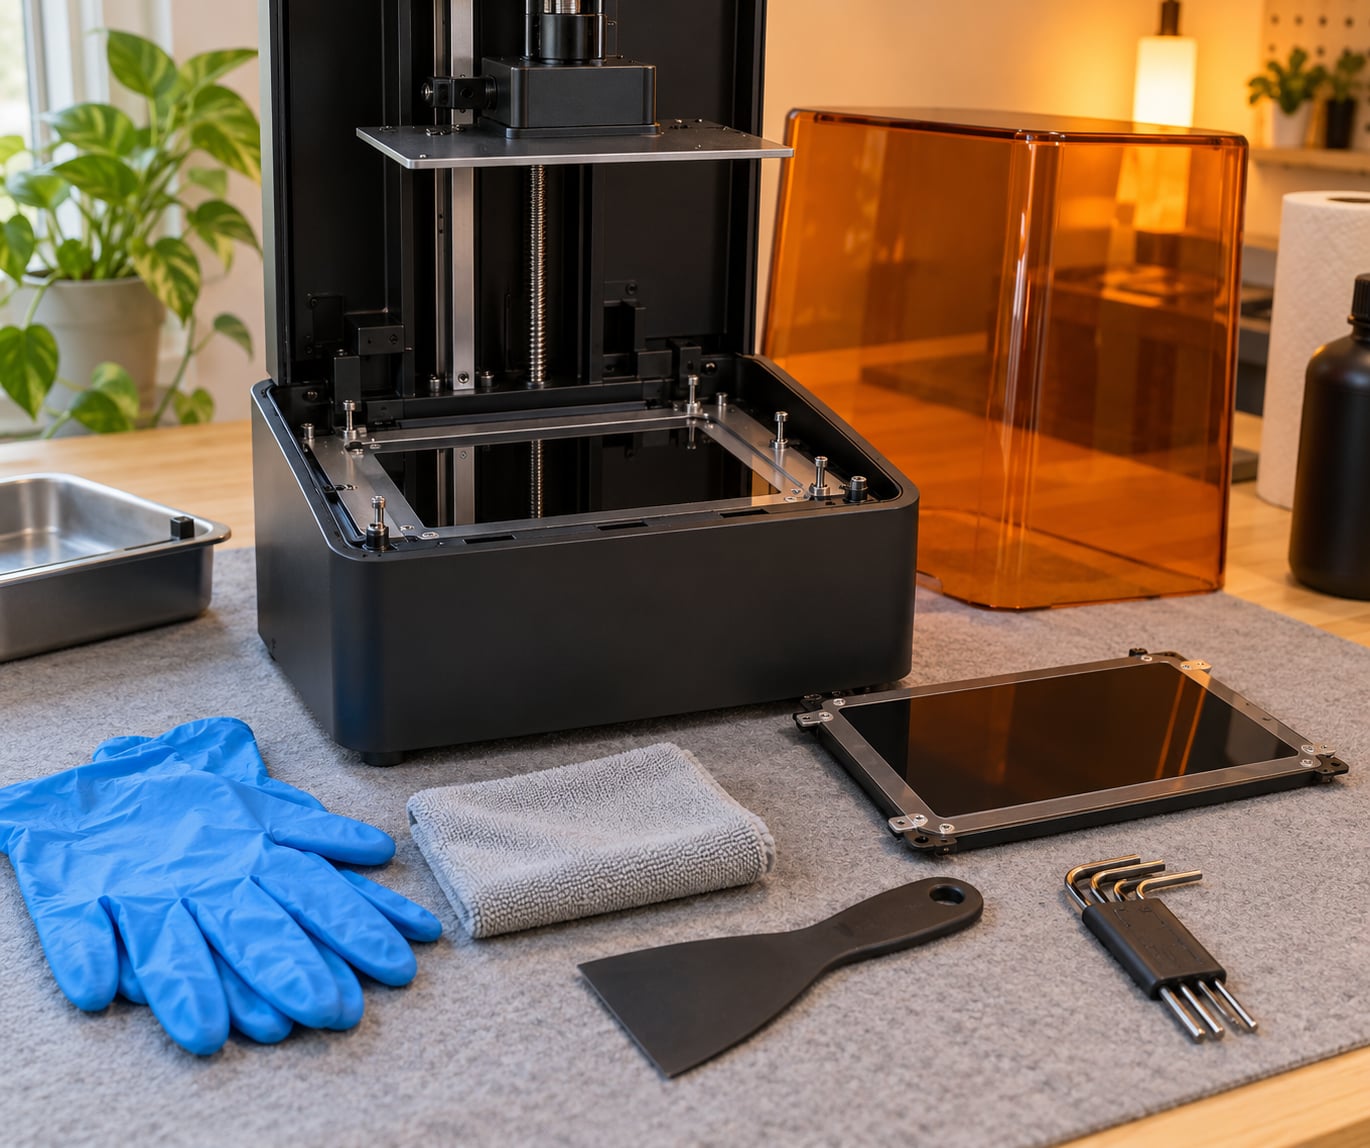
Do not touch the UV LED array with bare fingers. Skin oils on the emitter are permanent and can burn it, which turns a cheap screen repair into a light-source replacement. Nitrile gloves for the teardown cost almost nothing and are the reason you are not replacing two parts instead of one.
Table of Contents
- 1What You Need
- 2How to Repair a Damaged LCD Screen on a Resin Printer
- 31. Identify Whether the LCD, Backlight or Connection Has Failed
- 42. Disconnect Power and Remove the Display Safely
- 53. Inspect and Test the Cable, Connector and Display Connections
- 64. Check Software, Settings and External Devices
- 75. Repair the Backlight or Replace the LCD Assembly
- 86. Reassemble, Calibrate and Test the Printer
- 9Common Mistakes
- 10Frequently Asked Questions
- 11Can a blank LCD screen on a resin printer be repaired?
- 12What is the difference between an LCD screen and a resin-printer LCD?
- 13Why does a replacement LCD show no image on my resin printer?
- 14Can software fix a damaged resin-printer LCD screen?
- 15When should I contact the manufacturer instead of repairing the display?
- 16Conclusion
What You Need
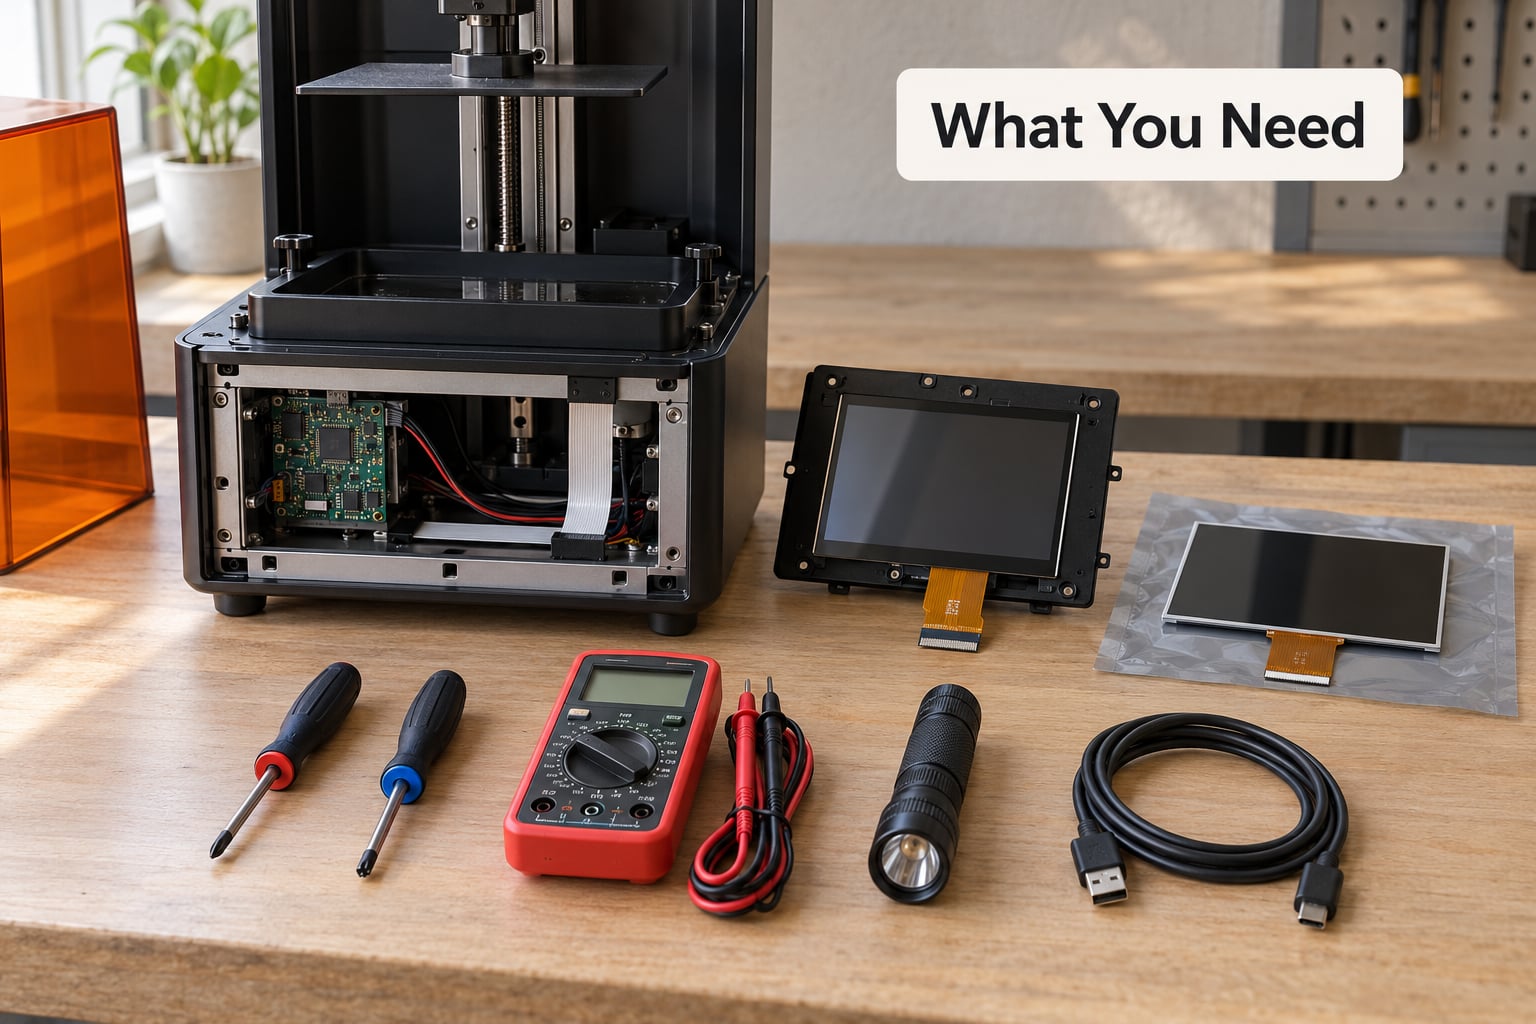
Small, specific tools make this job boring. Have the printer manual open on your phone, because screw positions and menu names differ by model.
- Printer and display model details. The model number from the base plate and the panel part number printed on the back of the LCD. A screen is only interchangeable within its own model family.
- Phillips and Torx drivers. Most resin printers use Torx. The Anycubic wiki for the Photon Mono 4 calls out S2.0 and S3.0 hex keys specifically, and the Anycubic Photon Mono 2 guide uses an M2.0 hex key. Buy a small metric hex set rather than guessing one size.
- A multimeter, only for the tests your printer manual supports. Most guides on electrical faults, including the Prusa knowledge base entry for FDM machines, start with continuity and connector inspection rather than probing a live board.
- A flashlight. Press it flat against the powered-off panel. If you can see a faint menu, the LCD is alive and the backlight has failed, which is a different repair from a dead panel.
- Nitrile gloves and a microfiber cloth, plus paper towel and plastic wrap for solvent work.
- A USB cable and access to the UV-tool software your printer uses, so you can rule out a computer or software problem.
- The correct LCD or touchscreen assembly, only once the diagnosis points at the panel.
One warning about parts: an ordinary consumer LCD is not a substitute for a resin-printer masking LCD. The panel is chosen for how much UV passes through it, how evenly the light is distributed, and how it dims a pixel. A tablet screen with a brighter, clearer panel will cure your resin unevenly or not at all, and you will have traded a visible fault for an invisible one that ruins prints.
How to Repair a Damaged LCD Screen on a Resin Printer
The process runs from least to most invasive: clean the screen, reseat the connections, check software and external display output, then replace the panel. Most faults are found in the first three steps, and each step you pass costs nothing but an hour. Skip ahead only when a test has already ruled the earlier causes out.
1. Identify Whether the LCD, Backlight or Connection Has Failed
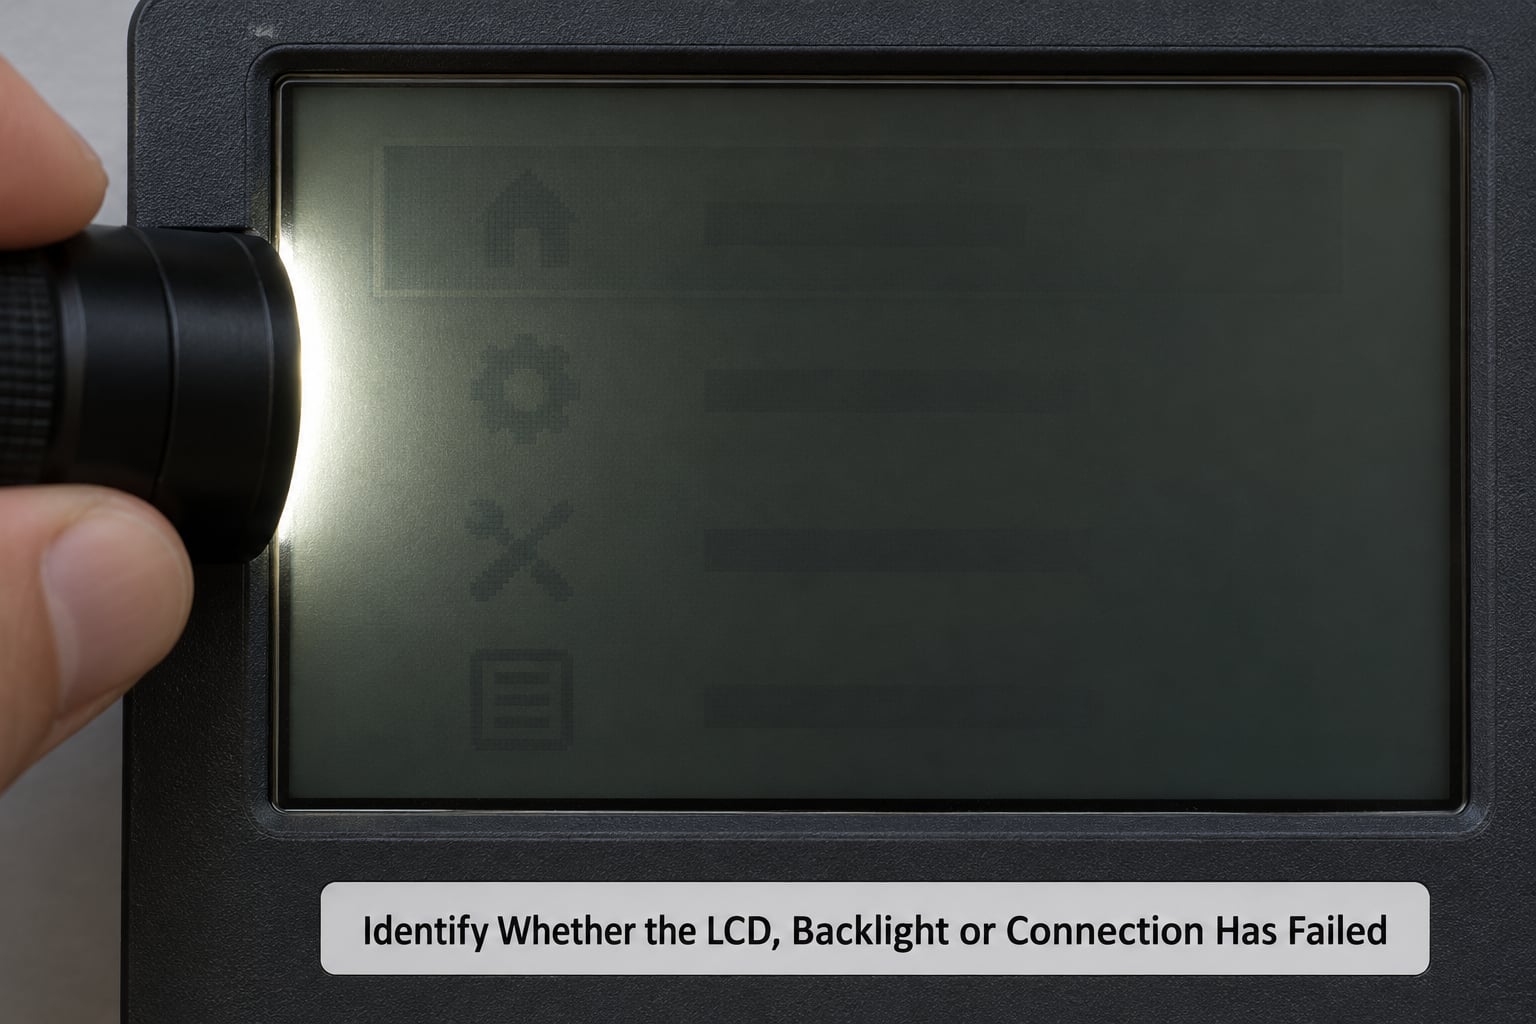
Look at what the screen is telling you, not what you assume it means. With the printer on, a black panel that still responds to the touchscreen means the backlight is gone. A panel that shows a faint grey image under a flashlight means the same thing. A blank panel that shows nothing under a flashlight, plus no status light and no motor movement, points at power or the board rather than the screen.
These are the distinctions that save money:
- A cured resin blob or haze blocking part of the image. A spill that set against the glass. Chemical soak and plastic scraping, no disassembly needed.
- Streaks and fingerprints that clear after a wipe. Contamination, not damage. Microfiber and alcohol clean.
- Fine scratches, a cloudy look, prints with holes. Mechanical damage from metal tools or the build plate. Try cleaning first; this usually ends in panel replacement.
- Black panel, touch still responds. The backlight or its cable failed. Reseat the backlight cable first, then buy the assembly.
- White squares, garbled text, vertical stripes. A loose or corroded ribbon cable. Reseat the FPC connector.
- Nothing at all, no response, printer dead. Power supply or mainboard. Stop and test the board rather than the screen.
- A visible crack spreading from a corner. Impact damage. Not repairable; the panel gets replaced.
Holding a flashlight flat against the glass is the fastest single test in this whole guide. It costs nothing and it separates a backlight failure from a panel failure in about fifteen seconds. Hold the flashlight right up against the panel with the room dark, and look for menu text, a cursor, or a home icon.
Also run the printer’s exposure test pattern before you decide anything. A screen can pass a visual check and still be fading unevenly, which shows up as a rectangle with soft or striped edges instead of a crisp block.
Be aware that menu names and status-light behaviour differ by manufacturer and firmware. A ChiTu-based board behaves differently from the Anycubic and Elegoo firmware in ways that matter here, so treat any exact menu path as valid only for the model and firmware it was written for.
2. Disconnect Power and Remove the Display Safely
Power isolation is not negotiable. Finish or cancel the current exposure, switch the printer off at the front, disconnect the power cable, then wait several minutes before opening anything. If your manual describes a power-supply discharge step, follow it exactly.
With the printer open, work from the outside in. Remove the rear cover or the top frame, then the control panel or screen bezel. Every model fastens these differently, so follow your manual rather than a generic video.
Lift the FPC ribbon cable connector straight up by its buckle. Never pull the cable itself, and never twist the connector, because the FPC is the fragile part and the connector is the strong part. A reader on the Kingroon guide documented the cable specification for a common resin printer as 50 pins at 0.5 mm pitch, roughly 150 mm long, Type A contact, which tells you how little force that connector needs.
Keep resin away from the area. Cover the vat, drain any standing resin, and do not let a spill sit near the open chassis. If resin gets inside, stop and clean it before reassembling anything.
3. Inspect and Test the Cable, Connector and Display Connections
Most electrical faults on these machines are mechanical. Look for a ribbon cable that has crept out of its socket by a fraction of a millimetre, pins bent by a cable inserted at the wrong angle, corrosion near the connector, or brown discolouration that means heat. Resin that has run down inside the frame and set around the cable will physically hold a connector open.
To reseat a removable connector, open the buckle, release the cable, and reseat it until the cable sits fully inside and the buckle clicks closed with even pressure across its width. A cable that only feels latched at one end is not seated.
Before you trust a multimeter, check whether your manual supports that measurement. Measuring resistance across a live backlight or stepping through a board test point can give you a number that means nothing and a probe slip that shorts something useful.
Repeat the inspection after a full power cycle rather than immediately after opening the chassis. Half of all “dead screens” people report come back after a reboot, and this is the cheapest way to repair a damaged LCD screen on a resin printer before buying a part. It costs one button press.
One practical habit worth keeping: photograph the cable routing and tape placement before you disconnect anything. The black shading tape and the double-sided adhesive strip around the panel border go back on in a specific order, and a photo saves the guesswork when the edges sit slightly off.
4. Check Software, Settings and External Devices
Before buying a panel, rule out the things that imitate screen failure. In order: connect the printer with the original USB cable and the original computer, open the UV-tool software that came with it, and check whether the software sees the machine at all.
If the software connects but the panel stays dark, run the firmware update your manual offers for that version. Firmware mismatches after a board swap or a failed update produce blank or unresponsive interfaces that look exactly like a hardware fault.
If your printer supports it, test an external monitor. Some resin printers expose a display output or can be controlled from a computer interface, and a working external view with a dark internal panel confirms the fault sits in the screen assembly rather than the mainboard.
Where menu names differ across platforms, match the function rather than the label: the exposure time settings, the screen brightness or dim setting, and the factory reset option all live in slightly different menus on ChiTu-based, Anycubic, and Elegoo firmware. A dim setting turned all the way down will look like a dead backlight until you find it.
Test with a known-good cable and a different USB port before you call the panel dead. It takes two minutes and it is the second most common cause of a screen that “suddenly stopped working”.
5. Repair the Backlight or Replace the LCD Assembly
Replace the panel when the diagnosis points at it: a cracked lens, a dead backlight with no image under a flashlight, a dead panel that shows nothing even with an external display working, or extensive scratching that cleaning will not fix. Cracks cannot be repaired. That is the honest answer to how to repair a damaged LCD screen on a resin printer with a split panel, and it is the one most people search for and almost nobody says plainly.
Match the part before you buy it. Use the model number and, where available, the panel part number printed on the back of the original. The honzamrazek.cz resin-leak write-up names TM089CFSP01 as the panel in an Elegoo Saturn, which is the kind of specificity that stops a wasted order.
Check the physical dimensions and the masking area, not just the diagonal size. A 6.6-inch panel on the Anycubic Photon Mono 2 runs 4096 by 2560, and the screen has to sit flat against the vat frame with the shading tape forming a light-tight border.
Look closely at the connector orientation before you power anything up. The cable goes in one way, and forcing it the other way bends pins that will fail weeks later. Work from the manual’s diagram, and keep the anti-scratch film off until the printer is reassembled and tested.
Handle the new panel by its edges with gloves on, and keep it out of direct UV light while it is out of the machine. Mount it with the original double-sided adhesive and black shading tape in their original positions.
6. Reassemble, Calibrate and Test the Printer
Work backwards through the teardown. Reconnect the ribbon cable and confirm the buckle is closed across the full width, refit the bezel and covers, then check inside the frame for loose screws, stray tools, or trapped cured resin before you close anything up.
Power on and confirm the image first, then confirm touch response. A panel that lights up but registers touches in the wrong place, or not at all, usually means a cable that is seated but not seated correctly.
Run the printer’s exposure test pattern and read it. The test frame should have sharp, even edges across the whole area. Soft edges in one corner point at uneven backlight or a sealing problem, not at your resin settings.
Print a small test model and check that every layer cures at the same depth. If the part sticks to the plate or pulls loose, the screen is fine and your platform height has moved, which happens whenever anyone works inside the frame.
Re-level the platform after any screen swap. The Anycubic wiki treats this as its own final step, and skipping it is the reason owners finish a perfect repair with warped prints. If the fault returns after all of this, the problem is on the mainboard or the UV light source, and that is a bench job.
Common Mistakes
Working on a powered printer is the mistake that hurts most and helps least. Unplug first, always.
Treating a backlight failure as a dead LCD wastes a panel you did not need to buy. The flashlight test costs nothing, so run it before anything else.
Using acetone without a corner test is the most expensive error in this list. Acetone on a paper towel under plastic wrap lifts cured resin in 10 to 15 minutes, and it can also haze a polarizer that was never rated for it. Manufacturers warn that acetone resistance varies by panel batch and part number, so test a small corner for 30 minutes and look before you soak the whole screen. Accidental solvent damage has left people needing a new panel rather than a clean one.
On the opposite side of that debate, the official Phrozen guidance for cleaning an LCD after a spill is 95 percent sanitizing alcohol on a paper towel under plastic wrap, left for 12 to 24 hours. That is the conservative choice, and it is the one to follow if you have any doubt about your panel. If you want a middle path, very hot water on a sponge for about 15 minutes softens a cured film and is gentler than either solvent.
Using metal tools is the other big one. Phrozen’s help centre says plainly not to use metal scrapers or any other metal object to remove resin from the screen, and most manufacturers repeat it. Razor blades get recommended online anyway, usually by people who have not seen what one does to a masking panel. Leave them in the drawer and use a plastic scraper, or your fingernail after a soak.
The rest are quieter but common. Buying a generic LCD that does not match the model. Pulling the ribbon cable instead of the buckle. Installing the new panel backwards. Forgetting to reconnect the display at all and then blaming the new part. Skipping the firmware and cable checks. And testing only the home screen, which works perfectly on a panel whose exposure output has faded.
Two habits will stop most of this happening again. Keep a rough log of exposure hours, since a panel is a consumable and owners generally expect a few thousand hours before burnout, and know your number before you start blaming the printer. Clean the screen with a microfiber cloth and alcohol every few weeks, keep an anti-scratch protective film fitted where your model supports one, and treat any resin spill as a same-day problem.
Frequently Asked Questions
Can a blank LCD screen on a resin printer be repaired?
Often, yes, because a blank screen is usually not the screen. Reseat the FPC connector, check for a bent pin, confirm the original cable and computer still work with the UV-tool software, and hold a flashlight flat against the panel. A faint menu under the flashlight means the backlight failed, not the panel. A fully dark, unresponsive screen with no printer response points at power or the board.
What is the difference between an LCD screen and a resin-printer LCD?
A resin-printer LCD is a monochrome masking panel sized and specified so that only the pixel areas under the print receive UV light. Its light transmittance, resolution, dimming behaviour and screen size are chosen for that job. A consumer or tablet display is brighter and clearer, which is exactly why it is wrong: it passes uneven light and ruins cure consistency.
Why does a replacement LCD show no image on my resin printer?
Work through the connection first. The FPC connector is often only partly latched, or the cable went in at the wrong angle and a pin is bent. Check that the buckle is closed across the full width of the cable and that the panel was not installed backwards. Next, confirm the anti-scratch film is off and the shading tape border is seated, then update firmware and test with the original cable and computer.
Can software fix a damaged resin-printer LCD screen?
Software fixes what software causes. A blank or unresponsive interface after a firmware update, a board swap, or a failed flash is often resolved by updating or reinstalling firmware and resetting settings. A cracked lens, a dead backlight, dead pixels or a burned ribbon trace cannot be fixed in software. If the panel shows a faint image under a flashlight, no amount of software will bring the backlight back.
When should I contact the manufacturer instead of repairing the display?
Contact them first if your printer is still under warranty, because opening the chassis usually ends coverage. Also stop and ask when the screen responds but the printer will not expose, when the panel is dead and the fault appears to be on the mainboard or UV light source, or when no OEM panel is available for your model. Bench-level board or UV array work is not a bench job.
Conclusion
Start with the cheap checks: unplug the printer, home the Z axis before you open it, note the model and panel part number, then hold a flashlight against the glass. A faint image means the backlight, no image at all means the connection or the board, and visible resin means you need a soak and a plastic scraper, not a new screen.
How to repair a damaged LCD screen on a resin printer is usually a short diagnostic process rather than a teardown. Cracks, dead panels and unavailable OEM parts are different problems, and those end in a replacement or a professional bench job rather than a weekend afternoon.