Knowing how to vent 3D printer fumes from a room takes three layers: contain emissions at the printer, filter or discharge the captured air, then move the room air itself. The whole job takes an afternoon for a desktop printer and about an hour for a printer farm. Getting the order right is what separates a setup that works from one that just smells less.
Most guides stop at the enclosure. That handles the printer, not the room you are standing in, which is usually a bedroom, home office or basement corner where fumes also reach a bed, a desk and a pet.
Table of Contents
- 1What You Need
- 2Step-by-Step
- 3How to Vent 3D Printer Fumes From a Room Without Spreading Them
- 4Choose What Must Be Exhausted and What Can Be Filtered
- 5Test and Maintain the Ventilation Setup
- 6Common Mistakes
- 7Frequently Asked Questions
- 8Can I vent a 3D printer through a window?
- 9Does an activated carbon filter make resin printing safe indoors?
- 10Do I need a HEPA filter as well as activated carbon?
- 11Is a bathroom a good place to vent 3D printer fumes?
- 12Is it safe to run a 3D printer in a bedroom?
- 13Conclusion
What You Need
Every item below has a job, and skipping one is usually why a setup underperforms.
- A suitable enclosure. A hard-sided box with a closable door and a real port for ducting works better than a fabric tent, which leaks and can melt near a heated chamber. Check that the printer’s own instructions allow the machine to run enclosed, because some printers fault on a closed chamber or need the door ajar.
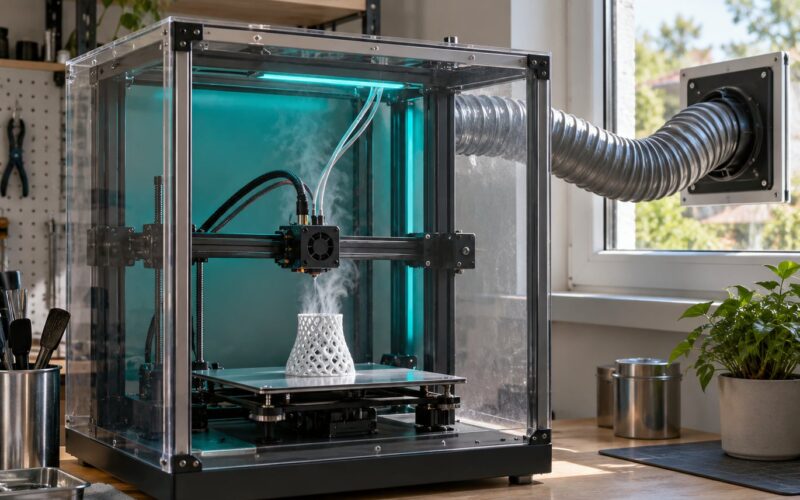
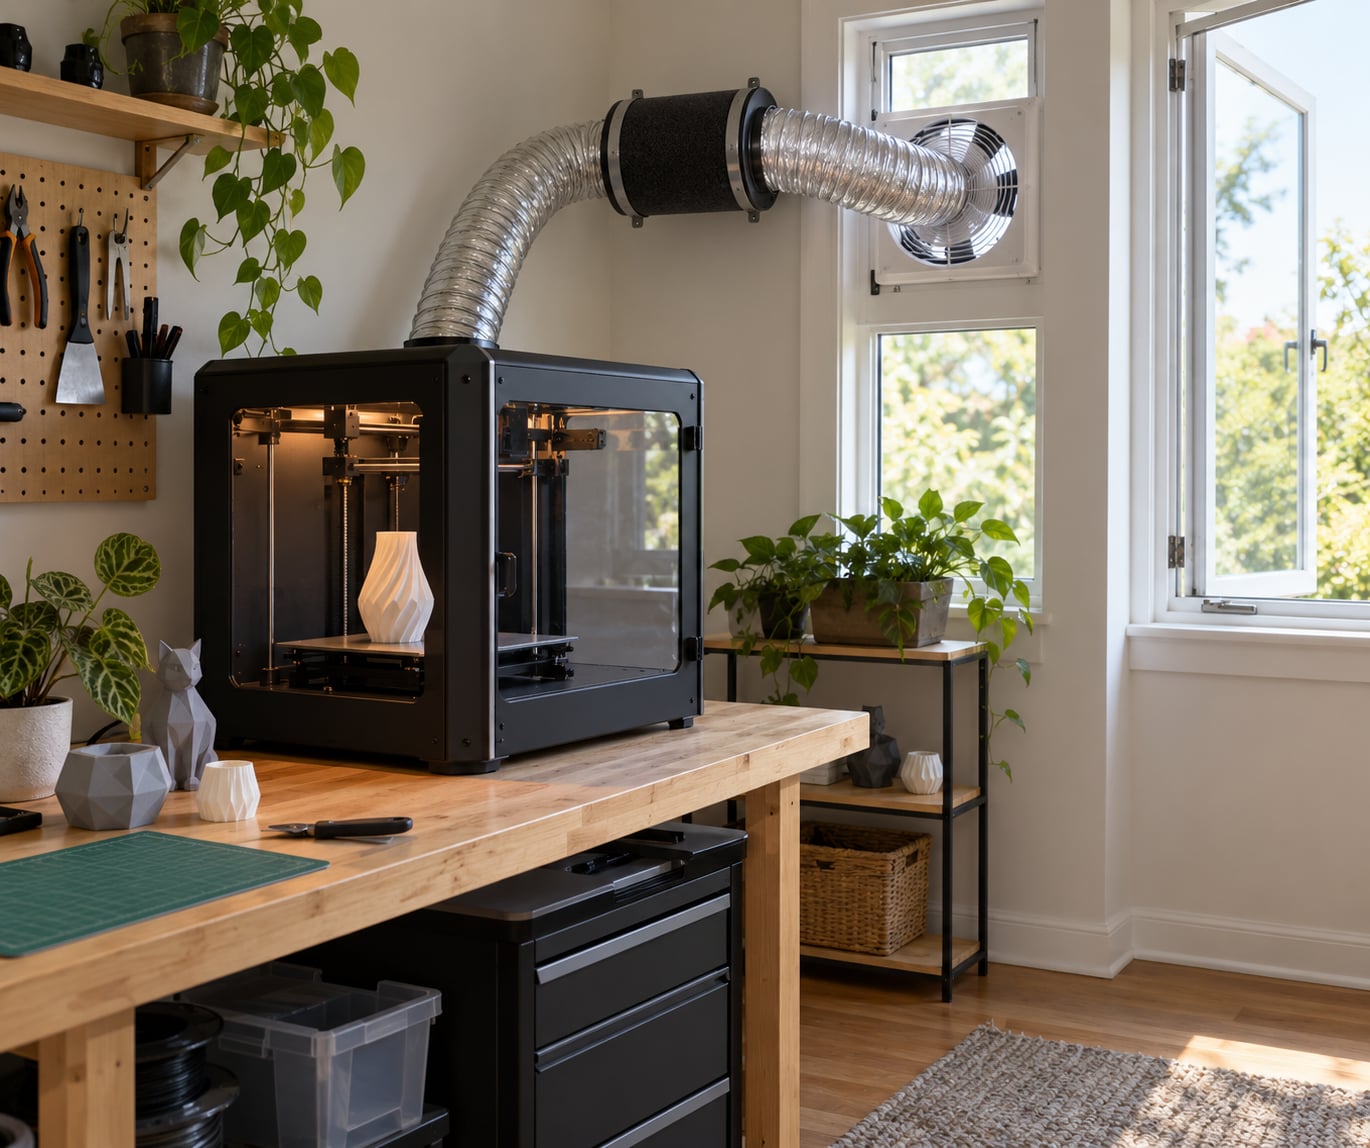
- Printer-compatible exhaust hardware. A 4 inch flexible duct and an inline duct fan are the community standard, and plenty of setups run fine without them. The fan has to be rated for continuous duty, not a spot cooler.
- A safe discharge location. A window insert, a wall vent hood or a through-wall penetration where the air can leave without dumping fumes back into the building.
- Optional inline filtration. A filter housing with activated carbon media and a true HEPA stage, if you plan to recirculate or to keep odour down around neighbours and neighbouring rooms.
- Room ventilation. Two openings on opposite walls, a door that seals reasonably well, and a box fan that pushes air out rather than in.
- A way to monitor airflow and printer temperature. A cheap anemizer or smoke pencil to confirm the fan is actually moving air, and a thermometer or hygrometer inside the enclosure.
A backdraft damper belongs in that list too. It stops condensation and reverse flow through the duct while the fan is off, which matters in cold weather and damp rooms.
Step-by-Step
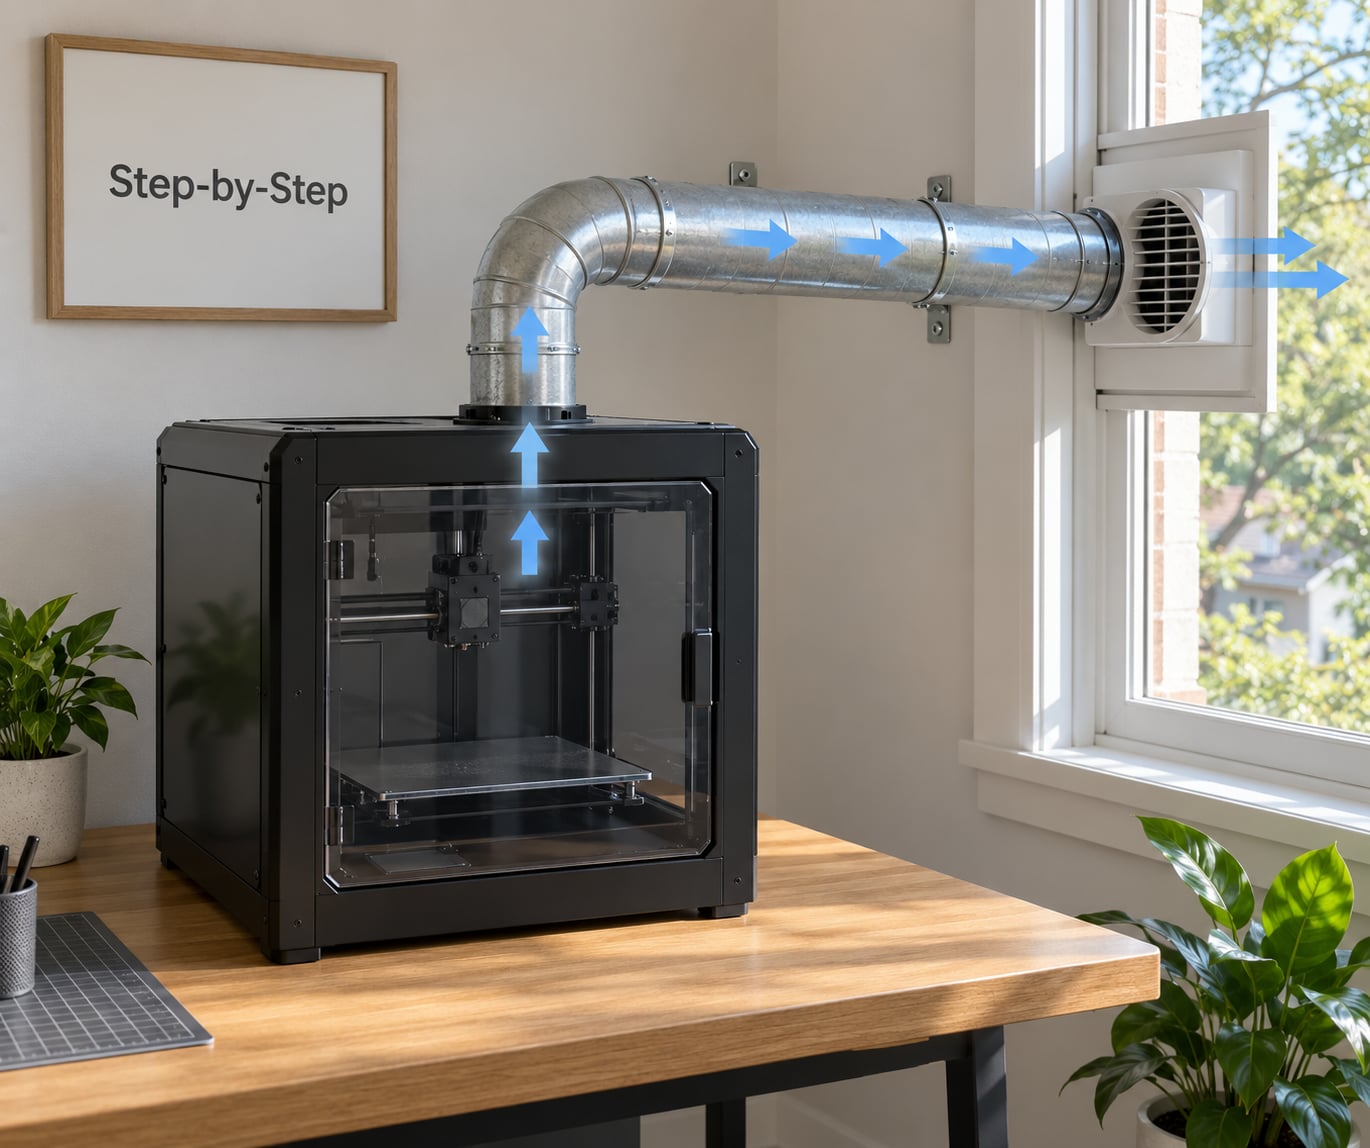
Work through this in order. Each step depends on the one before it.
- Identify what your material actually emits. PLA and PETG are low-emission. ABS and ASA add a distinct styrene smell. Nylon, polycarbonate, PC blends, fibre-filled filament and flame-retardant blends run hot enough to matter more, and resin printing adds acrylates plus isopropyl alcohol vapour from washing. Higher nozzle temperature and longer print time both raise output.
- Read the printer’s instructions for enclosure and exhaust limits. Look for the maximum chamber temperature, any door-switch interlock, and whether the manufacturer specifies direct venting. Many machines also warn against running certain filaments inside a sealed chamber.
- Build a controlled printing area. Close the room door and give the printer a sealed or gasketed enclosure inside it. The seal matters more than the box, because a leaky port pulls room air in rather than pushing fumes out.
- Install the exhaust path. Run the shortest, straightest duct you can from the enclosure port to the outdoor discharge point, with the fan mounted downstream of any filter so it pulls through the media. Seal every joint. Add a damper if the duct passes through cold or damp space.
- Keep the room exchanging air. Open a second opening on the opposite side of the room to give the extracted air somewhere to be replaced from, and run a fan that pushes air out of the room while the print runs.
- Verify fumes are not returning. Stand at the discharge point, then at the doorway, then in the rest of the house, and check for odour and for air movement. Watch the first hour of a long print, not just the empty room before it starts.
How to Vent 3D Printer Fumes From a Room Without Spreading Them
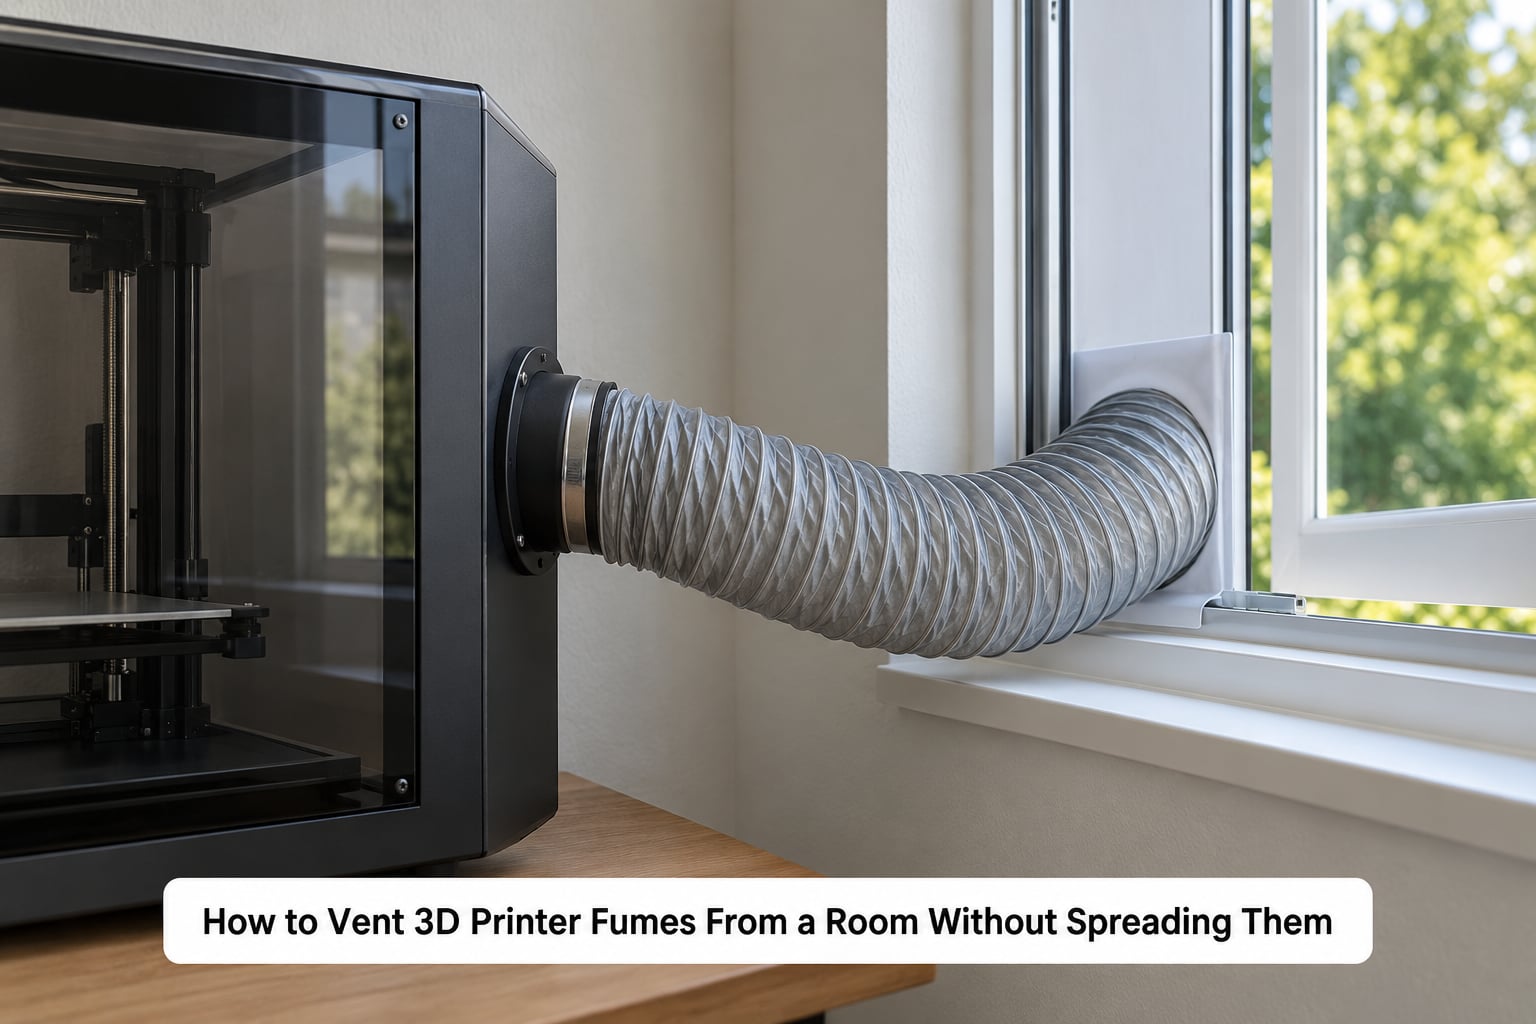
The core idea is capture at source, discharge outdoors by the shortest practical route, and never recirculate untreated air back into the space you occupy.
Capture at source means the enclosure does the work, not the room. Once fumes have mixed into the room air, no amount of downstream cleanup gets them back. Keep the enclosure negative by exhausting slightly more air than leaks in, and check that with a tissue held near the door gap rather than by guesswork.
Discharge outdoors and nowhere else. Dumping into a window that also feeds the bedroom, or into a return-air register, moves the problem somewhere you will not notice it until later. A window adapter is convenient, but check that it does not pull rain in, does not let insects nest in the duct, and does not dump exhaust air back through an open casement.
Never recirculate untreated air. A unit that filters and blows back into the same room is doing something useful, but only for the fraction of air it actually moves. Room air volume matters: measure the room in cubic feet, then look for air changes per hour in the range of four to six for a small print room. On a purifier, the CADR rating tells you its clean air delivery rate, and you compare that against the room volume rather than the square footage on the box.
Account for what that exchange costs you in print quality. Exhaust air entering an enclosure drops chamber temperature, and a large surface of cold air across a warm bed is a classic cause of first-layer problems and warping. Many community builders cut back on speed and add a heated chamber or insulation instead of running full blast. If the enclosure temperature swings hard or the printer faults on overheat, slow the fan or add a restrictor rather than fighting the machine.
Choose What Must Be Exhausted and What Can Be Filtered
Particles and gases behave differently, and no single filter handles both well.
Ultrafine particles from melted polymer are the particulate side. They measure well under 0.1 microns, far smaller than visible dust, which is why a mask rated for dust does little for them. A true HEPA filter is built for this, because it works on capture efficiency at the fine end rather than on straining larger fibres.
Volatile organic compounds are the gas side. Styrene from ABS and ASA, plus acrolein, formaldehyde and benzene compounds flagged in studies of printer emissions, pass straight through a particle filter. Activated carbon adsorbs them by surface area, and that is where carbon earns its place. A thin carbon deodorising sheet sold to sit on top of a fan is not the same thing at all and will saturate in days.
Filtration works inside the exhaust path. It reduces what leaves the duct and what returns through the intake, which matters for shared walls, apartments and neighbours. It does not replace outdoor discharge when a process releases hazardous gas or when the printer manufacturer specifies direct venting. Treat carbon as a media to monitor and replace on a schedule, not a permanent fix. Every cartridge has a service life and a pressure drop that grows as it fills.
Material changes the decision. PLA and PETG are comfortable with filtration plus good room air exchange. ABS and ASA, nylon and polycarbonate blends are a strong case for direct outdoor discharge with filtration as a bonus. Resin printing needs its own plan: the emissions come from printing and from washing and curing, so the exhaust point belongs at the wash station too, not only at the printer.
Test and Maintain the Ventilation Setup
A build that worked once can drift out of spec after a few months, and none of it announces itself.
- Check airflow first. A tissue, smoke pencil or anemizer at the discharge point tells you in seconds whether the fan is moving air and whether the path is open. Blocked filters and crushed duct are the usual cause of a silent fan.
- Look for leaks at the enclosure. Any gap larger than the port leaks room air inward. Reseal the door seal and tape joints, then re-check the tissue test.
- Watch for backpressure. A rattling fan, whistling duct or rising noise level usually means resistance downstream. Long duct runs with several elbows, or a filter past its useful life, all add pressure the fan has to fight.
- Watch chamber temperature. If the enclosure cools so far that the first layer lifts or corners curl, the airflow path is working and the print settings need to follow. Slow the fan, add a restrictor, or insulate the box.
- Replace carbon and HEPA media on the manufacturer’s schedule, and sooner if odour returns or airflow drops. Write the date on the housing so you do not have to guess later.
- Follow the filter and printer instructions for cleaning intervals rather than your own feel. If you notice persistent headache, throat or eye irritation near the machine, stop printing and fix the extraction before going back to it.
For resin work, add two habits to the routine: cover the vat when it is not in use, and keep washing and curing in the same extracted space as the printer. Wear nitrile gloves through the wash step regardless of how good the room ventilation is.
Common Mistakes
Each of these is common, and each is easy to spot once you know what it looks like.
- Venting into a closed room. An open window on the far wall with no path for replacement air means the extracted volume has nowhere to come from, so air seeps in wherever it can, doors and all.
- Routing fumes toward a return-air vent. A return register is a duct into the rest of the house. Discharge outdoors instead.
- Treating a carbon sheet as the whole solution. It handles odour lightly and saturates fast, and it does nothing for ultrafine particles.
- Leaving gaps around the enclosure. Unsealed doors and ill-fitting ports defeat the negative pressure and pull fumes back into the room.
- Running without enough makeup air. With every opening sealed except the duct, the fan starves. Confirm a real intake path before you call the build finished.
- Pointing a strong fan at the chamber outlet. Aiming a room fan straight at an open enclosure blows across the print and invites warping and layer shifts. Aim it at the room, not the build chamber.
- Ignoring temperature and fire-safety guidance. Over-venting drops chamber temperature below what the filament and the machine expect. Keep combustibles away from heated parts and hot exhaust ports, and keep any fire extinguisher rated for the room within reach.
- Opening the enclosure right after a long print and leaning in. The first thing out is the highest concentration of the print. Let it air out for ten to twenty minutes before you open it.
Two more that come up constantly: assuming PLA needs no airflow at all, and running printers overnight in a bedroom with the door shut. Neither is a risk-free assumption, and both are easy to change once the enclosure and a discharge path exist.
Frequently Asked Questions
Can I vent a 3D printer through a window?
Yes, as long as the discharge point has unrestricted outdoor airflow and the setup does not pull rain, insects or exhaust back into the room. A window adapter that seals the gap around a fan is the most common build. Keep the opening on the exterior wall, avoid a casement that swings back over the discharge, and check that neighbouring windows are not close enough to catch your exhaust.
Does an activated carbon filter make resin printing safe indoors?
Not on its own. Carbon can reduce some odours and organic vapours, but performance depends on the pollutant, the condition of the media and how much contact time air gets. It does not remove every gas, and resin printing also produces isopropyl alcohol vapour at the wash station. Use carbon as one layer alongside ventilation and manufacturer guidance, not as a substitute.
Do I need a HEPA filter as well as activated carbon?
It depends on what you are dealing with. HEPA media is built to capture fine airborne particles including ultrafine particulate, while activated carbon adsorbs gases and odours. Many printers produce both, so a combined stage is the practical choice. Neither filter makes every material or process safe on its own, and neither replaces outdoor discharge when the printer manufacturer calls for direct venting.
Is a bathroom a good place to vent 3D printer fumes?
A bathroom can work because it usually has an exhaust fan, but it is not a universal safe outlet. Airflow capacity, grille design and local building conditions vary widely, and a fan sized for odour is rarely sized for continuous printing. Keep the printer in a sealed enclosure, discharge outdoors where you can, and never treat the bathroom fan as the only extraction for resin work or high-temperature materials.
Is it safe to run a 3D printer in a bedroom?
It is workable, but bedrooms are the worst case: small air volume, long unattended prints and sleeping nearby. Enclose the printer, run an exhaust duct outdoors, keep the door closed during the print and allow ten to twenty minutes of ventilation before opening the enclosure. Consider whether the machine belongs elsewhere for overnight jobs, and stop if anyone nearby develops headache or throat irritation.
Conclusion
Start by naming the material and what it emits, then read the printer’s instructions for enclosure temperature and exhaust limits. Enclose the printer, seal it well, duct the captured air outdoors by the shortest route, and only then deal with room air exchange. Once the first long print runs, stand in the room and in the rest of the house and check that you cannot smell anything. That single check tells you more than any specification sheet.
Updated for October 2026. If symptoms show up around your printer, stop and talk to your doctor or an occupational safety professional rather than working around it.