The fastest way to work out how to reduce 3D printer noise in a bedroom is to attack the three paths the sound takes out of the machine: airborne hiss from the fans, structure-borne thump that travels through the desk and floor, and reflections that build up in a small room. Isolate the printer, secure the loose parts, quiet the motion, and only then consider an enclosure. Most people get halfway there in an evening and never spend a cent.
The awkward part of this topic is that almost every enclosure article online is really about warping, not noise. So the fixes below are sorted by what they do to sound, with print quality and airflow as constraints rather than goals. A typical desktop machine runs somewhere around 50-70 dB at one metre, which is louder than a refrigerator and easily enough to pull a light sleeper awake.
Table of Contents
- 1What You Need
- 2Step-by-Step
- 3Measure the Noise Before Changing Settings
- 4Isolate the Printer from the Bed and Walls
- 5Secure the Printer and Reduce Rattling
- 6Add an Enclosure Without Blocking Ventilation
- 7Reduce Fan and Motion Noise Safely
- 8Choose Quieter Materials and Lower-Resonance Settings
- 9Schedule Prints Around Sleep and Quiet Hours
- 10How to Reduce 3D Printer Noise in a Bedroom Without Ruining Prints
- 11Common Mistakes
- 12Frequently Asked Questions
- 13How loud should a 3D printer be in a bedroom?
- 14Is it safe to run a 3D printer overnight in a bedroom?
- 15Do I need an enclosure to reduce 3D printer noise?
- 16Can I put a 3D printer on a desk or a bed?
- 17Does lowering the print temperature make a 3D printer quieter?
- 18When is printer noise a sign of a mechanical problem?
- 19Conclusion
What You Need
None of this is required, and you can get a large part of the benefit with things you already own. Buy only what your measurement tells you need.
- A phone decibel app, or a basic sound meter. A phone app is not laboratory-grade, but comparing the same spot before and after a change is the entire point, and relative numbers are enough for that.
- The manual for your exact printer model. Menu names, safe fan-speed ranges and which fasteners may be tightened differ between machines, and newer firmware releases move things around.
- A dense isolation mat. Dense rubber, closed-cell foam or a paver. A soft open-cell mat does almost nothing.
- Small hand tools and the right fasteners. Hex keys, a belt tension gauge if your printer uses GT2 belts, and thread locker for screws you plan to touch.
- Enclosure materials, if you get that far. Aluminum extrusion and panels, or a rigid cabinet with an open intake and a filtered exhaust.
- Filtered exhaust and ear protection. The filter matters if you print ABS, ASA or anything else that off-gasses, and hearing protection is worth having during a tuning session.
Step-by-Step
Work through this in order. Each step has a measurement that tells you whether it worked, and the order is deliberate, because isolation and loose-part fixes are free and enclosure work is the expensive, least reversible change.
Measure the Noise Before Changing Settings
Put the phone at the height of your pillow, at the distance your head actually is when you sleep, and record two numbers: the steady hum during a print and the peak level when the head travels or a fan spins up. Write both down. A peak that is far above the steady level tells you the problem is motion or rattle, not airflow.
Then match what you hear against this table, because each source has a different fix and buying the wrong one is the usual reason people get nowhere.
| What you hear | Likely source | What usually helps |
|---|---|---|
| Steady high hiss | Part cooling and chamber fans | Lower fan percentage in the slicer, larger fan if the shroud allows |
| Electric whine that rises and falls with movement | Stepper motors and drivers | StealthChop-style drivers, lower motor current, motion settings |
| Rattle or clatter on direction changes | Loose covers, spool hub, belt tension | Secure or tension the loose part, no settings change needed |
| Buzz you feel through the desk or bed frame | Structure-borne vibration | Dense isolation mat, mass base, decoupling feet |
| Whole-room hum that gets worse in a corner | Low-frequency build-up and reflections | Move away from the corner, close the bedroom door, add mass to the enclosure |
Isolate the Printer from the Bed and Walls
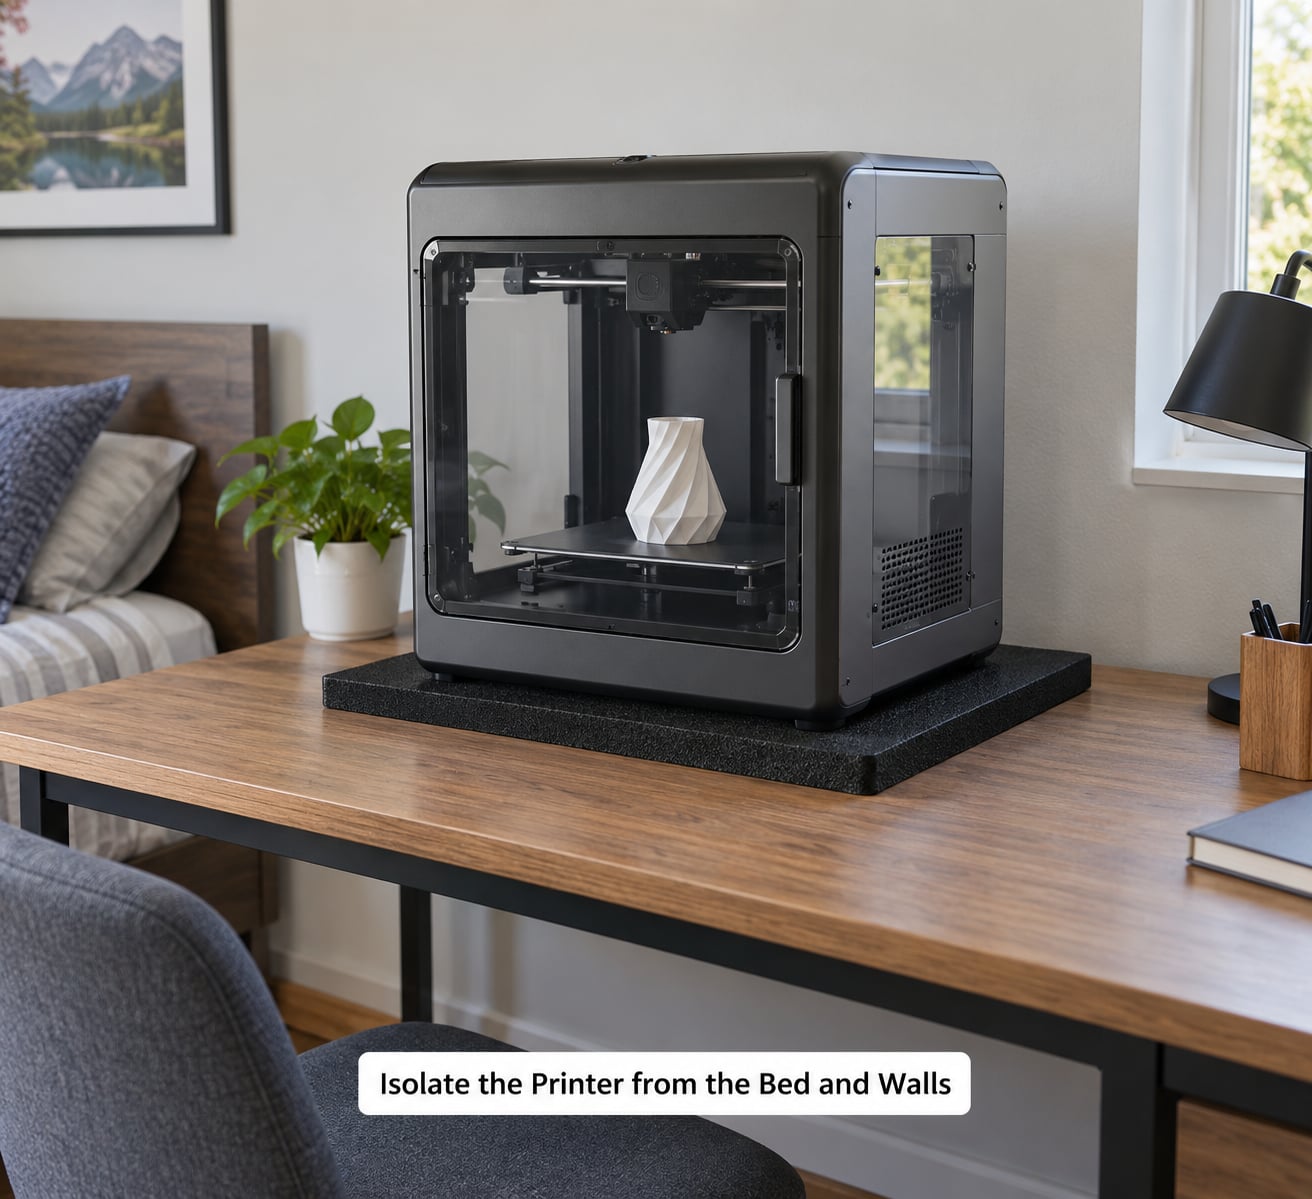
Move the machine away from the wall and off anything hollow. A light particleboard desk is a speaker: the printer drives it, and the desk pushes that energy into the floor and the bed frame. A dense mat, a paver, or a piece of gym mat under a heavy base breaks the path.
On the Prusa forum, one user combined a thick paver, a gym mat and sorbothene feet between the paver and the printer. On the Maker Forums another reported a heavy paver with rubber feet cutting the noise roughly in half. What matters is the density, not the thickness of a soft layer. A Reddit thread in r/3Dprinting is blunt about the common mistake: felt feet do not absorb enough energy to be worth anything.
Keep the mat clear of the machine’s feet so it cannot rock, and leave the vents and the umbilical cable free. Re-measure at the pillow after you change the base.
Secure the Printer and Reduce Rattling
Go around the machine with your hand on it while a print runs, and find every loose part. Covers, spool hubs, fan ducts, cable clips, the filament runout sensor, and any screw that has backed out slightly are all common offenders, and all of them rattle more than their size suggests.
Check belt tension against your printer’s specification rather than by ear, since an over-tightened belt is noisier and wears faster. Use thread locker only on screws the manual lists as serviceable, and never load the frame or the aluminium extrusions. Any modification to the frame or the extrusion can affect rigidity and, in some designs, your warranty cover.
Rattling is the cheapest fix on this whole list. If your measurement drops and nothing else changed, that was your problem.
Add an Enclosure Without Blocking Ventilation
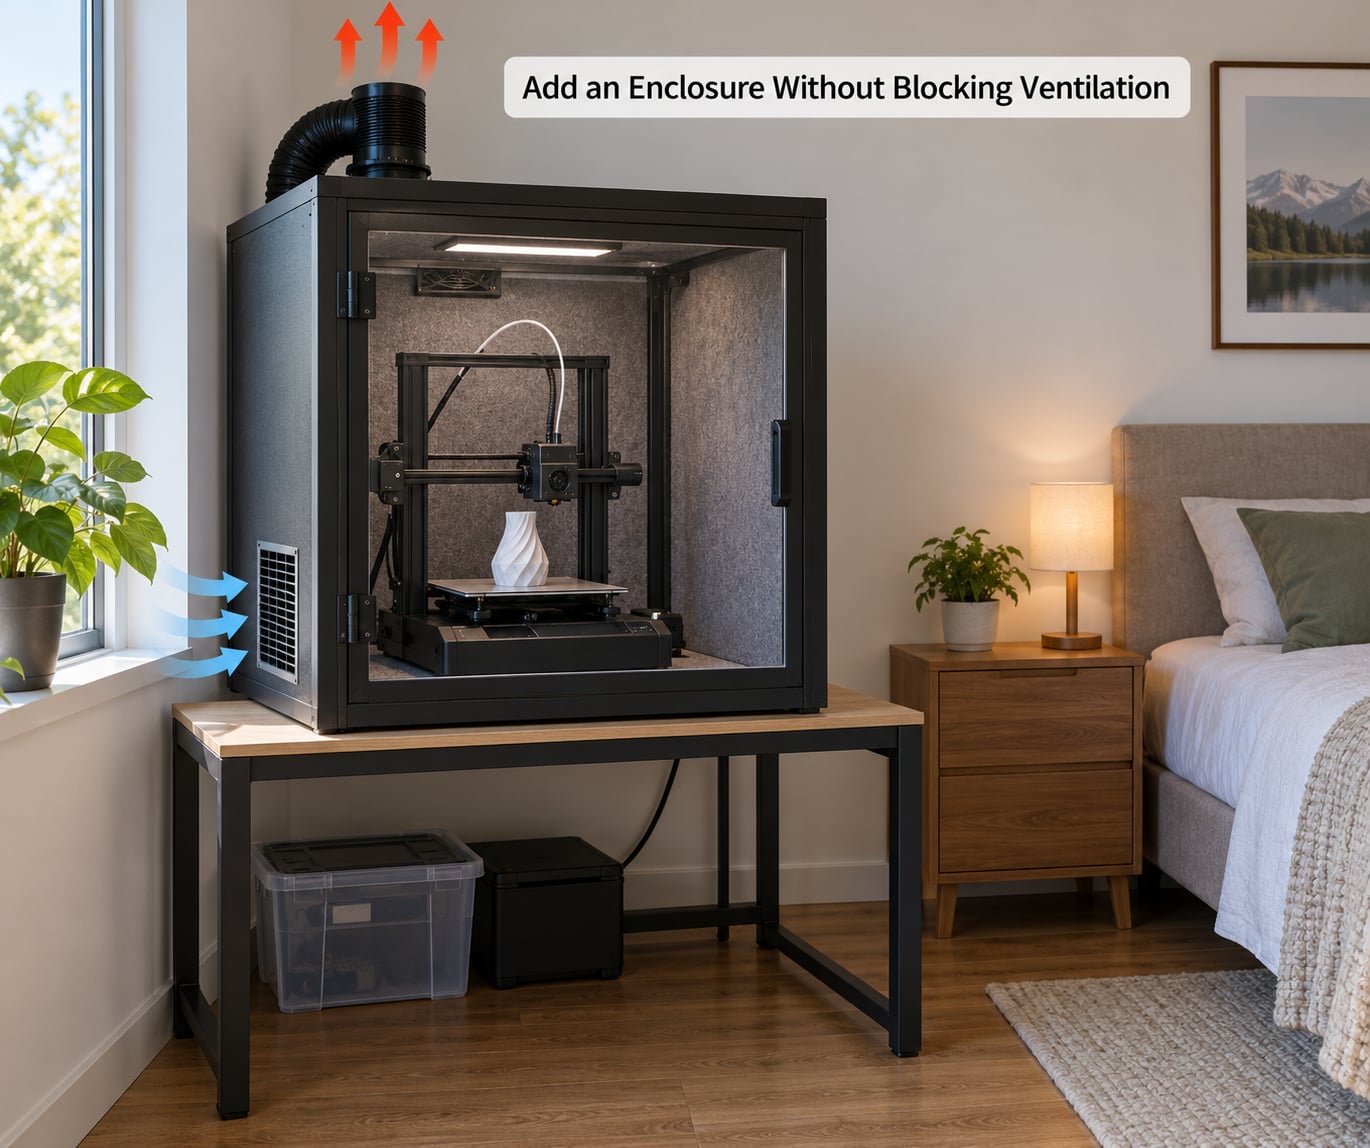
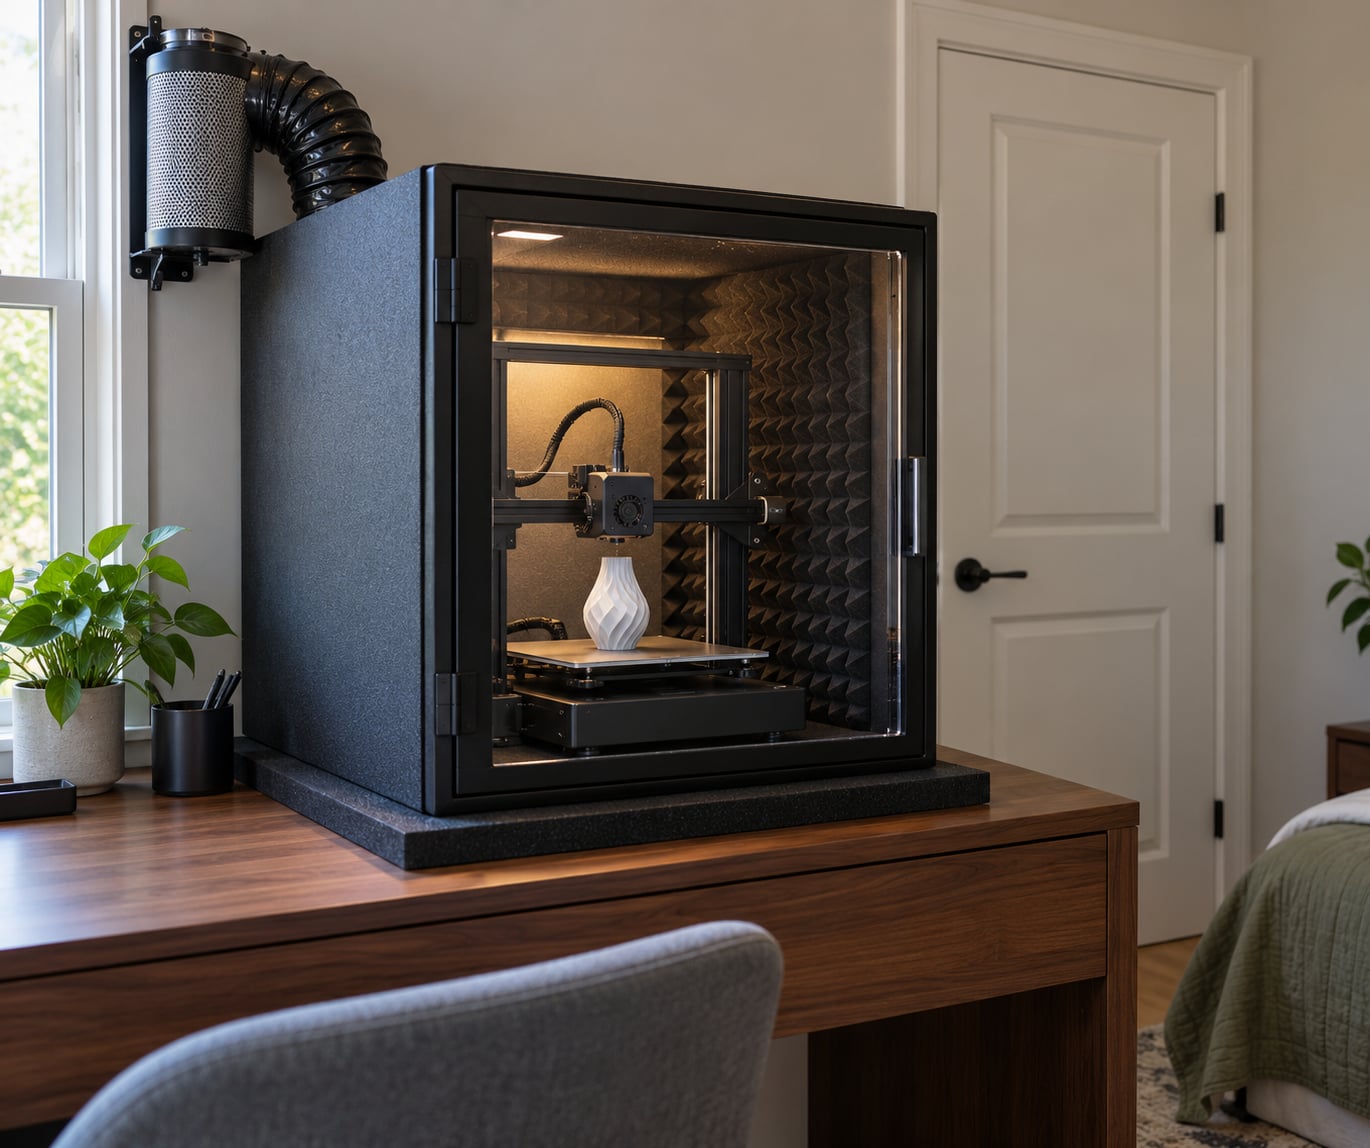
An enclosure blocks the airborne path, and it is the biggest single lever available. Enclosed printers are typically around half as loud as the same machine running open, per the vendor testing that circulates on this topic, and a community post on the Carbide3d forum makes a similar observation about switching to a non-window enclosure.
Three routes work. Buy a ready-made acoustic enclosure sized for your printer. Build one from aluminum extrusion and panels, then line the interior with acoustic foam to kill the reflections the panels create. Or choose an enclosed printer in the first place, which is what most people in this situation do now.
Ventilation is not optional. Forum users who sealed a printer into a cabinet report trapped heat and shortened electronics life, and a hot chamber also raises the odds of a warped part failing later. Leave an intake and an exhaust, and if you print ABS, ASA or polycarbonate, route the exhaust through a carbon or HEPA filter. Keep the enclosure clear of the bed, curtains and other furniture.
Reduce Fan and Motion Noise Safely
Fan hiss is easy to trim. Drop the part-cooling fan percentage in the slicer rather than to zero, because you still need layer bonding, and on enclosed machines drop the auxiliary and chamber fans as well, which users often find are louder than the print head. On the Sovol community forum, one user described lowering travel speed and acceleration as a massive change to noise.
Slow the machine down. Lower print speed, travel speed, acceleration and jerk, and avoid sudden direction changes. The cost is print time, and that objection comes up in every thread on this subject, so be selective: a 24-hour print running while you are at work can be slow. A print running at 1 a.m. cannot.
Menu paths and safe limits vary by printer and slicer, so read your own documentation before changing motion limits. If your board supports a stealthChop-style driver mode, that is a straightforward swap on most printers and it changes the motor’s sound from a whine to near silence, often with no visible quality difference.
Choose Quieter Materials and Lower-Resonance Settings
Material choice has a real but secondary effect. PLA at the low end of its temperature range runs cooler, cooler means lower fan demand and less chamber heat. Slower speed and gentler acceleration reduce ringing, which is the wobble that appears as echoing lines on vertical surfaces after a sharp move.
The trade-offs are honest ones. Lower temperatures can weaken layer bonding on tall or thin parts, slower speeds stretch the print, and a longer print in a hot room means a hotter room. Change one variable at a time so you know which change caused what.
One note on a common claim you will see: soft TPU is sometimes described as the quiet filament. It is not a sound solution. Treat it as a print-quality and material decision instead.
Schedule Prints Around Sleep and Quiet Hours
Long prints are the real enemy. Most noise complaints are not about a printer running during the day, they are about a 20-hour job starting at 11 p.m. Use the scheduling tools in your printer’s app or slicer to start after your normal bedtime, or put the machine on a smart plug on a fixed timer so long jobs land in the hours nobody is listening.
Treat unattended printing as a fire-safety question rather than a convenience one. Keep the machine on a hard surface, not a bed or a soft furnishing, keep a working smoke alarm in the room, never leave an extension cord or a daisy-chained power strip running overnight, and follow the safety guidance that comes with your printer. If a print has to run unsupervised, a dry, well-ventilated spot away from your sleeping area is a better choice than the corner of the bedroom.
How to Reduce 3D Printer Noise in a Bedroom Without Ruining Prints
Here is the order that protects print quality while you work. Isolate the machine from the desk first, because it is free and it fixes the structure-borne path. Secure the loose parts second, because rattle is noise with no upside at all. Tune the fans, motion and temperature third, and re-measure after each individual change.
Add a ventilated enclosure only if the measurements still say you need one, and keep the airflow while you fit it. Schedule anything long, so the quiet hours stay quiet. After every change, print a small part and look for ringing, layer shifts and under-extrusion, and keep the change only if the part still looks right.
Common Mistakes
Most failed attempts come down to a handful of repeated errors. Each one has a simple correction.
- Using flimsy furniture. A hollow desk or a bed table becomes a speaker cone. Move to a solid top or a floor, and add mass below the printer.
- Putting soft foam directly under the machine. Open-cell foam compresses and returns energy. Use a dense mat or a paver, and never let the machine rock on it.
- Overtightening the frame or the extrusions. Extra tension does not damp anything; it can introduce ringing and wear. Tighten only what the manual lists.
- Sealing the enclosure with no airflow. Trapped heat shortens electronics life and can warp parts later. Keep an intake and a filtered exhaust open.
- Lowering temperatures far too much. Cold layers bond poorly, and under-extrusion is not quiet printing, it is bad printing. Trim temperature in small steps and inspect the part.
- Changing five settings at once. If the noise drops you cannot tell which change did it, and if the print quality falls you cannot tell what to undo. One change, one measurement.
If you only do one thing this week, measure first and then isolate the printer from the desk. Everything else is an optimisation on top of that.
Frequently Asked Questions
How loud should a 3D printer be in a bedroom?
Aim to keep the level at sleeping distance near 40 dB or below, which is roughly a quiet library. An open-frame desktop printer commonly measures 50-70 dB at one metre, so it usually needs isolation, an enclosure, or both. Measure at pillow height rather than at the machine, record the peak as well as the steady level, and re-measure after every change so you know what actually helped.
Is it safe to run a 3D printer overnight in a bedroom?
It is common practice, but treat it as a fire-safety decision. Run the machine on a hard surface, never on a bed or soft furnishing, keep a working smoke alarm in the room, avoid extension cords and daisy-chained power strips, and follow the safety guidance supplied with your printer. If you print ABS or ASA, an enclosed machine with a filtered exhaust in a ventilated room is the safer arrangement.
Do I need an enclosure to reduce 3D printer noise?
Not always. Isolation from the desk, securing loose parts and slowing the motion often remove a large share of the noise for nothing. An enclosure is the biggest single lever when the remaining sound is airborne hiss, and an enclosed printer is typically around half as loud as the same machine open. It is worth buying only if your measurements after the cheaper steps still show noise at sleeping distance.
Can I put a 3D printer on a desk or a bed?
A desk works if it is solid, level and dense, and if the printer is decoupled from it with a dense mat or a paver. A hollow or particleboard desk will carry vibration through the floor and the bed frame, which is often more disturbing than the printer itself. Never put a printer on a bed, a duvet or any soft surface, because heat builds up underneath and the surface can ignite.
Does lowering the print temperature make a 3D printer quieter?
Only indirectly and mildly. A lower temperature reduces part-cooling fan demand and keeps the chamber cooler, but the fans usually still run and the steppers and fans stay the same. Lower temperatures can also weaken layer bonding on tall or thin parts, so it is a print-quality trade-off rather than a sound fix. Quieter results come from fan speed, motion settings and isolation instead.
When is printer noise a sign of a mechanical problem?
Treat it as a fault if the sound changes character rather than pitch: new rattling, grinding, squeaking that changes with direction, or a noise that appears suddenly and stays. A failing fan bearing, a dry or worn linear rail, a loose belt, a dented frame or a failing stepper can all sound different from normal operation. Rattling and belt tension are safe checks; anything involving bearings, rails or the frame warrants servicing before the machine is left running overnight.
Conclusion
Start with a measurement at pillow height, then put the printer on a dense base away from the walls. Secure whatever rattles, trim the fans and the motion one setting at a time, and only buy an enclosure if the numbers still demand one, keeping airflow and filtered exhaust in the plan throughout. Print a small test part after every change and keep it only if quality holds. Long jobs belong in the hours when the room is empty.