To lubricate 3D printer rails and rods, you clean each moving surface first, then apply a very thin film of the right lubricant: light oil for smooth rods and linear-rail carriages, grease for lead screws. The whole job takes 30 to 60 minutes on a printer with an X and Y gantry, and most of that time is spent cleaning and getting the machine back together. Done properly it kills the squeak, the grinding, and the uneven hand-step marks along one axis.
Dry metal on dry metal is the problem. Friction heats the contact patch, wears it microscopically, and traps plastic dust and filament debris that turns into an abrasive paste. A thin film of lubricant separates those surfaces so the carriage rides on oil rather than on metal and grit.
Two rules cover most of the difficulty. Use the smallest amount you can, and clean before you lubricate rather than after. Everything below follows from those two ideas, and your printer’s manual beats any general rule when the two disagree.
Table of Contents
- 1What You Need
- 2Step-by-Step: How to Lubricate 3D Printer Rails and Rods
- 31. Identify Your Printer’s Motion System
- 42. Turn Off and Cool the Printer
- 53. Remove the Bed or Access Panels
- 64. Clean the Rails and Rods First
- 75. Choose and Apply the Right Lubricant
- 86. Move Each Axis Through Its Full Range
- 97. Reassemble, Test, and Clean Up
- 10Common Mistakes
- 11Frequently Asked Questions
- 12What lubricant should I use on 3D printer linear rails?
- 13Can you use WD-40 to lubricate a 3D printer?
- 14How often should I lubricate my 3D printer?
- 15What type of grease is best for 3D printer linear rails?
- 16Should I oil V-slot wheels or elliptical rail wheels?
- 17Why is my linear rail sticky after greasing?
- 18Conclusion
What You Need
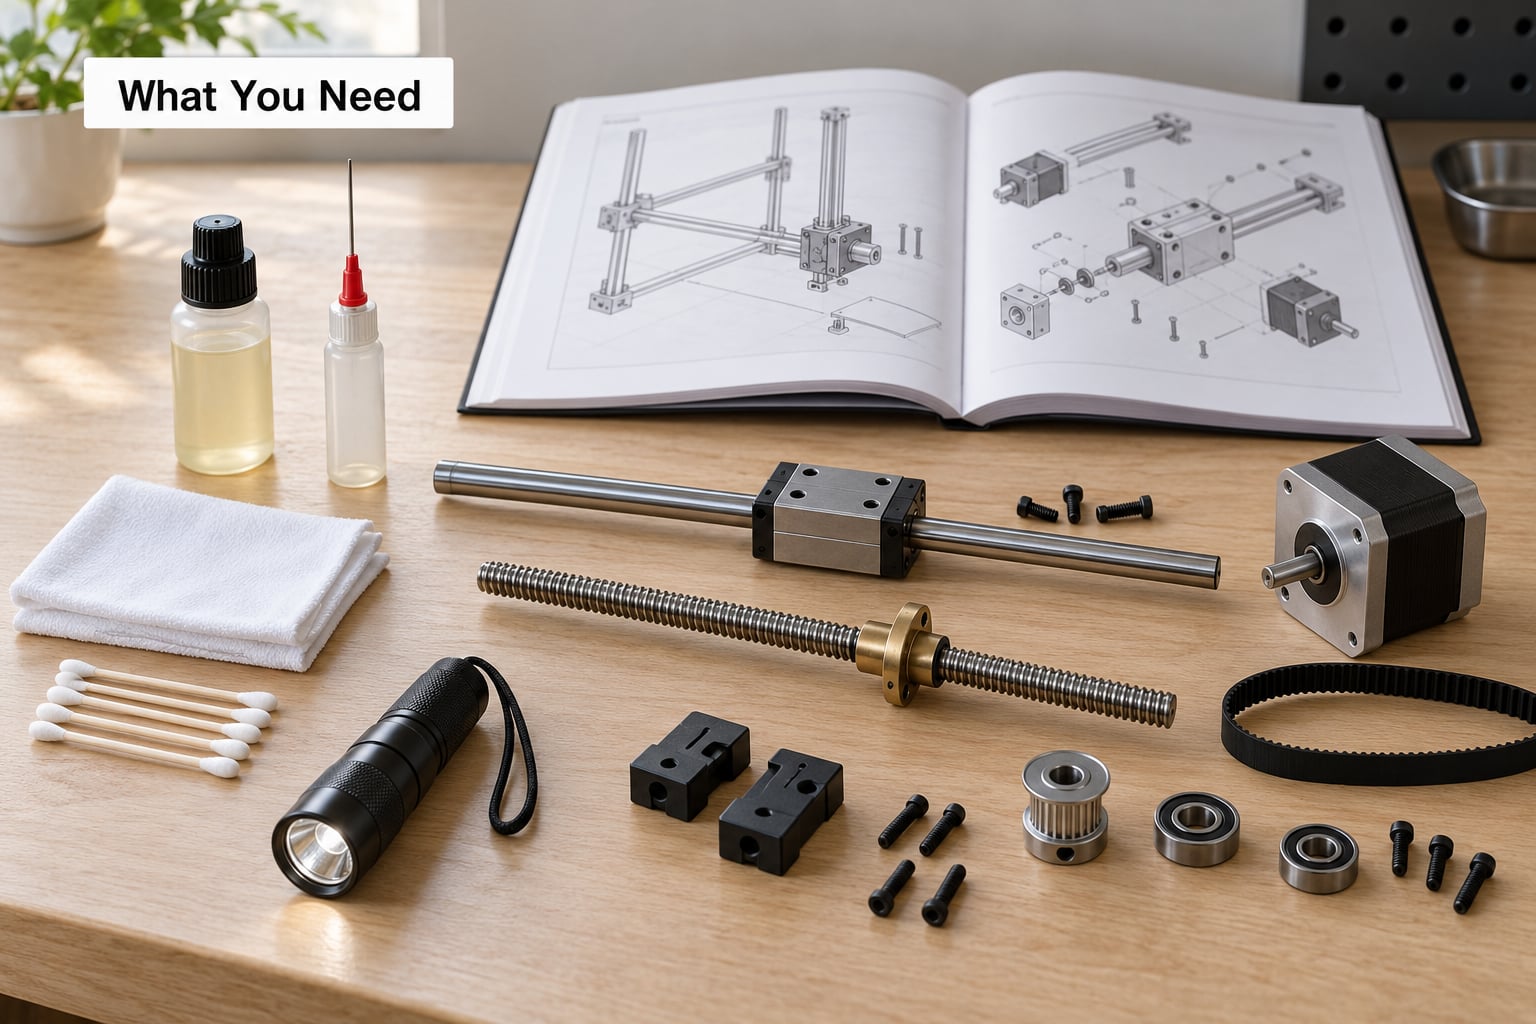
The tool list is short. Most people already own three-quarters of it.
- Isopropyl alcohol (90% or higher) for cutting through old grease, shipping oil, and finger oil.
- Lint-free cloths or paper towels, plus cotton swabs for the tight spots around carriage seals.
- A small precision oiler with a fine needle that actually fits the port, or a syringe with a blunt needle.
- A flashlight so you can see the wear band on the rod rather than guessing.
- A clean box or tray to catch drips and keep screws in one place while the machine is apart.
- The printer manual or service documentation, open on the maintenance section, before you touch anything.
For the lubricant itself, most owners end up owning two products and never need a third.
Light oil handles smooth rods and linear-rail carriages. Sewing machine oil and light machine oil both work. Synthetic oil with a PTFE (Teflon) additive works too, and it creeps into gaps that a grease will not reach. If your rails squeak but a grease made them sluggish, oil is usually the answer.
Grease handles lead screws and anything that stays loaded and slow. Look for an NLGI grade of 0 or 1. The NLGI consistency number describes how thick the grease is: grade 0 behaves almost like oil, grade 1 is a light grease that spreads easily, grade 2 is the general-purpose tub grease most hardware shops stock and is usually too thick for a small carriage, and anything grade 3 or higher will clog seals and collect dust. White lithium grease is the one most people buy first, and it is also the one most people regret, because it is sticky and it pulls dust in fast.
That PTFE additive comes up constantly on the forums because it is a genuine question rather than a myth. PTFE is fine on steel bearings and it improves creep behaviour. It is not fine on plastic bushings or self-lubricating polymer parts, which is why those stay dry. Many high-end linear bearings are shipped oil-lubricated by the manufacturer for the same reason.
Availability is the other thing worth knowing in advance. Shops that stock motor oil rarely stock NLGI 0 or 1 grease. It helps to know the grade number you want before you make the trip, and to have oil as a workable fallback.
Step-by-Step: How to Lubricate 3D Printer Rails and Rods
1. Identify Your Printer’s Motion System
You cannot pick a lubricant until you know what you are looking at, and the answer decides everything downstream.
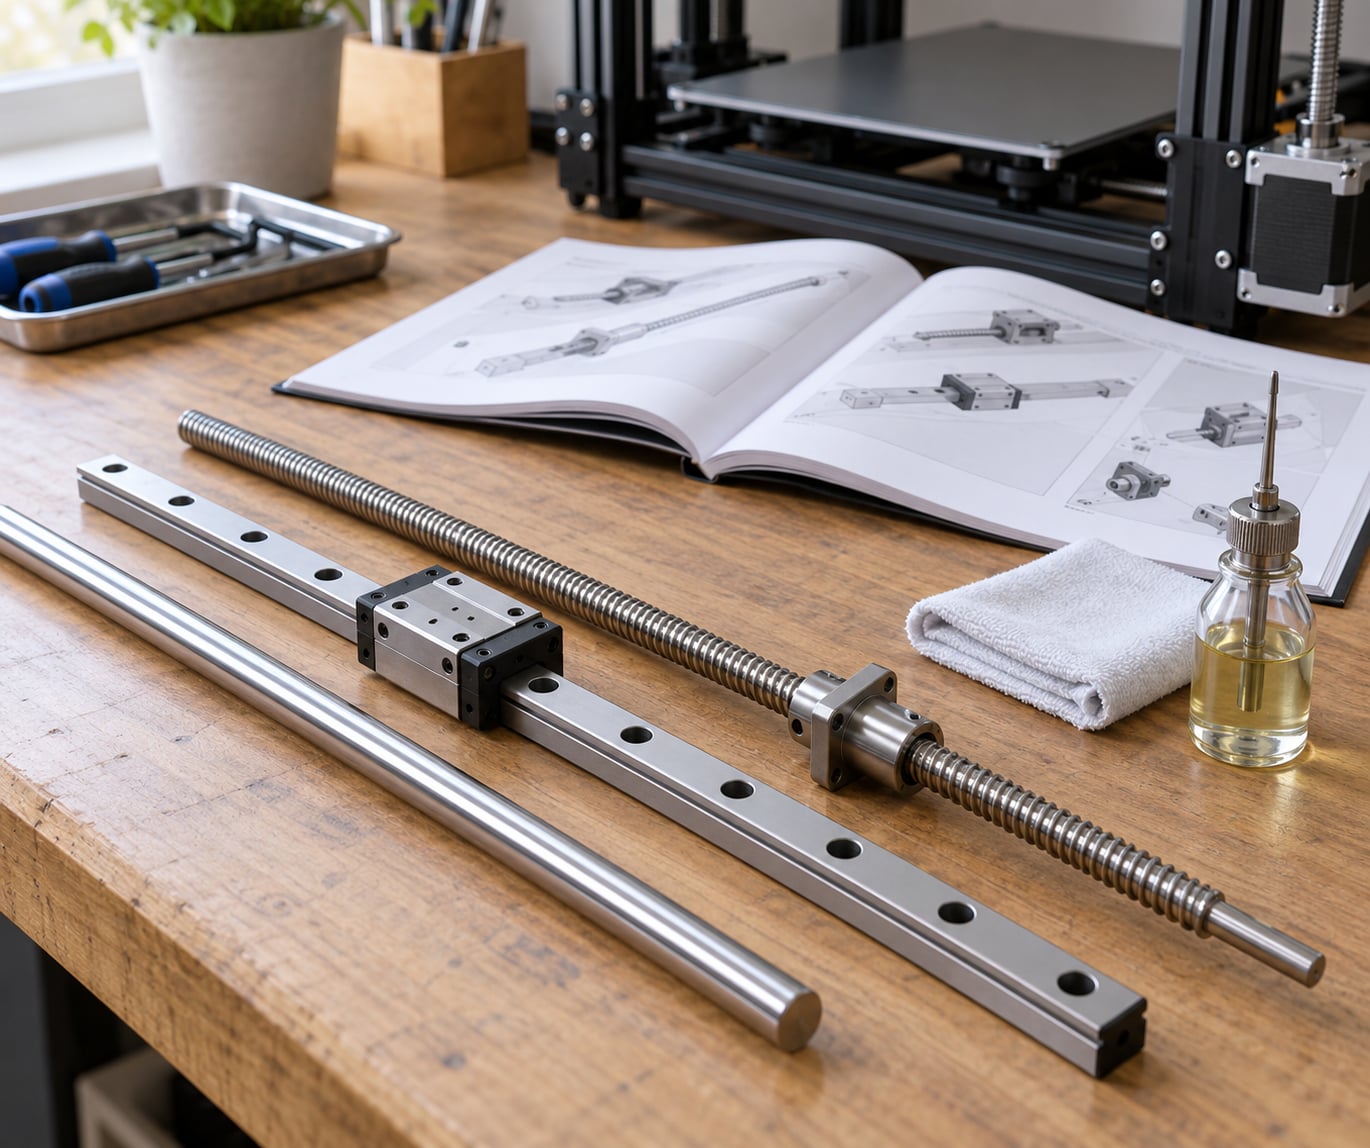
Smooth rods with LMU8 or LM8UU carriages are polished steel shafts with plain bearing blocks that slide directly on the shaft. You will see two cylindrical carriages per axis with rubber wipers at each end. This is the classic Ender 3 and Prusa i3 layout.
MGN-style linear rails are a grooved steel rail with a recirculating-ball carriage riding in the groove. MGN12, MGN9, and MGN15 are the common sizes. These have small side holes or a grease fitting, or nothing at all.
Elliptical rails and V-slot wheels are a grooved extrusion with wheels that grip the groove from both sides. These run dry by design.
Lead screws are the threaded Z screw, usually paired with a trapezoid nut or a coupler. If you can see threads, it is a lead screw.
The X axis is usually a linear rail or smooth rods, and the Y axis is very often two smooth rods. A CoreXY-style toolhead adds two more rails. The manual’s maintenance section or exploded view will confirm, and it will also tell you the lubricant the manufacturer expects. Where the manual and general practice disagree, the manual wins.
2. Turn Off and Cool the Printer
Stop any print, switch off the machine at the wall rather than only at the control panel, and let it cool. A heated bed at 60 degrees and a hotend at 240 degrees will burn you and will also carry oil straight into your fingers and onto the frame.
Wait until you can hold a hand near the hotend comfortably and the bed is cool to the touch. Then home all axes one last time before you cut power, so you know the machine is at a known position when you power it back on later. Actually, homing first is the better habit: power up, home, then shut down at the wall.
3. Remove the Bed or Access Panels
You need the moving axis to slide freely by hand, so the bed has to come off the Y rails or the gantry has to drop. On a Cartesian printer that usually means four thumb screws or a lever-release plate. On an Ender-style machine the bed unclamps and the whole plate lifts straight up and off the two smooth rods.
Before anything else moves, photograph or note the position of the belt clips and cable ties. Photographing the gantry in place saves a lot of guessing when you put it back together. Support the gantry by hand so the weight does not hang on the rods or the belt, and keep the heated bed cable out of the way of the moving parts.
Signs that the axis is ready for lubrication: a squeak or a grinding sound as it moves, a heavy spot partway along the travel, visible scoring or rust on the rod surface, or a carriage that feels gritty rather than smooth. If it moves silently and evenly, note the date and skip it.
4. Clean the Rails and Rods First
This is the step people skip, and it is the step that decides whether the job lasts a month or a year. Lubricant applied over old grease and dust just mixes with it into paste.
Wipe the rod down with a lint-free cloth dampened with isopropyl alcohol, working along its full length. Then dry it fully. Do not soak the shaft and do not spray cleaner into a carriage, because alcohol can wash the grease out of a sealed ball bearing and leave it running dry.
On linear rails, run the carriage along the rail while you dab each ball pocket with an alcohol-dampened cotton swab. Repeat passes beat a single heavy application. For a badly contaminated carriage, soak it off the rail in a small container of alcohol for 20 to 30 minutes, working the balls with your fingers, then let it dry completely before any lubricant goes on.
New rails often arrive with a heavy protective shipping oil. Degrease those properly with warm water and degreaser first, then finish with alcohol, or you will seal the shipping oil into the grease and print with a contaminated axis for the life of the printer.
Use soft materials only. Steel wool, abrasive pads, and magic erasers will scratch the shaft or the rail groove, and those scratches become your noise source later.
5. Choose and Apply the Right Lubricant
Apply with a fine needle or precision oiler, a few drops at a time, and stop when the surface starts to look wet. More is not better here.
Smooth rods: put a thin line of light oil directly along the length of the shaft, then move the carriage up and down to spread it. Wipe off anything that beads or runs off the rod. The surface should look like a fingerprint, not like a wet stick.
Linear rail carriages with grease holes: inject a small amount of NLGI 0 or 1 grease into each hole while you rotate the carriage in small circles, so the grease spreads into the ball tracks. Keep rotating until the resistance evens out. Then move the carriage the full length of the rail several times and wipe the rails and the carriage seals clean.
Linear rail carriages with no grease holes: this is the most common unresolved question on the forums, and there is a workable answer. The block is sealed, so there is no way to inject grease into the ball circuit from outside, and forcing grease under the wiper seal only packs the outside and does nothing for the balls. Instead, remove the carriage from the rail entirely, turn it over, and work a thin film of oil into the ball tracks directly. A clean syringe needle lets you place oil in the groove without flooding it. Then refit the carriage and run the axis back and forth until the drag is even. Owners of budget rails report that this is where a sticky lithium grease fails and a light oil succeeds.
Lead screws: here is the part where the manuals genuinely contradict each other, so check your own machine. Prusa documentation for the MK4 states that the Z lead screws should not be lubricated, on the grounds that the leadscrew nuts are self-lubricating. Bamba Lab documentation schedules lead screw greasing roughly every three months. Both positions are defensible for their own machine, so follow the one for yours, and expect online advice to be confident and wrong about half the time.
If your manual does call for grease, apply a thin film to the screw only, never to the nut, and turn the axis by hand through its full travel to spread it. Greasing the nut as well is the most common way to introduce backlash and an uneven first layer.
What to keep dry: toothed belts, idler pulleys, V-slot wheels and elliptical rail wheels, carbon fibre reinforced rods, plastic bushings and self-lubricating polymer parts, and any heated surface. Belts in particular should never be oiled; oil on a toothed belt reduces grip and shortens its life. Oil on carbon fibre rods can penetrate the composite and swell it permanently.
Stay away from penetrating sprays such as WD-40 as a matter of course. It leaves an oily film that gathers dust, it attacks some plastics, and it does not lubricate properly once it dries. The one partial exception is a maintenance step described by some manufacturers for an X-axis guide rail as a short treatment before a proper lubricant goes on, and even that is model-specific. If your documentation mentions it, follow the documentation.
6. Move Each Axis Through Its Full Range
Lubricant applied in one place does nothing until it is distributed. Run each axis end to end, slowly, several times. Do this by hand if the axis is unloaded and the machine is off, which is the safer option and gives you the most feedback.
What you want is consistent resistance. You should feel the same amount of drag at the centre of travel as at the ends, and no spot where the carriage suddenly grabs or snaps free. On a smooth rod, a heavy spot usually means either an uneven film or a bent shaft. On a linear rail, a heavy spot usually means the carriage was not rotated enough while you applied the lubricant.
With the power on and the machine idle, a low hum from the stepper while it holds position is normal and needs no lubricant at all. A squeak or grinding that changes pitch as the axis moves is friction, and that is what lubrication fixes. Ringing that only shows up as a ghosting artifact on printed walls is a tension or input-shaping problem, not a lubrication problem, and no amount of oil will change it.
7. Reassemble, Test, and Clean Up
Reconnect the bed and any panels you removed, route the cables exactly as they were, and check belt tension before the first move. A carriage that suddenly binds after reassembly is usually a cable pinched against a rail or a belt that came unclipped, so look there first.
Power on, home all axes, and move each one across its full travel by hand at power. Then run a short test print, ideally a small calibration or tower model, and check the first layer and one vertical wall for smoothness.
Warning signs to stop and investigate: binding that appears only after reassembly, grease squeezed out from under a wiper seal, lubricant dripping onto the bed surface or the belt path, or new ringing and layer shifts that were not there before. Any of those means wipe it back, reduce the amount, or put a component back the way it was.
A note on intervals. Prusa documentation suggests servicing the printer roughly every 200 print hours, and Bamba Lab documentation uses a calendar interval of about three months for lead screw greasing. For a printer running daily, use your judgment on condition rather than the calendar: squeaking, extra drag, or visible dust accumulation is a better trigger than any number. A weekend hobby printer that only ever sees four hours a month can comfortably double those intervals.
Common Mistakes
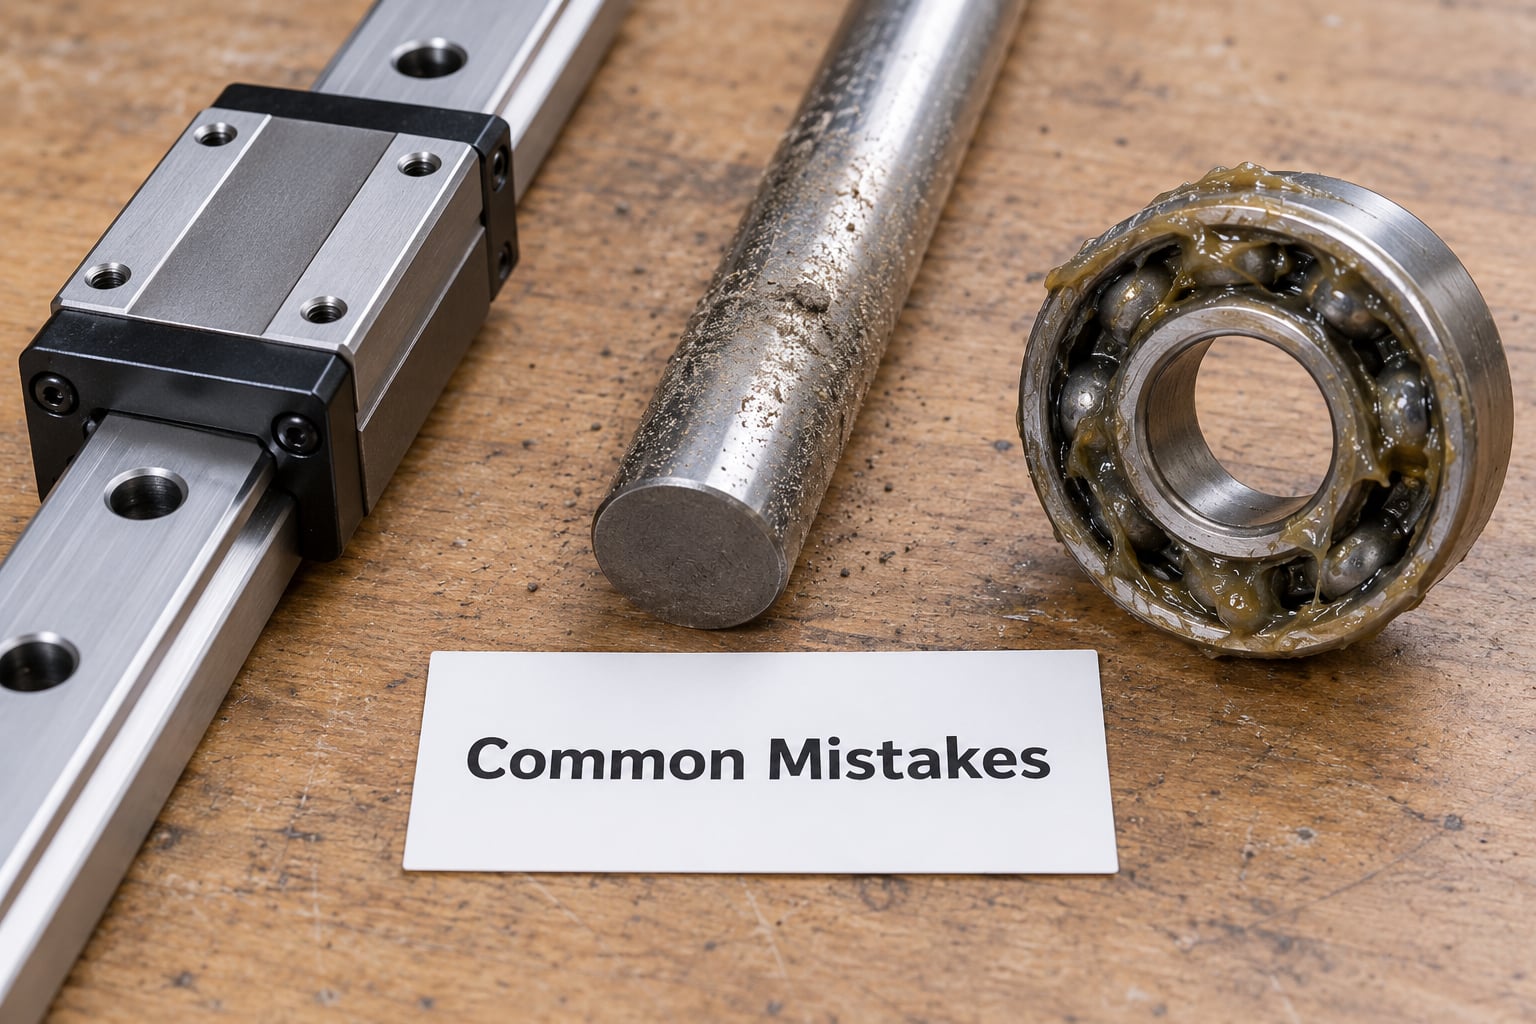
Almost every lubrication complaint traces back to one of six errors.
Using too much lubricant. The surface ends up sticky, filament dust and hair stick to it within days, and the resulting paste drags along the rail and makes noise worse than before. The fix is to wipe the rail and the carriage seals down properly after application and to use a few drops rather than a syringeful. Signs of over-lubrication are a rail that collects dust faster than you can clean it and a carriage that feels heavier after greasing than before.
Using white lithium grease on linear rails. It is sticky, it gathers dust aggressively, and it is a frequent source of complaints from owners who tried it and switched to oil. The fix is to clean the rail and carriage thoroughly with alcohol, then use a light oil or an NLGI 0 or 1 grease instead.
Oiling belts, V-wheels, or carbon fibre rods. Oil on a toothed belt reduces the grip that keeps it from skipping, and oil on a carbon fibre rod can swell the composite permanently. The fix is to wipe the surface with alcohol and leave it dry. If your printer uses V-slot wheels or an elliptical rail, that whole axis stays dry by design.
Skipping the cleaning step. Lubricant over old grease and shipping oil mixes into paste immediately. The fix is to degrease first every single time, even when the axis looks clean, because the film you cannot see is the one that is causing the problem.
Moving a loaded axis. Dragging a carriage across a rod while the bed is still full, or running the Z axis with weight on the nut, can bend a shaft or strip a nut. The fix is to unload the axis first: remove the glass bed from a magnetic mount, and turn the Z screw by hand rather than driving it under load.
Greasing a lead screw the manual says to leave alone. Community advice on this one is genuinely split. The fix is to open your own printer’s documentation and follow it rather than a forum post, because a self-lubricating nut does not benefit from grease and can end up with backlash.
Frequently Asked Questions
What lubricant should I use on 3D printer linear rails?
A light oil is the safest default for smooth rods and linear-rail carriages: sewing machine oil, light machine oil, or a synthetic oil with a PTFE additive. It spreads, it does not gather dust, and it creeps into the ball tracks. Use an NLGI 0 or 1 grease instead if your manual specifies grease or if the rail runs hot. Avoid white lithium grease, which is sticky and collects filament debris quickly. Whatever you choose, clean the rail with isopropyl alcohol first and use the smallest amount that works.
Can you use WD-40 to lubricate a 3D printer?
Generally no. WD-40 leaves an oily film that traps dust, is not a long-term lubricant, and can attack certain plastics and elastomer seals. It has no place on belts, V-wheels, plastic bushings, or carbon fibre rods. A few manufacturers describe a maintenance step using it on an X-axis guide rail before proper lubrication, and that is the only situation where it is reasonable, because the documentation explicitly calls for it. For anything else, use light oil or an NLGI 0 or 1 grease.
How often should I lubricate my 3D printer?
Use condition over calendar. Prusa documentation suggests servicing roughly every 200 print hours, and Bamba Lab documentation schedules lead screw greasing about every three months. If you print daily, check every few weeks for squeaking, extra drag, or dust build-up. If you print a few hours a month, twice a year is realistic. Re-lubricating too often wastes lubricant and mostly just reintroduces dust, so skip a service if the axis still moves silently and evenly.
What type of grease is best for 3D printer linear rails?
An NLGI grade 0 or 1 grease. The NLGI number describes consistency: grade 0 behaves almost like oil, grade 1 is a light grease that spreads into the ball tracks, and grade 2 is the general-purpose tub grease that is usually too thick for a small carriage. Grade 3 and above will clog wiper seals and collect dust. If you can only find grade 2 locally, it will work on lead screws but a light oil is a better fit for rail carriages.
Should I oil V-slot wheels or elliptical rail wheels?
No. V-slot wheels and elliptical rail wheels are designed to run dry, gripping the extrusion groove mechanically through the preload in their bearings. Oil on the wheels makes them slippery, collects dust into a paste on the groove, and accelerates wear of both the wheel tread and the extrusion. If an elliptical rail axis squeaks, the usual cause is dry or dirty wheels or loose wheel preload, not a lack of lubricant. Clean the groove and the wheels with isopropyl alcohol and adjust the wheel eccentric instead.
Why is my linear rail sticky after greasing?
Almost always too much lubricant, or the wrong one. White lithium grease and thick NLGI 2 grease both leave a sticky film that traps filament dust, hair, and plastic powder into an abrasive paste that drags along the rail. The fix is to remove the carriage, soak it in isopropyl alcohol for 20 to 30 minutes while working the balls with your fingers, clean the rail and groove thoroughly, let everything dry fully, and reapply a much smaller amount of light oil or NLGI 0 grease.
Conclusion
Start by looking at one axis and working out which system it uses. Smooth rods and linear carriages get a light oil, lead screws get grease only if your printer’s documentation asks for it, and belts, V-wheels, plastic bushings, and carbon fibre rods stay dry.
Clean the surface with isopropyl alcohol, apply the smallest amount of lubricant that will spread, run the axis through its full travel to distribute it, wipe off the excess, and then test each axis by hand before you put the printer back to work. Ten careful minutes now beats a day of diagnosing noise and artifacts later.