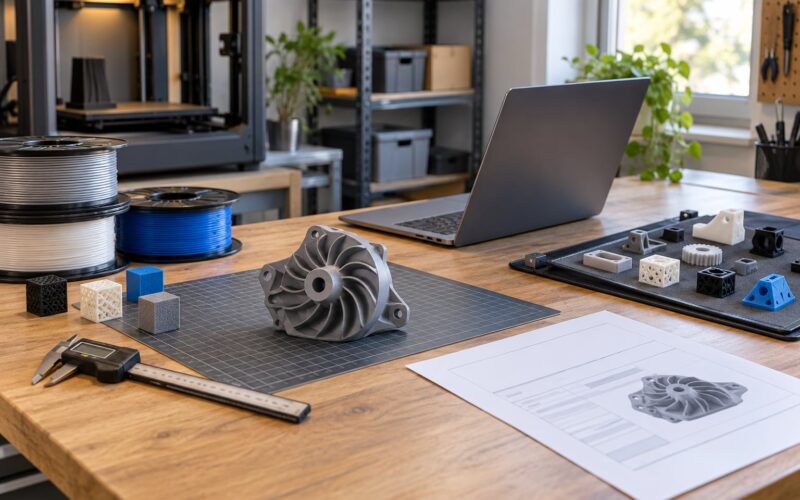
A 3D print farm pays off when every machine spends nearly all of its powered hours making parts you can invoice, and you price those parts from a real cost model rather than a guess. Knowing how to run a 3d print farm profitably comes down to four levers: the niche you serve, the machines and materials that fit it, the accuracy of your cost per print, and how little dead time your schedule allows.
The operators who stick around are rarely the ones with the most machines. They are the ones who picked one job type, learned its failure rate, and stopped guessing at costs. This guide walks through that operating sequence, from niche selection to the month you decide a sixth printer makes sense.
If you only remember five things, remember these: track cost per print down to the failed spool, batch similar geometries so setups drop, keep every machine queued overnight, price from validated cost plus a margin rather than from what competitors charge, and treat utilization rate as the number that decides everything else.
Table of Contents
- 1What You Need
- 2How to Run a 3D Print Farm Profitably Step by Step
- 31. Choose a Profitable Niche and Service Offer
- 42. Match Printers and Materials to the Work
- 53. Calculate the True Cost of Every Job
- 64. Price for Value and Sustainable Margin
- 75. Schedule the Farm for High Utilization
- 86. Standardize Quality and Repeatability
- 97. Manage Materials, Maintenance, and Downtime
- 108. Build Repeatable Sales and Customer Operations
- 119. Track Profitability and Scale Carefully
- 12Common Mistakes
- 13Frequently Asked Questions
- 14How profitable is a 3D print farm?
- 15How many 3D printers do I need to make money?
- 16How much do 3D print farms charge for printed parts?
- 17What is the most profitable 3D printed item to sell?
- 18Is the 3D printing market saturated?
- 19When should a print farm hire help instead of staying solo?
- 20Conclusion
What You Need

A business model you can write on one page. Decide who pays, what they receive, how long you promise, and what you refuse to print. Everything downstream, from equipment to insurance, follows from that paragraph.
Repeatable print jobs, not one-off curiosities. A design that prints the same way for five hundred units is an asset; a model you tweak for every customer is a job that never repeats.
Equipment matched to that work. Budget-bed enclosed printers, higher-speed CoreXY-style machines, or resin printers all suit different jobs, and mixing classes usually means mixing problems. Two to five identical machines is the realistic entry point most operators recommend.
Materials in a controlled state. Dry boxes or a heated chamber, an inventory system that knows what you have, and enough material that you never print a rush order from an empty shelf.
Labor and software. Someone has to load plates, remove parts, inspect them and ship them. A farm dashboard such as OctoPrint with OctoFarm, SimplyPrint, or a Klipper and Mainsail setup is what turns a room full of machines into something you can leave alone overnight.
Workspace, power and cooling. Check the circuit capacity for the machines you plan to run, keep resin farms ventilated and filtered, and know your noise tolerance before you invite neighbours into the argument.
Safety procedures. Hotends and heated beds, moving belts, solvent cleaning and electrical load all deserve a written routine, plus a smoke detector, an extinguisher rated for electrical fires and a clear shutdown switch per bank of machines.
Sales channels and records. A marketplace listing, a direct storefront, or local B2B service work. Whichever you pick, track orders, costs and customer details from day one so your financial picture is a spreadsheet rather than a memory.
How to Run a 3D Print Farm Profitably Step by Step
Nine steps, in the order that keeps money from leaking. Skipping ahead to step nine is why most hobby farms never become businesses.
1. Choose a Profitable Niche and Service Offer
Test a niche before you commit capital, not after. Operators in r/3Dprinting and r/3DPrintFarms are blunt about this: anything downloadable commercially is already commoditised, and searching your own idea on a marketplace usually returns dozens of near-identical listings. That is your saturation signal.
Rank candidates by margin per hour of machine time, not margin per unit. A part that earns well but takes nine hours of printing to deliver one customer is worse than a simpler part earning slightly less and reprinting all night.
Look for demand with structure: repeat orders, tight tolerances, awkward geometry that injection moulding handles badly, or replacement parts for equipment nobody else stocks. Prototyping fixtures, jigs, cosplay parts and on-demand spares tend to hold up better than decorative commodity items.
Then write the offer. One line, one audience, one promise. Local businesses needing a prototype in three days is a service. A hundred generic organizers is a product lottery.
2. Match Printers and Materials to the Work
Buy from the job list, not from spec sheets. Build volume decides which parts you can accept; speed decides whether a deadline is reachable; enclosure and heated chamber decide whether ABS and ASA parts are viable at all; accuracy decides whether you can quote a tolerance.
Redundancy beats variety at small scale. When one of four machines goes down, you still have identical workflows, identical slicer profiles and a spare set of parts on the shelf. A mixed farm looks flexible and behaves badly.
Material follows the application. PLA for display and draft parts, PETG for anything that takes heat or impact, TPU for flexible goods, ASA outdoors, resin where surface finish matters and the geometry can be supported. Multi-spool units help once you run more than one material per machine, but they are not a substitute for storage discipline.
3. Calculate the True Cost of Every Job
Cost per print equals material plus electricity plus machine time plus maintenance plus labor plus failure allowance, and every term needs a number attached to it. Print a reference part on one machine, weigh the finished object, weigh the spool before and after, and you have your grams-per-kilogram figure that applies to every job that follows.
Electricity comes from average power draw times print time times your local rate per kilowatt-hour. Measure with a plug meter during a real print, not the label wattage, because a heated bed cycling on and off draws far less than its peak rating suggests.
Machine time is depreciation divided by expected life, so a machine that costs a few hundred and lasts three years adds a small but real hourly rate. Maintenance is a percentage of machine cost per year covering nozzles, hardened parts, belts and the occasional board.
Labor is the term most first-time operators leave out. Count the minutes to remove a part, clean the plate, inspect it, pack it and ship it. Multiply by an hourly rate you would actually accept from a client.
The failure allowance comes from your own log, not from optimism. Multiply your measured failure rate by the average cost of a wasted job and add it in. One operator posting in r/3DPrinterComparison reported a strong sales month that turned into less than a third of that in profit once marketplace listing fees were counted, and the gap was mostly costs nobody had modelled.
4. Price for Value and Sustainable Margin
Build a minimum order price from your cost model, then apply a markup multiplier for the risk, the design work and the customer convenience. Cost plus three is a reasonable floor for uncomplicated, repeatable work; custom geometry and rush delivery justify more.
Add setup and finishing time as a separate line rather than hiding it inside machine hours. Post-processing, sanding, priming and assembly take longer than most newcomers assume, and they are the hours that quietly turn a profitable order into a break-even one.
Set a rush premium and a batch discount with actual numbers behind them. A 40% premium for a two-day turnaround is defensible when your queue was full. A bulk discount on identical parts is easy because your setup cost drops per unit.
Quote from validated cost and stop watching competitor listings once you have your number. Race-to-the-bottom pricing is how a business loses money while looking busy.
5. Schedule the Farm for High Utilization
Utilization rate is the share of powered hours spent printing a billable job. Below roughly half, the fixed costs per print climb steeply; above seventy percent you are usually profitable on machine time alone.
Batch similar geometries together. Every job switch costs minutes of heat-up, levelling and purge, and those minutes are pure dead time. Group one material, one layer height and one geometry family per overnight run.
Keep the queue deep. A farm management platform that holds a queue per machine, starts the next job automatically and alerts you when a print dies is worth more than the printer it monitors. Overnight failures are the single most common way a farm loses margin, because the machine sits cold until you wake up.
Balance the load across machines so no unit carries the queue while another idles. Watch for the printer that consistently takes the longest jobs and either improve it or move that work elsewhere.
6. Standardize Quality and Repeatability
Store one validated slicer profile per material and part family, including orientation, layer height, temperatures, wall count and support style. Orientation alone changes both strength and material use, so treat it as a decision you record rather than one you re-invent.
Inspect every part against a short checklist: dimensions at the critical features, visible layer shifts, surface defects on show faces, correct weight for infill settings. A caliper and a printed test gauge cover most of it.
Label each part with job number, material and print date, and keep a revision history so a repeat order reproduces the earlier result. When a customer approves a sample, archive the exact file version they signed off.
Consistency is what turns a buyer into a repeat customer, and repeat customers are cheaper to serve than new ones.
7. Manage Materials, Maintenance, and Downtime
Treat moisture as a scheduled check, not a surprise. Absorbent filaments stored in humid air print differently every week, and a spool that has been open deserves a dry box with desiccant and a defined replacement interval for the desiccant.
Run a maintenance routine on a calendar: daily plate checks and nozzle wipes, weekly belt tension and axis feel, monthly nozzle inspection and calibration check, quarterly a full review of every machine that has printed a lot. Planned downtime in the schedule costs you nothing; unplanned downtime takes the whole night.
Keep spares on hand. Nozzles, nozzles of the hardened kind, PTFE or equivalent liners, belts, a spare hotend, a spare bed surface and one spare controller board cover the majority of failures and remove the shipping delay from the equation.
Track machine availability as a number, not a feeling. Hours available minus hours down equals hours you can actually sell, and that figure belongs in your pricing model.
8. Build Repeatable Sales and Customer Operations
Pick two channels at most. A marketplace handles discovery, a direct storefront or local service relationship handles margin, and juggling more than that at the start spreads your attention thin. Compare them on fees, control over pricing and how much they let you scale, then commit.
Publish samples before you publish volume. Photos of finished work with measurements and honest tolerances win more jobs than a long product list.
Standardize quoting and lead times. A written quote template that shows setup time, print time, finishing, shipping and the total keeps you from forgetting a line that eats the margin.
Handle orders the same way every time: confirm specifications, issue the quote, start on payment, print, inspect, photograph, ship with tracking and log the customer. Most repeat revenue comes from doing this reliably rather than from finding new customers.
Move one-off projects into repeat or recurring work where you can. A maintenance contract for printed jigs or spare parts for a small manufacturer is worth more than twenty scattered single orders.
9. Track Profitability and Scale Carefully
Review a small set of numbers monthly: revenue per machine hour, utilization rate, failure rate, labor cost as a percentage of revenue, gross margin, on-time delivery, and how much of your revenue comes from your biggest customer.
That last one protects you. A farm that depends on a single client is a farm with one failure away from a bad month, so know the number before you need it.
Add capacity when three conditions hold at once: utilization is consistently high on existing machines, your failure rate is understood and controlled, and your documentation is good enough that someone else could run the machines. Adding printers before the first three is how cash disappears into idle hardware.
Scale power, cooling and zoning in the same step. Circuit capacity, heat build-up and noise all become real constraints somewhere around ten machines, and retrofitting later costs far more than planning for it now.
Common Mistakes
Buying machines before you have a job. Twenty printers with no queue is the most expensive hobby in this hobby. Start with two identical machines, prove the workflow, then grow.
Forgetting labor in the price. Removal, cleaning, inspection, packing and shipping add real minutes to every order, and leaving them out is the quietest way to lose money on work that looks profitable.
Underquoting by guessing filament use. Weigh a reference part and a spool, then apply that ratio to everything else. Guesswork here quietly underprices every job you quote.
Accepting work you cannot repeat. If every order needs a new slicer profile and a fresh test, your machine hours are being spent on engineering rather than production.
Ignoring marketplace fees and shipping. Operators who only subtract filament discover at the end of the month why a busy sales period produced thin profit.
Running without remote monitoring. One overnight failure on a ten-machine farm can erase a day’s revenue, and a dashboard with alerts is the cheapest insurance available.
Scaling without documented quality control. The moment quality depends on one person’s memory, you cannot hire, delegate or scale safely.
A few operating habits cover most of that: batch similar jobs, keep queues deeper than you think you need, log every failure with a cause, review numbers monthly, and let one machine sit idle rather than pushing a print you cannot finish on time.
Frequently Asked Questions
How profitable is a 3D print farm?
Margin depends almost entirely on utilization and failure rate. Operators who keep machines printing billable hours for most of the week report healthy single-digit to mid-teens margins after fees, labor and failed prints. Those running at low utilization struggle to cover fixed costs at all. A useful check is to divide revenue by total machine hours and compare it with your cost per print plus overhead.
How many 3D printers do I need to make money?
Most operators who succeed start with two to five machines and add capacity only when existing machines stay busy. Two identical printers give you redundancy, so one failure does not stop output, and they still fit one room and one circuit. Adding twenty machines before you know your job costs, failure rate and pricing is the most common reason a farm never reaches break-even.
How much do 3D print farms charge for printed parts?
There is no standard rate, because parts differ too much in size, material, tolerance and turnaround. The workable method is cost plus a markup multiplier, with separate lines for design setup, finishing and rush delivery. Simple repeatable items usually support a multiplier near three, while custom geometry and short-turn jobs justify more. Quote from your own validated costs rather than from competitor listings.
What is the most profitable 3D printed item to sell?
There is no universally profitable item, but profit tends to follow specific traits rather than categories. Parts that are awkward to mould, needed in small quantities, easy to ship and likely to be reordered usually win. Designing your own products protects you better than reselling downloadable models, which operators consistently describe as saturated. Judge any candidate by margin per hour of machine time.
Is the 3D printing market saturated?
The commodity end is crowded. Operators on r/3Dprinting and r/3DPrintFarms agree that anything readily downloadable has been printed by dozens of sellers already, and per-part prices have fallen from the levels people remember. The less crowded end is local and specific: prototyping, fixtures, replacement parts, and commissioned designs for customers who cannot buy them off a shelf.
When should a print farm hire help instead of staying solo?
Hire when the bottleneck is consistently human rather than machine capacity. Constant plate loading, inspecting, packing and order questions that pull you off the machines usually signal the time is right. Before that, batch printing and overnight queues buy back much of the same time for free. A first hire is often part-time and focused on post-processing and dispatch.
Conclusion
Start with four concrete actions this week. Choose one niche and one customer type, and write the offer on a single line. Take a reference part, weigh it, measure the machine’s power draw with a plug meter, and build your first cost per print from those numbers. Set a minimum price from that cost plus a margin, and write it down before the next order arrives.
Then watch utilization for a month before buying anything else. If the machines are busy and your costs are known, capacity is the easiest growth step you will ever take. If they are idle, more machines will only multiply the quiet.