Why my 3D print is not sticking to the bed comes down to four things in nearly every case: a dirty build surface, a nozzle sitting at the wrong height, a bed that is too cold for the filament, or a part with too small a footprint to hold itself down. Work through those in that order, changing one thing at a time, and you will find the fault in under an hour.
Bed adhesion is the bond between your molten first layer and the build plate. When that bond is weak, the part lifts at a corner, slides sideways, or gets knocked loose halfway through a six-hour job. A failure at layer one wastes the whole print, not just the part.
The steps below sit in that order on purpose. Each one costs about a minute and rules out a whole category of problems before you reach the slower checks, which matters more than it sounds when you are six hours into a print that has already curled at the corners.
Table of Contents
- 1What You Need
- 2Step-by-Step Troubleshooting: Why My 3D Print Is Not Sticking to the Bed
- 31. Clean the Print Bed and Nozzle First
- 42. Check Bed Leveling When Your Print Is Not Sticking to the Bed
- 53. Set the Correct Nozzle Height and Z-Offset
- 64. Increase Bed and Nozzle Temperatures
- 75. Verify Material Settings and First-Layer Settings
- 86. Choose the Right Bed Surface and Adhesion Method
- 97. Confirm the Part Is Positioned for Success
- 10Common Mistakes That Ruin the First Layer
- 11How to Tell the Fix Worked
- 12Quick Troubleshooting Table: Symptom, Cause, Next Action
- 13Frequently Asked Questions
- 14Why is my first layer not sticking even when the bed is level?
- 15Should I use glue stick or hairspray for 3D printer bed adhesion?
- 16What Z-offset should I use for a perfect first layer?
- 17Why does my 3D print stick in the middle but lift at the corners?
- 18Can I print directly on a glass bed without adhesive?
- 19Why is my print popping off the bed after several minutes?
- 20Conclusion
What You Need
None of this requires a parts order. Everything here is either already on your desk or cheap to replace once you know which part gave up.
- A lint-free cloth or paper towel for wiping the plate, plus a second one kept separate so you do not re-deposit oils.
- Isopropyl alcohol at 90 percent or higher for glass and smooth PEI. Warm water and dish soap work for textured PEI and for build plates that are simply dusty.
- A lint roller or tape. Forum users on r/3Dprinting swear by a roller for pulling lint, dust, and skin oils off a textured sheet before printing.
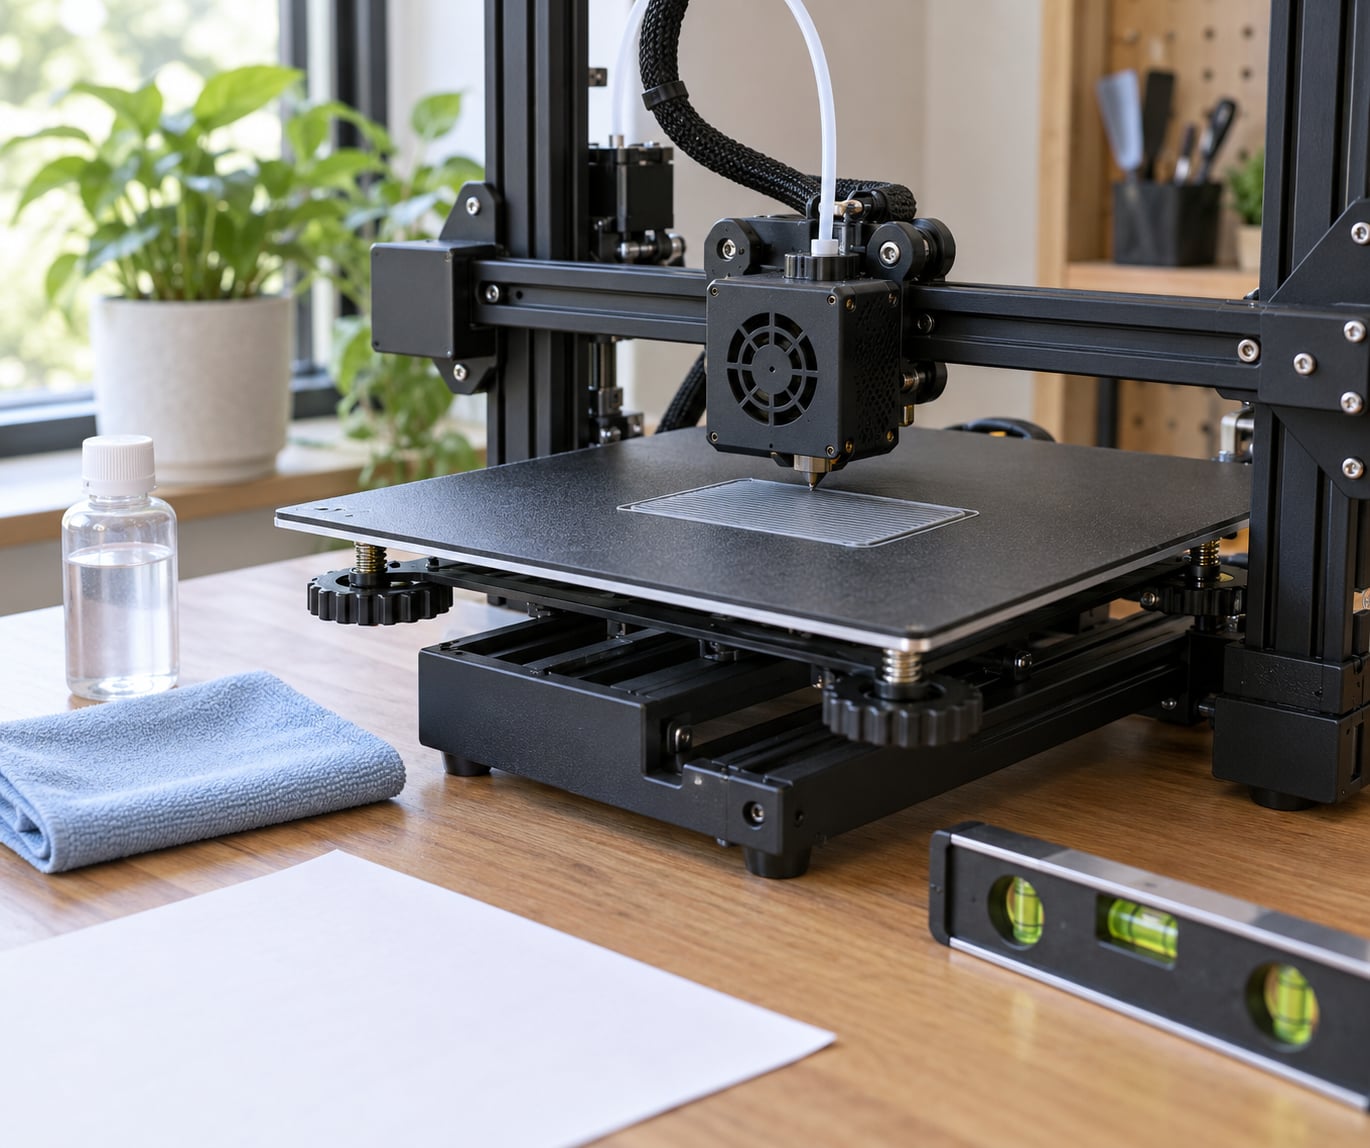
- Plain printer paper for the paper leveling test, plus a feeler gauge if you have one. A gauge is more honest, since paper thickness varies between reams.
- A nozzle of the correct size and, honestly, a wrench. A loose hotend throat screw causes first-layer failures that no amount of leveling will fix, and that is a recurring report on r/3Dprinting.
- Your printer firmware on screen. Every step below that involves mesh leveling or Z-offset happens in the printer menu, not the slicer.
Step-by-Step Troubleshooting: Why My 3D Print Is Not Sticking to the Bed
1. Clean the Print Bed and Nozzle First
Grease from your fingers, dust, and a fine film of previous filament are the most common reasons a plate stops accepting plastic, and the fix is ninety seconds of work. You do not need a deep clean every print, but you do need one the moment adhesion changes overnight.
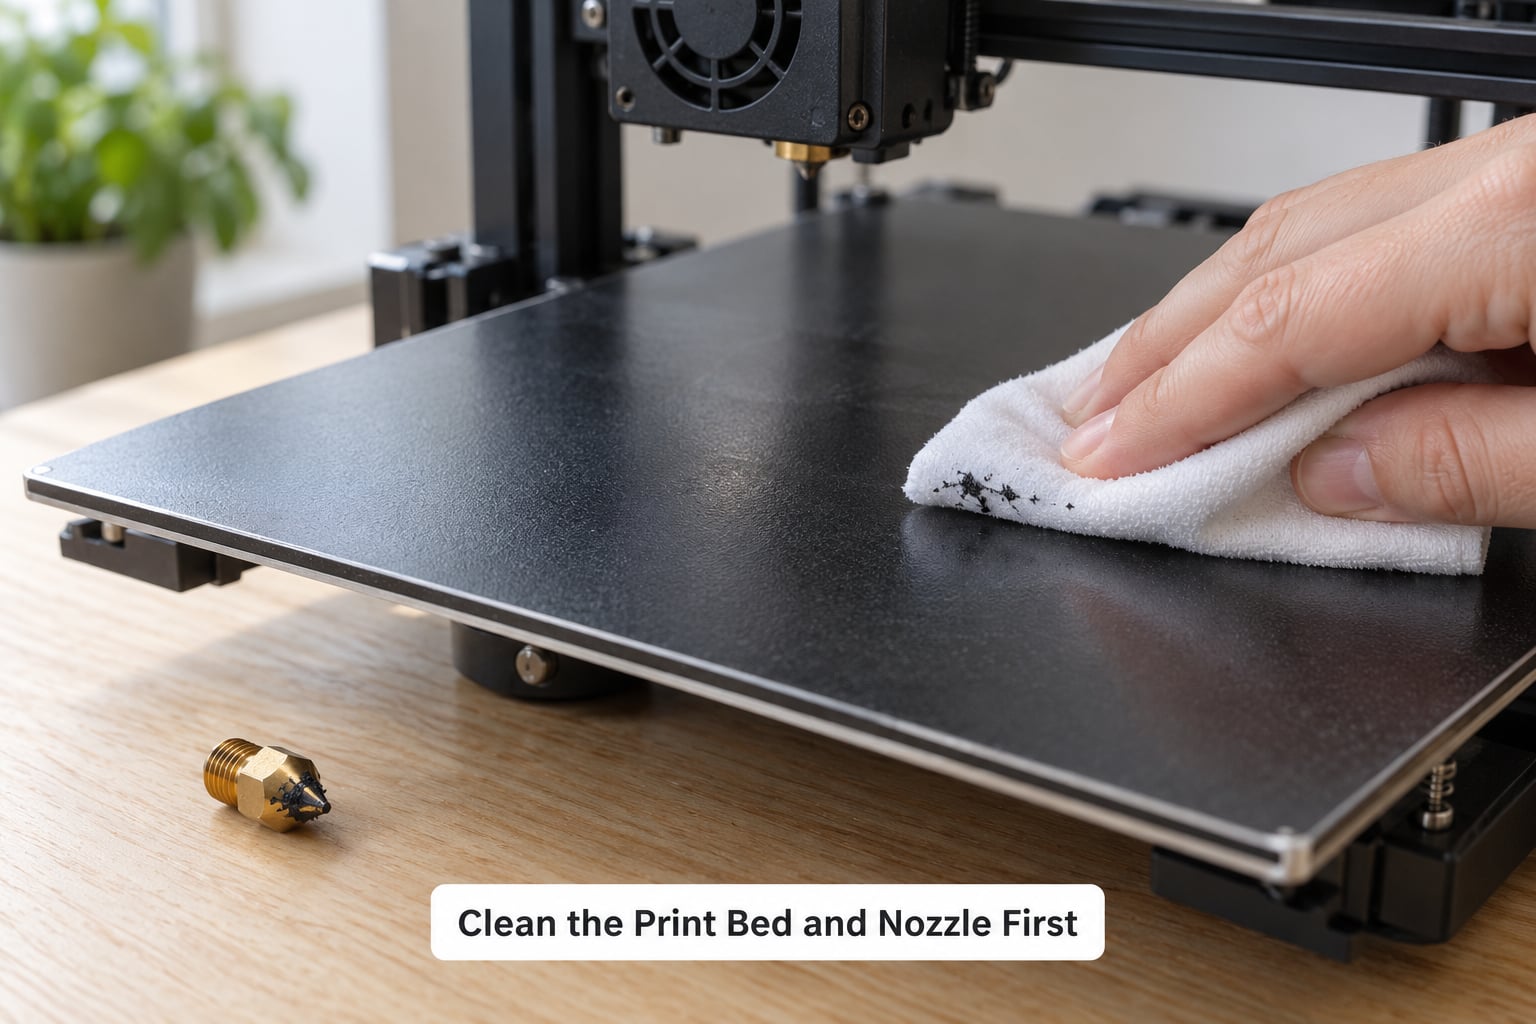
For glass and smooth PEI, dampen a cloth with 90 percent IPA and wipe until the streak is gone, then let it dry fully. A wet plate is a failed first layer. For textured PEI, skip the alcohol and use warm soapy water or a lint roller, because alcohol can leave a film that textured plates grip too well and the next part becomes impossible to remove.
Check the nozzle at the same time. A small blob of leaked plastic on the tip is not cosmetic, it drags across the plate and stops the line from laying flat. A trick that works well on stubborn residue, floating around the Prusa forum, is to press packing tape onto the surface and peel it off several times, then wipe once more.
You will know it worked when: the plate looks visually clean, feels slightly tacky rather than slick, and the very next test line is continuous with no skips.
2. Check Bed Leveling When Your Print Is Not Sticking to the Bed
An unlevel bed means the nozzle is at a different height on one side than the other, so the line squishes hard on one corner and floats on the opposite one. The corner that floats is the corner that lifts.
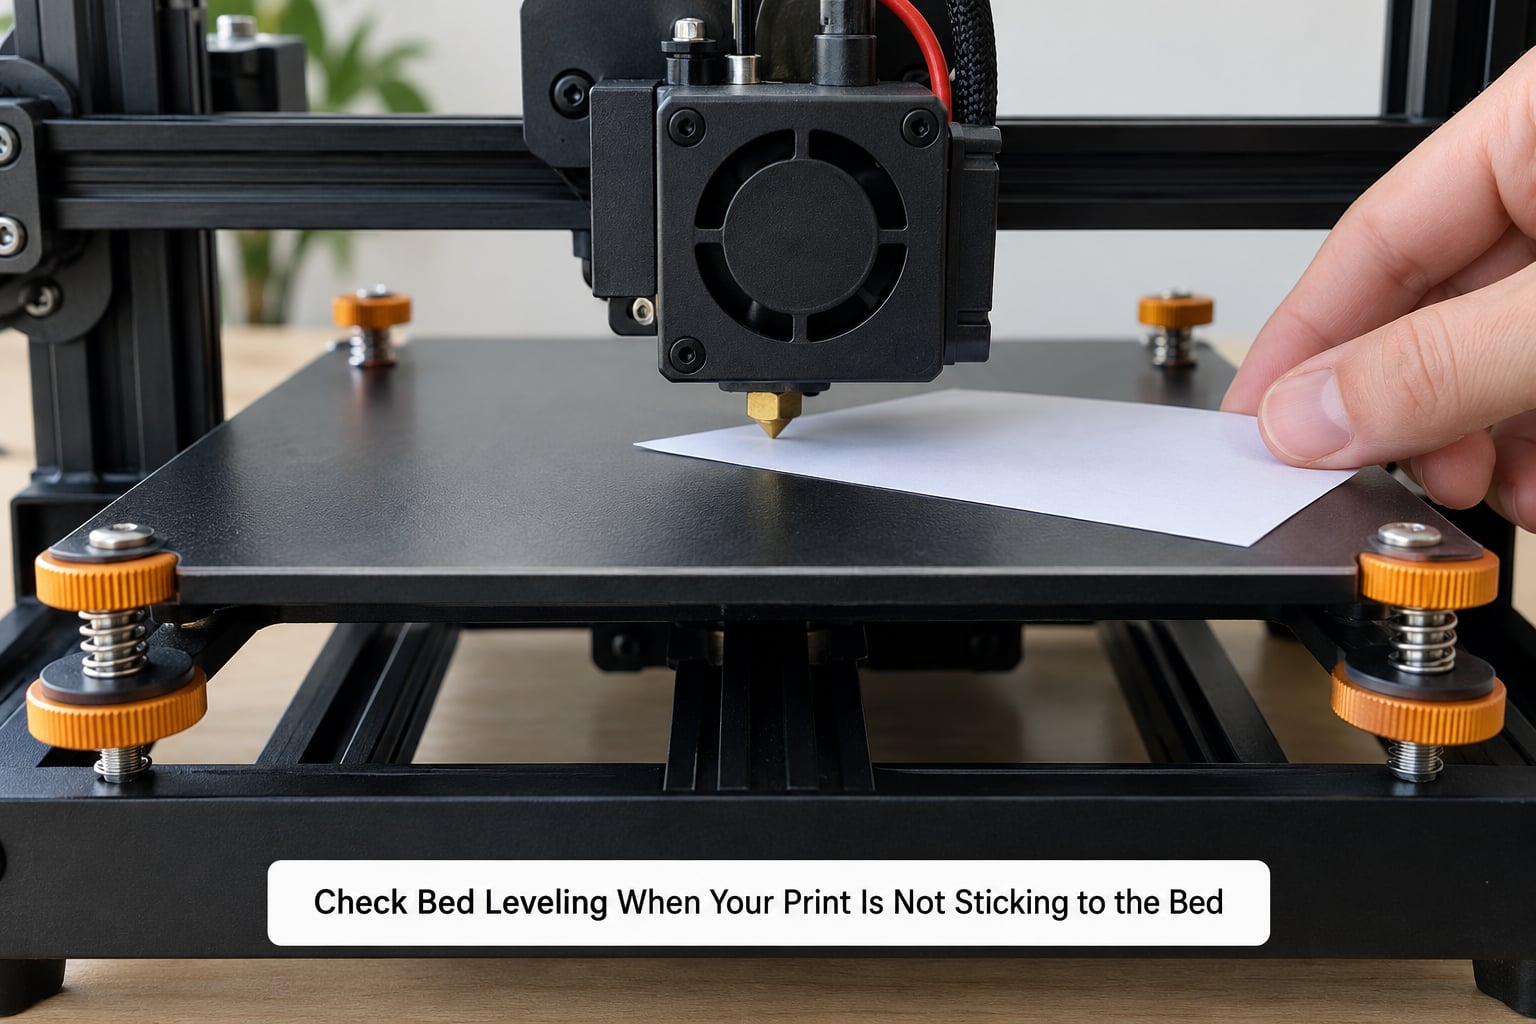
Heat the bed and the nozzle first, because a cold plate is a smaller plate as far as leveling goes. Most printers have a built-in routine: on an Ender 3 it is Control, then Prepare, then Auto Bed Leveling. On a Bambu Lab or Prusa machine, mesh leveling lives in the calibrate or settings menu. Run the built-in routine before any manual work, then re-run it any time you move the machine or change the plate.
For manual checks, run the nozzle to about 10 mm above the bed, then lower the Z-offset until the tip is a couple of millimetres above the surface, heat the nozzle, and slide a sheet of paper back and forth underneath. You want consistent light drag at all four points.
Loosen a corner knob a quarter turn at a time. Corner screws can be a full thread out before the bed is fully lowered, which is where most people lose patience and force the adjustment.
You will know it worked when: paper drag feels the same at every corner, and a test print shows line width that does not visibly change as the nozzle travels.
3. Set the Correct Nozzle Height and Z-Offset
This is the one people get wrong, and it deserves a separate heading. Bed leveling fixes the plane of the bed. Z-offset sets how far the nozzle floats above it. A bed can be perfectly flat and still print a first layer with gaps in every line.
Too far away and the filament lands as a rounded bead with air between it and the plate. The bead never welds, and you get separate lines that peel off individually. Too close and the line is scraped rather than laid down, which shows up as ridges, a grinding noise from the nozzle, and marks in the plastic.
The paper method gets you close but not calibrated. For an exact value, use a first-layer calibration model, such as the ones in the Prusa knowledge base or the XY Calibration Cube by Jose Garcia, print it, and read the line spacing off the surface. Adjust the offset by the width of the gap and print again. A good result sits around 0.2 mm for a 0.4 mm nozzle.
Set Z-offset with the hot end at print temperature, around 200 C for PLA, because a cold nozzle and a hot one do not measure the same.
You will know it worked when: the first layer is a flat sheet with no gaps between lines and no visible ridges in it, and it comes off the bed with resistance when you flick it with a fingernail.
4. Increase Bed and Nozzle Temperatures
Adhesion is a weld. The plastic has to stay molten long enough to fuse with the surface, and a cold plate or a cold nozzle kills that window. Move up in small steps of 5 C and watch the first layer as it lays down.
Rough starting points for a 0.4 mm nozzle: PLA at 60 C bed and 205 C nozzle, PETG at 80 to 90 C bed and 240 C nozzle, ABS and ASA at 100 to 110 C bed and 250 C nozzle. Those are starting points, not gospel, since filament brands vary and the datasheet for your spool wins.
For PETG, experienced users on r/FixMyPrint run 90 C for the first five layers and then drop to about 86 C, with eco or power-saving mode switched off so the bed holds heat. Most published tables say 65 to 70 C, which is low for a first layer and is why so many PETG prints fail at the corners.
Raising the nozzle temperature more than you need is its own problem. Above roughly 230 C, PLA softens, foams, and strings, and a too-hot nozzle can print a squashed first layer that looks like an offset problem but is not.
You will know it worked when: the plate is warm enough that touching it feels uncomfortable, and the part resists being pried up while still small.
5. Verify Material Settings and First-Layer Settings
A correct physical setup can still produce a bad first layer if the slicer is asking for something the machine cannot give. Check these in the printer profile and the slicer before you buy any adhesive.
- Filament diameter. Set to 1.75 mm. At 2.85 mm the slicer asks for more plastic than the nozzle delivers, and you get thin lines that never flatten.
- First layer speed. 10 to 25 mm/s. r/FixMyPrint members report that dropping the first layer to around 10 mm/s and raising the bed to 65 C solved most of their adhesion problems.
- Initial layer line width. 120 to 150 percent of normal gives the nozzle more to squish against the plate.
- Flow ratio or extrusion multiplier. Above 1.05 on the first layer helps on smooth plates.
- Line spacing. Under 100 percent on the first layer leaves tiny gaps between adjacent lines, and those gaps are where a layer starts to separate.
- Nozzle diameter and layer height. A 0.2 mm first layer on a 0.4 mm nozzle is the usual target; a 0.1 mm first layer is asking for trouble.
Also check the elephant’s foot setting. A sharp outer edge on the first layer causes the curled rim around a part on glass, and a small chamfer fixes it.
You will know it worked when: the printed test square shows one continuous first layer with no cracks you can run a fingernail into.
6. Choose the Right Bed Surface and Adhesion Method
Matching the build plate to the filament matters more than most guides admit. Glass is smooth and gives the best surface finish but holds nothing well on its own without an adhesive. Textured PEI grips aggressively and works out of the box for PLA and PETG, but can hold so tightly that parts scar. Smooth PEI is the all-rounder and is the easiest surface to clean.
Adhesives are not a free upgrade. A PVA glue stick on textured PEI is a waste, since the texture already grips. On bare glass, a thin glue stick layer or a light coat of hairspray is the traditional fix and works within a few prints. Painter’s tape on glass is a reasonable middle ground for a single job, since you peel the surface clean afterwards. Kapton tape is durable but needs a heat-resistant bed and a deliberate cleaning routine.
One warning from r/FixMyPrint: not every spring steel PEI sheet behaves the same, and some arrive with a coating that will not hold. If everything else checks out and the sheet is scratched, bubbled, or peeling, a new plate is a legitimate fix.
You will know it worked when: the part releases with a deliberate push of a spatula, without flexing, and the surface is undamaged underneath.
7. Confirm the Part Is Positioned for Success
Adhesion is a force balance. The bigger the contact area, the more the plate can hold the part against the curling force of cooling plastic. A thin tower standing on a 5 mm circle has almost nothing to grip, and no temperature setting will save it.
Turn the part so its first layer sits flat against the bed, and add a brim of 3 to 8 mm to extend the footprint by a millimetre or two on each side. A brim is the best answer for small parts and for tall thin ones. A raft gives even more contact and costs the most time and material. A skirt only purges and does almost nothing for adhesion, though it is useful for spotting a bad first layer before the real print starts.
You will know it worked when: the footprint under the part is clearly larger than the part itself, and no free-floating islands appear on the plate.
Common Mistakes That Ruin the First Layer
Almost every wasted print comes from one of these six.
Leveling a cold bed. Metal expands when heated, and the bed is not flat when cold and flat when hot. Level with the bed at 60 C or above, or you will chase the same problem every time you reprint.
Treating leveling and Z-offset as the same thing. Leveling sets the plane. Z-offset sets the gap. Fixing one when the other is wrong produces a plate that measures level and a print that still fails.
Cleaning with the wrong thing for the plate. Alcohol is right for glass and smooth PEI and wrong for some textured coatings, where it can leave a film. Do not put acetone on a thermoplastic PEI sheet as a routine step either; it hazes the surface permanently.
Using a metal scraper on glass. It scratches, and the scratch becomes the future failure line. Use a plastic spatula, and if plastic has fused to glass, soften it with a heat gun and lift it while it is warm.
Going straight to glue when the height is wrong. Adhesive on a bed set too high gives you a welded first layer and a ruined plate when you try to remove the part. Fix the geometry first.
Changing five settings at once. If you raise the bed temperature, add a brim, change the surface, and switch filament in one go, and it works, you have learned nothing. Change one thing, print a small test, record the result.
How to Tell the Fix Worked
A correct first layer looks almost boring. The lines sit side by side with no visible gap and no ridge running along them, the whole footprint is covered edge to edge, and the layer is flat enough that a fingernail finds no catch.
You can test adhesion by pushing the part sideways with a fingertip while the print is still in progress. A properly stuck part does not move at all, even at layer three. If it shifts, the layer count gives you a free second chance: stop the print, fix the cause, and start again rather than watching an hour of work unspool.
Do not force an unfinished print off the bed. A part popped loose at layer 10 is not a disaster you caused, but a part ripped off the sheet can take the coating with it. Use a plastic spatula and slide it under one corner.
Quick Troubleshooting Table: Symptom, Cause, Next Action
Find the row that matches what you see, then do the last column before touching anything else. If you have already worked through the steps above and the question of why my 3D print is not sticking to the bed is still open, the symptom tells you more than the theory does.
| What you see | Most likely cause | Next action |
|---|---|---|
| Whole part lifts off before layer 5 | Z-offset too high, or bed temperature too low | Print a first-layer calibration model and check the bed heat |
| Only the corners lift, centre stays flat | Bed not level, or bed flexing under the nozzle | Re-run mesh leveling hot, then check the four corner knobs |
| Small part fails, larger prints are fine | Footprint too small to hold the part down | Rotate the part flat and add a 5 mm brim |
| Lines are separate and lift individually | Nozzle too far away, or first-layer line spacing above 100 percent | Lower the Z-offset, set first-layer spacing to 95 percent |
| Nozzle scrapes the bed and leaves marks | Nozzle too close, or bed carriage dragging | Raise the Z-offset slightly and check for a loose hotend |
| Prints fine, then stops sticking partway through | Draft, cooling fan, or the bed losing heat | Disable the part cooling fan on layer one and add a draft shield |
| Sticks fine on PETG, fails on PLA | Plate surface suited to one material only | Clean the plate and test the other material on a fresh spot |
| Corners curl up on a large flat part | Cooling-induced warping, not a bonding failure | Add a brim, enclose the printer, or raise the enclosure temperature |
| Adhesion changed after months of fine prints | Plate coated in fingerprints, or a worn coating | Deep clean; if the sheet is scratched or hazed, replace it |
Frequently Asked Questions
Why is my first layer not sticking even when the bed is level?
Because leveling and height are separate settings. A bed can be perfectly flat and still sit too far from the nozzle, so the line lands as a rounded bead with air under it and never welds. Print a first-layer calibration model, read the line spacing, and adjust the Z-offset until the layer is flat with no gaps. Around 0.2 mm works for a 0.4 mm nozzle.
Should I use glue stick or hairspray for 3D printer bed adhesion?
On bare glass, either works. A thin PVA glue stick layer gives predictable results and washes off with warm water, while hairspray is cheaper and lasts through a few prints. Neither is needed on textured PEI, which already grips well and can be hard to release from. On smooth PEI, glue stick is safer than hairspray because it releases more predictably.
What Z-offset should I use for a perfect first layer?
There is no universal number, because it depends on your nozzle, plate, and how well the bed is set. For a 0.4 mm nozzle, a well-tuned printer usually lands near 0.2 mm. Set it with a first-layer calibration model rather than a paper test, do it with the nozzle at print temperature, and check the result by looking for a continuous layer with no gaps and no ridges.
Why does my 3D print stick in the middle but lift at the corners?
That pattern points at the bed rather than the plastic. A gap under the corners means the nozzle travels higher there, so the corners never get squished against the plate. Re-run mesh leveling with the bed hot, and check that all four corner adjustment knobs are equally engaged. A brim also helps here, because it adds contact area right where the part is losing it.
Can I print directly on a glass bed without adhesive?
Yes, for PLA, and many printers do it every day with a heated bed at 60 C. Glass has very low surface energy, so adhesion depends mostly on temperature, a correct Z-offset, and a clean plate. If you need glue stick or hairspray for larger or taller parts, treat it as a help rather than a requirement, and keep a spatula nearby because glass bonds to plastic surprisingly well when the first layer is right.
Why is my print popping off the bed after several minutes?
A part that holds for a while and then releases is usually warping, not a bonding failure. The outer edges cool and contract faster than the inside, and the part curls until it pries itself loose. Add a brim, keep the part away from the edge of the plate, disable the part cooling fan on the first layers, and use an enclosure or draft shield for ABS and ASA.
Conclusion
Start with the three things that take under five minutes: clean the plate and check the nozzle for leaks, re-run bed leveling with the bed hot, and confirm the Z-offset with a calibration model. Those three fix the large majority of the failures people describe in forums and troubleshooting threads, so most searches for why my 3D print is not sticking to the bed end right there.
After that, work down the list one variable at a time. Raise the bed temperature in 5 C steps, check the slicer’s first-layer speed, line width, and flow settings, then match the build surface to your filament and add a brim if the footprint is small. Change one thing, run a small test, and write down what happened.
If everything checks out and the plate is scratched, hazed, or peeling, replace the build plate. That is not giving up, it is the last item on the list and the one most people skip.