How to wash and cure resin prints safely comes down to three jobs: dissolve the uncured resin off the part with the right solvent in a ventilated space, dry it until no solvent remains, then cure it under 405 nm UV light until the surface stops feeling greasy. Budget 30 to 45 minutes of hands-on time for a small batch, and start with nothing more exotic than two jars, a brush, gloves and a curing light.
Uncured resin is irritating to skin and toxic to aquatic life. Isopropyl alcohol, the usual wash solvent, has a flash point of about 53 F (12 C) per the NIOSH Pocket Guide, which is why the order of operations matters: gloves and airflow go on before you touch the build plate, not after something has already spilled.
Table of Contents
- 1What You Need Before You Touch a Wet Resin Print
- 2Step-by-Step: How to Wash and Cure Resin Prints Safely
- 3How to Wash and Cure Resin Prints Safely: Preparation
- 4How to Wash and Cure Resin Prints Safely: Washing the Print
- 5How to Wash and Cure Resin Prints Safely: Curing the Print
- 6How to Wash and Cure Resin Prints Safely: Finishing and Storage
- 7Common Mistakes and How to Fix Them
- 8Frequently Asked Questions
- 9Do I need gloves and ventilation when washing a resin 3D print?
- 10Is it safe to wash a resin print under running water?
- 11How long should I cure a resin print?
- 12Can sunlight be used to cure resin prints?
- 13How do I know when a resin print is fully cured?
- 14What should I do with uncured resin and rinse water?
- 15Conclusion
What You Need Before You Touch a Wet Resin Print
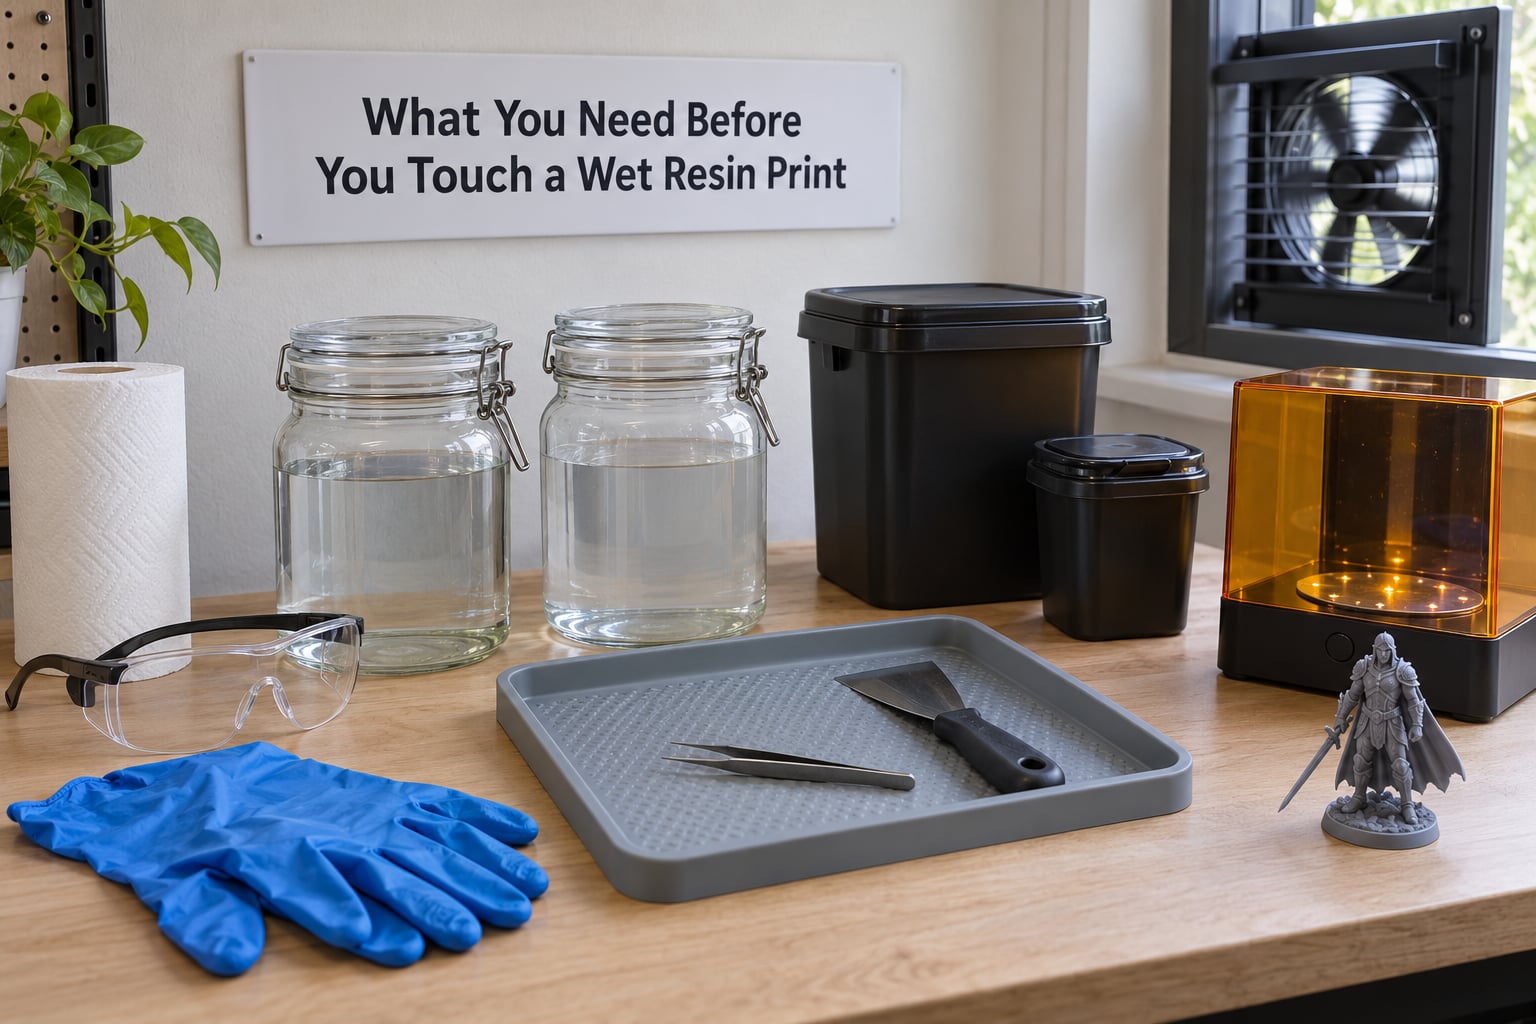
Your resin’s technical data sheet and safety data sheet outrank anything written here. Different formulations carry different recommended soak times, and some are water-washable while others are not. Read both documents on day one, before the first print comes off the plate, and write the wash and cure times on a card next to your printer.
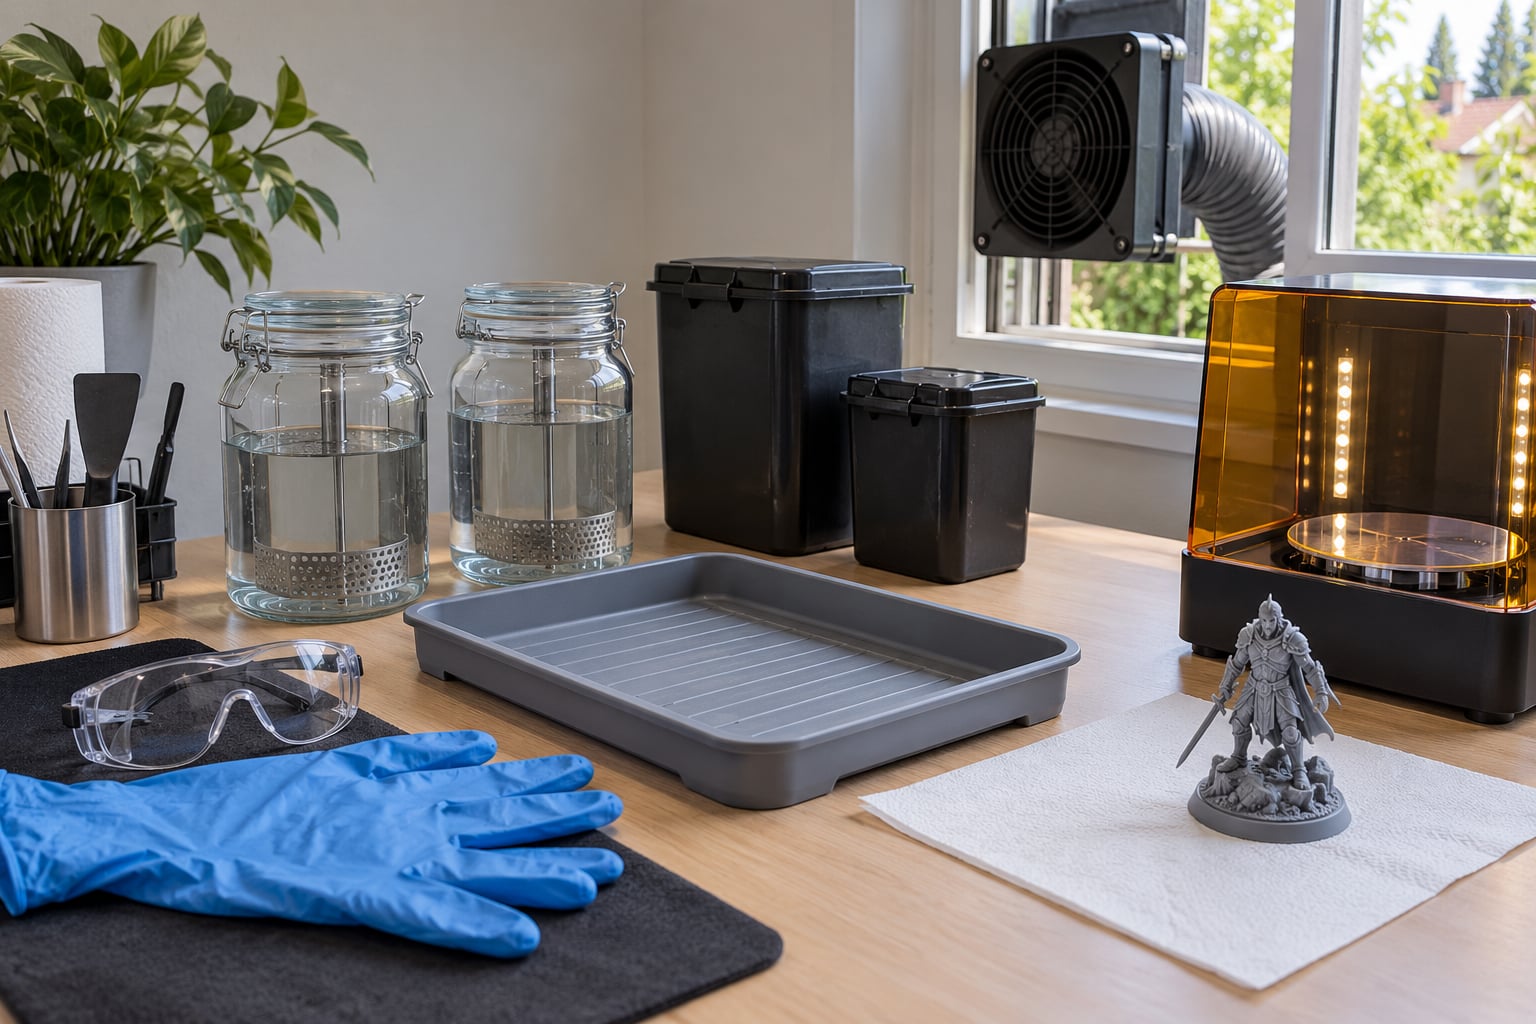
- Nitrile gloves, food grade. Alcohol dissolves resin rather than neutralizing it, so anything that has touched uncured resin can carry it straight back to bare skin. Latex is not the same protection and goes through quickly.
- Safety goggles. The most common accident in post-processing is dropping a part into a jar and pushing solvent up out of it.
- Ventilation. A window with a small fan pulling air out of the room is the bare minimum. A fume extractor or an enclosed grow tent with ducting is better. Never cure in a sealed closet.
- A silicone tray or mat plus a plastic-lined section of bench, so a spill has somewhere to sit that is not your desk or your floor.
- Your wash solvent. Isopropyl alcohol at 90 percent or higher for standard resins, or plain water for water-washable types. Two lidded glass or polypropylene jars beat one bucket, because a second clean bath costs almost nothing.
- A soft brush, plastic scraper, and lint-free wipes for plate release and the first rinse.
- An air source for drying: a compressed air nozzle or an airbrush on low. Paper towels alone leave solvent in the cavities.
- A 405 nm curing source. A dedicated curing station, a UV nail lamp, a UV-transparent tub, or a sunny window. Match it to the resin photoinitiator.
Beyond that, a cheap wig cap makes a surprisingly decent filter mesh over the vat screen, which most people report is a better use of money than a branded filter.
Step-by-Step: How to Wash and Cure Resin Prints Safely
Before the detail, the short version most people search for:
- Set up ventilation, put on nitrile gloves and goggles, and protect the bench.
- Read your resin’s data sheet and note its wash and cure times.
- Release the part from the build plate and scrape off the bulk resin.
- Wash in a dirty bath, then a clean bath, then a final rinse.
- Dry completely, inspect for tackiness, then cure on every face.
- Dispose of resin, solvent and rinse water as hazardous household waste.
How to Wash and Cure Resin Prints Safely: Preparation
Preparation is the step people skip, and it is the one that decides whether the rest of the process is safe. Read the safety data sheet for the hazard statements and the technical data sheet for the recommended wash and cure times, then set up the room: airflow first, gloves second, wet work third.
Keep the printer room free of anything you would mind ruining. Many hobbyists move the whole printer to a garage or shed for this reason, and if you print in a home, that is a reasonable place to keep uncured resin and solvent. If children, pets or food share the space, treat ventilation as non-negotiable and close the door while you work.
How to Wash and Cure Resin Prints Safely: Washing the Print
Take the part off the plate by flexing it gently or sliding a plastic scraper underneath the edge, then scrape or wipe away the pour-out layer and any pad scars before the part ever touches liquid. Half the gunk is removed here, and a scraped part dirties the bath far more slowly than one dropped in gummy.
On wash time, you will see everything from 5 minutes to 60 minutes. The honest answer is that it depends on geometry and how saturated the bath already is. A small mini in IPA for 10 minutes is the practical baseline most people use, and hollow shells, latticework and anything with deep recesses need more. Formlabs advises replacing wash solution once it becomes roughly 5 percent saturated with resin, which for most home setups means a swap every few batches rather than every print.
Use two baths. The first is your dirty rinse, the second is clean solvent and a final quick rinse. The community shorthand for this is two pickle jars: slosh or brush a print in one jar, move it to the second, and the number of minutes stops mattering as much. An ultrasonic cleaner does a good job on small parts, though it is not gentle enough for every fragile print, and a stirrer in a warm bath beats twenty minutes of soaking in cold liquid.
For hollow prints and cavities, agitate rather than soak. Fill with solvent, cover, and turn, brush, or blow through, and run a low-pressure air blast down each hole you modelled. Trapped resin that survives this stage cures into a hard skin inside the part and comes back as a sticky, skin-tight failure months later.
How to Wash and Cure Resin Prints Safely: Curing the Print
Drying matters as much as washing. Do not use a heat gun or hair dryer on a print that is still wet with alcohol: with a flash point near 53 F, you are putting a heat source close to vapour that ignites easily. Let parts air-dry in a dust-free spot, then finish with cool or warm low-pressure air.
Cure until the surface is not tacky. Most modern resins are matched to 405 nm, so a 405 nm source is the safe default, and turning the part through the process beats leaving one face shadowed. Treat the numbers below as starting points to test on your own parts, not as rules that override your data sheet.
| Curing method | Starting point per face | Watch out for |
|---|---|---|
| 405 nm curing station | 5 to 10 minutes, top and bottom | Shadowed undersides on large parts; rotate halfway |
| UV nail lamp | Several short cycles with the lamp right against the part | Low irradiance, so it takes longer than people expect |
| Direct sunlight | 15 to 30 minutes of strong sun for thin parts | UV-rated glass blocks useful wavelengths; test the window |
| Heated curing chamber | Cycle per manufacturer, with the part dry first | Heat can soften a part before it fully polymerizes |
| Water bath in a UV tub | Short cycles, turning often | Water excludes oxygen, which solves oxygen inhibition |
The water bath is the underrated fix for prints that stay tacky. The problem is oxygen inhibition: air at the surface stops the outermost skin from polymerizing, so a part can be hard underneath and greasy on top. Submerging the part in water and running a UV source over it removes the oxygen from the surface and lets that skin finish, which is why a part that failed on the turntable sometimes cures in a tub.
Over-curing is real but slow. Extra exposure beyond full cure can darken white resin toward yellow, and rigid parts can become brittle and, over time, distort. Test a corner or an extra mini with double the normal time before you double the time on a whole batch.
How to Wash and Cure Resin Prints Safely: Finishing and Storage
Test with a nitrile glove, not a bare fingertip. A cured surface feels hard and dry, with no tack, no fingerprint sticking to it, and no slight give on thin edges. Then remove supports with flush cutters, cutting the contact point rather than prying the part off its own geometry, and keep the part away from direct sun for a day while it finishes off-gassing.
Any tack after curing means go back: rinse and cure again, or try the water bath. Do not try to paint or superglue a surface that still has live resin on it. Store finished parts loosely dusted, away from heat, and keep uncured bottles sealed, upright and dated, because shelf life quietly changes the wash behaviour of older bottles.
Common Mistakes and How to Fix Them
Almost every wash and cure problem traces back to one of these.
- Handling resin bare-handed because alcohol is nearby. Alcohol loosens resin from skin but does not neutralize it, and the dissolved resin can be more irritating than the neat liquid. Wear nitrile gloves for every wash, rinse and cleanup, and change them the moment they are coated.
- Washing in a kitchen or bathroom sink. You are sending solvent, uncured resin and rinse water into household plumbing, and putting vapour into a room with food in it. Use a contained work area with its own ventilation, and collect every liquid.
- One bath, slosh, rinse, repeat. A single dirty bath means later prints sit in sludge. Two baths, a dirty one and a clean one, is the cheapest quality upgrade available.
- Rinsing water straight down the drain. Water-washable resin still contains reactive components before curing, and the cured plastic that comes out of it is toxic to aquatic life. Collect rinse water in a sealed container and treat it as household hazardous waste.
- Using a heat gun or hair dryer to speed up drying. With an IPA flash point around 53 F, you are near ignitable vapour. Air-dry first, then use cool or warm low-pressure air only.
- Curing only the face you can see. The underside stays uncured and the part peels or cracks weeks later. Turn it, cure every face, and expect the dark face of a mini to need an extra pass.
- Curing in a sealed room with a window closed. You are concentrating fumes where you live. Vent out, not in.
- Throw everything in the household trash. Resin-soaked rags, gloves, swabs and brushes all carry live resin. Seal them in a container and take them to a household hazardous waste collection point.
| Symptom | Likely cause | Fix |
|---|---|---|
| Sticky or greasy surface | Oxygen inhibition or under-cure | Add a UV water bath cycle, then re-cure every face |
| Cloudy or white film | Not fully dried before curing, or solvent haze | Dry longer, cool air only, cure again |
| Cured outside, soft inside | Resin trapped in a cavity | Better agitation and air blasting before the wash |
| Brittle or cracked part | Over-cure, or curing before the print was dry | Cut exposure time, dry fully, and support delicate areas |
| Yellowing on white resin | Long or repeated UV exposure | Match exposure to the resin, avoid repeat cures |
| Warping in a warm chamber | Heat before full polymerisation | Cure at room temperature first |
Frequently Asked Questions
Do I need gloves and ventilation when washing a resin 3D print?
Yes, both. You need nitrile gloves because alcohol dissolves resin rather than neutralizing it, so anything that touched uncured resin can transfer it to bare skin. Goggles protect against the splash when a part goes into a jar. Ventilation handles the vapour, and a fan pulling air out of the room beats an open window alone. Close the door while you work so fumes stay in the space you ventilated.
Is it safe to wash a resin print under running water?
Running tap water is fine for water-washable resin, and many standard resins rinse fine under water as a first pass before alcohol. What is not safe is putting that water down a drain or a kitchen sink, and going bare-handed for either job. Let the water run into a container, keep it away from children and pets, and take it to a household hazardous waste facility rather than the storm drain.
How long should I cure a resin print?
Most consumer 405 nm curing stations need 5 to 10 minutes on the top face and the same again on the bottom, turned face down. A UV nail lamp takes several short cycles because its irradiance is lower, and sunlight depends entirely on how strong the UV component is that day. Your resin’s technical data sheet outranks any number you read here, including this one.
Can sunlight be used to cure resin prints?
Yes, plenty of people rely on a sunny window and it works, but expect results to vary. Sunlight carries UV and heat together, so a thin part can finish in 15 to 30 minutes on a bright day while a thick one stays greasy much longer. UV-rated window glass blocks a good share of the useful wavelengths, so test the window rather than trusting the label, and keep the part from touching hot glass.
How do I know when a resin print is fully cured?
Gloves are the test. A fully cured surface feels hard and dry under nitrile, with no tack, no fingerprint sticking to it, and no slight give at thin edges. A part can feel solid underneath and still be greasy on top, because oxygen at the surface blocked that last reaction. Any remaining tack means keep curing or rinse and cure again rather than painting over live resin.
What should I do with uncured resin and rinse water?
Collect them separately and treat both as household hazardous waste. Uncured liquid resin, resin-soaked gloves, towels, swabs and brushes go into a sealed container because both liquid and cured resin carry aquatic toxicity warnings. Spent wash alcohol and rinse water from water-washable resin are collected the same way. Never mix them together, and check your local collection rules before the container fills up.
Conclusion
For your first run, read the resin’s data sheet and note its wash and cure times. Set up ventilation, gloves and goggles before you turn the printer on for the last time of the session, scrape the part, wash it in a dirty bath then a clean one, and dry it without heat.
Cure it on every face until a gloved finger finds no tack, treat stubborn spots with a UV water bath rather than more cure time, and collect every drop of resin, solvent and rinse water for hazardous waste. That order keeps the chemistry on your side.