Learning how to level a 3D printer bed by hand takes about ten minutes once you have done it twice. You home the printer, slide a sheet of paper under the nozzle, then work around the adjustment points one at a time until the paper drags lightly everywhere. That even gap, roughly 0.1 to 0.2 mm, is the entire job, and it is what stops the first layer from peeling off mid-print.
It is a ten-minute skill you will repeat for years, not a difficult one. Here is the method in the order that actually converges, plus what to do when the corners look fine and the middle still prints badly.
Table of Contents
- 1What You Need to Level a 3D Printer Bed by Hand
- 2Step-by-Step: Level a 3D Printer Bed by Hand
- 31. Prepare and Cool the Printer
- 42. Check Whether Your Printer Uses Manual or Automatic Leveling
- 53. Home the Nozzle and Coarse-Adjust the Bed
- 64. Set the Gap at Each Adjustment Point
- 75. Check Bed Flatness in the Middle
- 86. Run a Test Print and Make Final Adjustments
- 9Cartesian, CoreXY and delta differences
- 10Common Mistakes When Leveling a 3D Printer by Hand
- 11Measuring at different heights
- 12Loosening the wrong fastener
- 13Forcing a warped bed flat
- 14Ignoring temperature
- 15Treating mesh leveling as a substitute
- 16Trusting a bubble level on the bed
- 17Skipping the verification print
- 18Symptom to Cause to Fix
- 19Frequently Asked Questions
- 20Can I use regular paper to level a 3D printer bed?
- 21Should I level the bed while it is hot or cold?
- 22Do all 3D printers need manual bed leveling?
- 23Why does my first layer stick on one side but not the other?
- 24Is mesh leveling the same as leveling the bed by hand?
- 25How often should I relevel a 3D printer bed?
- 26Leveling Your Bed Starts with the Corners
What You Need to Level a 3D Printer Bed by Hand
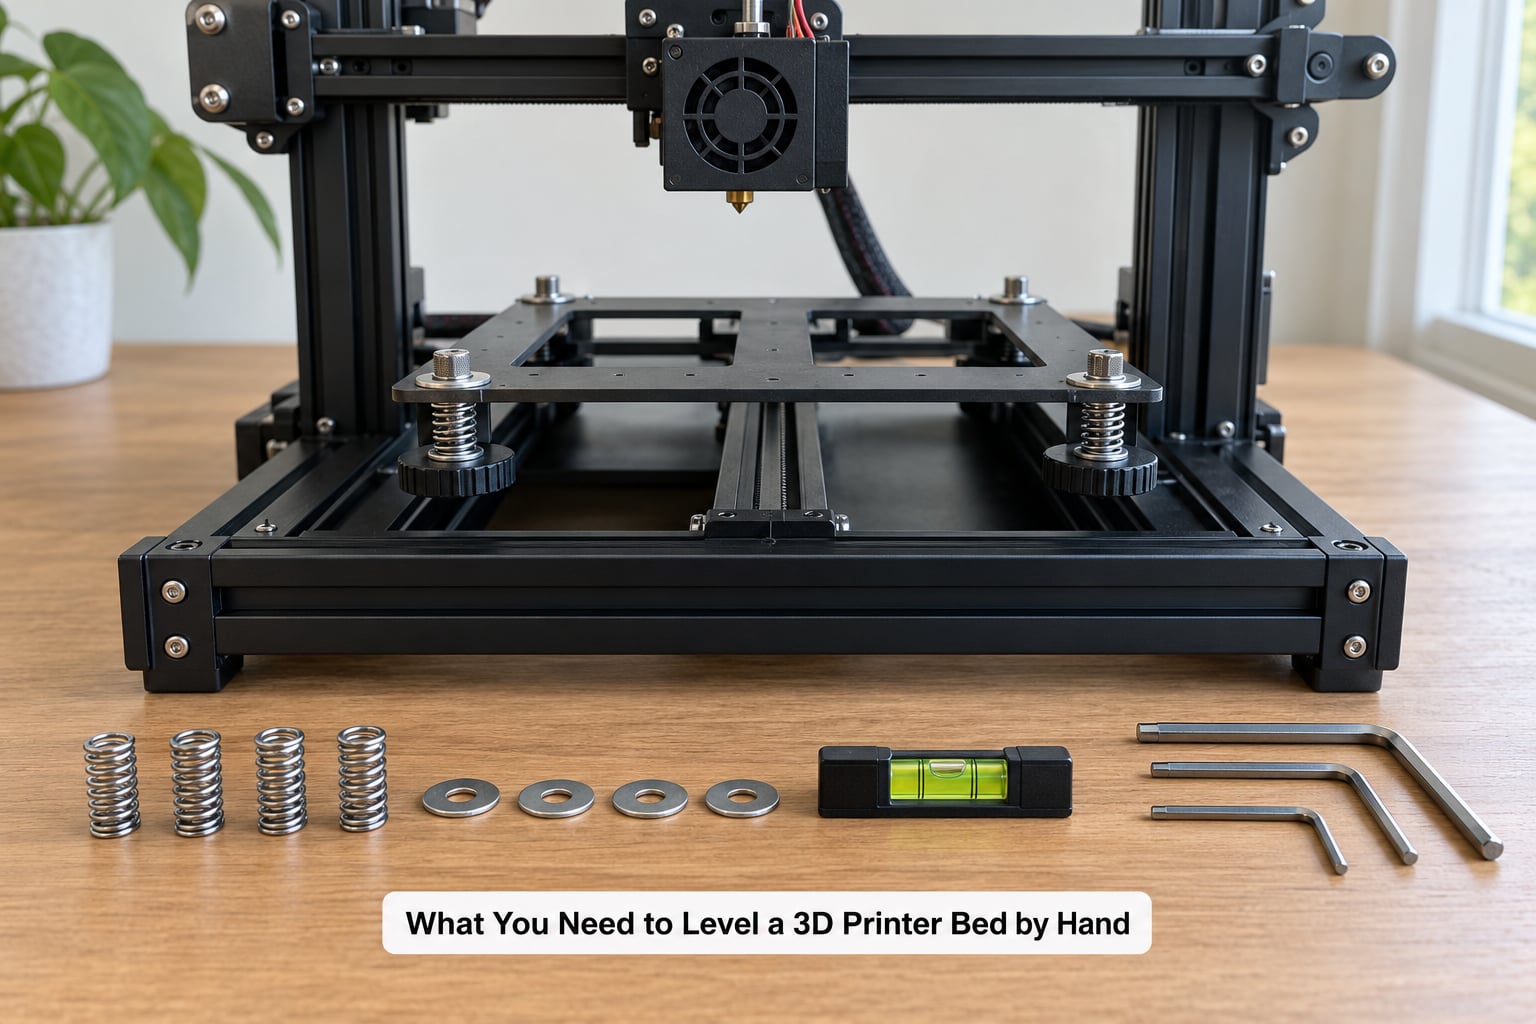
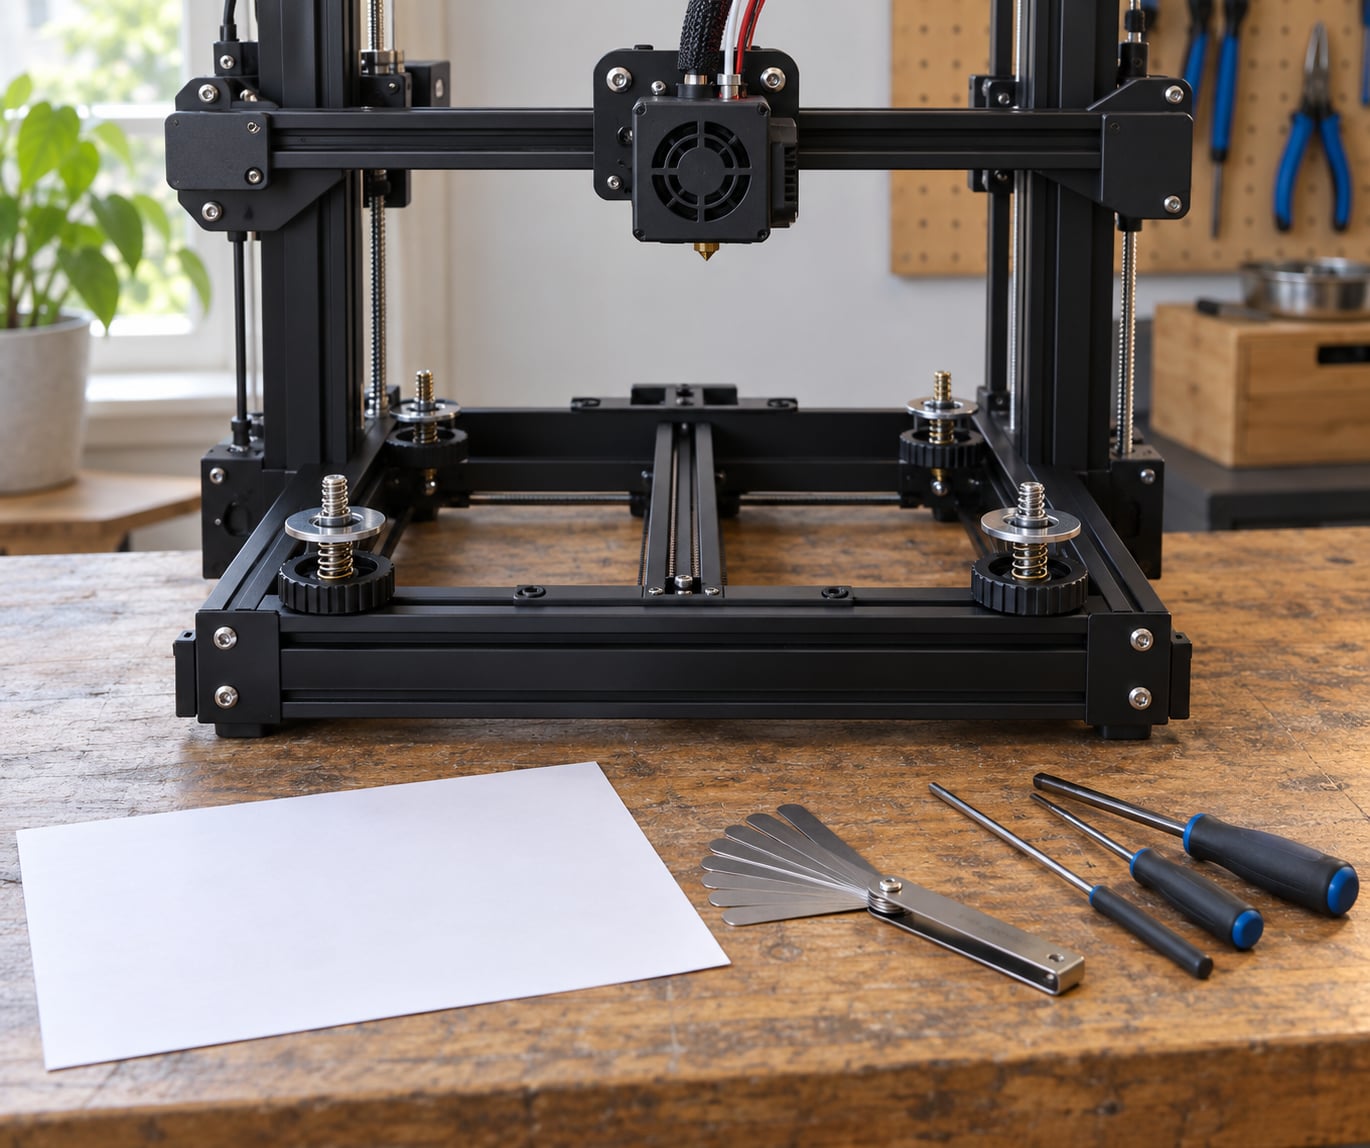
You need very little. A plain sheet of office paper is the standard spacer, and a 0.2 mm feeler gauge is the better tool once you own one. Most printers also ship with the hex drivers required to turn the adjustment hardware, so dig them out of the box before you start.
A small spirit level is optional and is not used on the bed. It only helps you confirm the printer frame itself is sitting flat on the table. A lint-free cloth and some isopropyl alcohol handle plate cleaning, which matters because a fingerprint or a plastic crumb between the sheet and the heater changes your reading.
Your printer’s adjustment hardware comes in a few flavours. Independent leveling knobs or thumb screws under each corner give you four separate points to turn. Spring tensioners do the same job with compression springs and thumbscrews, usually on three or four points, and they drift as they heat up. Silicone spacers replace the springs entirely and stay put for months. A few printers have four screws that lock the plate down with no adjustment at all, and those get a different approach described further down.
Bed designs and menu layouts vary, so read the manual for your machine before you turn anything. Several brands put the level controls behind a front menu rather than on the bed itself, and the manufacturer always knows which order their own mechanics intended.
Step-by-Step: Level a 3D Printer Bed by Hand
1. Prepare and Cool the Printer
Stop any print in progress and let the hotend and heated bed cool. Touching a 60 C bed plate is a burn, and cold metal gives you a truer gap reading than metal that is still creeping.
Remove the nozzle cap, purge bucket and any bracket sitting on the plate. Look at the build surface under a light and wipe it down, then check that the print sheet sits flat on the heater rather than rocking on a screw head or spanning a raised edge.
Do not slide a sheet of paper under the nozzle while the printer is powered down and the gantry is parked at one side. Every measurement has to happen at the same home position, or you are comparing two different gaps and calling it leveling.
2. Check Whether Your Printer Uses Manual or Automatic Leveling
Printers with independent adjustment knobs need the full procedure below. Printers with a probe, such as a BLTouch or CR Touch style sensor, still need their mechanical points roughly even before the probe does anything useful, because the probe corrects for what it finds, not for a badly twisted frame.
On those machines the manual routine shortens to one task: set all four points to roughly the same gap. Then let the firmware mesh it. Marlin-style firmware handles this with a mesh command, usually reached from the printer’s own menu or typed as G29 from a host program, while Klipper-based machines run a similar probing routine through their own macro.
Some printers with automatic leveling expose a way to back off and adjust the bed by hand anyway. If yours does, follow the same sequence and the probe will layer a correction map on top. Skip nothing on the assumption that software will rescue a crooked bed.
3. Home the Nozzle and Coarse-Adjust the Bed
Home the printer so the Z axis knows where zero is. On Marlin firmware the command is G28, or Z for a home on the Z axis alone, and most printers do it from the machine’s own control panel. Homing first matters because the gap you measure is measured from this reference point.
This is also where bed level and z-offset get confused, and they are different things. Bed level means the nozzle sits at a consistent distance from the plate everywhere on it. Z-offset, sometimes called the live offset, is the absolute height of the nozzle above the bed at the home position. Turning a corner knob changes the first one and does nothing to the second.
Set your z-offset to roughly 0.2 mm as a starting point, which on Marlin means using the Babystep Z or Z-offset control from the printer menu while a sheet of paper is held under the nozzle. Move the nozzle down a fraction at a time until the paper drags slightly but still slides. Getting this close first makes the corner work predictable instead of a hunt.
4. Set the Gap at Each Adjustment Point
Work the corners in a consistent order, such as front left, front right, back right, then back left. At each one, slide the paper under the nozzle, turn that corner’s knob or thumbscrew a fraction of a turn, and retest until the paper drags lightly. Tightening the screw raises that corner and moves the nozzle away from the plate.
Send the printer home again after every corner. Moving to the next point by sliding the gantry by hand changes the height reference and quietly corrupts the whole measurement.
Expect to repeat the loop. Tilting the bed on one corner lifts or drops the other three, so a single pass leaves small errors that only show up on the next pass. Most printers converge in three to five full circuits, and you are finished when each corner needs little or no movement and the gap feels identical at all four.
You want a slight drag with the paper still able to slide. If the paper will not move at all, you are too close and the nozzle will scrape the plate. A thicker card leaves a wider gap and loosens the print, so if you level with heavy card, level thinner than you think you need to.
5. Check Bed Flatness in the Middle
Corners are only four points on a plate that bows. After the corners are even, slide the paper to the centre and to the midpoint of each side and feel for the same light drag. This is the check most guides skip and it is the one that saves long prints.
If the centre is tighter than the corners, the plate is warped rather than unlevel. Turning the knobs will not fix a bowed sheet, because no adjustment point sits at the middle. The usual answers are a spring steel sheet on a flat carrier, a replacement plate, or applying pressure to the centre while the plastic is warm and letting it relax.
The community consensus in print forums lands on the same reframing: treat the middle as the part that needs to be brought into the plane of the corners, not as another screw to find. Mesh leveling smooths this out for you on printers that support it, which is one of the strongest reasons to run it after every mechanical pass.
6. Run a Test Print and Make Final Adjustments
Print something that tells you the truth in two minutes. A single thin layer across the whole plate at 0.2 mm layer height shows every region at once, and a set of leveling squares printed as a thin layer shows the same thing in a form you can compare against a known-good one.
Read the result by eye. Plastic squashed flat into one shiny line means too close. Visible gaps between the lines means too far. Lines that look perfect at the front and ragged at the back mean the middle or rear of the plate is still out, and you go back to that point rather than starting over.
Once the test reads clean at room temperature, do one more test with the bed and nozzle at working temperature. Metal grows when it heats, so a gap that was right cold is slightly wider when the print matters. Repeat the whole leveling routine whenever the printer is moved, the springs or spacers are changed, or the first layer starts drifting again.
Cartesian, CoreXY and delta differences
Cartesian and CoreXY machines use the corner procedure exactly as written, because the bed hangs from independent adjustment points. Delta printers work differently: the bed is carried by the effector, so there are no bed corners to turn. On a delta you check the bed surface for tilt with a straightedge and adjust the rear bed mount or run the printer’s own calibration routine, and the four-corner method does not apply.
Common Mistakes When Leveling a 3D Printer by Hand
Almost every failed first layer traces back to one of these. Each has a specific fix.
Measuring at different heights
The mistake: measuring one corner after homing, then reaching to the next corner without homing again, or checking with the gantry parked somewhere it never returns to.
The fix: home before every single measurement. If the printer has no reliable homing, mark the exact gantry position you measure at and return there every time.
Loosening the wrong fastener
The mistake: loosening the screw that holds the print sheet down while assuming the bed moved, then tightening it back with the plate shifted.
The fix: turn only the adjustment knob or thumbscrew. Confirm which one it is on your machine with the manual, especially on printers where both screws sit close together.
Forcing a warped bed flat
The mistake: tightening the corners until the paper feels even at all four points, then printing and finding the middle crushed and the corners starved.
The fix: accept that a bowed plate is a plate problem. Use a spring steel sheet on a rigid flat carrier or replace the plate, and use mesh leveling to correct the residual curve.
Ignoring temperature
The mistake: leveling cold, printing hot, and wondering why the first layer looked better during the check than during the print.
The fix: re-check at working temperature. For PLA a bed around 50 to 60 C is typical, and that is a reasonable target for the verification pass. On printers where bed springs do the holding, the same heat also softens them, which is why the level can drift partway through a long print.
Treating mesh leveling as a substitute
The mistake: running the probe routine on a bed whose corners are wildly uneven, then assuming the software fixed a mechanical twist.
The fix: equalise the mechanical points first, then mesh. A mesh taken over a twisted bed produces a lumpy correction that changes every time you relevel.
Trusting a bubble level on the bed
The mistake: resting a bubble level on the glass and turning knobs until the bubble centres.
The fix: stop. A bubble level tells you whether the surface is parallel to gravity, which is not the same as being a set distance from the nozzle along the Z axis. If you use one, level the printer’s frame on the table, not the plate. The paper or feeler gauge is the tool for this job.
Skipping the verification print
The mistake: declaring victory at the four corners and starting a large print straight away.
The fix: run a two-minute thin layer first. It costs nothing and it is the only measurement that covers the whole plate, including the middle and the midpoints between corners.
Symptom to Cause to Fix
| What you see | Likely cause | Fix |
|---|---|---|
| First layer lines squashed into a shiny blob | Gap too small, or z-offset set too low | Raise the z-offset a fraction, then recheck every corner at the same home height |
| Visible gaps between first layer lines | Gap too large, often from leveling with thick card | Lower the z-offset slightly and retest with thinner paper or a 0.2 mm feeler gauge |
| Print pops off partway through the first layer | Bed adhesion, not geometry | Clean the plate with isopropyl alcohol, confirm bed temperature, and check that the sheet is not loose |
| Corners clean but the centre looks rough | Bed warp across the middle | Check the centre gap by hand, then run mesh leveling or move to a flat spring steel sheet |
| Nozzle scratching the plate and gouging plastic | Z-offset or corner gap far too small | Home, raise the z-offset, and redo the corner loop before printing again |
| Level looks right cold, wrong when printing | Thermal expansion of the plate and springs | Re-verify at working temperature and retune from there |
Two more causes sit outside leveling entirely. A plastic crumb trapped under the print sheet throws the reading off just as badly as a crooked bed, so lift the sheet and check the heater surface before you start adjusting anything. And if your z-offset keeps reverting to zero after you power cycle or run a leveling routine, your firmware is storing it in RAM rather than in EEPROM, which is a settings save, not a leveling problem.
Finally, if the plate has a textured side, you can still level it by hand. Clean it, feel for the same light drag with paper, and expect to want a slightly tighter gap than on a smooth plate because texture grips harder and presses plastic into the peaks.
Frequently Asked Questions
Can I use regular paper to level a 3D printer bed?
Yes. Standard 80 gsm office paper is roughly 0.1 mm thick and works well for most printers running a 0.4 mm or 0.2 mm nozzle, and it is faster and more consistent than chasing a probe routine every print. Use a 0.2 mm feeler gauge if you want a tighter, more repeatable gap. Avoid thick card, which leaves the nozzle too far away and loosens the first layer.
Should I level the bed while it is hot or cold?
Level it cold for the main pass, because cold metal gives the truest reading and you will not burn yourself on the plate. Then check it once more at working temperature before a big print, since the bed expands as it heats and the gap widens slightly. For PLA a bed around 50 to 60 C is a sensible verification temperature. On spring-mounted beds the heat also softens the springs, so the level can drift mid-print.
Do all 3D printers need manual bed leveling?
No. Many printers ship with a probe and mesh leveling that handles the fine adjustment for you. Even those benefit from setting the four mechanical points roughly equal by hand first, because software corrects for what it measures rather than for a twisted frame. Printers with four fixed screws and no adjustment at all still need the corners set evenly before any mesh routine can do anything useful.
Why does my first layer stick on one side but not the other?
A tilt in the bed is the usual answer, which shows up as a gap on the low side and a squashed, over-extruded line on the high side. Check the gap at all four corners at the same home position, then feel the centre and each midpoint. If the corners are even and the middle is not, the plate is warped and no knob will fix it. Clean the whole plate with isopropyl alcohol before you decide it is a geometry problem.
Is mesh leveling the same as leveling the bed by hand?
No, they do different jobs. Hand leveling equalises the physical gap between the nozzle and the plate at the adjustment points. Mesh leveling probes several points across the surface and stores a correction map so the gap is consistent everywhere, including the middle. Mesh is the better tool for a bowed plate, but it cannot rescue a badly twisted frame, so do the mechanical work first.
How often should I relevel a 3D printer bed?
Once when the printer is unboxed, again after you move it, and then whenever the first layer starts drifting. For most people a monthly check is plenty, and a quick thin-layer test print tells you whether anything changed without any measuring at all. Replace or retension springs if the level keeps going off within days, and expect to recheck more often on a machine with silicone spacers removed or a glass bed that has been dropped.
Leveling Your Bed Starts with the Corners
The whole procedure comes down to this: home the printer, set your z-offset to about 0.2 mm, and walk the corners in the same order until a sheet of paper drags lightly at all four. Return to the home position between every corner and expect three to five circuits before it stops asking for changes.
Then check the centre, because that is where an even set of corners still hides a bowed plate. Once a thin test layer prints cleanly at working temperature, you have a bed you can trust for a large print. This guide was checked against current community practice in 2026, and the same four-corner routine has not really changed in years.