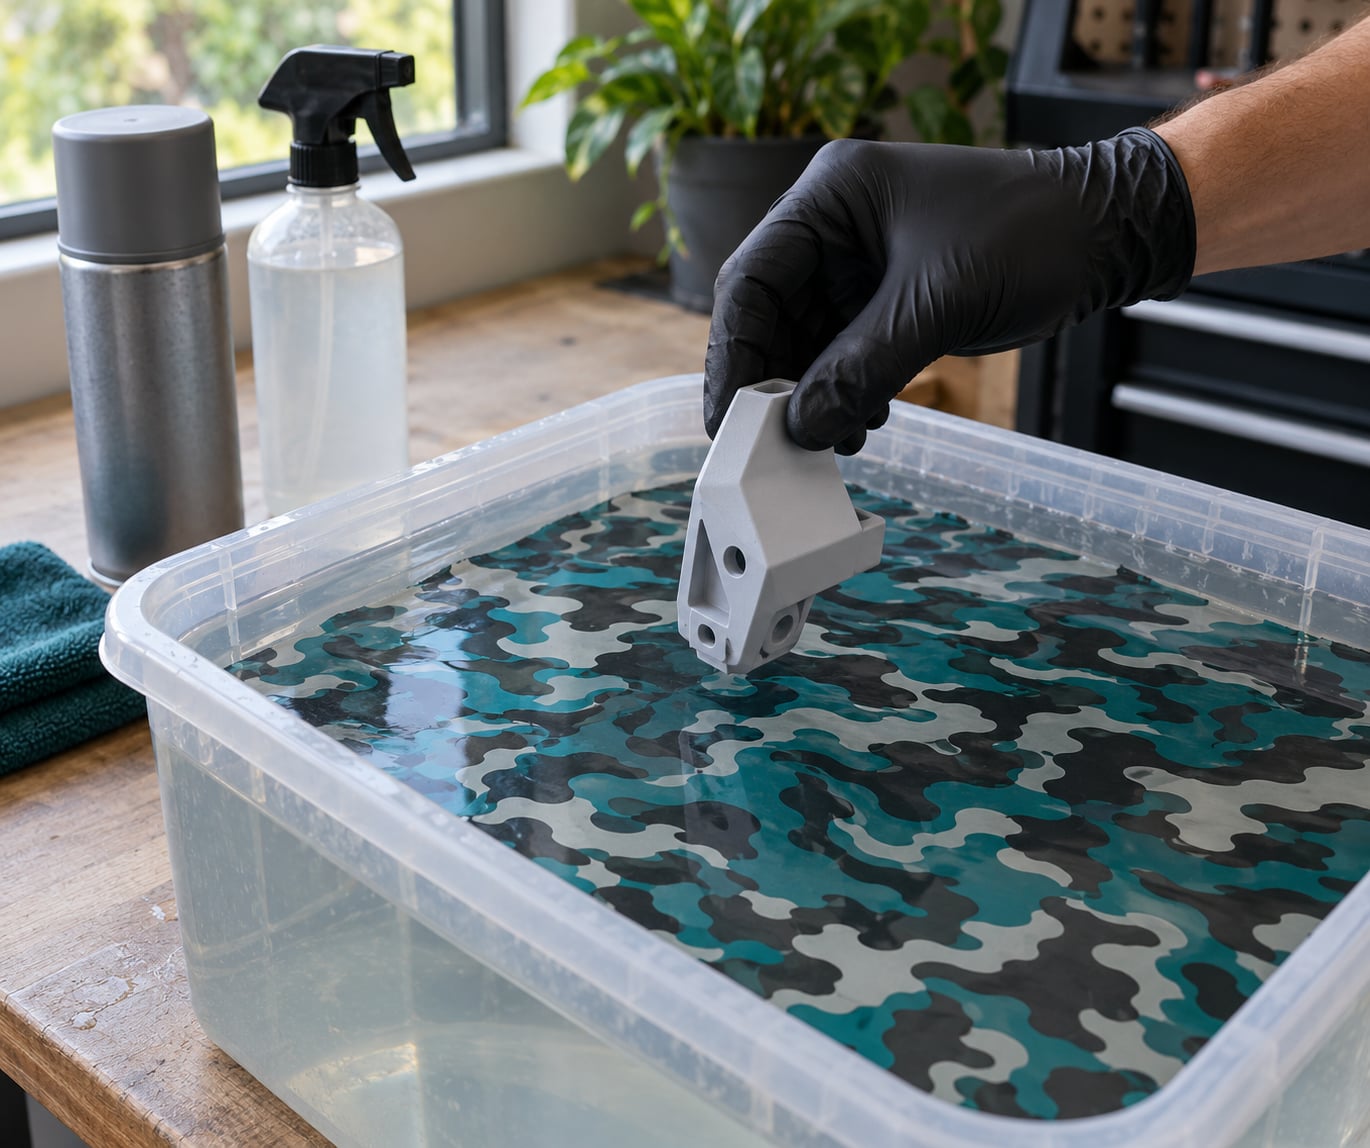
Hydro dipping, also called water transfer printing, is a three-stage finish: seal the print, float a graphic film on still water, then push the part through the surface so the design wraps its curves. To hydro dip a 3D print well, almost all of the work happens before the water — a part that is sanded, degreased and primed takes a pattern cleanly, and a part that skipped those steps bubbles and peels within days.
A basic kit is a plastic tub roughly 30 cm across, a sheet of hydrographic film, an activator, and a spray primer and base coat. Most people can do this at home in a garage or spare room, with no ventilation beyond an open window and a respirator for the spraying. Allow a full day for prep and cure before the dip itself, which takes about five minutes.
This guide covers FDM prints in PLA, PETG, ABS and ASA, plus fully washed and cured resin prints. Updated for October 2026.
Table of Contents
- 1What You Need
- 2Step-by-Step: How to Hydro Dip a 3D Print
- 3Prepare the 3D Print for Hydro Dipping
- 4Apply the Hydro Dipping Film
- 5Dry and Finish the Dipped Print
- 6Common Mistakes
- 7Safety and Material Compatibility
- 8Frequently Asked Questions
- 9Can I do hydro dipping myself at home?
- 10Can I print my own hydro dip film?
- 11What can I use as an activator for hydro dipping?
- 12How long will a hydro dip finish last?
- 13Can you hydro dip a TPU or resin 3D print?
- 14What type of paint is best for hydro dipping?
- 15Conclusion
What You Need
The list is short, and most of it you can skip on a first practice run.
- The print itself, fully cured and cool to the touch. Resin parts need a full post-cure first; a part still warm or tacky will never bond properly.
- A plastic tub or container, wide and deep enough that the part clears the bottom when you push it through. A storage tote or a dish tub works. Keep it clear of dust and grit on the bottom.
- Hydrographic film, one sheet per dip, cut a little larger than the part’s footprint so the pattern has material to wrap onto.
- Activator, sold specifically for water transfer film. This is the one item not to improvise on.
- Warm water, held between 25 and 30°C (77 to 86°F). A kitchen kettle works, and a thermometer is worth more than guessing.
- Isopropyl alcohol at 90% or higher, plus a lint-free cloth, for degreasing the print and your own fingertips.
- Filler or adhesion-promoting primer for plastic, in a spray can.
- A base coat paint in the tone you want to show through the pattern, usually light or white so a camouflage or carbon pattern reads clearly.
- Clear coat — gloss for the wet-look depth, satin for a finish you can handle, matte for the flattest look.
Optional extras earn their place if you print often: a heat mat or aquarium heater for temperature control, nitrile gloves, a tack cloth for wiping dust off the primed part, and 400 to 600 grit wet sandpaper for flattening a base coat. Respirator users should pick a 3M 60926 or an equivalent P100 organic vapour cartridge — the primer and activator both give off fumes you do not want in the room.
Step-by-Step: How to Hydro Dip a 3D Print
Expect three phases: preparing the surface, applying the film, then drying and sealing. The dip itself is one smooth motion and takes seconds — everything before it decides whether it succeeds.
Prepare the 3D Print for Hydro Dipping
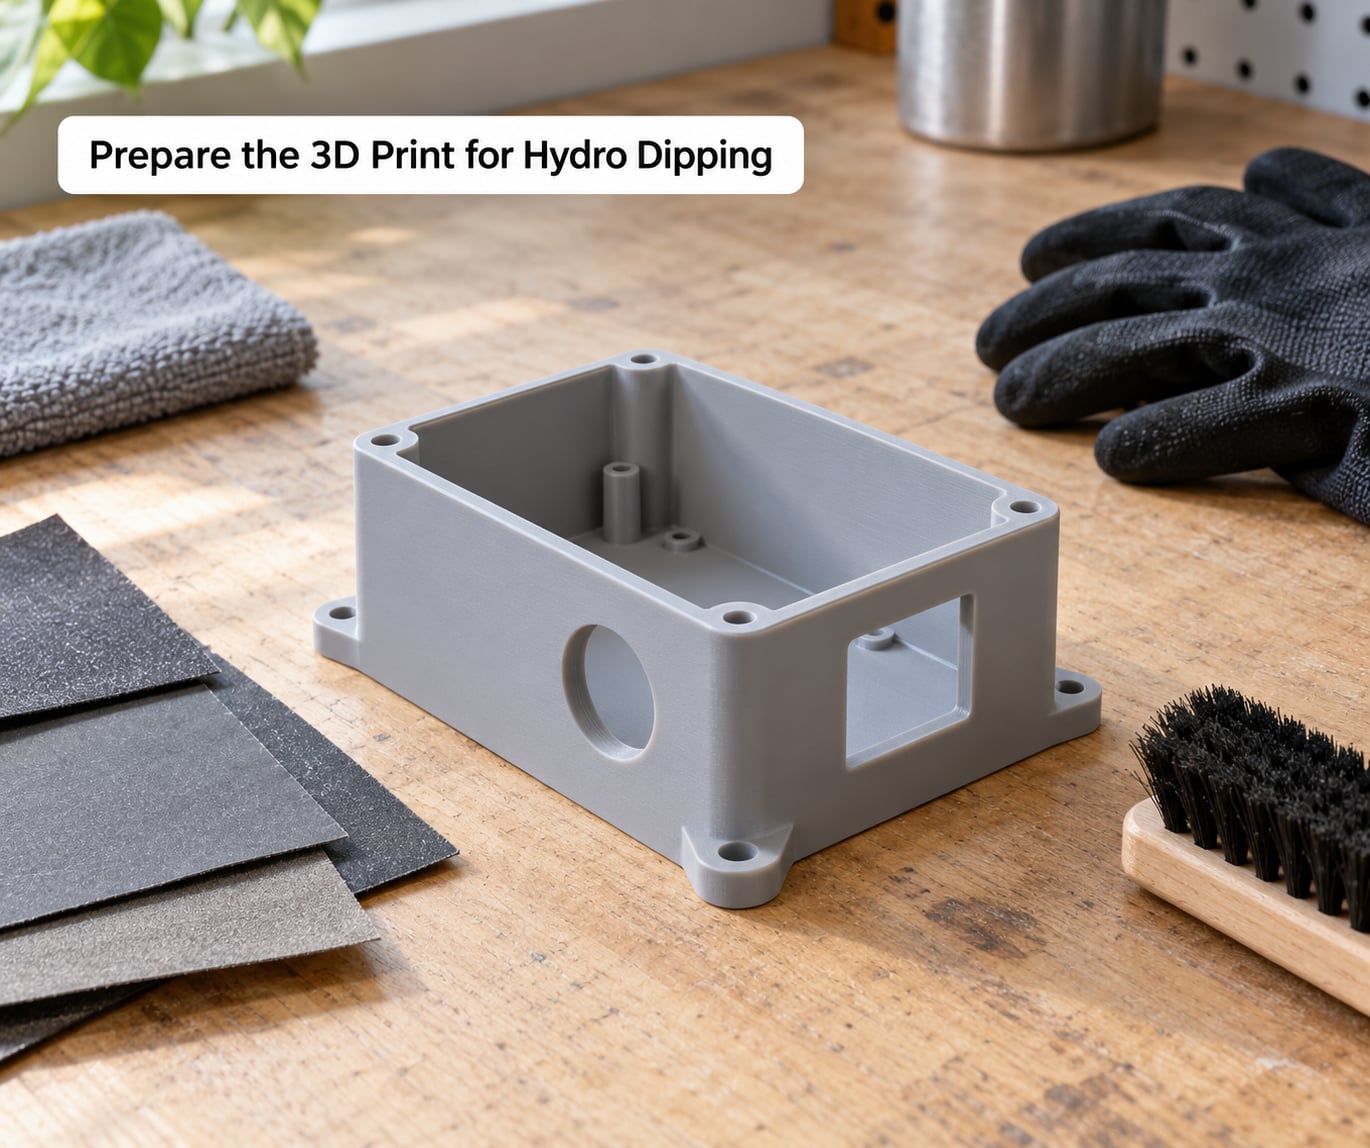
Remove every support and scrape off the nub. Raw FDM surfaces are porous, and porosity is the number one reason film lifts and bubbles, so sealing is not optional.
- Sand the surface. Work up through 220, 400 and 600 grit. A thick, coarse layer line needs more passes than a fine one, and the goal is a surface with no visible ridge you could catch a fingernail on.
- Wipe off dust and oils. Wipe with isopropyl alcohol, then wash your hands and dry them thoroughly before you touch the part again. Skin oil is the sneakiest cause of a failed bond, and it lands exactly where you grip the part for the dip.
- Prime. Apply a plastic adhesion promoter or filler primer in thin coats, 20 to 30 cm away, allowing each coat to flash before the next. Filler primer is worth the extra step on a rough print because it builds the low spots you could not sand out.
- Sand or wet-sand the primer. A light pass with 400 to 600 grit takes the texture down without cutting through to bare plastic. Wipe again with alcohol.
- Apply the base coat. Two or three even coats of your base colour, letting each dry to the touch. Give it 8 hours, ideally overnight, before it touches water. Film that goes on over a base coat cured for an hour will lift in a day.
FDM and resin parts differ in one place: a resin print must be fully washed, cured, and then inspected under light for any remaining semi-cured skin, because activator and water will lift it.
Apply the Hydro Dipping Film
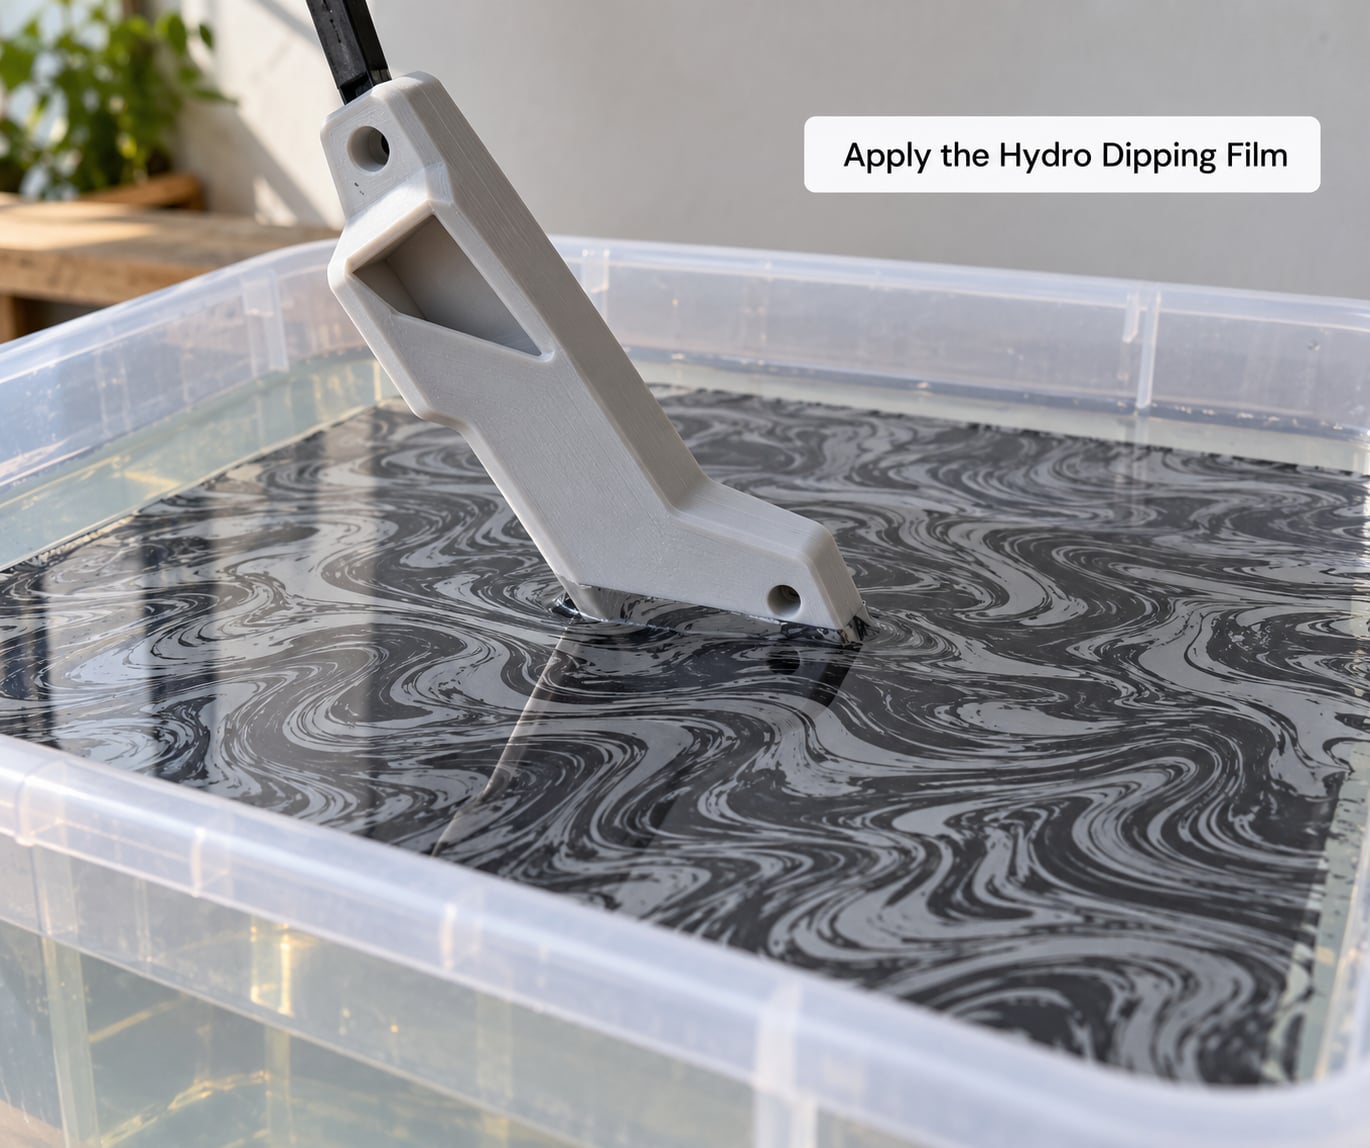
Warm water, a flat and still surface, and one continuous diagonal stroke decide whether the pattern lands evenly or stretches into streaks.
- Fill the tank. Set the tub on a level surface away from anything that vibrates. Fill with water at 25 to 30°C and let it go completely still. Cold water makes the activator set too fast and the pattern clump into blobs; hot water thins it out and the film slides off.
- Float the film. Lay the sheet on the surface printed side up — the printed design is the side that ends up on the part. Hold one corner against the tank wall while the rest settles, and wait 60 to 90 seconds for it to hydrate and go slightly glassy. Holes and open tops in your print let the film bridge across them instead of wrapping, so keep an eye on those areas.
- Add the activator. Pour it in a spiral over the film, not in one spot. Give it 30 to 60 seconds. The film should turn glossy and glass-like across the whole surface. If it stays flat and matte, the water was too cold or the activator went on too thin.
- Dip the part. Hold it by an edge you will not be inspecting, angle it about 30 degrees, and push it down in one slow stroke over 2 to 3 seconds. Straight down splashes and stretches the pattern; a diagonal entry lays it on cleanly.
- Do not scrub or wiggle. Once the part is through, let it hang for a few seconds to drain, then lift it out without touching the finished surface.
You get one attempt per sheet. If the pattern smears, rinse the part and start again with a fresh sheet rather than trying to fix it in the water.
Dry and Finish the Dipped Print
The finish is not done when the part leaves the water. Film needs air drying before any coating touches it, or you seal moisture in and get peeling weeks later.
- Rinse. Hold the part under cool running water for about a minute to wash off activator residue and loose pigment.
- Hang and dry fully. Suspend it on a wire so water drains off every edge. Give it a minimum of 2 hours and preferably overnight. No heat gun, no hairdryer — trapped moisture under a clear coat is the classic reason a dipped part peels.
- Trim and touch up. Once dry, trim the overhanging film at edges with a sharp craft knife. Where a spot did not take, dab a thin line of base colour paint on the bare area and let it cure before sealing.
- Clear coat. Apply 2 to 3 light coats of compatible clear coat, short passes, 15 cm away. Thick coats run, sag and trap bubbles.
- Full cure. Wait 24 hours before handling. A UV-resistant clear coat is the one to choose if the part lives outdoors or on a vehicle.
A well-done dip lasts years. Most published durability ranges put a properly prepped and clear-coated film at 5 to 15 years indoors, and failures come from abrasion, UV exposure, greasy hands and under-cured film rather than the film itself wearing out.
Common Mistakes
Almost every bad dip traces back to one of five causes, and you can diagnose it from what the failure looks like.
Bubbles and pinholes. The print was porous or not fully sealed. Fix: add a second coat of filler primer and extend the base coat cure to a full 24 hours.
Film lifts at layer lines. The ridges telegraph through the pattern, and the film bridges them instead of conforming. Fix: sand further to 600 grit, wet-sand the primer, and never dip a part you can still feel with a fingernail.
Wrinkles or a crumpled pattern. The film was moved after hydrating, or the part was pulled back out too slowly. Fix: one direction only, steady hands, and no second dip with the same sheet.
Patchy or incomplete coverage. Too much activator, a cold tank, or a part moved more than about 30 degrees while passing through. Fix: 30 degrees, warmer water, activator applied in a spiral rather than a pool.
Peeling within weeks. Trapped moisture or an incompatible clear coat. Fix: fully air-dry, and use a coating that is rated for the plastic rather than an interior-only product.
The film barely transfers. An improvised activator, or too little of the real one. This is the failure that wastes the most sheets.
Safety and Material Compatibility
Work in a ventilated space with nitrile gloves, and never spray primer or activator near a hot printer or an open flame.
On ventilation: open a window and use a P100 or organic vapour respirator for spraying. Do not rely on a paper mask. Keep activator bottles closed when not in use, and dispose of rinse water down the sink only if your local rules allow it — activator residue is not something to pour onto soil or into a storm drain.
Water and mains electricity do not mix. Fill and drain the tub away from your printer and any power strips, and dry the bench afterwards. If you use a heater to hold temperature, keep it outside the tub and on an RCD-protected circuit.
On materials, verdicts differ sharply between filaments. FDM prints in PLA, PETG, ABS and ASA all take film well once primed. Resin prints take film well too, provided they are fully washed and post-cured. TPU and TPE are the exception — flexible filaments deform in warm water, which distorts the pattern and destroys the bond, so leave them unpainted or use a different finish. Ceramic-fillers and glow-in-the-dark filaments behave similarly and are worth testing on a flat scrap piece first.
If you want a hard, functional finish rather than a decorative graphic, a ceramic coating such as Cerakote handles heat and wear better, but it gives you a single colour and not a pattern. Hydro dipping’s advantage is coverage of curves, undercuts and complex geometry that a spray gun cannot reach in one pass.
Frequently Asked Questions
Can I do hydro dipping myself at home?
Yes. Everything needed is a tub of water, a printed film sheet, an activator, primer and a clear coat, and a hobby-level kit fits in a cardboard box. Work outside or in a well-ventilated room because primer and activator fumes are the main reason people hesitate. Budget a full day, since curing time between coats eats most of that.
Can I print my own hydro dip film?
Technically yes, printable water transfer sheets exist, and several people run them through a standard printer and cut them up. They are thinner and more fragile than commercial film, the pattern resolution is lower, and the ink chemistry is less predictable. For a first dip, spend the money on a commercial sheet and print your own later if you want to experiment.
What can I use as an activator for hydro dipping?
Only a purpose-made hydrographic activator. Do not substitute isopropyl alcohol, dish soap, vinegar, or anything labelled for a different process, and skip the automotive activators sold next to window tint. Wrong chemistry either never releases the ink so nothing transfers, or it sets it too fast and the pattern clumps. Commercial activator is cheap and worth every cent.
How long will a hydro dip finish last?
A properly prepared and clear-coated film typically lasts 5 to 15 years indoors. Wear comes from abrasion, UV exposure, greasy hands and petroleum products rather than the film degrading on its own. Outdoor parts and vehicle shells fade faster unless you seal them with a UV-resistant clear coat and reapply it every few years.
Can you hydro dip a TPU or resin 3D print?
Skip TPU and TPE. Warm water softens flexible filaments, which deforms the part and stretches the pattern out of shape, so both fail at once. Resin prints work well, but only after a full wash and UV post-cure. Inspect the surface for semi-cured skin afterwards, because activator will lift any residue you leave behind.
What type of paint is best for hydro dipping?
An acrylic base coat in a light or white tone works best, because the pattern is printed translucent and reads much brighter over a pale base. Cover the part in two or three even coats and let each flash before the next. Then seal with a clear coat from the same brand family as your film, since the UV inhibitors are formulated to match.
Conclusion
Hydro dipping rewards patience in the prep stage and punishes rushing at the water. The whole process runs sand, degrease, prime, base coat, cure overnight, dip in one diagonal stroke, dry fully, then seal.
Start by preparing a small flat test piece — a simple printed plaque takes minutes to sand and tells you whether your primer, activator and water temperature are behaving. Once that comes out clean, take your smooth, sealed, overnight-cured print, float a film printed side up on water at 25 to 30°C, activate it, and dip once at about 30 degrees. That single slow stroke is where the pattern either lands cleanly or stretches, and it takes far less practice than most people expect.