The short answer: to make TMC steppers silent you flash firmware that exposes the driver registers, then switch the drivers into stealthChop mode. Knowing how to upgrade 3D printer firmware for silent drivers takes about two hours on a calm evening. In Klipper that is one line, stealthchop_threshold: 999999, inside each tmc2209 stepper_x section of printer.cfg; in Marlin it is the matching threshold in Configuration_adv.h before you compile and upload.
Most “loud printer” complaints are a configuration gap rather than a broken machine. Boards sold with TMC2208 or TMC2209 drivers advertised as silent frequently ship in spreadCycle mode, where every step is a mechanical event and you hear it. Ender 3 owners describe this exact pattern repeatedly: the hardware is capable, nothing in the firmware ever asks it to be quiet.
The risk is doing it in the wrong order. Flash the wrong board build and the printer will not boot. Overwrite your EEPROM and every tuned value goes with it. Treat the two hours it takes as an evening project, not a weekend gamble.
Table of Contents
- 1What You Need
- 2Step-by-Step: How to Upgrade 3D Printer Firmware for Silent Drivers
- 31. Confirm the Printer, Board, and Firmware Compatibility
- 42. Back Up the Existing Firmware and EEPROM Settings
- 53. Download or Build the Correct Silent-Driver Firmware
- 64. Put the Printer Into the Correct Flashing Mode
- 75. Flash the Firmware Through the Right Tool
- 86. Restore, Configure, and Test the Silent Drivers
- 9Common Mistakes
- 10Frequently Asked Questions
- 11Are all TMC drivers silent once you flash firmware?
- 12Can flashing firmware damage my 3D printer?
- 13How do I find out which mainboard my printer has?
- 14What should I do after a failed firmware flash?
- 15Do I lose my EEPROM settings when I update firmware?
- 16How can I reduce stepper noise without replacing hardware?
- 17Conclusion: Upgrade Safely and Test Before Normal Printing
What You Need
Gather these before you disconnect anything. Most failed upgrades come from a missing item in this list, not from the flashing itself.
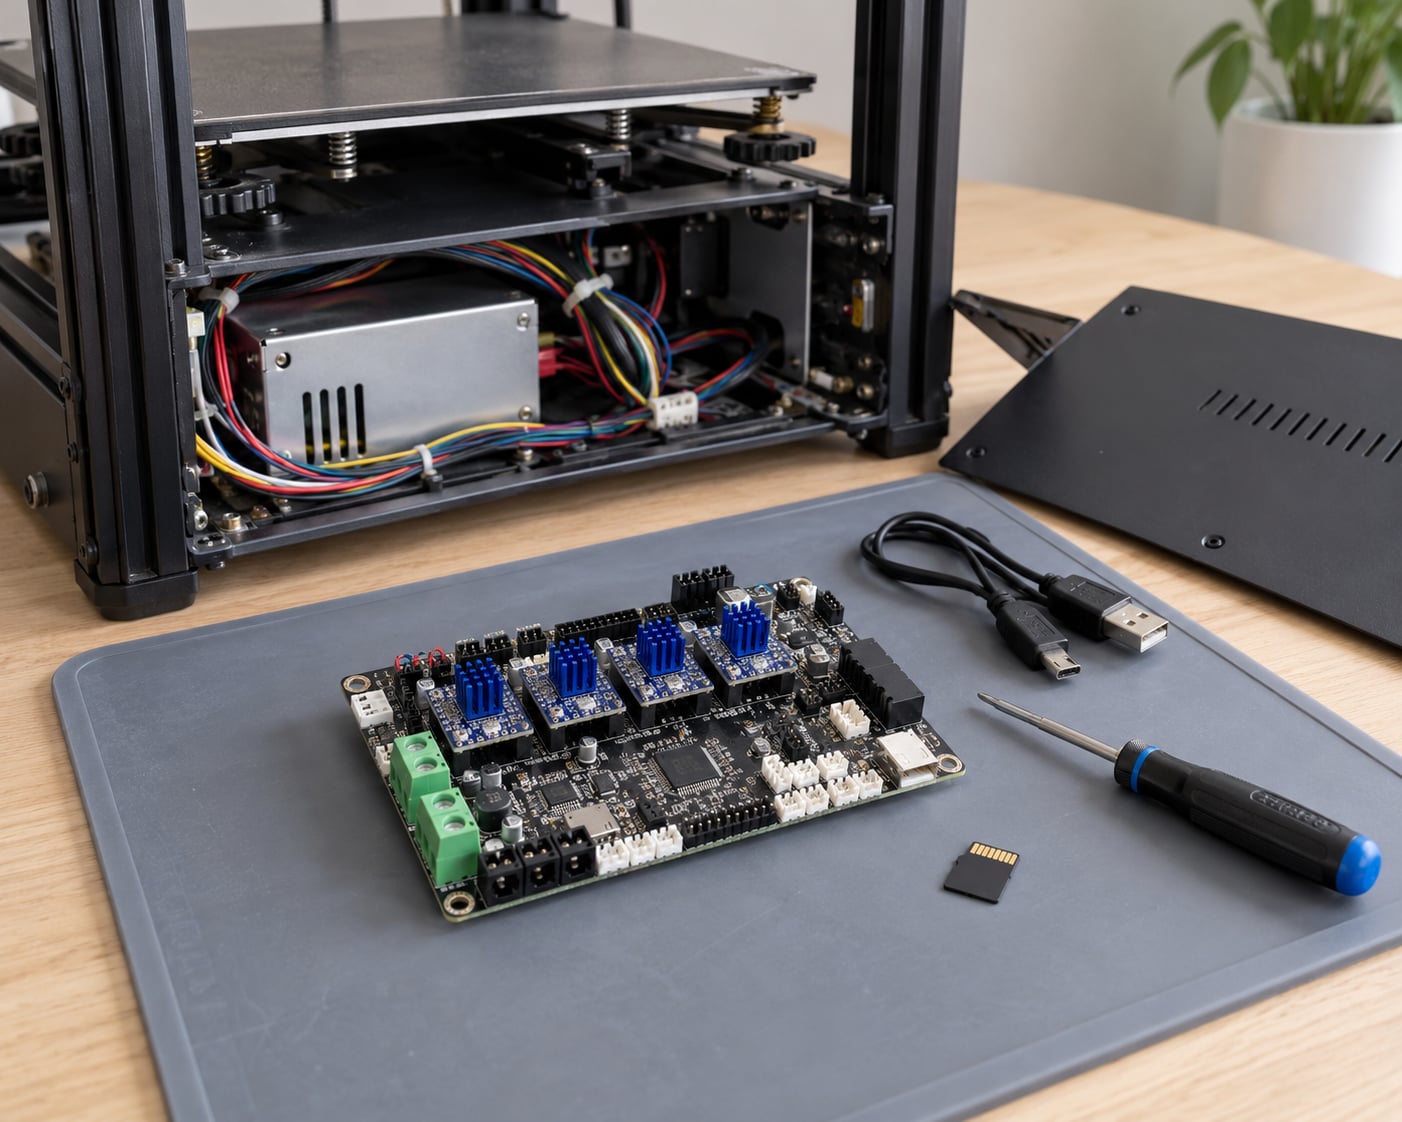
- Printer model and mainboard revision. The board is usually silkscreened (SKR Mini E3 V2.0, V3.0, SKR V1.3, Octopus, MKS Gen L, Ender 3 board 4.2.2 or 4.2.7). The revision matters, V2.0 and V3.0 are not interchangeable.
- The driver chip marking. Read the number off the module itself: TMC2130, TMC2208, TMC2209, TMC2660 or TMC5160. A photo of the board silkscreen and every driver is worth taking.
- The interface mode. UART, SPI or standalone. Standalone drivers are configured with solder jumpers and expose no silent-mode settings to firmware at all, so this determines whether the whole exercise is possible.
- Your current firmware version and configuration. In Klipper, printer.cfg. In Marlin, Configuration.h and Configuration_adv.h.
- A computer, a data-capable USB cable and a stable power supply. Charge-only cables are the single most common cause of a “failed” upload.
- The correct firmware binary or source build matching your board, plus the manufacturer’s or board builder’s own instructions for your exact revision.
- A backup method for stored settings. On Klipper that is a copy of printer.cfg and an EEPROM dump. On Marlin it is an EEPROM backup through the host software, plus a screenshot of your saved settings.
One last thing to check before downloading anything: confirm the firmware project you intend to use actually supports silent mode for your driver on your interface. Vendor factory firmware sometimes locks the drivers down, and Marlin’s stealthChop behaviour is board-specific enough that a known bug can make the setting silently do nothing.
Step-by-Step: How to Upgrade 3D Printer Firmware for Silent Drivers
1. Confirm the Printer, Board, and Firmware Compatibility
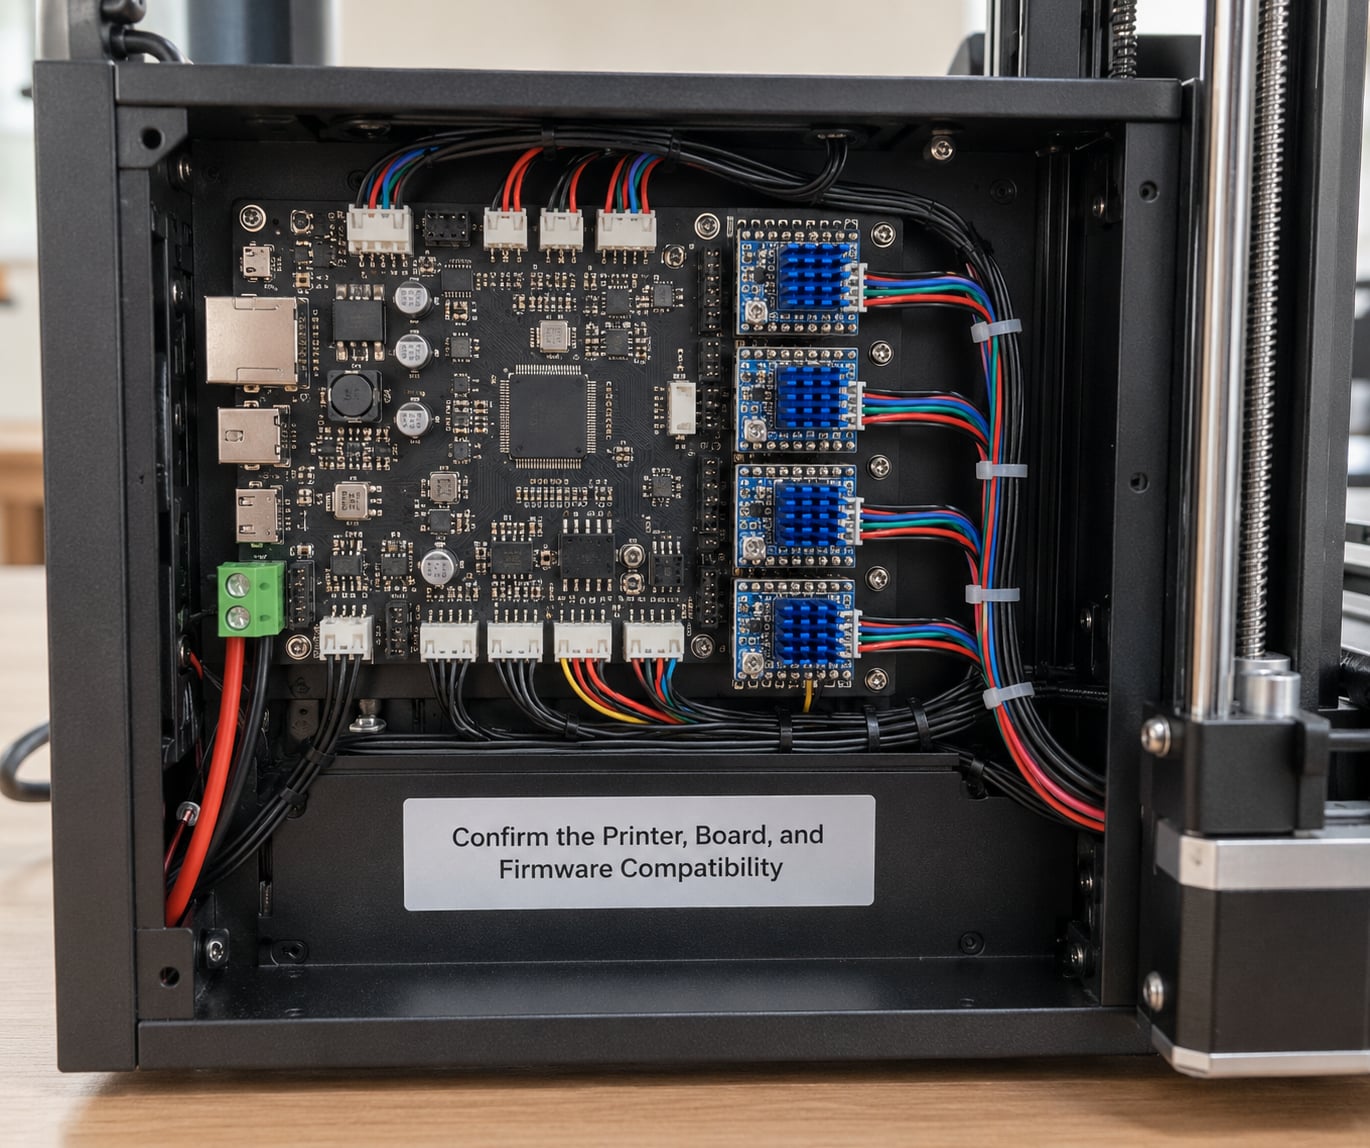
Start by writing down four facts: printer model, mainboard revision, driver chip, and currently installed firmware version. All four appear in your existing firmware files, so if you have Marlin installed you will find the board in Configuration.h and the driver block in Configuration_adv.h.
Then answer one question: is the driver exposed to the microcontroller?
| Interface mode | How the driver is wired | Can firmware set stealthChop? |
|---|---|---|
| UART | Two or four extra pins per driver carrying serial data to the MCU | Yes, all driver registers are reachable |
| SPI | A shared data bus with a chip-select line per driver | Yes, registers are reachable but shared |
| Standalone | Configuration pins only, no data connection to the MCU | No. Silent mode settings are unavailable |
Some boards expose different drivers on different interfaces, and a board can have a UART jumper set for one axis and SPI for another. Check each driver, not just the board name.
You know step one worked when you can state your driver model and its interface without guessing. If you cannot, stop here, because every later step depends on it.
2. Back Up the Existing Firmware and EEPROM Settings
Flashing can reset or relocate stored settings, and a backup turns a bad afternoon into a ten-minute recovery. In Klipper, connect to the machine over SSH or the web interface, copy printer.cfg somewhere safe, and run an EEPROM dump so any values stored in memory are written back to the file.
In Marlin, use the EEPROM backup function in your host software, then open that file and save it as text. Write down the numbers that are painful to rediscover: mesh bed levelling or probe offsets, steps-per-millimetre values, PID values, acceleration and jerk limits, and any sensorless homing thresholds.
Also save a copy of the firmware binary currently on the board if you have it. That file is your rollback path.
Success here is simple: you have a text copy of your configuration and a dump of your EEPROM, and you could restore both without the internet.
3. Download or Build the Correct Silent-Driver Firmware
This is the step where most people go wrong. To upgrade 3D printer firmware for silent drivers properly, the build has to match your board, your interface mode and your driver model. Nothing else in the guide works if this one is wrong.
With Klipper, you configure the microcontroller with make menuconfig in the Klipper source directory. Select the same micro-controller architecture as your board, enable the communication baud rate your drivers use (250000 for most UART TMC2208 and TMC2209 setups), and choose your board’s serial interface. Save, then build with make.
With Marlin, open the project in VS Code with the PlatformIO extension rather than the Arduino IDE. Set the MOTHERBOARD value in Configuration.h to your exact board, then open Configuration_adv.h and set the driver section for your chip and interface.
Before compiling, decide which quiet mode you actually want:
| Mode | Noise | Torque at speed | Positional error |
|---|---|---|---|
| spreadCycle | Loudest, audible step-by-step hum | Full | None |
| stealthChop | Near silent at low speed | Drops off at higher speed, around three times the driver full-step rate | Documented at roughly 75 percent of a full step, about 0.150mm at 40mm rotation distance and 200 steps per rotation |
| spreadCycle with interpolate off, microsteps 64 or 128 | Quiet, without mode switching | Full | About 0.006mm with microsteps 16, and less at higher microstepping |
That third row is the option experienced users reach for first. Higher microstepping with interpolation off gives comparable quietness with full torque and negligible positional loss, and it avoids the failure modes listed further down. StealthChop remains the right answer for an extruder and for very slow, low-acceleration moves.
You have the correct firmware when the build completes without errors and the board, baud rate and driver type you selected match what you recorded in step one.
4. Put the Printer Into the Correct Flashing Mode
Most boards flash from a microSD card, which means no special button sequence at all. Copy the freshly built firmware file to a FAT32-formatted card and power-cycle the printer.
The filename is the part that catches people. Boards with a bootloader that auto-renames expect firmware.bin and will rename it to firmware.cur once the flash succeeds. Other boards expect you to increment the filename yourself, from firmware.bin to firmware1.bin to firmware2.bin, because each boot loads the highest numbered file present. If you do not increment it, the board reboots into the same firmware you already had and nothing changes.
Disconnect USB before you power-cycle for an SD-card flash. Leaving the USB cable connected can backfeed power into the board, which is the one mistake on this page that can genuinely damage hardware.
RP2040 boards are different again. They have no SD slot and require two BOOTSEL presses while plugging USB in to enter boot mode, and the file must be sent over USB with a UF2 bootloader tool. ATmega boards flash over serial with avrdude or PlatformIO instead.
Use your board’s own manual for the button sequence. If the board shows no sign of reading the card, or if the file comes back with the same name it started with, the filename rule was not followed.
5. Flash the Firmware Through the Right Tool
For an SD-card Klipper flash, insert the card, power the printer, wait twenty seconds, power-cycle once more, then check whether the file was renamed or consumed. That rename is your success message. If the filename is unchanged, the bootloader did not run the update, and repeating the power cycle usually fixes it.
For a USB or serial flash on Klipper, find the port first with ls /dev/serial/by-id/. If several entries appear, match the USB serial in the identifier to the board you physically plugged in, because flashing the wrong port is a common way to lose an afternoon on a print farm.
make menuconfig
make
make flash FLASH_DEVICE=/dev/serial/by-id/usb-Klipper_stm32f407xx_XXXXXXXX-if00
For Marlin, build and upload from PlatformIO using the Upload button, or run pio run -t upload. Compiling happens first, so a configuration mistake surfaces as a compile error rather than a half-written board.
# Marlin Configuration_adv.h
#define TMC2209
#define TMC2209_STANDALONE            // remove or comment out for UART or SPI
#define TMC2209_UART
#define TMC2209_UART_ADDR            3
#define STEALTHCHOP_THRESHOLD        999999
#define TCOOLTHRS                   0x200
#define TPOWERDOWN                  30
Never unplug the printer or pull the USB cable while an upload is in progress. The write is not atomic, and an interrupted flash can leave a board that will not enumerate.
Watch for the verified success message before you power-cycle. Anything less, retry on a fresh port rather than hoping.
6. Restore, Configure, and Test the Silent Drivers
Boot the machine and check the log before touching anything else. In Klipper, read klippy.log through your web interface or SSH. A clean startup with no driver errors means the firmware is talking to the drivers correctly, which is the whole point of the exercise.
Then set the silent mode and current in printer.cfg, keeping the section header visible so you know which driver each block controls:
tmc2209 stepper_x
    uart_pin: PD11
    run_current: 0.8
    hold_current: 0.5
    interpolate: False
    stealthchop_threshold: 999999

stepper_x
    step_pin: PC13
    dir_pin: PA8
    enable_pin: !PC14
    microsteps: 128
    rotation_distance: 40
    endstop_pin: ^PC2
    position_endstop: 0
    position_max: 235
Repeat the block for each axis and for the extruder, matching the uart_pin for that driver. In Marlin, the equivalent lines live in Configuration_adv.h and need a recompile and reflash to take effect; in Klipper, F8 restarts and reloads the configuration with no rebuild at all.
Restore any EEPROM values the flash wiped, then run conservative checks at conservative speed. Start with the safety test and the per-axis acoustic test, which reports the distance in millimetres per step so you can also catch an incorrect rotation_distance:
M112                     # emergency stop must cut power to heaters
QUERY_ENDSTOPS           # triggers in the correct direction
STEPPER_BUZZ STEPPER=1   # repeat for 2, 3 and the extruder
DUMP_TMC STEPPER=1        # prints current, microsteps and driver mode
SET_TMC_FIELD STEPPER=1 FIELD=stealthchop_threshold VALUE=999999
Then heat the bed and nozzle and run PID_CALIBRATE, followed by SAVE_CONFIG, so the thermal values that were reset get restored properly.
Evaluate the result on four things: motor sound during a low-speed move, movement direction on every axis, layer consistency on a small test print, and temperature stability during a warm-up. Only move to normal print speeds and acceleration after all four look right.
Common Mistakes
Nearly every problem people report after a silent-driver upgrade falls into one of these buckets. Work down the list until the symptom matches.
- The board will not flash at all. Wrong board build, a charge-only USB cable, or an occupied serial port. Verify the cable on a phone first, then confirm the MOTHERBOARD or menuconfig selection against your board revision.
- Wrong communication baud rate. UART TMC drivers usually expect 250000. A mismatch produces driver read errors at startup rather than a flash failure.
- Everything is suddenly at default values. EEPROM_INIT_NOW or a first boot after flashing clears stored settings. That is expected once, and the backup you took in step two puts everything back.
- Motors move the wrong way or do not move. A reversed dir_pin, or current set far below what the motor needs to break free. Confirm direction before raising current.
- Stealthy and then loud above a certain speed. That is correct behaviour. StealthChop torque falls off above roughly three times the driver full-step rate, so Klipper switches to spreadCycle above the threshold you set.
- Unable to read tmc uart stepper_x register IFCNT. Power-cycle fully: unplug mains and USB for several seconds so the driver loses its register state, then boot again. A first Klipper flash after Marlin often leaves drivers in an incompatible state until all power is removed.
- TMC reports error ot=1 OvertempError, or ShortToGND. StealthChop mispredicting mechanical load can trip the driver’s protection. Raise the threshold velocity or back off run_current a little rather than abandoning silent mode outright.
- Driver reports uv_cp undervoltage. The driver supply is sagging, usually on a bed-heater-heavy run with an inadequate power supply.
- Firmware flashed and nothing changed. On SD-card boards the filename was not incremented for a manual-bootstrap board, or USB was still connected during power-cycle. Fix the filename or the cable, then power-cycle twice.
- Still loud after enabling stealthChop. Check DUMP_TMC to confirm the mode actually took, confirm the driver is in UART or SPI mode rather than standalone, and remember that fans, belts and the bed are often louder than the steppers.
The safety net worth setting up before you start is a known-good file and a rollback path. Keep the firmware binary that was working, and if the machine will not boot after a flash, put the old file back on the card under the correct incremented name and power-cycle. A machine that worked yesterday can almost always be returned to that state.
Frequently Asked Questions
Are all TMC drivers silent once you flash firmware?
No. Flashing only exposes the driver registers; the driver still has to be told to use stealthChop, and only UART or SPI connected drivers can be told at all. Standalone drivers are set with solder jumpers and give firmware no access to silent-mode settings. Many boards advertised as silent ship in spreadCycle, which is why the noise can survive a firmware update until the mode is explicitly configured in printer.cfg or Configuration_adv.h.
Can flashing firmware damage my 3D printer?
The flash itself is safe when done correctly. The realistic hardware risk is leaving a USB cable connected while power-cycling an SD-card flash, which can backfeed power into the board. Downloading firmware built for a different board will not damage hardware either, it simply leaves a board that will not start. Read the boot sequence from your board manual before you begin, and keep a copy of the firmware that was working.
How do I find out which mainboard my printer has?
Open the electronics compartment and read the silkscreen on the board itself. Ender 3 boards are usually marked 4.2.2 or 4.2.7, and common aftermarket boards include SKR Mini E3 V2.0 and V3.0, SKR V1.3, Octopus and MKS Gen L. Note the driver chip markings too, because a board can carry different TMC models. A phone photo of the board and each driver gives you everything you need to select the right firmware.
What should I do after a failed firmware flash?
If the board will not enumerate over USB, power-cycle with mains and USB both unplugged for at least ten seconds, then try a different port and a known data-capable cable. On SD-card boards, copy the known-good firmware file back to the card using the correct incremented filename and power-cycle. For a Marlin board flashed with the wrong configuration, rebuild and upload over USB instead of via the card. In every case, restore from the configuration backup you took before starting.
Do I lose my EEPROM settings when I update firmware?
It depends. A normal Klipper update keeps stored values, while a first boot after some Marlin builds resets them, especially when EEPROM_INIT_NOW is set. Either way, a configuration file backup plus an EEPROM dump taken before you start makes recovery quick. With Klipper, copying printer.cfg and issuing an EEPROM dump is enough. With Marlin, use the EEPROM backup in your host software and save the file as text you can read later.
How can I reduce stepper noise without replacing hardware?
Work down a ladder rather than replacing parts. First set stealthChop on every axis, or keep spreadCycle with microsteps raised to 128 and interpolate set to False, which is quiet without positional lag. Next, tune run_current so motors are not overdriven, check that belts are tensioned and a leadscrew is properly greased, and lower acceleration and jerk limits. Input shaping on Klipper removes ringing that no driver setting can touch.
Conclusion: Upgrade Safely and Test Before Normal Printing
Start by identifying your printer model, mainboard revision, driver chip and interface mode. Nothing else matters until those four are written down and confirmed.
Then back up your configuration and EEPROM, flash only a file built for that exact board, and verify at conservative speed before returning to normal settings. That is how to upgrade 3D printer firmware for silent drivers without losing a tuned machine to an afternoon of guessing.
Last reviewed for 2026.