Replace a 3D printer nozzle when the extrusion hole wears wider than your slicer expects, when you see a dulled or rounded tip up close, or when print problems survive a full clean and recalibration. On soft filaments like PLA and PETG, a brass nozzle typically lasts around 500 to 1,000 print hours; abrasive filaments cut that to a few dozen hours.
A worn bore is quiet about it. Nothing alarms you, the machine sounds normal, and the first sign is usually a print that looks slightly off — thinner walls, a grainy top face, corners that blob because the slicer is pushing more plastic than the nozzle can lay down.
This guide takes about fifteen minutes for the diagnostic part and another twenty for the swap, and it assumes a desktop or hobby FDM printer with a threaded nozzle you can reach. Exact hardware and adjustment menus differ by printer model, so treat the steps as the sequence rather than the torque values.
Table of Contents
- 1What You Need
- 2Step-by-Step
- 3How to Tell When to Replace a 3D Printer Nozzle
- 4How to Clean a Nozzle Before Replacing It
- 5How to Replace a 3D Printer Nozzle
- 6How to Test the New Nozzle
- 7Common Mistakes
- 8Frequently Asked Questions
- 9How often should I replace a 3D printer nozzle?
- 10What are the symptoms of a worn 3D printer nozzle?
- 11How long does a brass nozzle last?
- 12Can a clogged nozzle be cleaned instead of replaced?
- 13Do brass and hardened steel nozzles wear out at the same rate?
- 14Does replacing the nozzle affect my printer’s warranty?
- 15Conclusion
What You Need
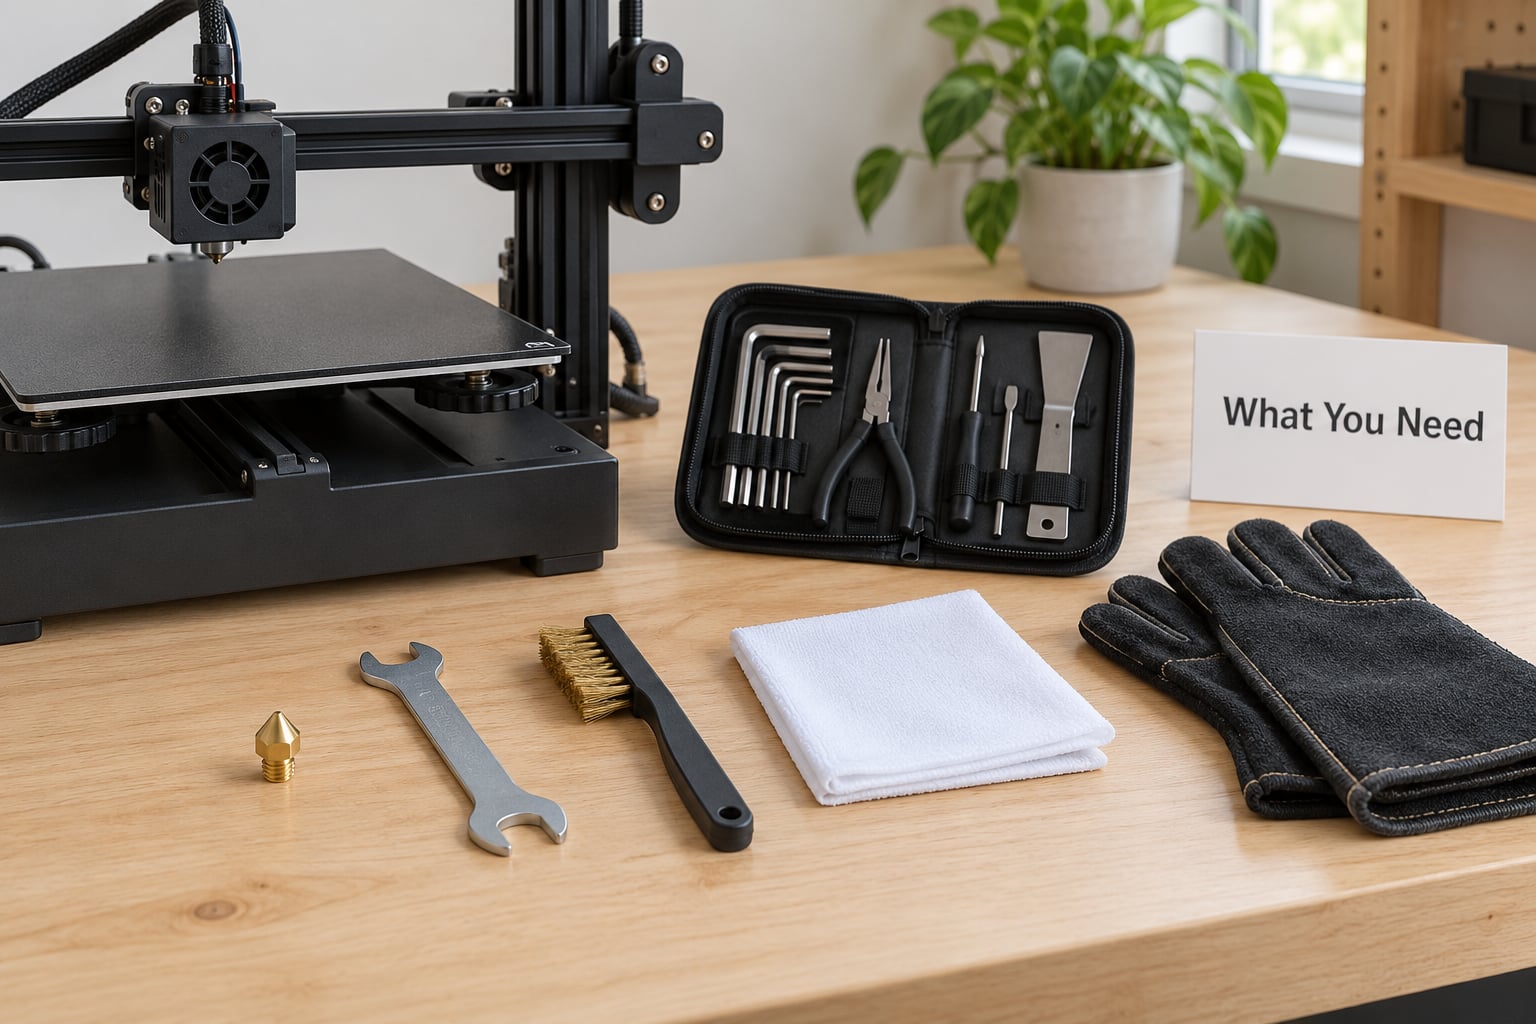
A replacement nozzle is only half of what you need. The other half is enough light, a clean surface, and a way to cool the hotend before you touch it.
- A replacement nozzle matching your printer’s thread, diameter and length. Match the diameter your slicer is set to: 0.4 mm for general work, 0.6 mm for fast coarse prints, 0.2 mm for fine detail.
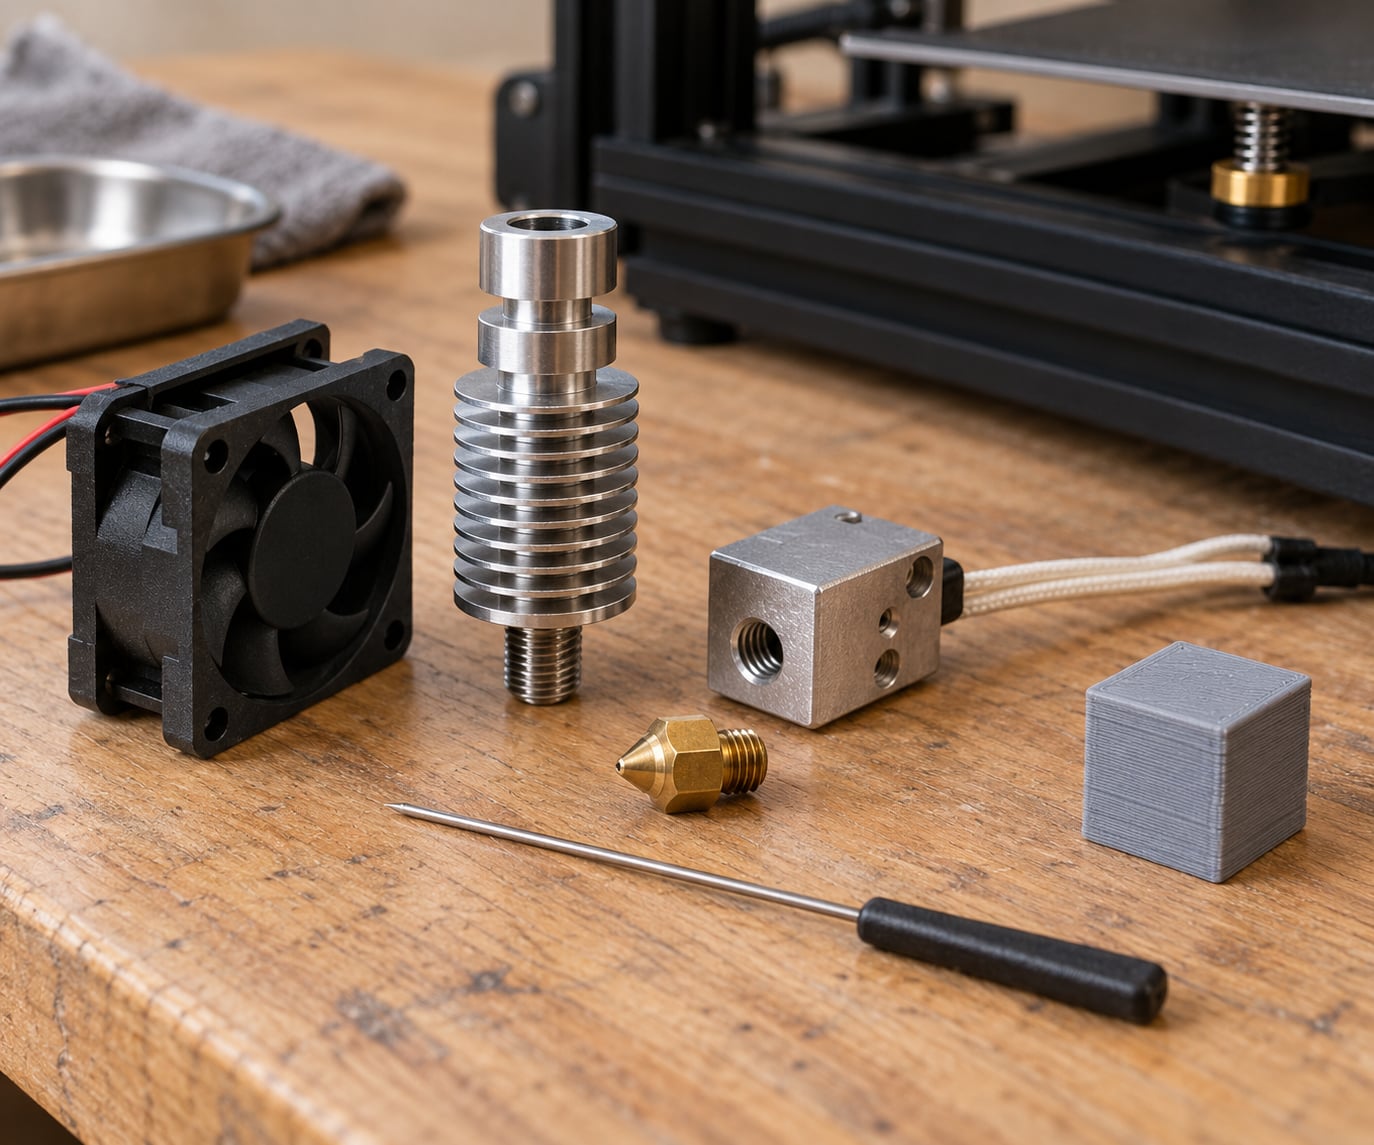
- Manufacturer-approved tools. Most hotends use a 7 mm or 8 mm wrench across the flats of the nozzle, sometimes paired with a 4 mm or 5 mm hex on the heat break. Some enclosed and direct-drive designs come with a purpose key, and a few use hex or set screws instead of a threaded nozzle.
- Cleaning supplies: brass or stainless cleaning rod sized to your bore, a soft nylon brush, cotton swabs, a lint-free cloth, and a bowl of warm water for soaking a removed nozzle.
- Heat-resistant gloves and a pair of needle-nose pliers for the clamp.
- Filament for the test print plus your usual first-layer test file or a single-wall calibration cube.
Temperature depends on your filament supplier’s guidance, so check the spool rather than assuming a number. Keep a spare in the correct material too — brass for soft filaments, hardened steel or ruby for anything with fibre or fill in it.
Step-by-Step
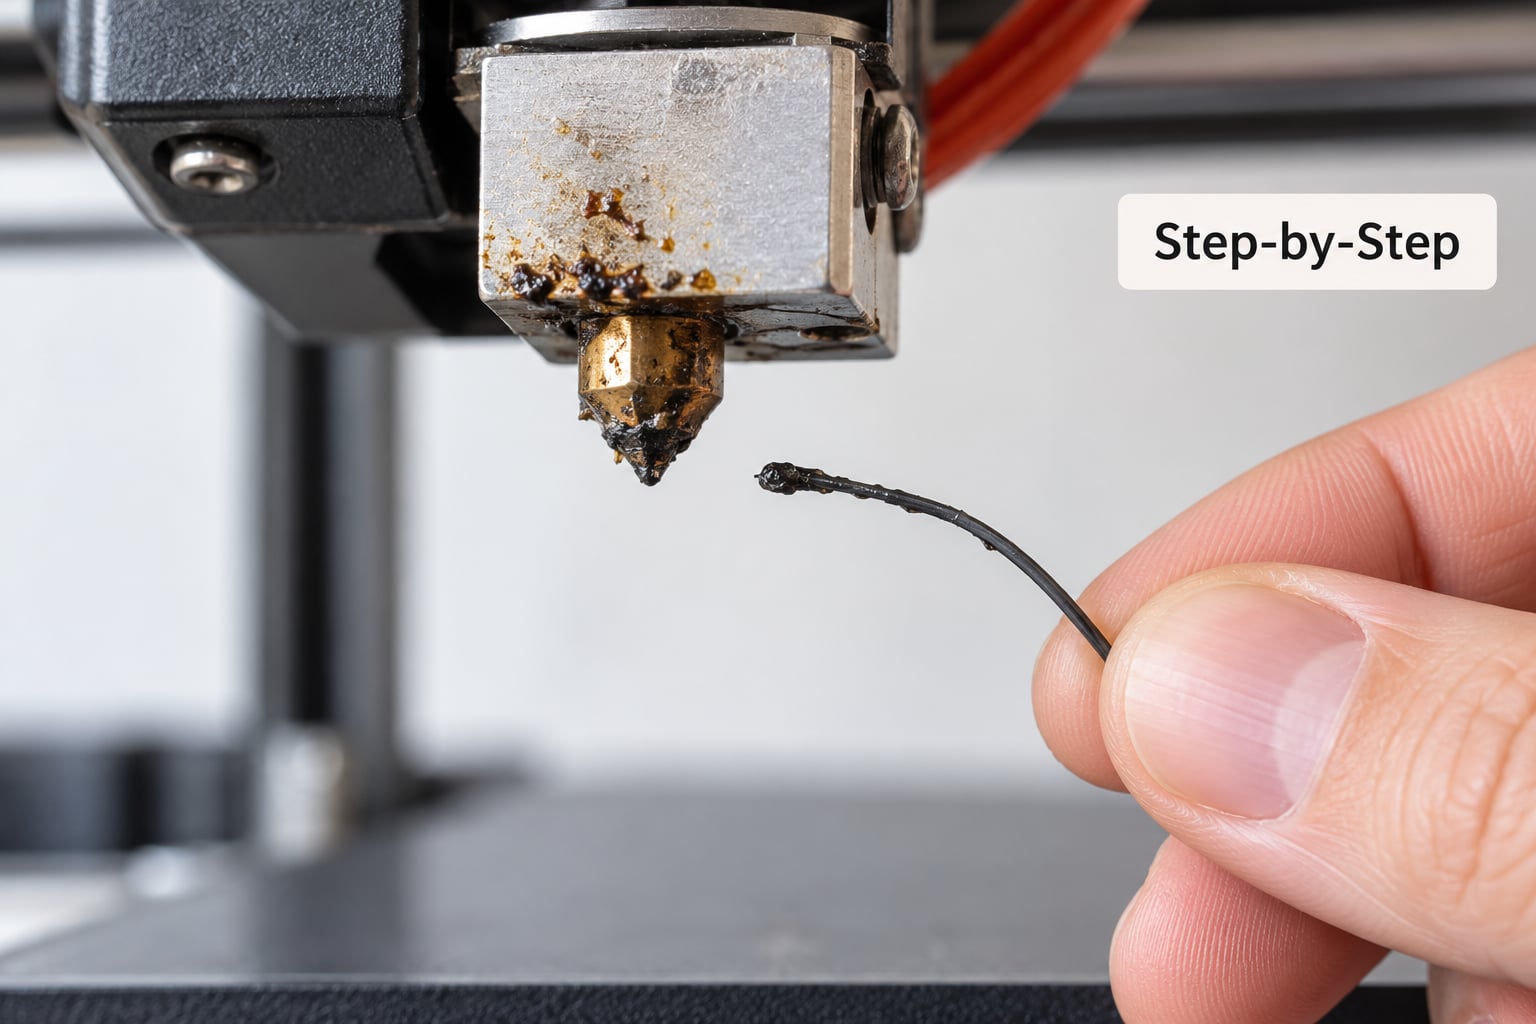
Work through this in four stages: diagnose, clean, replace only if cleaning was not enough, then test. Skipping straight to stage three is how most people end up with a fresh nozzle and the identical fault.
How to Tell When to Replace a 3D Printer Nozzle
Replace the nozzle when at least one symptom below shows up and stays after a cold pull, a filament change and a first-layer check. These are the seven clearest signals.
- Repeated stringing that cleaning doesn’t fix. Ooze at the tip after cleaning usually means plastic is seeping from between the threads or the bore edge, or the hole has deformed into a rough oval.
- Inconsistent extrusion at the same feed rate. Walls come out thinner than the slicer commands even when the spool is full and the extruder gear is clean.
- Visible damage to the tip. A flattened, rounded or mushroom-shaped tip, burrs around the rim, or scoring on the cone all shorten the distance over which plastic melts.
- Recurring jams at the same place. A bore that has been gouged by a cleaning needle traps material in the gouge, so the clog comes back within days.
- Poor surface quality on top and walls. A rough, sandy texture where the surface used to be smooth is a widening bore letting air into the melt.
- Layer lines that scrape or separate. If layers no longer bond and prints snap at the seam, extrusion width has drifted beyond the layer height you set.
- Problems that persist after cleaning, tuning and a fresh filament. When cold pull, flow multiplier and z-offset are all correct and the fault stays, the part is worn.
The honest caveat: two of these seven mimic other faults. Under-extrusion and layer separation are the most commonly misread symptoms in forum threads, and they are often a first-layer height or bed-adhesion problem instead. Treat the list as a reason to run the checks in the next section, not as proof on its own.
How to Clean a Nozzle Before Replacing It
A removable nozzle can usually be soaked, brushed or heat-cleaned, and doing that first costs five minutes and a spare part.
For a removed nozzle, soak it in warm water with a drop of dish soap for 20 minutes, then push a correctly sized cleaning rod through the bore from the wide end several times while it is still warm. Rinse, dry fully, and look at the tip against a new nozzle under a lamp. Filament-specific notes: PLA softens in warm water, so keep the soak under 60 °C; PETG needs the full 20 minutes; ABS and ASA need hot water near 80 °C and often a nylon brush afterwards.
For a nozzle still mounted in the hotend, set the temperature for the loaded filament, push filament through by hand until it flows clean, then raise the temperature to the material’s maximum and push again so the last residue melts out. Heat-creep and heat-soaked carbonised plastic usually clear at temperature.
Never push a needle, screw or screwdriver into the bore of a mounted nozzle. It gouges the hole, and that gouge becomes the seed of the next clog. Never soak a mounted hotend either — water around a heater cartridge, thermistor or wiring can be far more expensive than a nozzle. If your printer has a PTFE-lined heat break, repeated heat-hammering during unclogging also degrades the liner.
How to Replace a 3D Printer Nozzle
Replace the nozzle cool-down first, or hot with the filament preheated if it is welded in place — never force it either way.
- Cool down. Turn the heater off and wait until the printer reports it is safe. That usually means below 40 °C at the hotend. Hot replacement only makes sense when filament has fused the nozzle to the heat break, and the Ultimaker community consensus is the same: heat it to soften that weld before twisting.
- Release the mount. Undo the heatsink or mount nuts on most designs, or pull the heater cable free on printers that use a bayonet mount. Take the weight of the nozzle rather than levering against the throat tube — the throat is a thin aluminium tube and bends easily when you pull sideways on it.
- Unthread it. Hold the wrench on the flats of the nozzle, turn counter-clockwise, and stop as soon as it is free. Snug is enough; the heater block does the clamping, not the thread.
- Check the replacement fits properly. This is where most mistakes happen. A nozzle with too-short threads screws in without contacting the heat break, so it sits too far away from the melt zone. You get heat creep, ooze, stringing and clogs that look exactly like a worn nozzle but never go away. Confirm yours has the right thread length for your hotend family before you install it, and check that the silicone sock seats fully around the heater block afterwards.
- Install to a gap. Screw the new nozzle in by hand until it is nearly tight, then back it off slightly so a thin gap of roughly half a millimetre shows between the nozzle shoulder and the block. Tighten the mount hardware so the gap stays constant as the metal expands. Follow the manual for your printer if it specifies a gap.
- Restore the filament path. Refit the silicone sock, re-check the heatsink gap on printers that set their own Z-offset from it, and reconnect the heater and thermistor leads.
Skip any step your printer does not have. Enclosed printers with cartridge hotends replace the whole assembly rather than the nozzle, and filament printers with screw-secured nozzles work in the opposite order.
How to Test the New Nozzle
Confirm the swap worked with a short print and three checks: steady extrusion, a clean first layer, and no immediate fault.
Print a small single-wall test line or a 20 to 30 mm calibration cube rather than jumping back to a 12-hour job. Steady extrusion shows as a continuous line of consistent width with no gaps and no oozing between moves. Clean edges come from the bore being concentric, so look at corners and curves for bulges or pinching. Then check the first layer: run your z-offset or first-layer calibration again, because removing and refitting a nozzle shifts the tip position by a fraction of a millimetre, and that is enough to ruin a bed adhesion problem you thought you had solved.
Also confirm your slicer still lists the right nozzle diameter. If you swapped 0.4 mm for 0.6 mm and left the setting alone, flow and line width will be wrong in a way that looks like a bad nozzle. Set an extrusion multiplier test over a 100 mm wall to verify flow before committing to a long print.
If a clog reappears within a few prints on a brand new nozzle, the cause is upstream in the filament path, the heat break or the cooling. A fresh nozzle is the cleanest diagnostic tool you have: it tells you quickly whether the fault travels with the part or stays with the machine.
Common Mistakes
The most common error is replacing a nozzle when the dirty part of the system is somewhere else entirely, and the fix is always the same: rule out the path before the hardware.
- Replacing the nozzle when the filament path is the real cause. Contaminated spool, a dusty extruder gear, a clogged heat break or heat creep inside a PTFE-lined hotend all produce the same under-extrusion the reader blames on the nozzle. Load a known-good spool, purge the hotend long, and re-test before you swap.
- Over-tightening the nozzle or the mount. Torque past snug cracks heater blocks and strips thread. Tighten the mount hardware, not the nozzle thread.
- Fitting the wrong nozzle size or material. A 0.4 mm bore with the slicer set to 0.6 mm causes under-extrusion. Brass in carbon fibre or glow-in-the-dark filament wears in hours; use hardened steel, ruby or tungsten carbide for those.
- Fitting a nozzle with the wrong thread length. If it does not reach the heat break, it prints badly no matter how good the part is. Verify compatibility for your hotend family before installing.
- Forgetting nozzle height. Re-run first-layer calibration after every swap. Skipping it is the reason a good new nozzle gets returned as faulty.
- Skipping the test print. A 15-minute cube is cheaper than discovering the problem four hours into a job.
- Poking at a hot nozzle with metal tools. Metal against metal damages the tip and the bore and can damage the heater block. Use a cleaning rod made of the right material, and let the hotend cool before touching it.
One more thing worth deciding on purpose: a calendar schedule rarely beats symptom-triggered replacement. Most makers reporting on r/3Dprinting and r/ender3 get anywhere from six months to several years from the same nozzle, which makes a fixed date arbitrary. Track print hours for high-volume machines and swap on symptoms for everything else.
Frequently Asked Questions
How often should I replace a 3D printer nozzle?
Most people replace on symptoms rather than on a schedule. A brass nozzle on PLA or PETG typically gives 500 to 1,000 print hours, while abrasive filaments such as carbon fibre, glass fibre, wood-fill and glow-in-the-dark can cut that to 50 to 100 hours. Heavy users who print daily should track hours rather than months, since a calendar estimate varies too much between machines to be useful.
What are the symptoms of a worn 3D printer nozzle?
The common signs are stringing that cleaning does not remove, thinner walls than the slicer commands, a rough or grainy print surface, layer lines that separate, recurring jams in the same spot, and a visibly dulled, rounded or flattened tip. Two of these mimic other faults, so confirm the bore and filament path before replacing anything.
How long does a brass nozzle last?
A brass nozzle printing PLA or PETG usually lasts around 500 to 1,000 print hours, and reports from community forums range from a few months to several years depending on how often you print. Abrasive and filled filaments are the exception: those can wear a brass bore out in 50 to 100 hours, which is why hardened steel or ruby is the usual choice for them.
Can a clogged nozzle be cleaned instead of replaced?
Usually yes. A removable nozzle can be soaked in warm soapy water and pushed through with a correctly sized cleaning rod, and a mounted nozzle is often cleared by heating it to the filament maximum and extruding by hand. Do not use metal tools on a hot bore, since the scratches you create become the next clog. Replace it if the clog keeps returning.
Do brass and hardened steel nozzles wear out at the same rate?
No. Brass is soft, conductive and cheap, and it wears quickly on anything with fibre or fill. Hardened steel, ruby and tungsten carbide resist abrasion and tolerate higher temperatures, so they suit carbon fibre, glass fibre, nylon, metal-fill and glow-in-the-dark filaments. For standard PLA and PETG, brass lasts longer in practice and spreads heat more evenly.
Does replacing the nozzle affect my printer’s warranty?
It can. Several manufacturers consider a hotend or nozzle changed outside their parts or service process as excluded damage, particularly on printers opened while still powered or hot. Check your specific warranty terms before doing the work yourself, and where a service centre is required, let them supply the nozzle so the part matches what they fitted.
Conclusion
Clean the nozzle and inspect it against a new one first. Replace it when you find physical wear, a bore that keeps clogging, or print-quality problems that survive a filament change, a purge and a first-layer calibration — then re-check nozzle height and run a short test print. Start tonight by pulling your nozzle and looking at the tip under a decent lamp, then check the filament path behind it.