Ultraviolet light degrades 3D printed plastics through a process called photo-oxidation: UV photons are absorbed by chromophores and additives in the polymer, free radicals form, those radicals grab oxygen, and the polymer’s long carbon chains are chopped shorter. The result is familiar and ugly – yellowing, chalky surfaces, cracking, and a part that snaps instead of bending.
Understanding how UV exposure degrades 3D printed plastics matters more than most print guides admit, because the damage is invisible until it isn’t. A garden clip, a sunlit window mount or an aquarium fitting can look perfect for weeks and then fail suddenly, often along a layer line. If the part carries load or holds water, that failure is a safety problem, not a cosmetic one.
Below is the mechanism, the symptoms it produces, how seven common polymers respond, and a repeatable test protocol you can run yourself.
Table of Contents
- 1What Is UV Degradation in 3D Printed Plastics?
- 2How UV Exposure Degrades 3D Printed Plastics
- 31. Photon absorption
- 42. Free radical formation
- 53. Oxygen recombination
- 64. Chain scission
- 75. Carbonyl accumulation and crosslinking
- 8What Changes in the Printed Part?
- 9How Do Common 3D Printing Materials Respond?
- 10Which UV Wavelengths Cause the Most Damage?
- 11How Can You Test UV Resistance Before Choosing a Material?
- 12How Can You Slow UV Damage?
- 13What Factors Change the Rate of Degradation?
- 14Frequently Asked Questions
- 15Can UV exposure make a 3D printed plastic part brittle?
- 16Is PLA safe for long-term outdoor use?
- 17Does UV degradation always cause visible discoloration?
- 18Can painting or coating a printed part prevent UV damage?
- 19How do I compare the UV resistance of two 3D printing materials?
- 20Conclusion: Start with the Resin and Environment
- 21References
What Is UV Degradation in 3D Printed Plastics?
UV degradation is the gradual loss of physical and mechanical properties in a polymer caused by ultraviolet radiation. In a printed part it is one specific ageing pathway among several, and it is worth separating from the others before you chase the wrong fix.
Heat ageing is different: it accelerates the same kind of oxidative chemistry but with thermal energy rather than light. Moisture damage is hydrolysis, a chemical split of ester or amide bonds driven by water, which matters for hygroscopic materials like nylon and PETG. Chemical attack comes from solvents, oils or cleaners. UV is the pathway where light alone starts the reaction, so it keeps going in a dark drawer after the sun goes down, just far more slowly.
The parts most at risk are thin, translucent or unpigmented ones that sit in direct sun: garden markers, greenhouse clips, hose guides, outdoor signage, aquarium components under UV-C sterilizers, car dashboard mounts, and decorative pieces on a sill. Also at risk, and usually forgotten, is the spool itself. Filament stored on a windowsill ages before you ever extrude it, and you print the damage into the part.
Spool-level exposure and part-level exposure are different problems. A spool that sat in a south-facing window for a summer will have degraded surface layers before printing, which is why the filament that snaps off the spool and the finished part that cracks outdoors are related but separate failures.
How UV Exposure Degrades 3D Printed Plastics
The chemistry runs in five stages. Once it starts it self-reinforces, because the products of each step make the next step easier.
1. Photon absorption
A UV photon carries enough energy to break a carbon-carbon bond. Most of the polymer matrix is transparent to it, so the damage starts at something that absorbs: a chromophore, a residual catalyst, a pigment, an additive, or an impurity from the drying or extrusion process. That is the whole reason carbon black and other absorbers both darken the plastic and change how it ages.
2. Free radical formation
An absorbed photon excites the absorbing group and breaks a bond, leaving two highly reactive free radicals. Radicals are the engine of the whole process. They react within nanoseconds, and they react with whatever is nearby, including each other.
3. Oxygen recombination
Air is the fuel. A radical picks up molecular oxygen to form a peroxy radical, which abstracts hydrogen from a neighbouring polymer chain and leaves a hydroperoxide group behind. Hydroperoxides are thermally unstable and, in sunlight, they split to produce a fresh radical and start the cycle again. This is the chain reaction that turns a slow surface effect into bulk damage.
4. Chain scission
Here is the damage that matters mechanically. Every bond break shortens the molecular chains that carry load. Average molecular weight falls, long chains become short chains, and the part loses elongation at break well before it loses much tensile strength. That is the fingerprint of UV ageing: a material that was tough and flexible goes stiff and snaps, while the strength numbers still look respectable.
5. Carbonyl accumulation and crosslinking
The carbonyl index, a measure of carbonyl groups measured by infrared spectroscopy, rises steadily through exposure and is the standard lab proxy for photo-oxidation. In some formulations the opposite reaction also occurs, with radicals joining chains and creating crosslinks, which raises stiffness and lowers ductility too. Both routes converge on the same symptom set, and both leave a surface that is more brittle than the interior.
The lab data supports the story. In work published in Polymer Degradation and Stability, Theiler and colleagues showed that photo-oxidative degradation of unfilled polymer deteriorates physical and mechanical properties and changes friction behaviour, so a weathered part does not only weaken, it wears differently. A study of PLA films under 315 nm light found UV accelerated degradation, with temperature and relative humidity compounding the loss. And a SAGE-published study of 3D-printed ABS found the printed parts degraded fastest of the group tested, with flexural ductility down more than 27% after only 300 hours of exposure.
Two further consequences matter for FDM specifically. First, degraded material is more brittle, so cracks concentrate at interlayer boundaries where bonding is weakest. Second, surface embrittlement outpaces bulk embrittlement, so the outside of a part fails before the inside does.
What Changes in the Printed Part?
Here is what to look for, roughly in the order it tends to appear.
- Colour shift and yellowing. Chromophores form as oxidation proceeds, so whites and naturals yellow first. A pigmented part may fade toward a duller version of its own colour instead.
- Loss of gloss and surface chalking. The skin goes matte and slightly powdery. Chalking is the degraded surface layer being eroded by handling and rain rather than the bulk material failing.
- Reduced impact resistance and crazing. Fine surface craze lines appear under load, especially around sharp corners and holes where stress concentrates.
- Microcracking and embrittlement. Hairline cracks that do not appear in a photo but release under a fingernail or a light bend.
- Loss of elongation at break. The part stops flexing. It feels like a harder, more brittle version of the same plastic.
- Reduced layer adhesion. A printed part that delaminates or flakes along a layer line has lost interlayer bonding, which embrittlement accelerates.
- Dimensional drift. Shrinkage and warping follow from loss of ductility and post-exposure relaxation, and a part that no longer fits its mating feature is already compromised.
Because several failure modes produce the same brittle part, symptoms alone rarely tell you the cause. Use this table to narrow it down before you replace material.
| Symptom | Likely pathway | How to tell it apart |
|---|---|---|
| Yellowing concentrated on the exposed face | Photo-oxidation | Underside and shadowed areas stay clean |
| Brittle plus stringy, popping filament | Moisture hydrolysis | Wet, indoor or humid-air environment; no sun history |
| Softening, sagging, warped flat surfaces | Heat ageing or creep | Parked in a hot car or under direct sun; touches still warm |
| Clean layer separation straight off the printer | Print settings or adhesion | Failed on day one, never exposed to light |
| Chalking plus discolouration on soil-contact parts | UV combined with moisture | Ground-line degradation fading upward, typical of buried markers |
| Deterioration with no UV, solvent or heat history | Thermo-oxidative ageing in storage | Hot, unventilated shelf or car boot for months |
How Do Common 3D Printing Materials Respond?
Backbone chemistry decides most of this. Aliphatic polyesters such as PLA and aliphatic polyamides absorb little UV because they have few chromophores, so UV passes through them until something inside catches it. Aromatic rings, by contrast, absorb and dissipate the energy as heat. ASA replaces ABS’s butadiene rubber phase with an acrylic ester, which is why it holds up where ABS cracks.
| Material | Relative UV vulnerability | Typical symptoms first | Outdoor outlook |
|---|---|---|---|
| PLA | High | Yellowing, then brittleness and cracks | Seasonal items, prototypes, anything short-lived |
| ABS | High to moderate | Yellowing, surface chalking, loss of ductility | Poor unaided; printed ABS degraded fastest in testing at 300 h |
| ASA | Low | Slow gloss loss, minor colour shift over seasons | Best-in-class choice for exposed outdoor parts |
| PETG | Moderate | Yellowing, surface chalking, gradual embrittlement | Acceptable for one to two seasons, better than PLA under sun and heat |
| TPU | Moderate to high | Chalking and stiffening of the soft feel | Poor; consider it indoor unless stabilised |
| Nylon (PA) | Low for UV, high for moisture | UV symptom masked by hydrolysis symptoms | Strong outdoors if kept dry; needs a drying discipline |
| Polycarbonate | Moderate | Yellowing, then crazing and loss of impact strength | Poor without a coating; needs an enclosed printer |
Two caveats keep this honest. Pigment, filler, stabiliser package and the specific supplier’s formulation shift results meaningfully, and one maker’s UV-stabilised PLA is not another maker’s. Print geometry matters too: thicker walls and higher infill delay the loss of bulk strength but do nothing to stop surface chalking, and a heavily filled or carbon-loaded print changes the absorption behaviour entirely.
Community experience broadly matches the table. On r/3Dprinting, makers consistently rank ASA and PETG above PLA and ABS for sunlight, describe PETG holding up better under combined sun and heat while PLA warps under long exposure, and report PETG garden markers chalking at the soil line after one or two seasons. The same threads show PLA and ABS failing outdoors within weeks to months.
Pigmentation deserves its own note because the folk advice is muddled. Dark colours and carbon black absorb more light, which slows the light-driven reaction at the surface, but carbon-filled prints still embrittle, and the loading matters. On r/3Dprinting the black-PLA thread never reaches a settled answer, so treat “black is UV proof” as a myth and rely on the stabiliser package instead.
Which UV Wavelengths Cause the Most Damage?
UV spans roughly 100 to 400 nm. UV-C sits below 280 nm and is almost entirely filtered by the ozone layer, so it barely reaches the ground, but it is enormously damaging when present in a controlled source. UV-B runs roughly 280 to 315 nm and is the most damaging band that reaches real surfaces; it is what the 315 nm PLA film studies used. UV-A, roughly 315 to 400 nm, is the largest component of sunlight at ground level and does most of the cumulative damage outdoors.
Wavelength matters because energy per photon scales inversely with it. Shorter wavelengths break bonds far more readily, so a sterilizer lamp or an aquarium UV-C unit can age a part faster than sunlight does, which is why fish tank fittings and anything near a UV purifier need their own material decision.
Indoor lighting is usually far milder than daylight. Most lamps emit little or no UV, so degradation indoors is slow enough that it rarely matters, with a few exceptions: aquarium and sterilizer UV, tanning lamps, UV nail-curing lamps held near a part, and unshielded daylight streaming through a window. On that last point, plain glass blocks almost all UV-B but passes a meaningful share of UV-A, so parts on a windowsill are absolutely exposed and the myth that glass is a shield is wrong. Polycarbonate sheet and car windscreens block more UV than plain glass, but tint alone is not a reliable specification. If it matters, measure transmission for your actual glazing.
How Can You Test UV Resistance Before Choosing a Material?
You do not need a lab to get a usable answer. You need coupons, a controlled exposure and a fixed comparison basis.
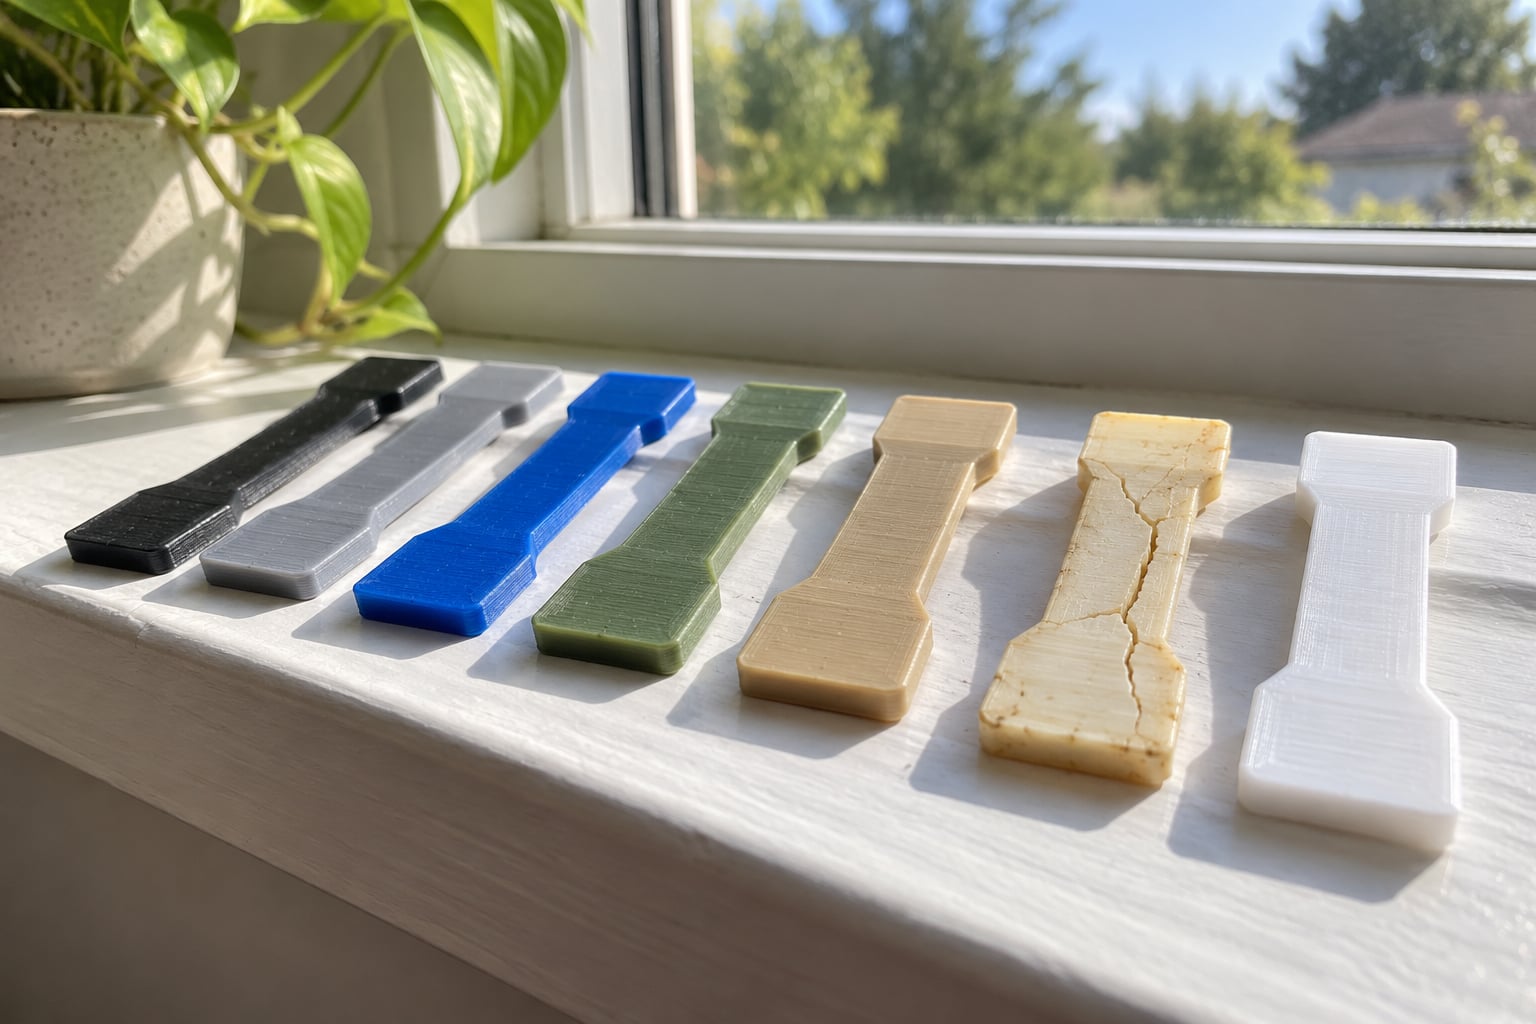
- Print test coupons, not parts. Use a simple flat bar or tensile dog-bone with the same wall count and infill as the real part. Print at least five, so you have spares and so a single outlier does not fool you.
- Keep an unexposed control. Reserve two coupons in a drawer. These are your baseline for colour and mechanics, and without them you cannot attribute any change to light.
- Age the first one before printing. If your material arrives pre-yellowed, brittle, or notching when you bend it, you are not testing UV resistance, you are testing bad filament.
- Expose to a real outdoor position. A south-facing, unshaded spot mounted at an angle gives a repeatable dose. Avoid rooftops and glass, which reflect or filter unpredictably.
- Log weekly, in the same light. Photograph each coupon against a plain background at a fixed distance. Keep a written record of colour, surface feel and any cracks. Photos are the only honest way to track slow change.
- Measure colour objectively if you can. A cheap colourimeter turns “looks a bit yellow” into a delta E number and is the single biggest improvement to a home test.
- Run mechanical checks at the end. Flex each coupon to the same deflection, or do a simple three-point bend. Compare against the controls. If the exposed coupons crack and the controls flex, you have your answer.
- For formal work, use accelerated weathering. ASTM G154 fluorescent UV exposure and Q-UV xenon-arc methods are the standard accelerated weathering test procedures, used with cycles that include condensation so heat and moisture are represented. Accelerated testing does not equal natural weathering; treat the equivalence as an estimate, and confirm with an outdoor run.
A cheap home protocol works too. One maker on r/3Dprinting printed coupons and held them under a UV lamp for 15 minutes, reporting measurable extra yellowing and concluding that a clear coat is worth adding. That is a screening test for dramatic differences, not a substitute for weeks of sunlight, but it takes an afternoon.
How Can You Slow UV Damage?
Start with material choice, because nothing else recovers the ground you lose there.
- Move to ASA for exposed parts. The acrylic ester backbone and aromatic structure absorb and dissipate UV energy rather than being torn apart by it.
- Pick a UV-stabilised formulation. HALS, a hindered amine light stabiliser, scavenges the radicals the reaction depends on. UV absorber masterbatches, typically benzotriazole or benzophenone chemistry, absorb the photons before the polymer can. Both are additive packages the supplier put in, so check the datasheet rather than the colour name.
- Use pigment as a filter, not as a guarantee. Dark and carbon-loaded prints absorb more light at the surface. Helpful, never sufficient alone.
- Coat the part. Primer, UV-resistant paint, clear coat, marine varnish and epoxy all put a barrier between the polymer and the light. A r/3Dprinting thread on painted PLA reached the same conclusion, and the primer-plus-topcoat builds a genuinely thicker barrier than paint alone.
- Overprint a sacrificial shell. Printing ASA or ASA-compatible material over a PLA core gives the light a sacrificial layer, and costs one extra changeover.
- Shield the part. An opaque enclosure or a shade cloth over a garden fixture often buys more life than any additive, and costs nothing.
- Store filament like food. Airtight bags with desiccant, away from windows and heat. IR through glass is the sleeper issue: sun through a window heats a spool even when direct UV is filtered.
- Inspect, and replace rather than repair. Once a part is load-bearing and chalky, no coating brings back molecular weight. Reprint it in the right material.
What Factors Change the Rate of Degradation?
Once you know the mechanism, the variables become predictable.
- Dose. Hours of exposure, not days. Cumulative UV dose is the dominant variable, so a part in shade lasts far longer than one in direct sun.
- Intensity. High-irradiance sun, southern latitudes and altitude raise the rate. UV-C sources are in a category of their own.
- Heat. Warm part plus warm air accelerates the hydroperoxide cycle. This is why a car dashboard or a sunlit sill is worse than open shade at the same latitude.
- Humidity and condensation. Cycles of wetting and drying add stress cracking on top of the oxidative damage, especially on soil-contact parts.
- Oxygen supply. Photo-oxidation needs it, and sealed bags slow it. That is why storage works at all.
- Wall thickness and infill. Thicker walls and denser infill slow the propagation of bulk loss. They do nothing for surface chalking.
- Layer orientation. Prints loaded in tension across layer lines are the ones that fail, because embrittled material fails at the weakest interface.
- Residual stress and geometry. Sharp corners, holes and thin sections concentrate stress and turn embrittlement into cracking. Radiused corners and thicker bosses spread it.
- Surface finish. Glossy, smooth, freshly extruded surfaces reflect more light initially and take longer to chalk than matte or textured surfaces.
- Additives. Absorbers, stabilisers, pigments, fillers and even residual moisture change the behaviour. Incompatible packages can accelerate degradation rather than slow it.
Frequently Asked Questions
Can UV exposure make a 3D printed plastic part brittle?
Yes, and it usually does so before you notice anything else. UV photons start photo-oxidation, radicals form, oxygen joins in, and chain scission shortens the polymer chains that carry load. Elongation at break falls before tensile strength does, so a part that once flexed and bent becomes stiff and snaps. Because degradation concentrates at layer boundaries, an embrittled FDM part can crack straight through a layer line under a load it handled last month.
Is PLA safe for long-term outdoor use?
For anything multi-season, no. PLA has few chromophores in its backbone, so UV passes through it until an impurity or pigment absorbs and starts the oxidation chain. Expect visible yellowing within weeks to months in direct sun and brittleness after that. PLA is still a reasonable choice for garden markers, seasonal decorations and prototypes that will be replaced, but not for a part holding water, bearing load or expected to last a full year.
Does UV degradation always cause visible discoloration?
No. Discoloration is one symptom, not a prerequisite, and pigmented or dark prints often fade rather than yellow, which is easy to miss. The mechanical loss runs independently of how the part looks: molecular weight and elongation can fall substantially while the surface still looks fine. That is exactly why you should never judge a part by its appearance before putting it in service, and why a control coupon matters in any test.
Can painting or coating a printed part prevent UV damage?
Coating slows it rather than preventing it, and the gain comes mostly from thickness and opacity. Primer plus a UV-resistant topcoat builds a far better barrier than a single thin coat of paint, and clear coats with UV inhibitors add more. On r/3Dprinting makers using primer and paint coats generally treat them as real mitigation for PLA. Expect improved life, not immunity: once the polymer underneath has embrittled, no coating restores it.
How do I compare the UV resistance of two 3D printing materials?
Test both under the same conditions rather than trusting the material name. Print five coupons of each, hold two back as unexposed controls, mount the rest at the same angle in the same unshaded position, and photograph them weekly against a plain background. At the end, compare colour change and the same flex or three-point bend test. Formulation, pigment and stabiliser package change results enough that one maker’s PLA is not another’s.
Conclusion: Start with the Resin and Environment
Four actions cover almost every case. Identify the polymer and the environment the part actually lives in, not the environment you hope it lives in. Check the supplier’s datasheet for a stabiliser package, since UV performance is a formulation claim. Run a small coupon test in the real exposure conditions with unexposed controls. Then specify the protection: ASA for exposed parts, a UV-stabilised grade where the geometry is fixed, and a coating or shield wherever the part cannot be changed.
Understanding how UV exposure degrades 3D printed plastics gives you one practical habit worth keeping. Test the material before you trust it, and judge the part by its properties rather than its colour.
References
- Mechanical and tribological performance of molded and 3D-printed ABS after UV exposure (SAGE) – printed ABS degraded fastest of the group tested, flexural ductility down more than 27% after 300 h of exposure.
- Theiler et al. (2018), Effects of UV radiation on the friction behaviour of polymers, Polymer Degradation and Stability (ScienceDirect) – photo-oxidative degradation deteriorates physical and mechanical properties and changes tribological behaviour.
- Effects of ultraviolet light (315 nm), temperature and relative humidity on the degradation of polylactic acid plastic films – UV accelerates PLA degradation, with temperature and humidity compounding it.
- ASTM G154, Standard Practice for Operating Fluorescent UV Lamp Apparatus for Exposure of Materials; Q-UV xenon-arc accelerated weathering methods.