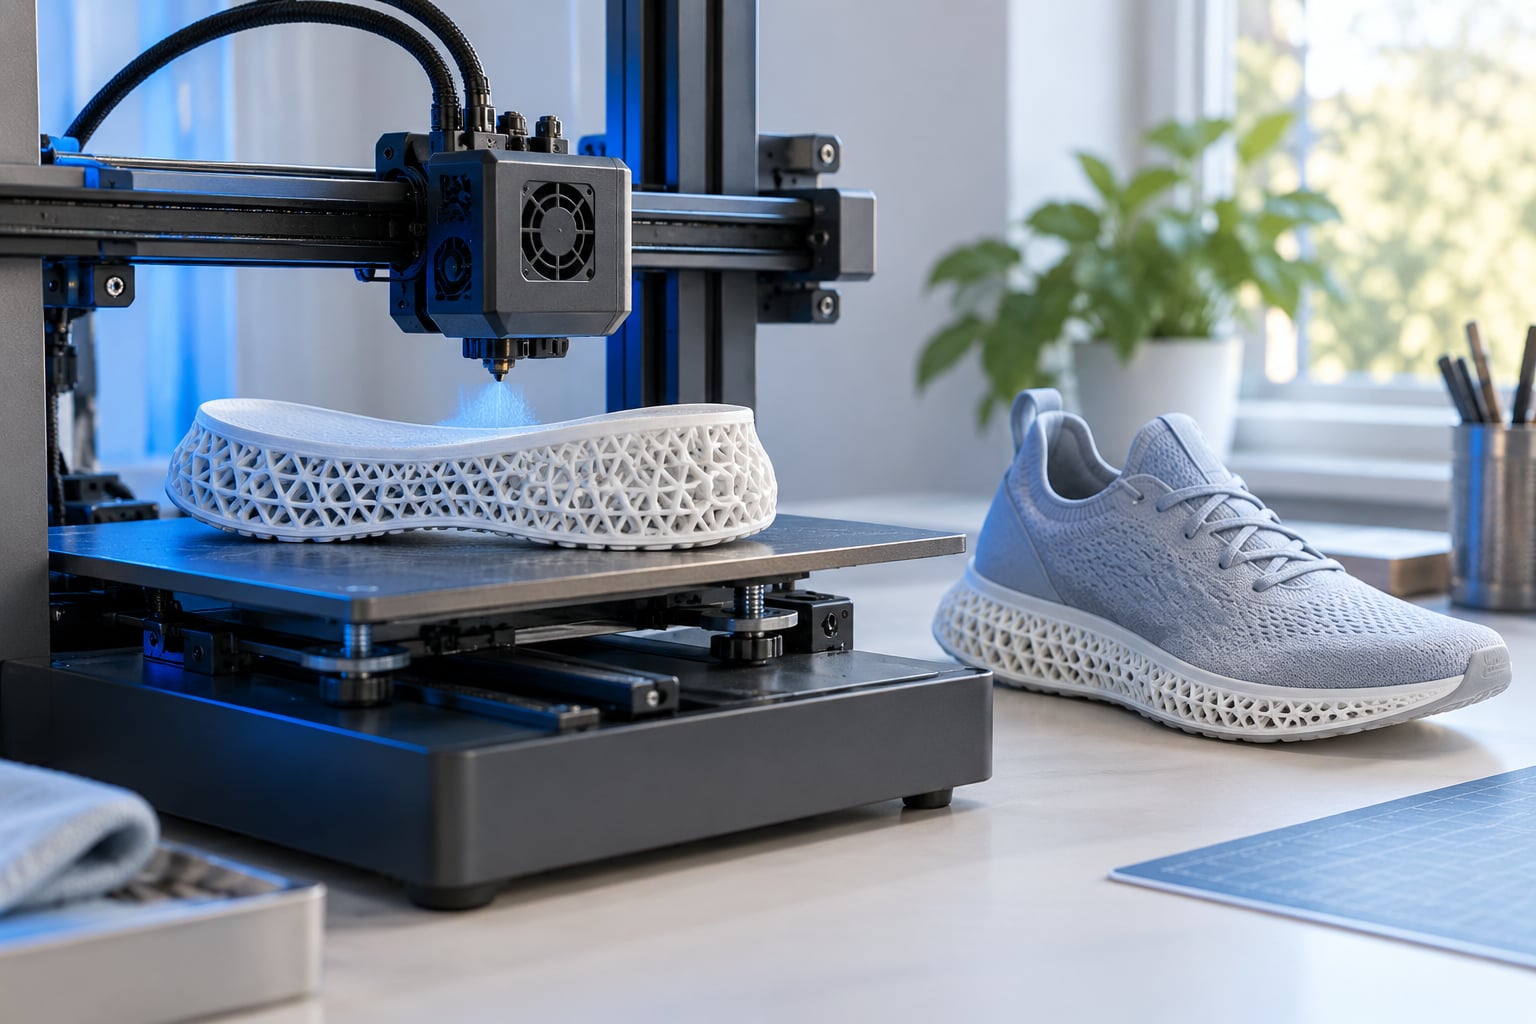
A 3D printed midsole is the cushioning layer of a shoe built layer by layer by an additive manufacturing process instead of being molded from foam, usually as an interconnected lattice of struts and voids whose density changes from zone to zone. That single idea is what 3D printed footwear and midsoles explained really comes down to: geometry you cannot mold, made in one piece without tooling.
Start with the anatomy, because most first questions come from people who do not yet know which part of a shoe gets printed. A shoe has an upper (the part your foot sits inside), a footbed or insole, a midsole (the cushioning wedge between foot and ground), an outsole (the rubber layer that touches the ground), and often a shank, a stiff plate that stops the foot from twisting.
The midsole is where nearly all the printing happens. It carries the load, absorbs the impact and decides how the shoe feels, so it is also the part that benefits most from being designed as a structure rather than a solid block. Outsoles and footbeds are printed too, usually in a stiffer material, while the upper is usually knitted or molded as a separate part and glued or stitched on.
Below is how the process works, which materials matter, what the lattice actually does under load, and where printing loses to molding.
Table of Contents
- 13D Printed Footwear and Midsoles Explained
- 2Which parts of a shoe are printed?
- 3How Does 3D Printing Make Footwear?
- 4The production sequence, step by step
- 5What about printing shoes at home?
- 6What Materials Are Used in 3D Printed Footwear?
- 7Printing processes and what each is used for
- 8How Do 3D Printed Midsoles Work?
- 9Struts, cells and zoned density
- 10What Are the Benefits of 3D Printed Shoes?
- 11What Are the Limitations and Trade-Offs?
- 12Durability and failure modes
- 13Production and material constraints
- 14How Do You Design a 3D Printed Midsole?
- 151. Gather the load data
- 162. Set the outer form first
- 173. Map load paths
- 184. Choose the lattice family
- 195. Print test coupons
- 206. Iterate, then fatigue test
- 21How Does 3D Printed Footwear Compare With Traditional Manufacturing?
- 22Where molding still wins
- 23Where printing wins
- 24Who Is Using 3D Printed Footwear?
- 25Frequently Asked Questions
- 26Can you use a 3D printer to make shoes?
- 27Are 3D printed shoes comfortable?
- 28Do 3D printed shoes last?
- 29What is the best material for a 3D printed midsole?
- 30What printing technology is used for 3D printed midsoles?
- 31Are 3D printed shoes better for the environment?
- 32Conclusion: Start With the Midsole Design
3D Printed Footwear and Midsoles Explained
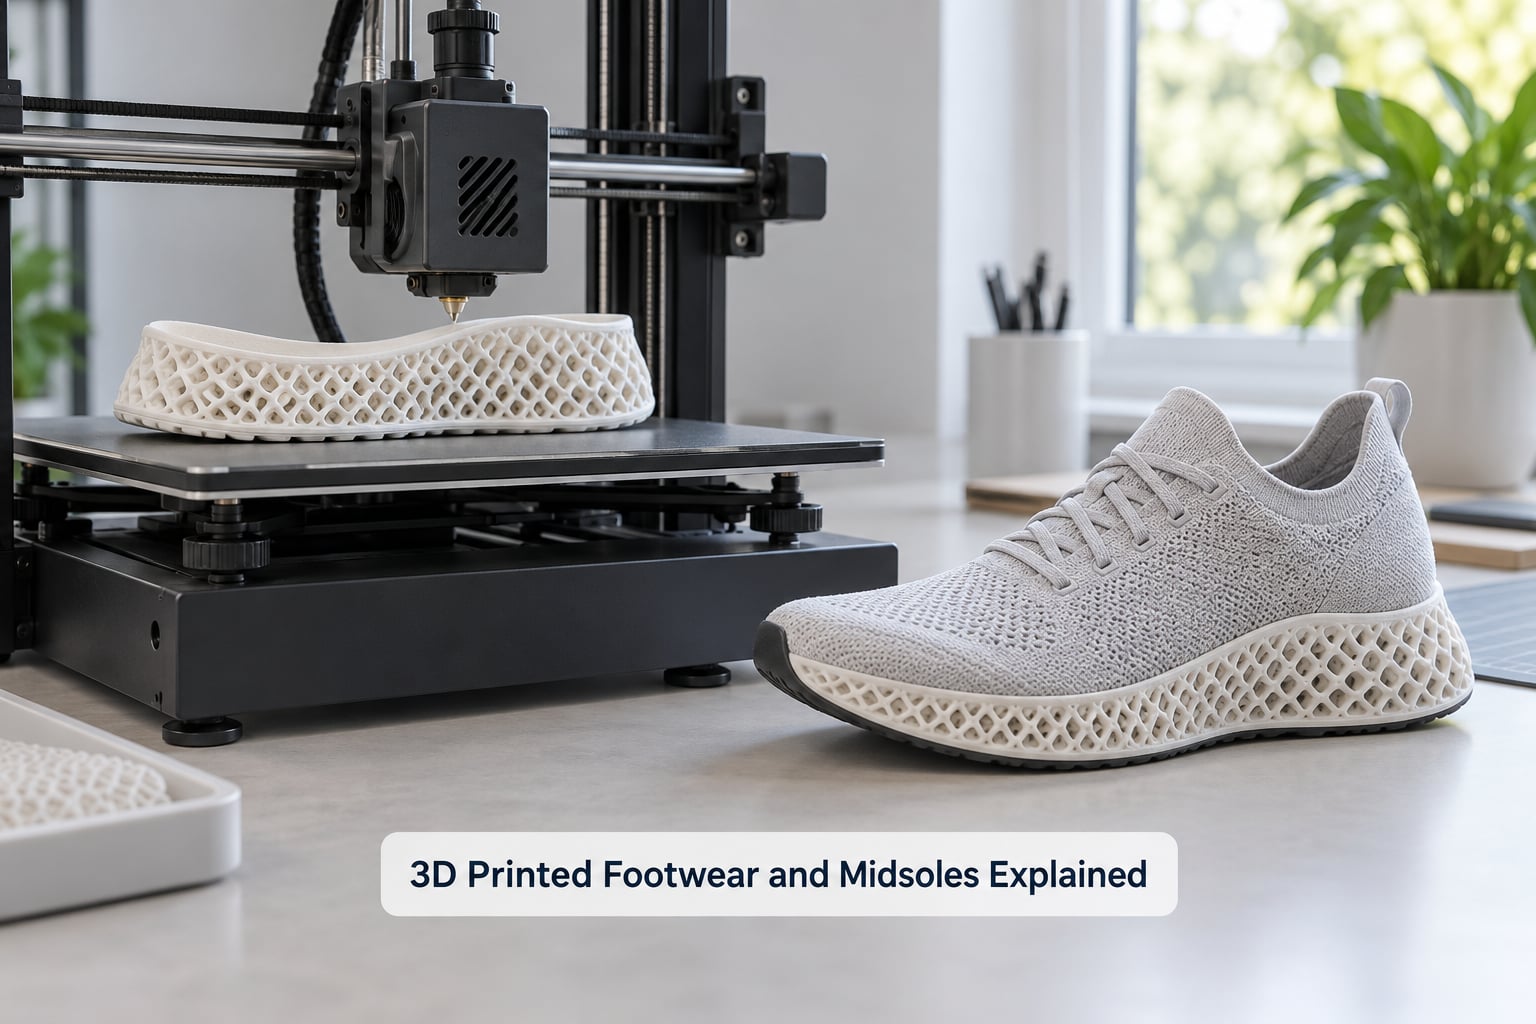
3D printed footwear is any shoe in which one or more components were built additively rather than by molding, carving or weaving the whole shape at once. The midsole is the usual entry point, but printed footbeds, outsoles, shanks and even complete sandals exist.
Which parts of a shoe are printed?
| Component | Function | Printed in practice? |
|---|---|---|
| Upper | Wraps and holds the foot | Rarely. Usually knitted or molded, then bonded to the midsole. |
| Footbed / insole | First surface under the foot | Often. Printed footbeds are cheap, thin and easy to customize. |
| Midsole | Cushioning, shock absorption, stability | Yes. This is the flagship application. |
| Shank | Controls torsion and bending | Sometimes, in a stiff nylon or a printed insert. |
| Outsole | Grip and wear surface | Occasionally, then bonded to a rubber outsole for grip. |
The practical answer to “can you use a 3D printer to make shoes?” is yes, but almost never as one piece. A printed midsole, printed footbed and a conventional outsole and upper, bonded together, is the arrangement that survives contact with real feet. Makers on r/3Dprinting and r/3DprintingHelp repeatedly hit the same wall: a single-piece print that is comfortable in theory collapses because the shoe needs separate parts with different stiffnesses.
How Does 3D Printing Make Footwear?
The workflow is the same in outline for every footwear process: design digitally, slice, build layer by layer, finish, assemble, inspect. What changes between processes is how each layer is deposited and what the machine can hold.
The production sequence, step by step
1. Digital last and fit data. The upper is built around a last (the form the shoe is shaped over), usually from a scan of a foot or a scan of an existing shoe. Commercial runs start with averaged scans so the last fits a population, not one person.
2. CAD model of the midsole. The designer shapes the outer form to match the upper and the outsole, then fills the inside with a lattice. Density and strut angle are mapped across the heel, midfoot and forefoot.
3. Simulation. The lattice is run through compression and stress simulation to see where load concentrates. A heel strike zone that is too stiff shows up immediately in the results.
4. Slicing or build preparation. Powder bed processes need a layer layout and placement in the bed. FDM needs toolpaths. Resin needs supports. SLS and MJF are the least fussy here because loose powder supports the part.
5. Printing. Layers are fused or cured. This is the slow part, and the reason a printed midsole costs more per unit than a molded one at volume.
6. Finishing. Cool-down, depowdering, blasting, trimming of supports, and sometimes a coating. Resin prints also need UV post-curing before they reach a foot.
7. Assembly and inspection. Bonding the printed part to the upper, then checking dimensions and weight. Every part off a powder bed is slightly different, so inspection is a real step, not a formality.
What about printing shoes at home?
Home printing is possible but constrained. For TPU on a filament printer you want a direct drive extruder, a constrained filament path, an all-metal hotend, a heated bed and a print volume big enough for a full-size midsole. Flexible filament buckles and jams on a bowden tube setup, and layer adhesion in TPU is weak: high layer heights and poor part cooling produce a shoe that splits along a layer.
Glue the parts to a midsole designed for one material. Forum posters on r/3Dprinting say it plainly: designing a single-material sole with no separate outsole avoids most of the assembly pain. Add half a layer and a large support tree, and you will spend longer removing supports from a flexible print than the print itself took.
What Materials Are Used in 3D Printed Footwear?
Flexible polymers dominate, because a shoe has to bend. The material must return to shape after compression, resist fatigue over millions of steps, and tolerate skin temperature and sweat.
| Material | Form | Elastic response | Surface finish | Best use in footwear |
|---|---|---|---|---|
| TPU (thermoplastic polyurethane) | Filament, pellets, powder | Fast, springy, high energy return | Matte, slightly grainy | The default midsole material for both industrial and home printing. |
| TPE (thermoplastic elastomer) | Filament, pellets | Soft, rubber-like, lower rebound | Matte | Slides, sandals, outsoles where grip and comfort beat return. |
| Nylon / PA 12 | Powder | Firm, holds stiffness | Grainy, sandblasted smooth | Structural components, shanks, exoskeletes, thin-walled lattices. |
| Photopolymer resin | Liquid resin | Rigid unless formulated soft | Very smooth, detailed | Prototypes and high-detail lattices, not most production midsoles. |
| Rigid thermoplastics (PA, PETG, PP) | Pellets | Minimal give | Slightly textured | Outsole tooling, jigs, non-wearable parts. PLA deforms under a warm foot and should not be used for a midsole. |
Two cautions. PLA creeps and deforms at foot temperature, which is why makers who tried it end up annealing parts in salt, a fairly desperate workaround. And photopolymer resin needs washing and full UV curing before contact with skin; uncured resin is a genuine irritant, and a printed shoe that has not been properly finished is not wearable.
Printing processes and what each is used for
| Process | How it builds | Supports | Typical footwear use |
|---|---|---|---|
| FDM / FFF | Extrudes molten filament layer by layer | Yes, extensive on lattice parts | Hobby midsoles, footbeds, prototypes, jigs |
| SLA / DLP | Cures liquid resin with light | Yes, then removed by hand | Detailed prototypes and fit studies |
| SLS | Lasers fuse polymer powder; loose powder supports the part | No | Production midsoles and sandal soles at low volume |
| MJF / DLS | Jets of binder or liquid, then heat fuses the powder bed | No | Higher-volume printed midsoles, complex lattices |
The named processes matter when you evaluate a brand. Powder bed methods are the ones that make real production midsoles possible, because they handle the geometry without support structures.
How Do 3D Printed Midsoles Work?
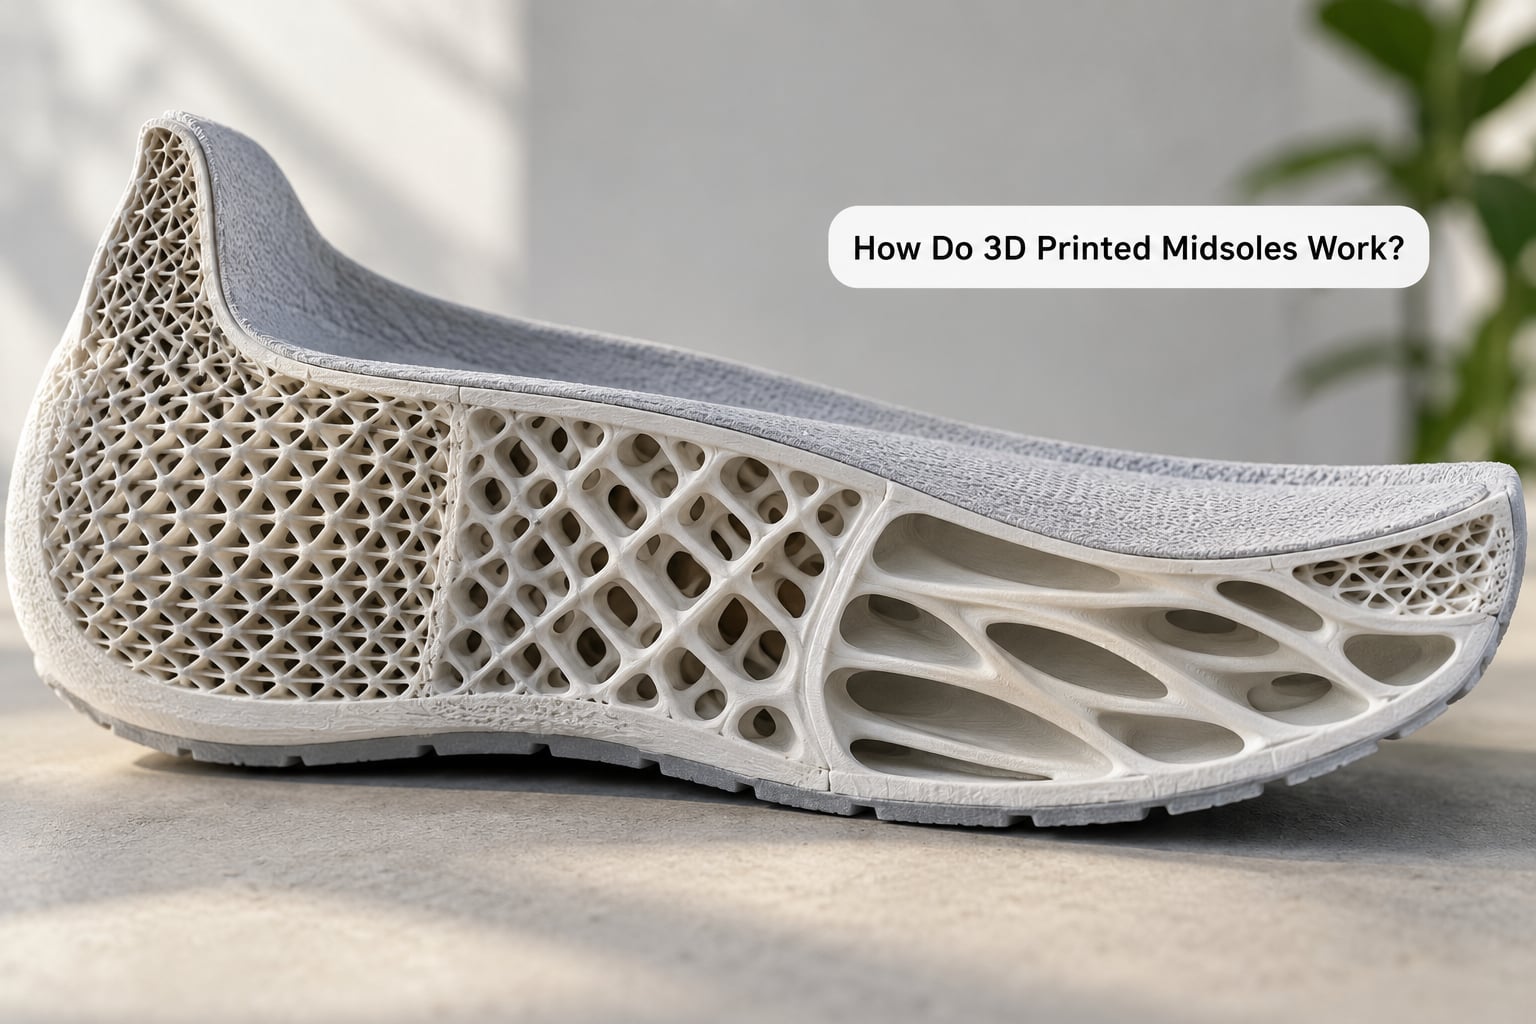
A printed midsole works because a lattice flexes instead of compressing. A molded foam block absorbs impact by crushing its cells, which is lossy and permanent. A lattice absorbs impact by bending its struts: the struts deform, then push most of that energy back into the foot as forward motion at toe-off.
Struts, cells and zoned density
Each strut carries load in bending. Thicker struts are stiffer, more angled struts handle shear better, and the size of the cell changes how the structure feels under a rolling heel-to-toe transition. A designer can make the heel soft for impact, the midfoot firm for stability and the forefoot responsive for toe-off, all in one print with one material.
The open channels between cells do something closed foam cannot: they move air. A printed midsole is breathable by geometry rather than by perforation, which is why wearers of lattice shoes report that they dry faster than foam shoes. It is also why debris collects in the channels, and cleaning them is the most common complaint among owners.
Research on negative Poisson’s ratio lattices pushes this further. A structure that widens when you pull it can be tuned for different stiffness in different directions, which is difficult with foam. Energy absorption studies in the academic literature keep coming back to the same conclusion: the geometry does the work, not just the material.
What Are the Benefits of 3D Printed Shoes?
The benefits fall into three groups: what the design can do, what the factory can do, and what the customer can do.
- Zoned cushioning. Variable density and stiffness inside a single midsole, tuned by zone rather than by a separate part.
- Ventilation without holes. Open cells move air through the structure itself, so there is no need to punch perforations into a foam block.
- No physical molds. Change the model and the next part is correct. The Adidas and Carbon program produced hundreds of thousands of midsoles without needing a mold, which is the number that makes the economics work.
- Local production. A small machine can serve a hospital, a clinic or a running club without a shipping container of inventory.
- Genuine custom fit. With foot scan data, the lattice can be adapted per person, which is the strongest argument in medical and orthotic applications.
- Fast iteration. A prototype midsole no longer waits on a steel mold. Teams test a geometry in days instead of months.
- Material efficiency. A lattice carries load while using far less polymer than a solid block, because the material sits where the forces actually go.
The common thread is that digital geometry removes the constraint that shaped the industry for decades: one mold, one size run, one cushioning feel.
What Are the Limitations and Trade-Offs?
Additive manufacturing is not automatically better, and the honest limitations are worth stating plainly.
Durability and failure modes
Foam fails by compression set: it flattens gradually across the whole surface. A lattice fails differently, as isolated strut fatigue. One strut cracks under repeated stress, then another, and the failure is local and often invisible until the cells above start to crush. Long-term published durability data for printed midsoles is thinner than the marketing suggests, and the absence of data is not the same as evidence of durability.
Production and material constraints
- Throughput. Printing is sequential. A powder bed cycle for a midsole runs many hours, which is why brands print close to a demand curve rather than to a forecast.
- Machine cost and setup. Industrial powder beds are expensive, and they need powder handling, depowdering and trained operators.
- Support removal on other processes. FDM and resin printing a lattice means printing, then breaking off, a lot of support from soft flexible geometry.
- Surface finish. Powder bed parts are grainy by nature. Sandblasting and coating improve this and add cost.
- Repairability. A failed lattice zone is usually not repairable. The whole midsole is replaced.
- Recycling claims. Many printed midsoles use bio-based or partially recycled content and are marketed as recyclable, but few have a real end-of-life loop. Check what the brand actually collects and what happens to the returned pair.
- Fit tolerance. Each part varies slightly. A production line that ignores that will eventually ship a midsole that does not match the upper it is bonded to.
None of this makes printing a bad route. It makes it a route that fits low-to-medium volumes, complex geometry and highly customized products better than it fits a cheap mass-market sneaker.
How Do You Design a 3D Printed Midsole?
This is the sequence that works for designers and engineers, whether you are printing one pair on a benchtop machine or a batch on a powder bed.
1. Gather the load data
Start from foot scans or a scan of an existing shoe, plus the target use. A recovery slide, a race-day racing flat and a shoe for standing all day see completely different loads, and the lattice should reflect that rather than one compromise shape.
2. Set the outer form first
Match the midsole volume to the upper and outsole you already have. Heel-to-toe drop, stack height and sidewall shape are decided before any lattice geometry, and changing them later invalidates the whole model.
3. Map load paths
Identify the heel strike zone, the midfoot transition and the forefoot push-off. Run a first simulation with a uniform lattice to find where the load concentrates, then zone the density to those areas.
4. Choose the lattice family
Tune strut thickness and angle per zone, not globally. Keep walls thick enough for the printing process you will use: powder bed tolerates thinner walls than FDM.
5. Print test coupons
Do not print the full shoe first. Print small blocks of each zone at the material and settings you plan to use, then compress them. Coupons take an afternoon and they tell you where the design is wrong.
6. Iterate, then fatigue test
Once the static response is right, run repeated compression cycles past the expected life. Lattice fatigue does not show up in a single load test, so the cycling matters more than the peak number.
Sneaker restoration hobbyists on r/SneakerRestoration run this process in reverse: they scan an existing shoe, reproduce a missing midsole and sometimes add a carbon fiber shank to a model that never had one. It is a slow way to get a part, but it works.
How Does 3D Printed Footwear Compare With Traditional Manufacturing?
Compare the two midsole routes directly: molded foam (EVA or polyurethane, injection or compression molded) against a printed lattice.
| Criterion | Molded foam midsole | 3D printed midsole |
|---|---|---|
| Cushioning behavior | Progressive crush of cells, some loss | Strut flex with high return |
| Zoned tuning | Limited within one material | Density and angle vary by zone |
| Breathability | Depends on perforation | Open cells move air by design |
| Tooling | Steel mold per size and design | No mold; a digital file |
| Lead time for a new design | Months | Days for a first prototype |
| Unit cost at high volume | Low | Higher |
| Unit cost at low volume | Poor, mold dominates | Reasonable |
| Design complexity | Limited by molding and demolding | Nearly unrestricted |
| Consistency between parts | Very high | Good, but each part varies |
| Failure pattern | Uniform compression set | Isolated strut fatigue |
| Custom fit per person | Not practical | Practical with scan data |
| Repair | Not repairable | Not repairable |
Where molding still wins
High volume, simple shape, low price, tight repeatability. A molded EVA midsole in a commodity sneaker is hard to beat on cost and consistency, and most printed shoes on sale today are not trying to.
Where printing wins
Complicated geometry, zoned cushioning, small batches, rapid design iteration and genuinely custom fit. Slides and recovery footwear sit here, which is why printed sandals appeared so quickly.
Who Is Using 3D Printed Footwear?
The user base is broader than the sneaker headlines suggest.
- Athletic brands use printed midsoles for tuned cushioning and to keep model refreshes cheap, since a geometry change needs no new mold.
- Footwear startups build whole products on printed soles, and slides and sandals became the common entry point because the geometry is forgiving and the design brief is simple.
- Medical and orthotic providers print footbeds and orthoses from pressure data, including designs aimed at reducing plantar pressure in diabetic feet. This is where customization pays for itself, and where clinical outcomes matter more than energy return.
- Makers and restoration hobbyists print custom footbeds, reproduction midsoles and one-off prototypes, usually on FDM with TPU.
- Manufacturers use the technology for jigs, lasts and fixtures long before they commit to printed shoes in production.
The pattern across all of them: printing is used first where volume is low and geometry is hard, and only later where volume is high and the shape is simple.
Frequently Asked Questions
Can you use a 3D printer to make shoes?
Yes, mostly the midsole and footbed. A single-piece printable shoe is close to impossible for most people, because the sole, shank and upper need different stiffnesses. Real printed shoes combine a printed lattice midsole with a conventional outsole and upper, bonded together. At home you will need TPU filament on a direct drive printer with an all-metal hotend.
Are 3D printed shoes comfortable?
Most wearers describe a break-in period. The first impression is often a midsole that feels softer, less stiff or slightly odd underfoot compared with foam, because lattice struts flex rather than compress. After a few wears the structure settles into a consistent response. Fit is still fit, so start with a normal size and check the width.
Do 3D printed shoes last?
Durability is the least settled question in this category. Molded foam wears by flattening evenly. A printed lattice wears by strut fatigue, which is local and often invisible until it advances. Long-term published data is thinner than brand marketing suggests. If your use involves heavy daily mileage, test a pair and keep a conventional foam shoe as a backup.
What is the best material for a 3D printed midsole?
TPU is the usual answer. It is flexible, tough, springs back quickly and prints on both hobby filament machines and industrial powder bed systems. TPE is softer and better for slides and sandals. Nylon powder is stiffer and suits structural parts and shanks. Avoid PLA for anything worn against a warm foot, because it creeps and deforms.
What printing technology is used for 3D printed midsoles?
Production midsoles come from powder bed processes: SLS fuses polymer powder with a laser, while MJF and Carbon’s DLS jet binder or liquid onto the powder and heat fuse it. Powder bed methods need no support structures, which is why they suit complex lattices. FDM and resin printing are used for prototypes, footbeds and hobby work.
Are 3D printed shoes better for the environment?
It depends on the whole life of the shoe. Printed parts can use less material than a solid block and some brands use bio-based or partly recycled feedstock. But few brands operate a real collection and recycling loop, and industrial powder beds use energy. Treat the sustainability claim as unproven unless the brand names its material source and end-of-life route.
Conclusion: Start With the Midsole Design
The decision points are simpler than they look. Decide the intended use first, because standing all day and racing are not the same load case. Then pick the material that suits your process, get real fit data rather than a generic last, and treat the lattice as the actual design work. Print coupons, test them, then print the shoe.
Everything else, from the print process to the production volume, follows from those four choices.
Updated for October 2026.