How to prevent heat creep in a hotend comes down to keeping a sharp line between the hot melt zone and the cold zone above it. In practice that means verifying airflow, insulating the heater block, cutting filament drag and dialing back temperature before you change any hardware. Most printers that jam 40 minutes into an otherwise clean print get fixed in a single evening.
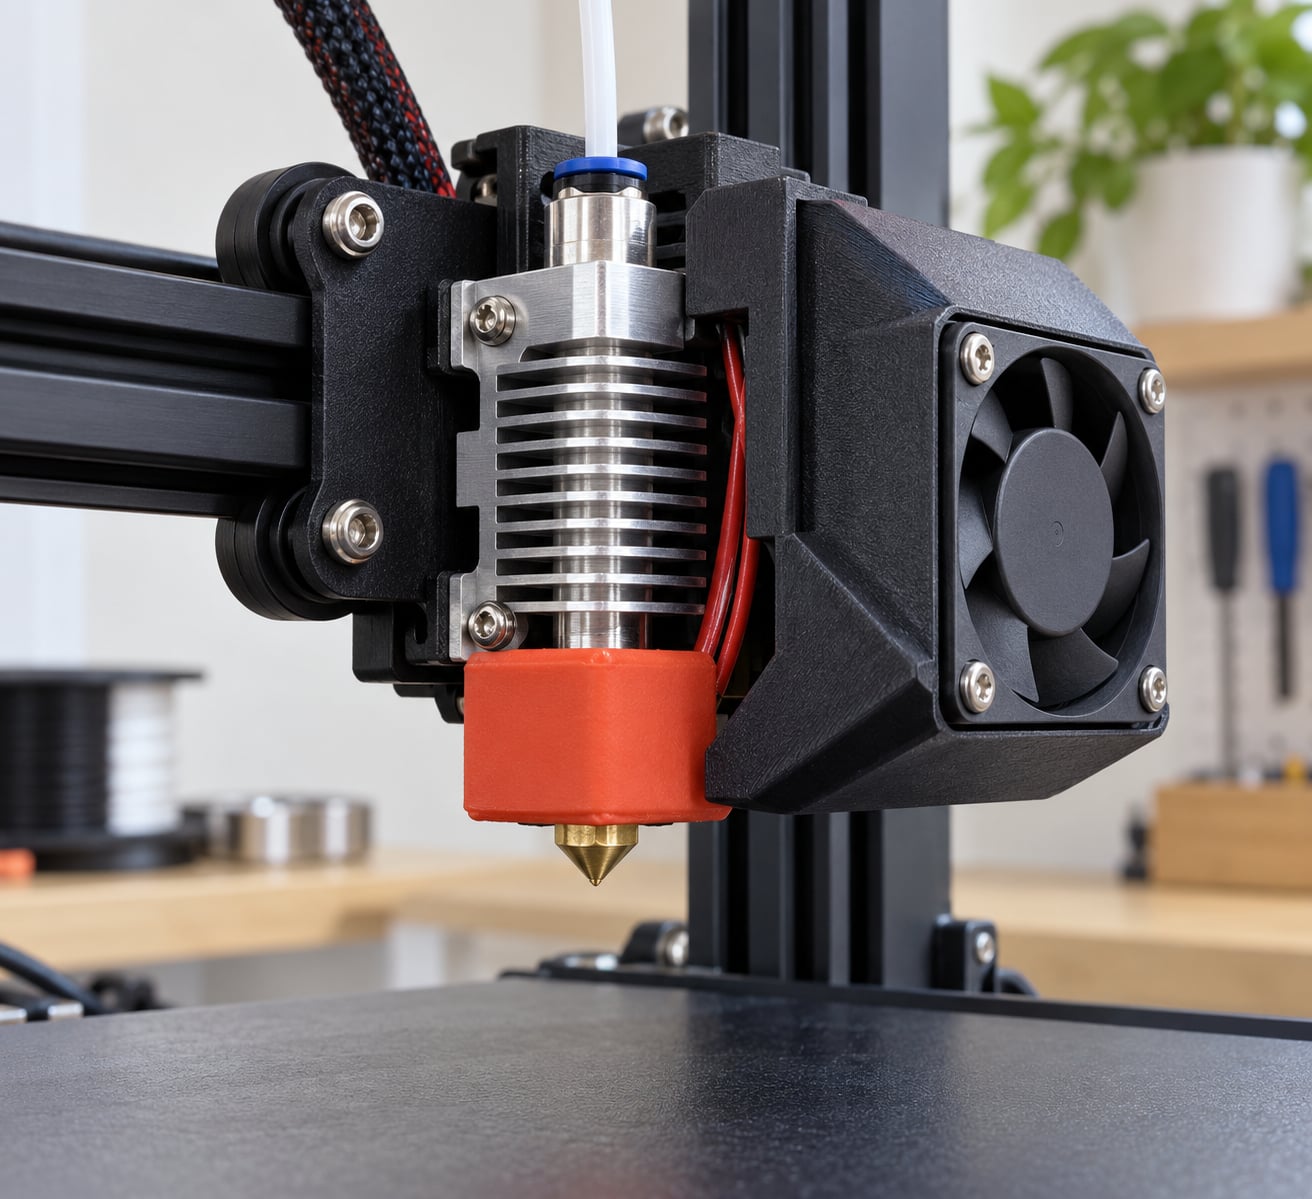
Heat creep happens when heat travels up past the heat break and softens filament where it should still be solid. That soft section gets dragged, swells and eventually seizes against the inside of the heat break or the PTFE tube above it. The filament stops being pushed, the extruder starts clicking and the print dies mid-layer.
The pattern is what gives it away. The print starts clean, the first several layers look fine, and then somewhere between 30 and 90 minutes in, extrusion stops. Cold pulls run by owners on the Prusa forum and r/ender3 repeatedly show a swollen plug sitting above the heat block rather than at the nozzle tip, which points at cold-side heat rather than a blockage at the tip.
This guide walks the diagnosis in a fixed order. Work top to bottom and stop when the problem disappears, because most machines that jam repeatedly have two contributing causes, not one.
Table of Contents
- 1What You Need
- 2Tools
- 3Printer access
- 4Replacement parts worth having on hand
- 5Safety
- 6Step-by-Step: How to Prevent Heat Creep in a Hotend
- 7Step 1: Confirm That Heat Creep Is the Actual Problem
- 8Step 2: Check Part-Cooling Airflow to Prevent Heat Creep
- 9Step 3: Inspect the Heater Block and Nozzle Area
- 10Step 4: Reduce Heat Around the Hotend
- 11Step 5: Check Filament Tension and Path
- 12Step 6: Verify Temperature and Slicer Settings
- 13Step 7: Retest and Record the Fix
- 14Common Mistakes
- 15Frequently Asked Questions
- 16Why does my hotend keep clogging?
- 17Is 230 degrees too hot for PLA?
- 18Do I need a silicone sock on every printer?
- 19How do I tell heat creep apart from a partial nozzle clog?
- 20Does heat creep still happen in an enclosed printer?
- 21Do I need a bi-metal heat break, or will a silicone sock be enough?
- 22Conclusion
What You Need
You can do the whole procedure with a small hand kit and about an hour. None of it requires opening a computer case or touching mains wiring.
Tools
- A small set of hex drivers, usually 2.0 mm, 2.5 mm and 3.0 mm, matching whatever your hotend uses
- Needle-nose pliers for the Bowden coupler and zip ties
- A soft brush and cotton swabs for dust and old paste
- A brass wire brush for nozzle cleaning, kept away from hardened steel nozzles
- High-temperature thermal paste for the heat break threads
- An infrared thermometer, useful but optional
- Spare filament in the same material, plus a spool of nylon cleaning filament
If your printer runs a Bowden extruder, add a spare PTFE-lined tube and a couple of couplers. Bowden tubes are cheap and a chewed or bulged one is a common hidden cause.
Printer access
You need to be able to reach the fan shroud, the heat break and the filament entry point with the machine cold. Clear a bench space roughly a metre deep so you can see the whole toolhead while it is off the carriage. Side panels off is fine on a frame printer, but check your printer’s manual first, and support the frame if removing a panel changes how it sits.
Replacement parts worth having on hand
- A silicone sock that fits your heater block
- A 40 x 40 x 20 mm axial fan of the correct voltage and current rating
- PTFE-lined Bowden tube and couplers if applicable
- A spare heat break of the same type you already have
Match fan voltage to what the board expects. A 24 V fan on a 24 V board and a 24 V fan on a board that expects 12 V are not the same purchase.
Safety
Unplug the machine before any hands-on work. A nozzle at 240 degrees will melt skin in seconds, and a silicone sock and heat break stay hot long after the readout drops. Let the toolhead sit for 20 to 30 minutes after a print before you touch the heater block.
One more thing worth knowing: molten plastic and nylon cleaning filaments give off fumes. Run those cold pulls near an open window or with a fan pointed at the printer, not in a sealed room where you sit and read.
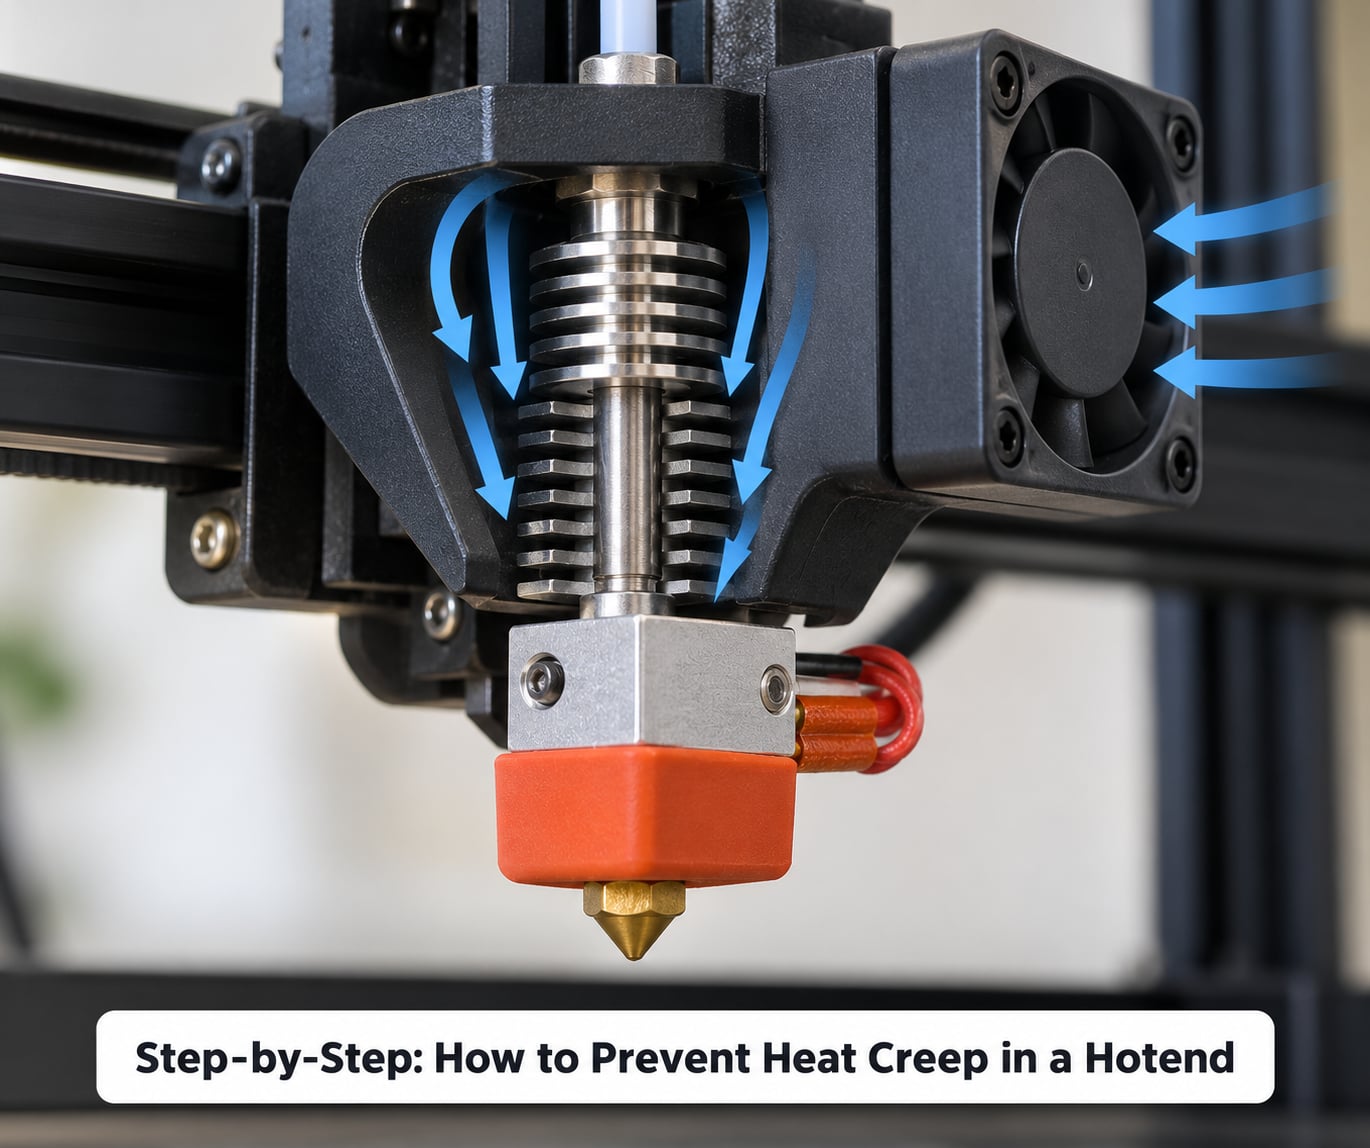
Step-by-Step: How to Prevent Heat Creep in a Hotend
Step 1: Confirm That Heat Creep Is the Actual Problem
Watch a failure instead of guessing at it. Note the layer time when extrusion stopped, and pull the filament out of the extruder before it cools so nothing breaks inside the tube.
Heat creep has three tells. The jam appears late in a print rather than at the start. It happens on one material and not another, usually PETG failing while PLA is fine. And the filament comes out with a soft, bulged section just above the heat block, often with a hard flat edge where it packed against the throat.
Compare that with the alternatives. A partial nozzle clog shows up as intermittent under-extrusion from layer one, reduced width, or blobs and gaps at the start of moves, and a cold pull finds a chunk of material right at the nozzle tip. Layer shifts look like a clean lateral offset in the geometry, usually with a repeat pattern. Stringing is a separate problem entirely and it never stops extrusion.
A worn PTFE tube or a scratched filament path can mimic heat creep because the same drag on the cold side jams the hot side. Keep that possibility in mind for the next steps.
A quick cold pull tells you which of these you have. Heat the nozzle to about 240 degrees, push in the nylon cleaning filament with the extruder, then pull it back while it is still soft. Melted plastic bulging outward in a collar above the heat block means cold-side heat. A small lump at the very tip means a clog at the nozzle.
Step 2: Check Part-Cooling Airflow to Prevent Heat Creep
Part cooling is the single most effective lever you have, and the cheapest one to check. Hold a strip of tissue or a thin piece of filament near the nozzle while the fan runs. If it barely moves, the fan is not delivering air where you think it is.
Look for three failures. The fan may be dead, turning backwards, or clogged with dust. The duct may be misaligned so air goes straight down past the nozzle instead of across the bead. Or the nozzle may be pointing at the part when you wanted it angled across the layer.
Duct position matters more than people expect. Air blown straight down into the nozzle keeps the heat break warm and gives you a blob. A nozzle angled away from the freshly laid bead sends cooling sideways over the plastic, which is the job. Users who swapped in an angled or C-shaped shroud on a Prusa MK3S reported that 0.05 mm layer-height jams that had run 90 minutes just stopped happening.
Fan speed matters as well. Running the part cooling fan at 100 percent all the time gives more margin on the cold side but can warp a short first layer on some printers. Slicers usually handle this, and you can also give the first layer 0 percent fan and full speed afterwards as a middle ground.
Step 3: Inspect the Heater Block and Nozzle Area
With the machine cold and unplugged, look at how heat leaves the hot side. A bare heater block radiates a surprising amount of energy into the surrounding air, and all of it eventually arrives at the heat break.
A silicone sock is the cheapest hardware fix in this whole guide and it carries the highest consensus across printing forums. It insulates the heater block and nozzle, so the same heater wattage keeps the melt zone hot while far less heat reaches the cold side. Fit the sock over the block before the nozzle, keep the thermistor and heater cartridge fully seated against metal, and check that it is not cracked or missing a chunk.
Next, the heat break itself. Unscrew the throat assembly and inspect the threads. If you see white paste residue crusted around the base of the heat break or on the cold side, that is the most commonly missed item in this entire procedure. Old paste becomes an insulator and pushes heat upward instead of conducting it into the heat sink.
Clean both mating surfaces with a cotton swab, apply a thin and even layer of fresh high-temperature paste, and screw the assembly down hand tight plus a small turn. Overtightening cracks the heat break, and a cracked heat break conducts badly in exactly the wrong direction. One owner on r/3Dprinting traced months of creeping jams to this, and fresh paste on a year-old printer brought it straight back.
Finally, check the nozzle. A partly blocked nozzle raises chamber pressure, forces extra heat into the block, and can starve the melt zone so the machine raises its temperature to compensate. Clear it with a brass brush while hot, and if the tip looks chewed, pitted or deformed, replace it.
Nozzle material is worth one sentence. Brass conducts heat well and is the sensible choice for PLA and PETG. Hardened steel and ruby are tougher but conduct noticeably less, so they run cooler at the tip and demand more temperature for the same flow. If you print abrasive material on a brass nozzle, expect wear to become a chamber-pressure problem before it becomes a visible hole.
Step 4: Reduce Heat Around the Hotend
The cold side is only cold if there is cool air around it. In an enclosure, the chamber can settle well above room temperature once a heated bed and a running hotend have been at work for an hour, and that is a genuine contributor to heat creep in long prints.
Printers that fail in July and behave all winter are the classic case, and one Cape Town owner described exactly that seasonal pattern. If your machine has a chamber fan or a filter, confirm it is actually running and that the filter has not clogged shut. Position the inlet so it draws from outside the heated zone rather than from the vicinity of the bed.
Check what sits next to the hotend. An over-tight fan mount, a loose cable bundle pressed against the heat sink, or a recirculation duct aimed at the cold side can all raise local temperature. On open-frame printers in a warm room, a simple shield that blocks stray air movement around the toolhead does more than nothing, because stable airflow at speed beats weak airflow that reverses.
Bed temperature contributes more indirectly than most guides admit. A hotter bed keeps the whole machine warmer, which warms the heat sink, which slows the cold side. If your machine is in an enclosure and you can drop the bed a few degrees without the part releasing, try it and watch what happens over a full print.
Step 5: Check Filament Tension and Path
Every gram of drag you remove from the cold side makes the melt zone’s job easier. Start at the extruder: the tension spring should be firm enough to hold a short bend in the filament but loose enough that the gears can turn without stalling. Too tight and the feeder compresses and swells the filament right where you do not want it compressed.
On a Bowden setup, check the tube for kinks, tight bends and a flat spot where it was pushed against a corner during assembly. Replace any bulged section. Users running long Bowden paths report that shortening the filament route and cutting retraction down to around 0.5 mm cleared chronic PETG jams on all-metal hotends.
Run the extruder cold and by hand from the entry point toward the extruder. If you feel a gritty catch anywhere in the path, find the burr with a bright light. Dry filament shreds and its rough edges cause exactly this kind of drag. A dryer or a dry box costs less filament than a single failed eight-hour print.
Filament diameter is the other half of this. Undersized filament lets the gears slip, oversized filament causes real compression in the melt zone, and both force the machine to run hotter than it should. Measure a few points on a fresh cut and keep anything outside your printer’s stated tolerance out of the machine.
Step 6: Verify Temperature and Slicer Settings
Now that the hardware and the filament path are honest, check what the slicer is asking for. Open your profile and confirm the nozzle temperature, then watch the machine reach it. A machine that sits 10 degrees below target while printing will melt less and drag more.
If the reading looks wrong, compare the commanded temperature against a separate measurement. A loose thermistor or a failing heater cartridge shows up as a slow, inaccurate climb rather than a clean ramp. Filament makers also publish their own temperature ranges, and those beat a copied profile from someone else’s machine.
Lowering temperature helps, but only slightly. Dropping a few degrees reduces the gradient driving heat upward, and going well below the maker’s recommended range mostly buys you underextrusion and layer adhesion problems instead.
Retraction is the setting people miss most. On direct drive, start around 0.5 to 1.0 mm at 25 to 45 mm/s. On a Bowden setup, you generally need more, often 4 to 6 mm. All-metal hotends with a long filament path usually need the lower end, and PETG clogs more readily than PLA, so lower retraction and lower speed are the safe direction when a PETG print keeps stalling.
Print speed affects the same gradient indirectly. A very slow print gives hot material more time to sit in the heat break, so if a machine only jams on fine, slow prints, raising the speed a little is a legitimate fix. Keep it within the volumetric flow limit of your melt zone; exceeding it forces the nozzle temperature up to compensate, which pushes more heat into the cold side.
If you changed any of this hardware, re-run your PID tune before the next long print. A silicone sock changes how fast the block responds, and a block with the wrong PID values will overshoot and undershoot, and those swings show up as inconsistent extrusion before they show up as a jam.
One note on names: menu paths and limits differ between printers, firmware and slicer packages, so check what yours actually calls the fan speed, retraction distance and PID options before assuming a setting is missing.
Step 7: Retest and Record the Fix
Print a short test that includes a cold start. A small calibration piece or a section of the model you were printing when it failed will reproduce the problem in under an hour instead of eight.
If it holds, print the failing model again, ideally past the time it previously jammed. Compare the nozzle temperature graph and the cooling fan curve from before and after, and write down what you changed.
That note matters more than it looks like it should. Heat creep usually comes back eventually, and a written record of the fix is what tells you the difference between a cooling problem, a paste problem and a filament problem the next time.
Common Mistakes
Chasing stringing instead of airflow. Stringing is temperature and retraction. A cold pull showing swelling above the heat block is a cooling problem, and no amount of retraction tuning fixes it.
Dropping temperature too far. Going well under the filament maker’s range underextrudes and weakens layer bonding, then leaves you with a rougher part and the same jam. Trim in small steps instead.
Blocking the part cooling fan. People panic when a first layer lifts and reduce fan speed, or run the fan off for the first layers on a printer with no enclosure. That removes the exact margin you were trying to protect.
Overtightening the heat break. Cross-threading or cracking the thin tube is easy under pressure and hard to see. Hand tight plus a fraction of a turn is plenty with proper paste.
Trusting an unreliable temperature reading. If the nozzle does not reach the set temperature on time, every other adjustment is guesswork. Check the thermistor and heater cartridge first.
Skipping the paste and the sock together. Both are cheap and both work by the same mechanism, so if you only do one, do the sock first.
Two quick tips. Change thermal paste every 12 to 18 months on a printer you use often, and always after opening the hotend. And if your setup is a Bowden, shortening the filament path is usually a bigger win than any slicer setting you can change.
Frequently Asked Questions
Why does my hotend keep clogging?
A hotend that clogs repeatedly usually has heat creep rather than a nozzle fault. Heat from the melt zone travels up the heat break and softens filament where it should stay solid, and that soft section packs against the throat. Cold pulls showing a swollen plug above the heat block confirm it. Check part cooling airflow, the thermal paste on the heat break threads, and the silicone sock before touching anything else.
Is 230 degrees too hot for PLA?
For most PLA it is unnecessarily high, but it is not automatically the cause of your jams. PLA typically prints between 190 and 220 degrees, and staying inside the filament maker’s range gives you a bigger thermal gradient to fight. If your printer handles 230 degrees fine and PLA prints come out clean, drop toward 200 degrees as a test, and treat airflow and insulation as the main fixes rather than temperature alone.
Do I need a silicone sock on every printer?
A silicone sock is the highest-consensus fix across printing forums and it costs very little. It insulates the heater block so less heat reaches the cold side, which is helpful on almost any FDM printer. One caution: it changes how quickly the block responds to temperature changes, so re-run your PID tune after fitting one. Without that retune the block overshoots and undershoots.
How do I tell heat creep apart from a partial nozzle clog?
Run a cold pull at about 240 degrees with nylon cleaning filament and look at what comes back. A swollen bulge or melted collar above the heat block means heat is reaching the cold side. A small lump at the very tip means the blockage is at the nozzle, usually debris from a previous print. Under-extrusion from the first layer, with blobs and gaps at the start of moves, also points at the nozzle rather than the cold side.
Does heat creep still happen in an enclosed printer?
Yes. An enclosure keeps draughts off the print and helps with warp, but the chamber also warms up over an hour or two as the bed and hotend run. Warm air means a warmer heat sink and a weaker cold side, which is why enclosed printers can jam on long prints and behave on short ones. Confirm the chamber fan or filter is running, and try a small bed temperature reduction if prints fail late.
Do I need a bi-metal heat break, or will a silicone sock be enough?
For most printers the silicone sock and fresh thermal paste on the heat break threads are enough, and they cost a fraction of a heat break change. A bi-metal heat break, with a titanium alloy upper section and a copper collar, cuts heat conduction upward sharply and is worth it for long prints, low layer heights or a hot room. Experienced users with chronic jams report it as the change that finally solved them.
Conclusion
If you want to stop heat creep, work in this order: confirm the cold pull shows swelling above the heat block, then check part cooling airflow, inspect the heater block and the thermal paste on the heat break threads, look at chamber temperature and nearby heat sources, and finally clear up filament drag and tune retraction.
Most machines that jam repeatedly have two contributing causes, so expect to make a second change after the first one helps. Fit a silicone sock, retune your PID, and write down what you changed so the next occurrence takes minutes instead of a weekend.