An all metal hotend upgrade explained in one line: you replace the PTFE-lined filament path with metal, mainly a stainless steel heat break, so filament stays solid until it reaches the heater block. That raises your usable nozzle temperature ceiling, opens up nylon and polycarbonate, and lets you run shorter retraction settings. The catch is heat creep, which you have to actively cool against.
Most people who look into this upgrade are running an older printer, an Ender 3 or CR-10 style machine, that jams on PETG or simply will not hold temperature. This guide walks through what actually changes inside the hotend, how to check whether your printer can take the upgrade, how to install and tune it, and what to fix when things go sideways.
Table of Contents
- 1All Metal Hotend Upgrade Explained: Core Differences
- 2What Is an All-Metal Hotend?
- 3How the All-Metal Melt Zone Works
- 4What Materials Can You Print After the Upgrade?
- 5Is Your FDM Printer Compatible With an All-Metal Upgrade?
- 6What Benefits and Tradeoffs Should You Expect?
- 7How Is an All-Metal Hotend Upgrade Installed?
- 8How Do You Calibrate and Tune the New Hotend?
- 9Why Does an All-Metal Hotend Make High-Temperature Printing Difficult?
- 10What Safety Precautions Apply During Installation and Testing?
- 11How Do You Maintain and Troubleshoot the Upgrade?
- 12Frequently Asked Questions
- 13Does an all-metal hotend let any FDM printer print PEEK?
- 14Can I convert a stock printer to an all-metal hotend?
- 15Do I need firmware or slicer changes after installation?
- 16What temperature should I use to test the new hotend?
- 17Why does my printer leak or ooze after a hotend upgrade?
- 18Is a direct-drive conversion necessary for high-temperature materials?
- 19Conclusion: Is the Upgrade Worth It?
All Metal Hotend Upgrade Explained: Core Differences
The upgrade does one thing well: it moves the point where filament softens out of a polymer tube and into metal. Everything else, the gains and the headaches, follows from that single change.
What Is an All-Metal Hotend?
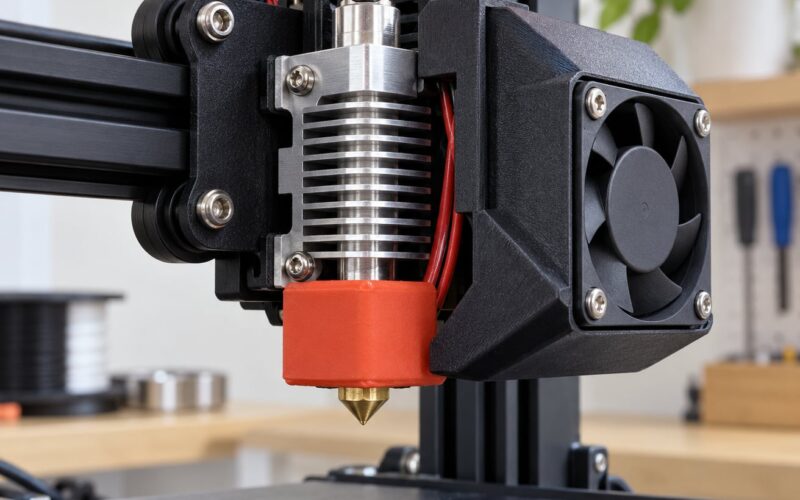
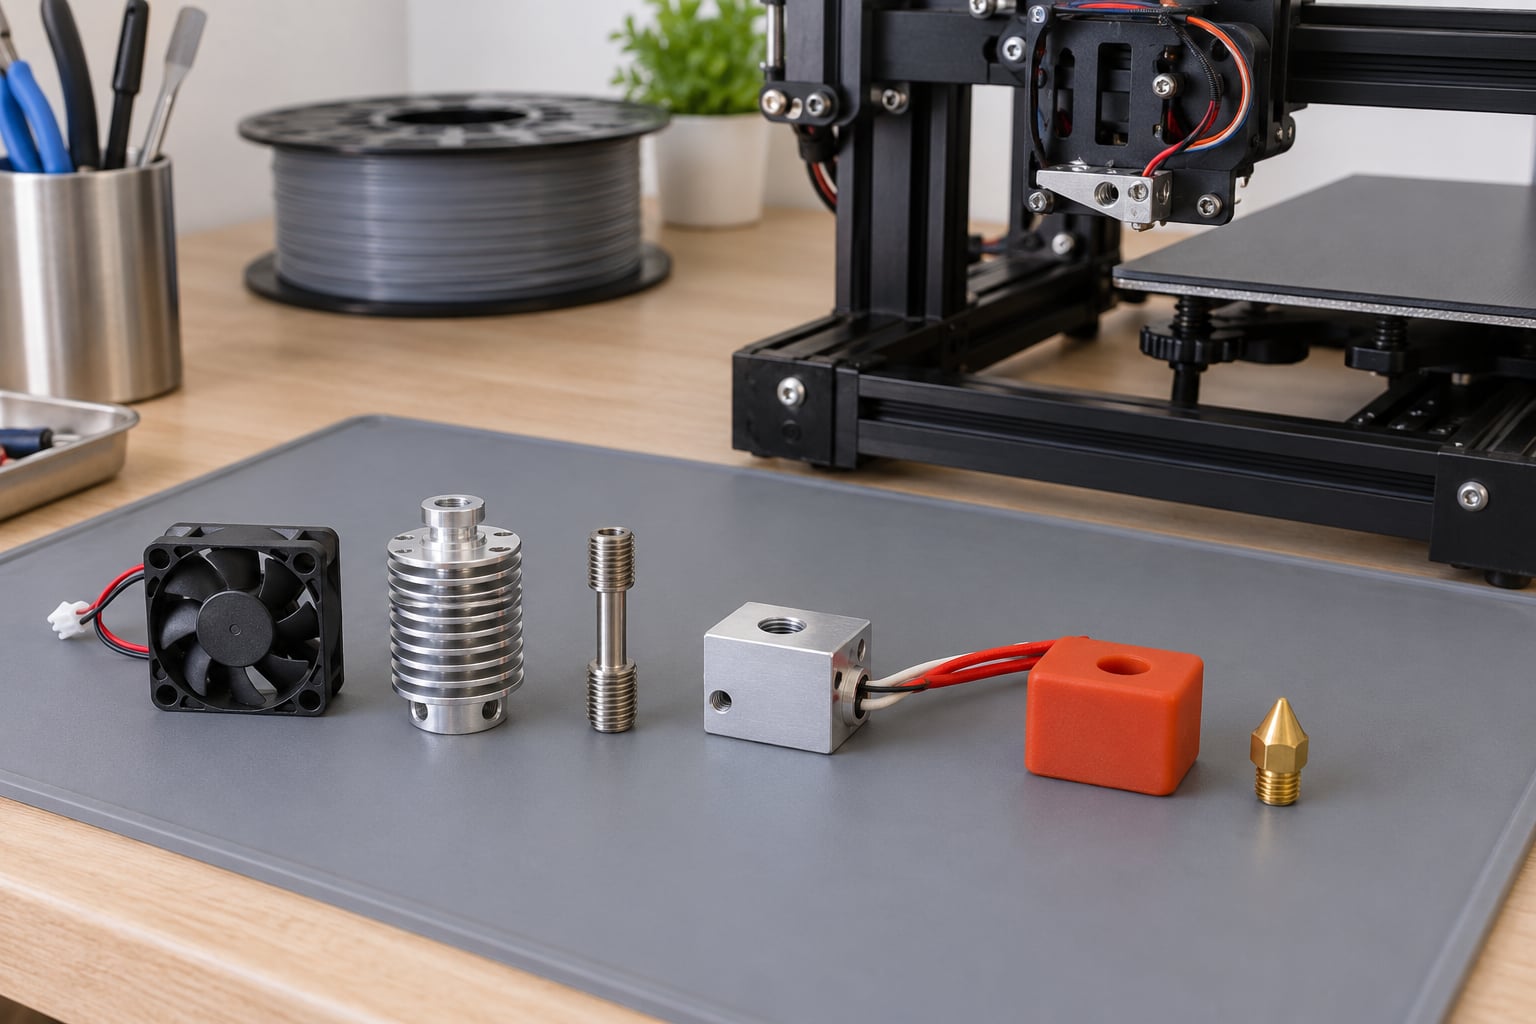
An all-metal hotend is an extruder assembly with no PTFE anywhere in the melt zone. Instead of a plastic liner, it uses a metal heat break, usually stainless steel, between the cold filament path and the heater block. Because metal conducts heat far more slowly than PTFE, filament arrives solid, melts in one predictable spot, and the hotend can hold roughly 260 to 300 degrees Celsius without the liner degrading.
That single swap does three things. It raises the temperature ceiling, because PTFE starts to soften and off-gas around 240 to 250 degrees Celsius. It fixes the melt zone location, because the transition from solid to molten no longer creeps along a plastic tube during long or fast prints. And it frees up your slicer, because the shorter, stiffer melt zone needs far less retraction than a Bowden tube full of hot PTFE.
How the All-Metal Melt Zone Works
The heat break is doing the hard work. Filament passes through it in solid form, meets the heater block, melts, and comes out the nozzle. Heat tries to travel upward the whole time, and a stainless steel tube conducts roughly a hundred times less heat than the aluminum it replaced in practice, which is why a good metal hotend keeps the top of the heat break within about 20 degrees Celsius of ambient even while the block sits at 250.
| Feature | PTFE-lined hotend | All-metal hotend |
|---|---|---|
| Filament path material | PTFE liner inside an aluminum heat break | Stainless steel or alloy heat break |
| Practical nozzle ceiling | About 240-250 C before the liner degrades | Typically 260-300 C, limited by the heater and block |
| Melt zone position | Can creep upward during long or fast prints | Fixed by the metal heat break |
| Retraction needed | Often 5-8 mm on Bowden setups | Roughly 0.4-0.8 mm direct drive, 1-3 mm Bowden |
| Main failure mode | PTFE degrades, gases, liner flakes | Heat creep softening filament in the heat break |
| Extra cooling required | Standard heatsink fan | Full fan airflow and often a better duct |
What Materials Can You Print After the Upgrade?
Material capability is the reason most people do this. The hotend is the enabling part, but a material also needs the right nozzle, the right chamber, and the right profile.
| Material | Typical nozzle range | What else it needs |
|---|---|---|
| PLA and PLA Plus | 200-230 C | Nothing extra; works on a stock open-frame machine |
| PETG | 230-250 C | A dry spool and a decent first layer; benefits from an all-metal path |
| ABS and ASA | 240-270 C | An enclosure and some way to handle fumes |
| Nylon and variants | 250-280 C | A hardened steel nozzle, drying, and a sealed chamber |
| Carbon-fiber or glass-fiber filled filament | 240-280 C | A hardened steel or tungsten carbide nozzle to resist abrasion |
| Polycarbonate | 270-300 C | An enclosed heated chamber and a hot-end rated for it |
| PEEK and PEI | 350-450 C and up | A purpose-built industrial machine, not a desktop upgrade |
Read that last row carefully. A metal heat break on a desktop printer does not make it a PEEK machine. Those polymers need a heated chamber, an industrial-grade hotend, and often a sealed nitrogen atmosphere, so if PEEK is your goal you are shopping for a different class of printer entirely.
One more note on fibers. The hotend and the nozzle are separate upgrades. An all-metal path at 280 degrees Celsius printing carbon-fiber nylon with a stock brass nozzle will chew that nozzle out in a few hours, so pair the hotend swap with a hardened steel or tungsten carbide nozzle.
Is Your FDM Printer Compatible With an All-Metal Upgrade?
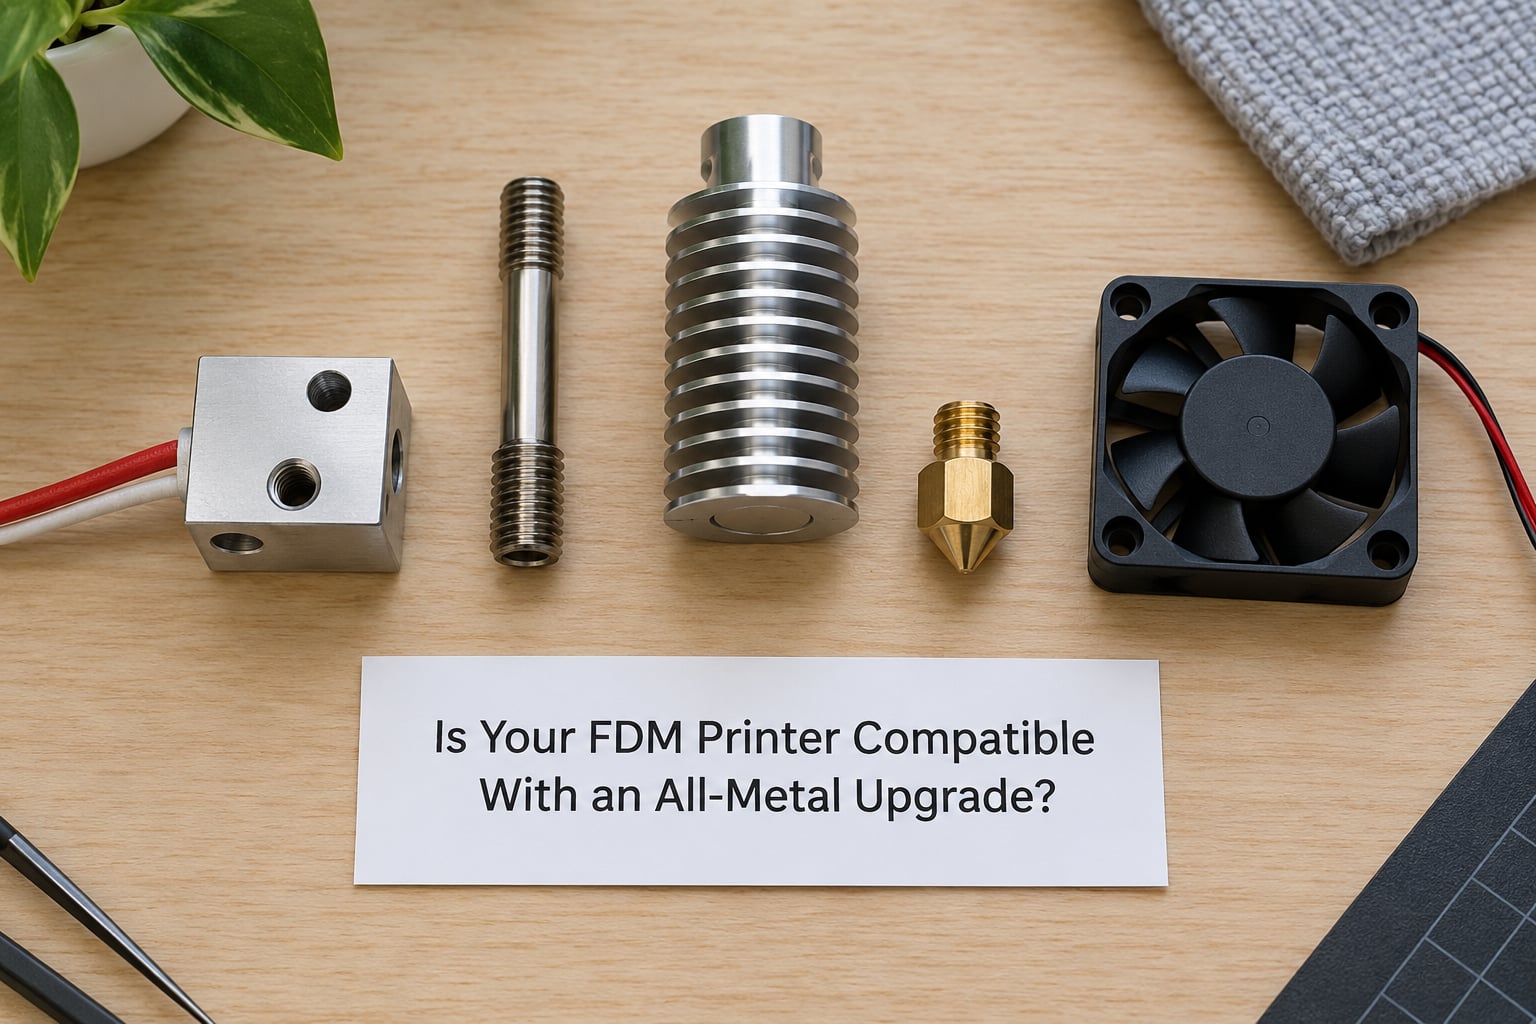
Compatibility is mostly about physical fit, electrical headroom, and firmware limits. Check each of these before you buy anything, because most regret in this upgrade comes from ordering a kit that physically does not bolt on.
- Mount geometry. E3D-style V6 mounts, Creality-style mounts, and Prusa-style mounts have different bolt patterns, fan positions, and throat shapes. Match the exact mount your printer uses.
- Voltage and wattage. A 24 V heater on a 24 V board is fine. A 40 W or 50 W cartridge on a stock low-power board may not reach the temperature you need, or may brown out the rail. Check your board’s heater output and mains supply rating.
- Thermistor type. Most kits ship a 100K NTC thermistor, which matches Ender, CR-10, and Prusa boards. If yours is a different resistance or type, you must set the right thermistor table in firmware or the reported temperature will be badly wrong.
- Firmware temperature cap. Marlin ships with a hotend maximum around 250 to 260 degrees Celsius. Raise it only after the hardware supports it.
- Clearances and the cooling path. The heat sink needs airflow, the fan needs a duct or shroud that seals, and the block needs room for its cable and silicone sock.
- Hotend or complete hotend assembly? A hotend kit gives you the melt zone only, which is right if your mount, fan, and wiring already work. A complete assembly also replaces the fan, duct, wiring, and often the board. If your cooling path is worn or your board is old, buy the complete assembly once.
Also confirm what your printer’s extruder path looks like. A Bowden setup can use an all-metal hotend and still keep PTFE tubing between the extruder and the hotend, but that tube then becomes the limiting factor at high temperatures. A Capricorn-style tube rated for higher temps is a common middle ground that costs less than converting to direct drive, and it still degrades eventually.
What Benefits and Tradeoffs Should You Expect?
Here is the honest version, with the wins and the costs in the same place.
What you gain. Temperature headroom, which unlocks ABS, ASA, nylon, and filled filaments. A fixed melt zone, so long prints at high feed rates stop softening filament in the wrong place. Lower retraction, so you can cut a Bowden value from 6 mm to under 2 mm. Better surface finish on many plastics because flow is steadier. And a shorter, cleaner start and end of print since the melt zone does not dribble during travel moves.
What it costs you. Cooling becomes mandatory rather than optional. You will likely want a silicone sock on the block, a proper fan duct, and a way to confirm airflow at the top of the heat sink. Print quality becomes more sensitive: with a tighter melt zone, block wobble and nozzle height errors show up faster. Ooze can increase slightly at higher temperatures. And the printer is now modified, so a warranty or a resale conversation gets more complicated.
The fair test is whether your current hotend jams. If a healthy PTFE hotend prints PLA and PETG without trouble, this upgrade mostly buys you materials you may never print. If it clogs weekly, the upgrade pays for itself in saved filament alone.
How Is an All-Metal Hotend Upgrade Installed?
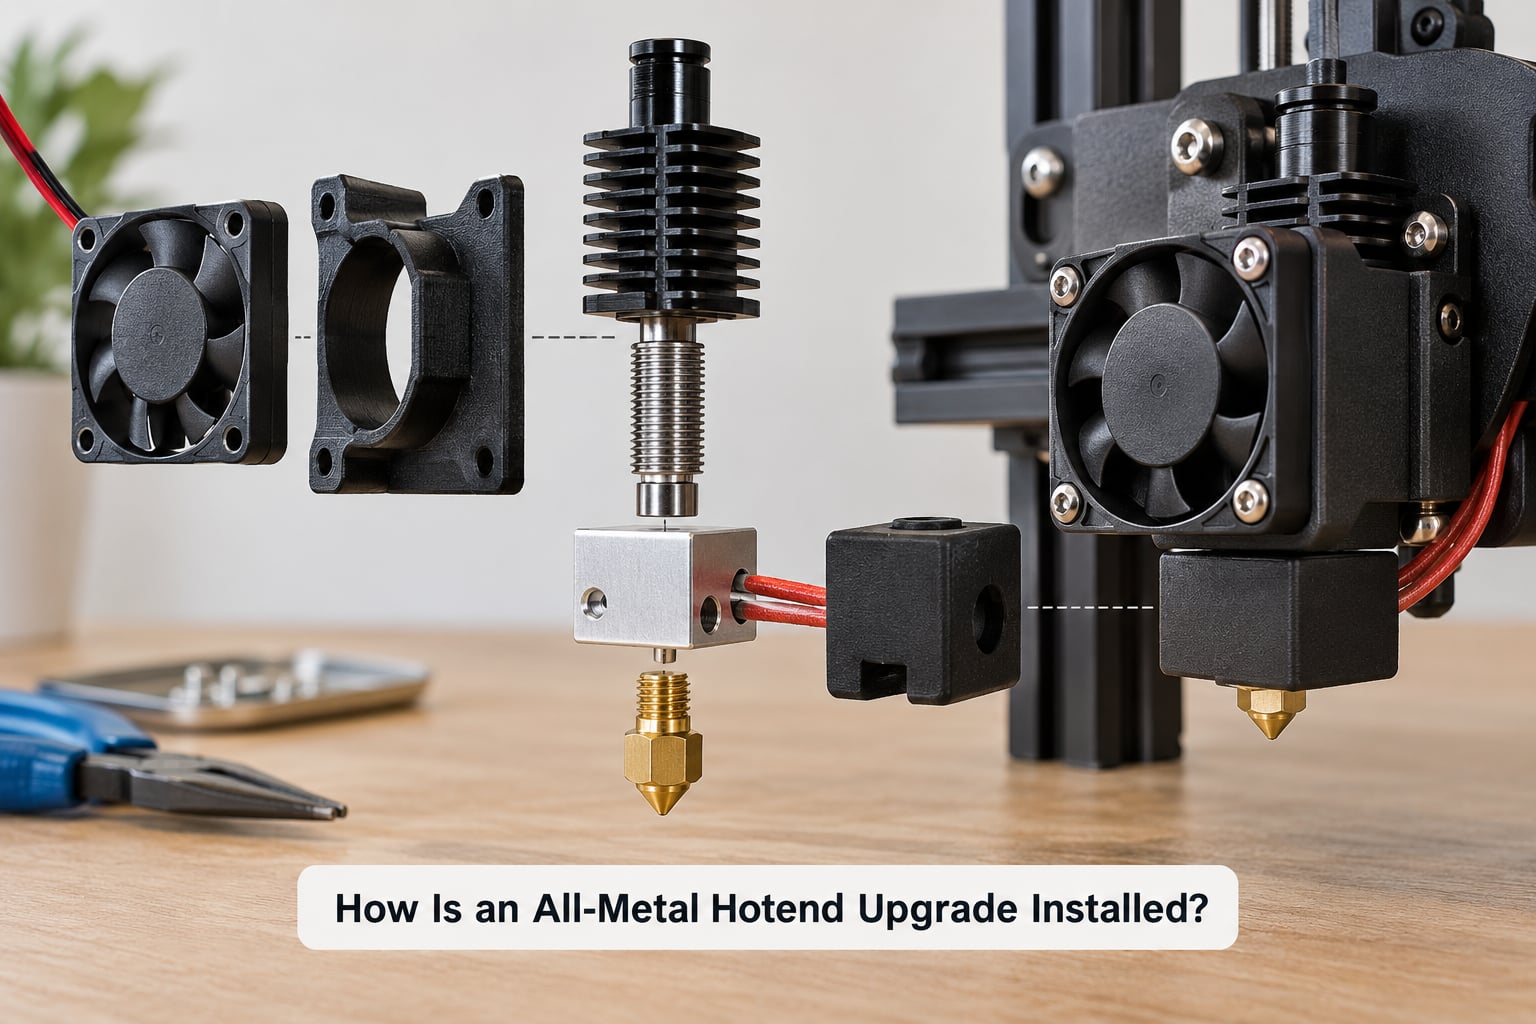
Every printer is a little different, so follow your machine’s manual as the authority and treat the sequence below as the shape of the job. Budget a couple of hours with the printer off a bench, and have a spare 0.4 mm nozzle and a small tray ready, because tiny hardware screws do escape.
- Power down properly. Switch the printer off, then disconnect it at the wall. Do not work on a hotend that is still warm.
- Unmount the old hotend. Remove the fan and duct, loosen the mount screws, and free the wiring from the board. Support the gantry so the weight does not twist it.
- Compare old and new assemblies. Lay the two side by side and check the bolt pattern, the fan position, the heater cartridge routing, and the thermistor connector. This is where a wrong kit shows up.
- Fit the heat sink and fan. Mount the heat break and fins first, then the fan so it blows directly across the top of the fins. A fan that blows past the sink does nothing.
- Install the heat break into the block. Apply thermal paste or a thin silicone pad on the mating face, insert the break evenly, and tighten the block onto it in a cross pattern so the seal sits flat.
- Fit the heater cartridge and thermistor. Seat the cartridge fully against the block, tighten the set screw, and secure the thermistor so it sits close to the melt zone but not touching the heater wire.
- Add the silicone sock and nozzle. The sock goes on before the nozzle so it does not tear. Install the nozzle while the assembly is still off the printer and hand-tighten it against the hot face, then a quarter turn more once hot.
- Mount to the frame and reconnect wiring. Refit the duct so the hotend air path is sealed, plug the hotend heater, fan, and thermistor into their labelled board headers, and route cables so they clear the gantry at every position.
- Update firmware before you heat. Set the correct thermistor type, raise the hotend maximum temperature only as far as your hardware supports, and run an autotune for PID.
- Re-level the bed. Removing the nozzle assembly usually shifts the Z axis, so re-mesh and re-level before printing anything that matters.
- Heat up slowly and watch it. Bring the hotend to a moderate working temperature, feel the top of the heat sink with the back of your fingers, and confirm it stays near ambient while the block reads temperature. That single check catches a failed fan or a mis-seated break immediately.
How Do You Calibrate and Tune the New Hotend?
Tune in this order, because later steps are meaningless if earlier ones are wrong.
- Verify temperature accuracy. Compare the printer’s reported temperature against a separate thermometer or a known-good thermocouple probe. A wrong thermistor table or a poor sensor bed shows up as a consistent offset.
- Confirm heat break cooling. At a normal working temperature the top of the heat sink should feel barely warm. If it is hot to the touch, fix airflow before printing anything.
- Check cool-down behaviour. After heating, the nozzle and block should drop back toward ambient within a reasonable time. Extremely slow cooling points at insulation or a heat creep path.
- Set nozzle height and first layer. Re-run the mesh or manual level, then print a single layer or a small square and check it with a feeler gauge.
- Calibrate extrusion or flow. Run your slicer’s flow or extrusion calibration at a fixed layer height and a slow speed, then encode it into the filament profile.
- Set retraction. Start well below your old value. Around 0.4 to 0.8 mm suits most direct drive setups and roughly 1 to 3 mm suits Bowden, and keeping the total under 2 mm is a rule most experienced users repeat. Then tune it up or down until stringing is minimal and the seam holds.
- Run a temperature tower. Print the material at five or six descending temperatures to find the lowest one that still bonds layer to layer, then use that value as your profile temperature.
- Validate with a real print. Run something representative in size and duration. Short calibration prints hide heat creep that shows up two hours into a long job.
Why Does an All-Metal Hotend Make High-Temperature Printing Difficult?
The same heat that melts your filament also tries to melt it in the wrong place. High-temperature printing is a constant argument between heat going where you want it and heat going where you do not.
- Heat creep. Heat climbs the heat break and softens the solid filament above the melt zone. In an all-metal hotend this happens around 250 degrees Celsius and above, and the filament deforms, grips, and then snaps. On a Bowden setup it can jam the extruder instead. Mitigate with a silicone sock, a well-sealed fan duct, clean cooling fins, and a fan you can confirm is actually running at full voltage.
- Heat soak in the chamber. On an enclosed printer, a 300 degree Celsius hotend sitting inside a 60 degree chamber keeps the whole machine warm. Parts come off the bed soft, so corners lift. Open the front door, lower the chamber temperature, or print an insulating skirt.
- Thermal loop length. A long thin filament path warms slowly, so early layers extrude differently from later ones. Shorten the path with direct drive, accept it, or use an ooze or wipe setting in your slicer.
- Filament softening in the drive gear. Below the hotend, the extruder gear can smear soft filament and eventually grind it away. Keep the extruder away from the block and check that your extruder can handle the material.
- Warping and delamination. High-temperature plastics shrink as they cool. Slow the outer wall, add a brim, and keep the chamber steady.
What Safety Precautions Apply During Installation and Testing?
This is the part where a two-hour upgrade turns into a damaged printer or a trip to urgent care.
- Disconnect mains power before touching anything. Not just off, disconnected. Backlighted screens and heated components stay live longer than people expect.
- Treat the hotend as a burn hazard for a while. A 280 degree Celsius block will cause a real burn and stays hot for a long time after power off. Let it cool to near ambient before you handle it.
- Check voltage and wattage against the manual. A higher-wattage heater needs a board and supply that can deliver it. Follow your printer’s manual and the hotend manufacturer’s documentation rather than guessing, and do not modify mains wiring.
- Use a thermocouple on the nozzle, not your finger, when a real temperature reading matters.
- Ventilate high-temperature materials. ABS, ASA, polycarbonate, and nylon release irritating vapour when melted. Print in a ventilated room or with the door open, and ideally with an exhaust fan or filtration.
- Secure the nozzle before heating. A loose nozzle at high temperature can loosen further and drop into the motion system.
- Never leave the first heat test unattended. Watch the first heat-up, keep a fire extinguisher nearby, and know where the power switch is.
How Do You Maintain and Troubleshoot the Upgrade?
An all-metal hotend needs less maintenance than a PTFE-lined one but more attention to cooling. Wipe the nozzle clean every few prints, keep the cooling fins and fan duct free of dust and plastic, and check that the fan still spins at full speed every month or two.
Work through problems in this order: mechanical first, then cooling, then temperature, then calibration. Swapping slicer settings is the last step, not the first.
| Symptom | Likely cause | What to check |
|---|---|---|
| Filament softens or bends above the melt zone, then jams | Heat creep | Fan spinning at full voltage, duct sealed, fins clean, silicone sock fitted |
| Constant under-extrusion after the upgrade | Retraction too high for the new melt zone | Drop retraction to roughly 0.4-0.8 mm direct drive or 1-3 mm Bowden, then recheck flow |
| Reported temperature is wrong or will not heat | Wrong thermistor type in firmware, or a loose connection | Thermistor table, connector seating, cartridge set screw |
| Heat break gets too hot to touch while the block reads temperature | Fan failure or duct leak | Fan voltage, rotation direction, duct fit |
| Ooze and leaking after printing | Heat creep raising the temperature of the whole melt zone | Same cooling checks; lower the temperature and add a wipe in the slicer |
| Corners lifting and layer separation on hot materials | Warm chamber and thermal contraction | Chamber temperature, brim, outer wall speed, enclosure door closed |
| Nozzle wears out quickly with filled filament | Brass nozzle abrading | Fit a hardened steel or tungsten carbide nozzle |
| Prints stopped sticking after removing the nozzle assembly | Z height shifted during the swap | Re-level the bed and re-home the Z axis |
If a symptom persists after the cooling and mechanical checks, contact your printer manufacturer and the hotend supplier before changing anything else. Printer-specific wiring and firmware differ widely, and guessing there is how people end up with a dead board.
Frequently Asked Questions
Does an all-metal hotend let any FDM printer print PEEK?
No. PEEK and PEI need nozzle temperatures of roughly 350 to 450 degrees Celsius, plus a heated and sealed chamber, an industrial-grade hotend, and controlled cooling. A desktop all-metal upgrade typically tops out near 300 degrees Celsius. It comfortably handles nylon, polycarbonate, ABS, ASA, and filled filaments, which is where most home users stop.
Can I convert a stock printer to an all-metal hotend?
Most can, provided the mount geometry matches, the board can supply enough heater power, and the cooling path can be sealed. Check your printer model against the hotend’s bolt pattern and connector layout before ordering. Budget for extra parts: a fan, a duct, a silicone sock, and often a hardened nozzle and an extruder that suits the material.
Do I need firmware or slicer changes after installation?
Firmware, yes. Set the correct thermistor type, raise the hotend maximum temperature only as far as your hardware allows, and run an autotune for PID. In the slicer, cut retraction substantially, check flow calibration again, and expect to lower fan and temperature settings. Skip these steps and a new hotend will feel worse than the one it replaced.
What temperature should I use to test the new hotend?
Start around 200 to 220 degrees Celsius for a simple PLA or PETG test, staying well under anything likely to trigger heat creep. Watch the top of the heat sink with the back of your fingers; it should stay close to ambient. Only push toward 250 degrees Celsius and beyond once cooling is confirmed and firmware limits have been raised.
Why does my printer leak or ooze after a hotend upgrade?
Oozing almost always means heat is reaching the filament above the melt zone, which is heat creep. Confirm the heatsink fan runs at full voltage, blows directly across the fins, and is ducted so air cannot bypass the sink. Fit a silicone sock, clean the fins, and reduce temperature. A badly seated heat break can cause it too.
Is a direct-drive conversion necessary for high-temperature materials?
Not strictly, but it helps a lot. Direct drive shortens the filament path, so less heat travels into the extruder and retraction drops. A Bowden setup still works with an all-metal hotend if you use a tube rated for higher temperatures, though that tube remains the weak link above its rating and will need replacing eventually.
Conclusion: Is the Upgrade Worth It?
Worth it if you plan to print nylon, ASA, polycarbonate, or fibre-filled filament, or if your current hotend already jams regularly. Not worth it if you only print PLA on a machine that has never given you trouble, and not worth it if your real problem is a warped bed or a tired extruder motor.
Before buying anything, check three things: the mount pattern matches your printer, your board can supply the heater wattage at your mains voltage, and your firmware temperature limit can be raised. Start with the parts check, not the purchase.
Then treat cooling as part of the job rather than an extra. A fan, a sealed duct, a silicone sock, and a clean set of fins are what separate a smooth upgrade from a machine that leaks plastic on hour three. That is really the whole all metal hotend upgrade explained in one breath: more temperature, less creep, and a machine that only behaves if you cool it properly.