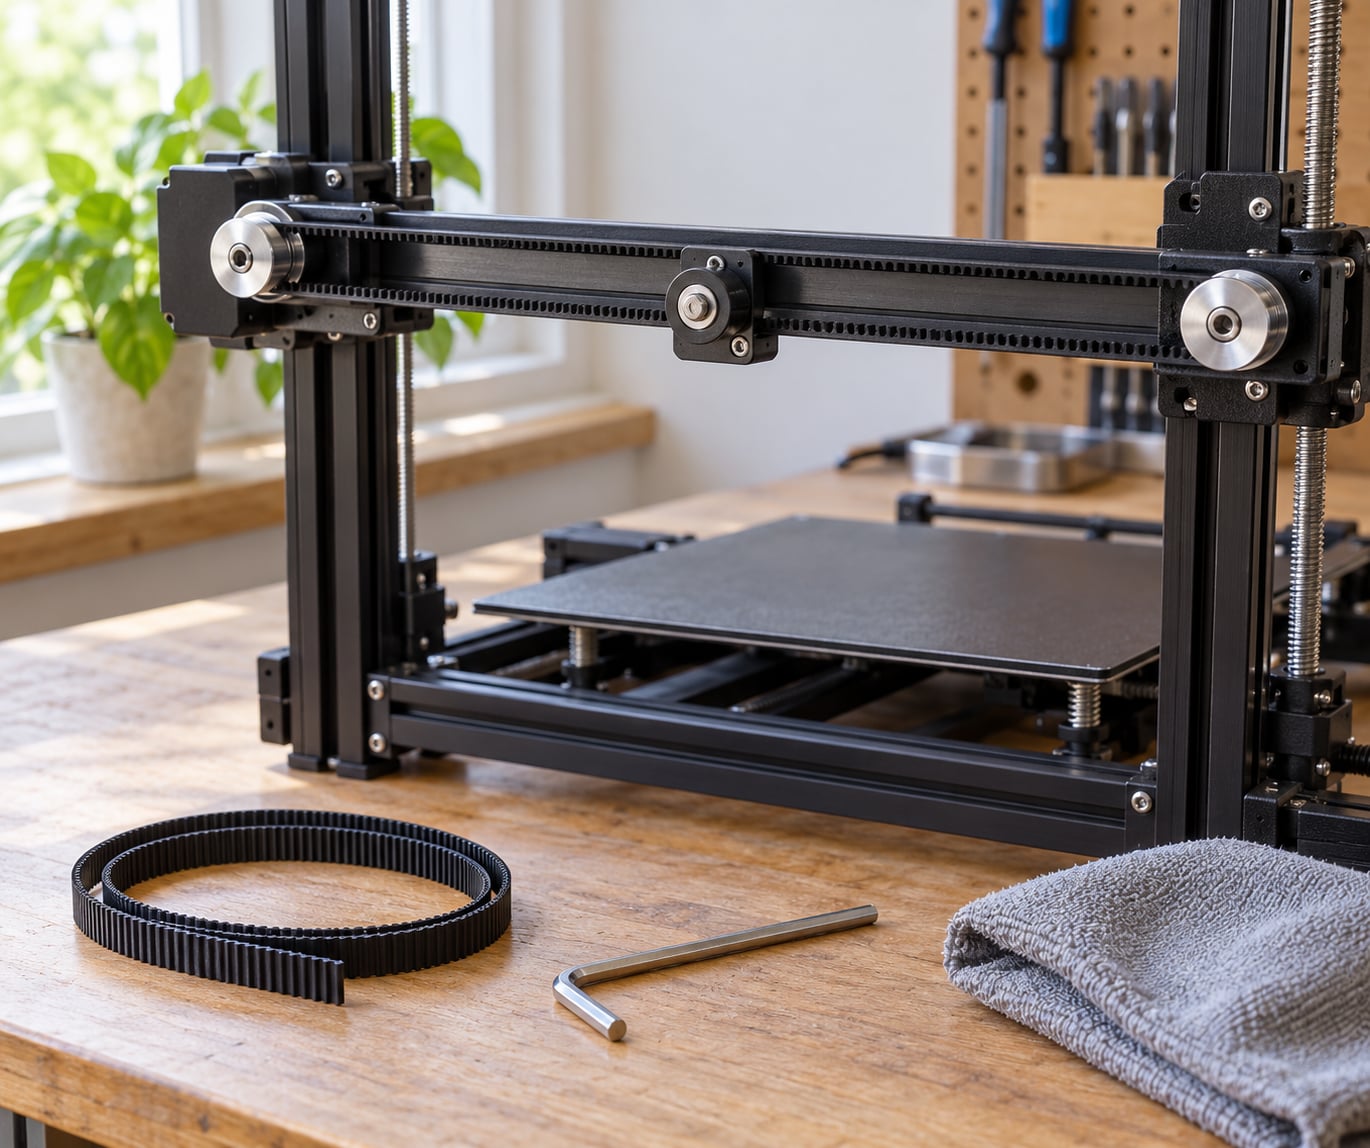
A 3D printer belt is a toothed GT2 timing belt that carries rotation from a stepper motor to a moving axis, and replacing one takes about 30 minutes once the printer is off. The job is simple: release the tension, unhook the old belt, thread the new one along the same path with the teeth engaged on every pulley, then tension until a plucked belt reads its target frequency.
Most belt problems are tension problems wearing a belt costume. A loose belt shows up as layer shifts, ringing on corners and a carriage that rocks when you push it. An over-tight one gets hot, wears the motor bearing and can bend the motor shaft, so the goal is firm and even, not maximum.
This guide covers the whole job, from picking the right belt through to the first test print, and it is current for 2026.
Table of Contents
- 1What You Need
- 2Step-by-Step: How to Replace a 3D Printer Belt and Tension It
- 31. Identify the Correct Belt and Tension Setup
- 42. Remove the Old Belt Without Forcing It
- 53. Clean and Inspect the Belt Path
- 64. Install the New Belt in the Correct Direction
- 75. Set the Initial Belt Tension
- 86. Check Alignment and Test the Axis
- 9Common Mistakes and Fixes
- 10Frequently Asked Questions
- 11How tight should a 3D printer belt be?
- 12How do I adjust the belt tension on my Ender 3?
- 13Which way should the toothed side of the belt face?
- 14Do I need to recalibrate after replacing a belt?
- 15When does a belt not need replacing?
- 16Conclusion
What You Need
Gather these before you open the frame, because half of a belt job is interrupted trips to find the right tool.
- The replacement belt. Check the printer manual or the parts diagram for belt width (6 mm or 10 mm), pitch (2 mm for GT2) and whether your axis uses an endless loop or an open-ended belt with two clamps.
- 2.5 mm hex key for motor mounts and frame hardware.
- 1.5 mm hex key for the grub screw that locks a pulley to the motor shaft.
- A phone for a tension tuner app, and a camera on it so you can photograph the routing before you touch anything.
- Cleaning supplies: lint-free cloth, isopropyl alcohol, a small brush or lint-free swab for the pulley grooves.
- Optional: threadlocker for the motor mount bolts, and a drop of grease on a tension thumb screw that turns badly.
Power the printer off and unplug it before anything else. Keep hair, loose sleeves and jewellery clear of the exposed belt path, and never torque a belt hard enough to suspect the motor shaft is bending.
Step-by-Step: How to Replace a 3D Printer Belt and Tension It
The procedure below works on the common Cartesian bed-slinger layout: an X belt driving the gantry and a Y belt driving the bed, each with two motor pulleys and one or more idlers. CoreXY machines use the same steps with a more crowded pulley path, so photograph the routing before you remove anything.
1. Identify the Correct Belt and Tension Setup
Match four things: belt width, tooth pitch, loop style and length. A 10 mm belt will not sit correctly in a 6 mm pulley groove, and a belt with the wrong pitch will skip or chew its own teeth under load.
Measure the old belt before you cut anything, then count the teeth on the stretch you know is straight. Every tooth is 2 mm, so tooth count times 2 gives you the centre-to-centre length, and counting a span rather than the whole loop is easier than laying a tangled belt on a table. Buy the loop length your manual lists, or cut an open-ended belt to the old length plus a few millimetres of margin for clamping.
Steel-cored GT2 lasts far longer than glass-fibre-reinforced belt because the teeth never fray, and the smooth backing side is the side that should face outward on most paths. Confirm with your printer’s routing diagram, because the smooth-side-in convention is not universal.
That measured length is your fallback if the belt has to be cut rather than bought as a ready loop, and the tension method that suits your printer depends on whether it has a dedicated tensioner or relies on sliding the motor mount.
2. Remove the Old Belt Without Forcing It
Release the tension first, then the belt comes off with no fight. On a printer with a tensioner, back the eccentric nut or thumb screw out fully until the belt is completely slack.
On a printer with no tensioner, which includes a lot of stock Ender 3 variants, loosen the two motor mount bolts a few turns and push the motor toward the idler to create slack. You should not have to cut the belt to get it off.
Now free the ends: pull each end out of its belt clamp or printed belt clip, or lift the loop off the pulleys entirely on an endless design. Take a photo of the belt path first, and note which side faced which pulley.
If the belt snapped during removal or the path is unclear, the old belt is now the reference for length and routing, so keep it.
3. Clean and Inspect the Belt Path
A belt goes onto whatever is underneath it, so clean the path before the new belt goes on. Wipe the pulley grooves and motor and idler shafts with isopropyl alcohol and a lint-free cloth, and brush out the fluff and swarf that a printed part leaves behind.
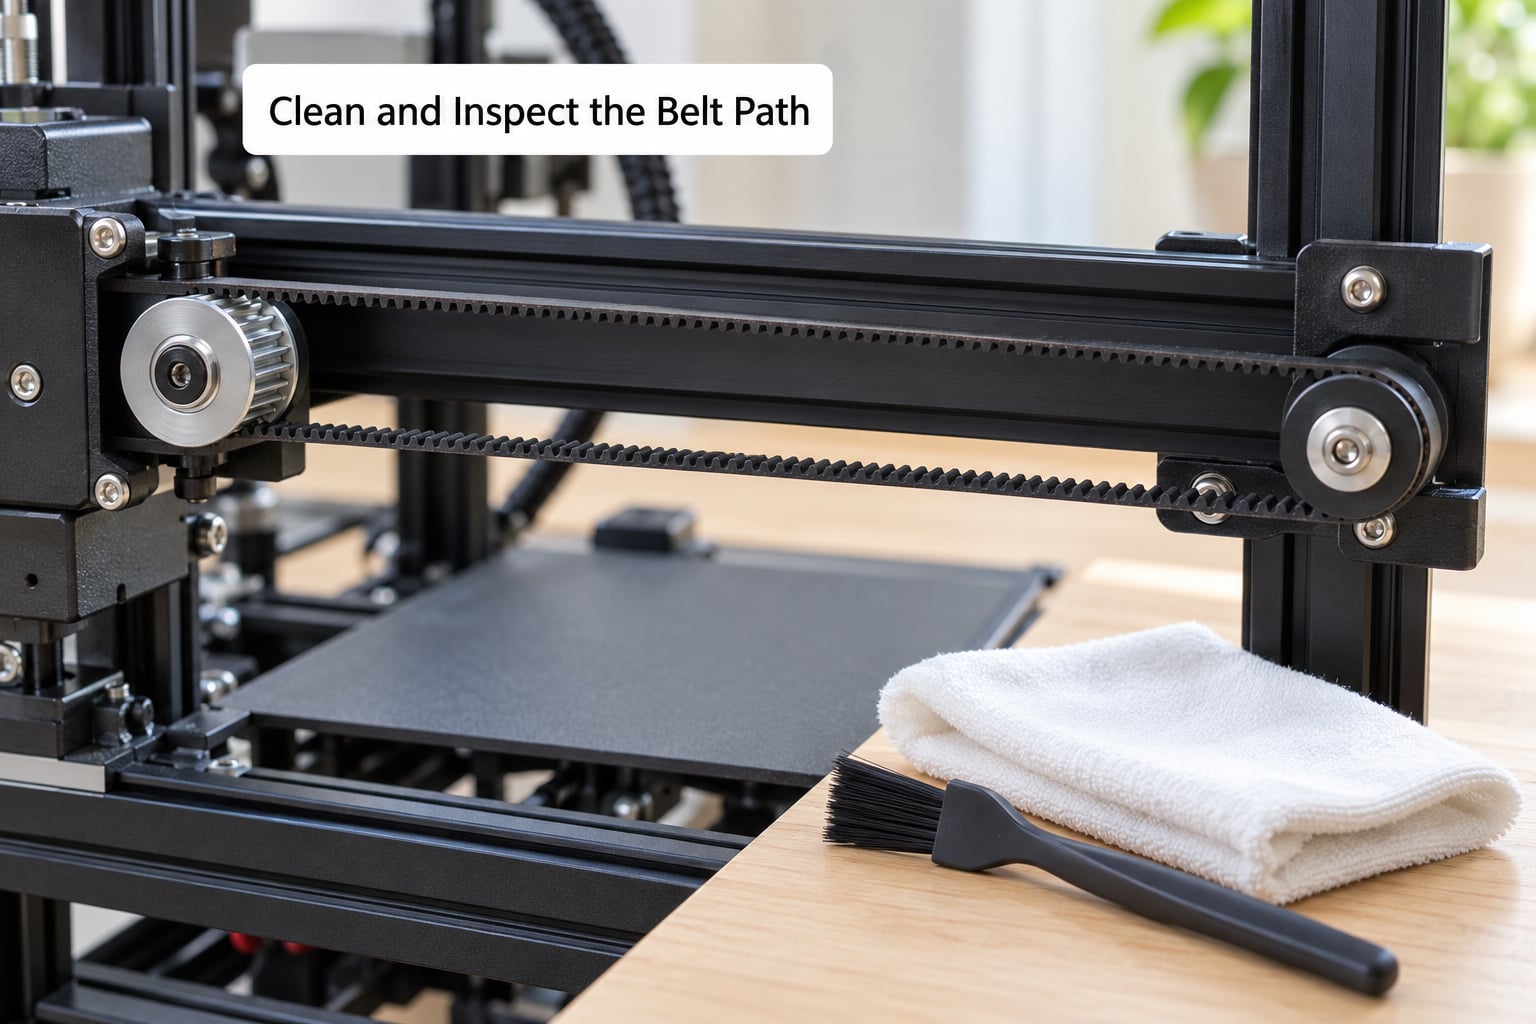
While you are there, check three things. Look for glazing or shine on the pulley faces, which means the belt has been rubbing. Spin each idler by hand: a rough or notchy feel points to a worn 625 or 624 bearing rather than a bad belt. And confirm the toothed idlers are toothed, because a smooth face running over belt teeth shears the teeth off in a few minutes of printing.
This is also where you tell a belt fault from something else. A layer shift that only happens at one end of travel is usually an axis alignment or motor mount problem, not a belt. A noise that changes with carriage speed but not with load points at the idler. Noise that appears only when the axis reverses is backlash, and that is tension or motor mount slop.
If a pulley is loose on the shaft, snug the 1.5 mm grub screw on the flat of the D-shaped shaft and add threadlocker before the belt goes back on.
4. Install the New Belt in the Correct Direction
Thread the belt along the path you photographed, teeth facing the pulley teeth on every sprocket and the smooth backing riding the smooth faces. A belt routed with the smooth side toward a toothed pulley will ride up onto the teeth and grind.
Work the belt around the path by hand rather than pulling it tight, and check as you go that every tooth sits in a tooth valley on each pulley. Seat the ends fully in the clamps or clips, then tighten the clamp screws firmly without leaning on the driver.
If the belt must be cut to length, cut it square with a proper belt cutter and crimp the new end with a clamp plate, not tape. A hand-stretched loop will never hold tension properly.
Now move the axis slowly by hand across its full travel. Binding at one end means the pulley is not square on its shaft or the belt is riding the pulley flange, and it needs fixing before any tensioning happens.
5. Set the Initial Belt Tension
Set tension by feel first, then confirm it with a measurement. Firm means the belt is taut and does not slacken when you wiggle the carriage, but it can still be turned by hand with steady, even resistance from one end of travel to the other.
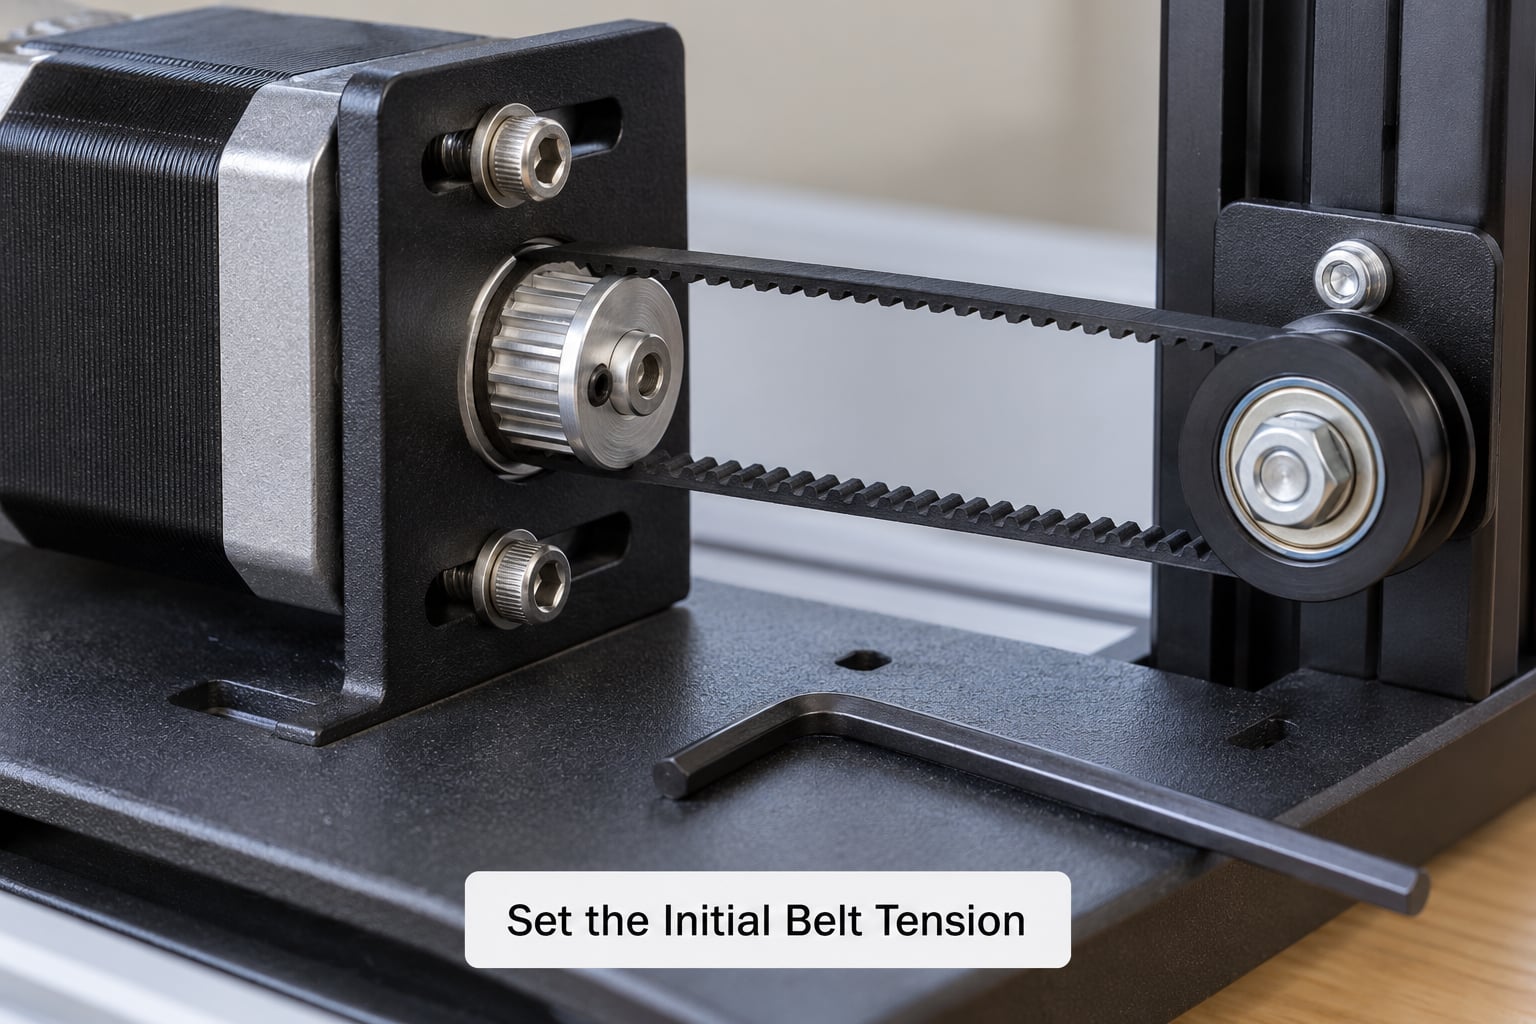
How you tighten depends on the machine. On a printer with an eccentric tension nut, turn it clockwise in small steps and re-check by hand as you go. On a thumb screw tensioner, back the screw out, then turn it in a quarter turn at a time. On a printer with no tensioner, push the motor toward the idler until the belt is taut, then tighten both motor mount bolts evenly while holding the motor in position.
Three methods tell you when you are there.
- By feel: push the carriage or bed with a finger. It should move with even resistance, with no free play at the ends and no tight spot in the middle. This is the fastest check and the least precise.
- Pluck test: treat the span between two pulleys as a guitar string. Pluck it with a finger and measure the pitch in hertz. Anywhere on a free, unsupported span works, but avoid clamping points and anything touching the belt, because mounts damp the note and give a falsely low reading.
- Firmware reading: Prusa and Bambu machines report a numeric tension. On Prusa, the belt tension item sits in the on-screen calibration menu. On Bamba, it is under the device calibration screens, where the printer plays a target tone you match by ear. Both beat a guess.
Typical frequency targets, if you are using a phone tuner app:
| Printer or axis | Approximate target | Notes |
|---|---|---|
| Ender 3 and clones | About 85 Hz on X and Y | Stock machines usually need an aftermarket tensioner |
| Prusa MK3S+ | Roughly 110 Hz and 95 Hz per the firmware check | Use the on-screen value rather than an app |
| Bambu X1, P1, A1 | About 100 Hz | Calibration screen plays the target tone |
| Voron and other CoreXY | About 110 Hz, A and B within 2 Hz of each other | Mismatched belts print rectangles as parallelograms |
You will also see figures as low as 40 to 60 Hz quoted elsewhere. That is not a contradiction. Frequency scales with the square root of tension over span, so a short unsupported span between two closely spaced pulleys reads low for exactly the same tension that reads 85 to 110 Hz on a long gantry belt. Judge the two belts on your printer against each other, not against someone else’s number.
One more thing: tension drops as the frame and belt warm up. Check again at operating temperature, and re-check a few days later, because a belt that will not hold its reading overnight has stretched and needs replacing rather than readjusting.
6. Check Alignment and Test the Axis
Verify the work by hand before you let the printer drive itself. Push the carriage through its full range and confirm equal resistance with no dead spot, then use the printer’s own controls for a slow move across the axis at low feed rate and listen for skipping or grinding.
After that, print a 20 mm calibration cube. A clean cube with square corners tells you steps per millimetre and backlash are still correct after the belt change. A diagonal shear across the top usually means belt tension, while a consistent lean in one direction points at motor mount alignment instead.
If your printer uses input shaping, re-run the shaper calibration, since resonance frequency shifts with tension. On Klipper this is the standard SHAPER_CALIBRATE command through the web interface, and Marlin-based machines have a similar routine in their motion settings. Then print a single first layer and look for an even line across the whole bed before committing to a real job.
Common Mistakes and Fixes
Almost every belt job that goes wrong is one of six mistakes, and each has a specific fix.
| Mistake | What you see | Fix |
|---|---|---|
| Belt too loose | Layer shifts, ringing, skipping teeth under load | Tension by 5 to 10 Hz and re-test with a cube |
| Belt too tight | Hot motors, humming, worn motor bearing, bent shaft | Back the tension off until the hand-feel is even |
| Wrong tooth orientation | Belt rides up the pulley and grinds within minutes | Re-route with teeth toward pulley teeth |
| Toothless idler in the path | Sheared teeth, shredded belt | Fit a toothed idler, and replace the belt |
| Loose pulley grub screw | Intermittent layer shift, belt teeth skipping | Set the screw on the D-flat with threadlocker |
| Tension drops within hours | Symptom returns, shifts reappear | Belt has stretched, replace it rather than readjust |
A skewed or parallelogram-shaped print is a tension signature: one axis is being pulled harder than the other. On a CoreXY, match the A and B belts within 2 Hz before touching anything else.
Make it a routine. A visual check of belt condition and tensioner hardware once a month, a hand-feel check with a frequency reading every three months, and a full replacement every 12 to 24 months for a quality steel-core GT2 belt. While the frame is open, wipe the linear rails and re-apply light lubricant, since routing a new belt tends to smear the existing film off the rails.
Frequently Asked Questions
How tight should a 3D printer belt be?
A belt should be firm enough that it does not slacken when you move the carriage, but still turn by hand with even resistance across the full travel. Measurably, a plucked span should read roughly 85 to 110 Hz on most gantry and bed belts. If the motor gets noticeably hot while idling, you are past the useful limit.
How do I adjust the belt tension on my Ender 3?
Most Ender 3 variants have no dedicated tensioner, so loosen the two bolts that clamp the stepper motor to its mount, push the motor toward the idler until the belt is taut, then retighten both bolts evenly while holding the motor. A printable or purchased tensioner mounted on the gantry end makes future adjustments a one-knob job.
Which way should the toothed side of the belt face?
The toothed side belongs against the pulley teeth on every sprocket, and the smooth backing rides the smooth faces. Running the smooth side toward a toothed pulley lets the belt climb onto the teeth and grind, which is the usual cause of a new belt that starts making noise within minutes of printing.
Do I need to recalibrate after replacing a belt?
Run a 20 mm calibration cube to confirm steps per millimetre and backlash are unchanged, and re-run input shaping calibration if your printer uses it, because resonance frequency shifts with tension. Most firmware does not need a full restep, but it is worth checking that the bed mesh and Z offset are unchanged before a long print.
When does a belt not need replacing?
If your only problem is a printer that feels loose or makes occasional noise, tightening the tensioner or the motor mount usually fixes it. Replacement is only needed when the belt is cracked, frayed, missing teeth, has a fuzzy glazed surface, or refuses to hold tension after a few days. Replacing a healthy belt is wasted money.
Conclusion
Start with the three things that decide whether the job worked: you fitted the correct belt width, pitch and length, you set firm even tension rather than maximum tightness, and you confirmed it by hand and with a test print before running a real job. Photograph the routing before you start, clean the pulleys while they are exposed, and check tension again once the printer is warm.