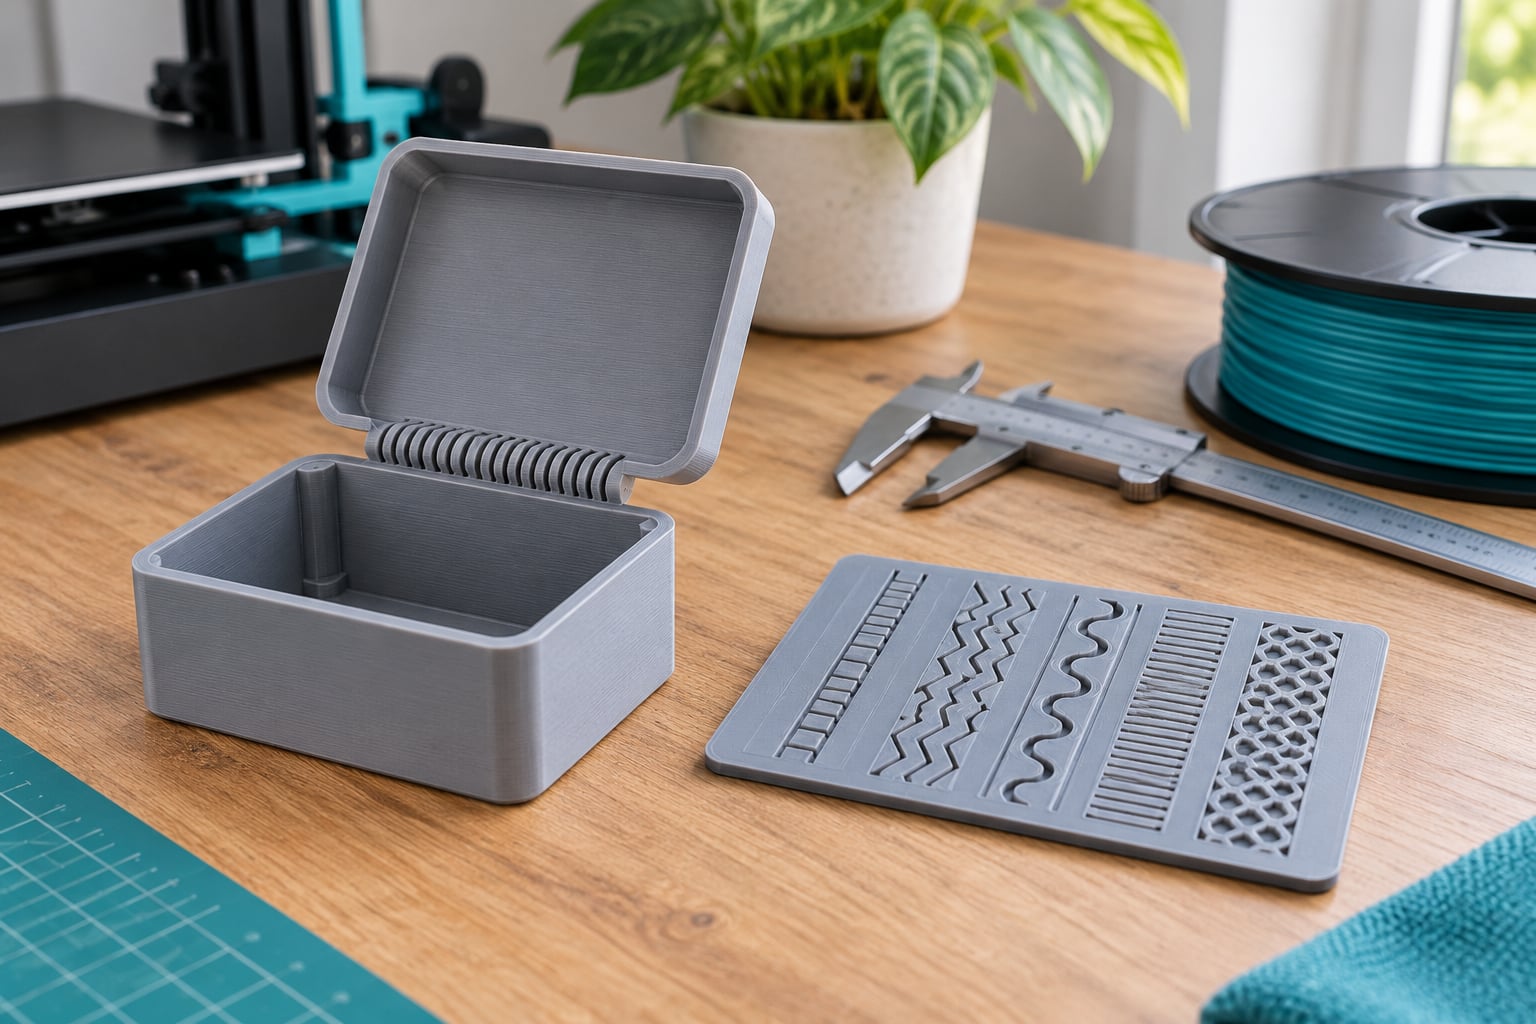
A living hinge is a thin, flexible web of plastic printed as part of a single piece, so two sections of that part bend and fold without a separate metal hinge, pin or glue joint. Living hinges in 3D printing explained below covers the patterns, materials, geometry, layer direction and printer settings that decide whether a hinge flexes for hundreds of cycles or snaps on the first open.
The core idea is simple: keep the bending zone thin, keep it long, and let the surrounding part stay rigid. Most failed hinges I have seen come down to one of those three being ignored.
Table of Contents
- 1What Is a Living Hinge in 3D Printing?
- 2How Does a Living Hinge Work?
- 3Bend direction, cells and the flex zone
- 4Living Hinges in 3D Printing Explained: Common Hinge Patterns
- 5Parallel flexure
- 6Perpendicular or offset pattern
- 7Serpentine and wave patterns
- 8Which Hinge Pattern Should You Use?
- 9What Materials Work Best for Living Hinges?
- 10How Do You Design a Printable Living Hinge?
- 11How Do You Orient a Living Hinge for 3D Printing?
- 12Which Printer Settings Improve Living Hinge Reliability?
- 13How Do You Test a Living Hinge?
- 14Why Is My Living Hinge Not Bending?
- 15How Durable Are 3D Printed Living Hinges?
- 16Living Hinges vs. Traditional Hinges
- 17Frequently Asked Questions
- 18Can living hinges be printed in PLA?
- 19Are living hinges stronger in PETG or PLA?
- 20Should a living hinge bend with or across the layers?
- 21What layer height is best for a flexible living hinge?
- 22Can resin 3D printing make functioning living hinges?
- 23Conclusion
What Is a Living Hinge in 3D Printing?
A living hinge is a flexible section of a printed part that acts as its own joint. It has no separate hardware, no moving parts to wear out and no adhesive, because the hinge and the two things it connects are all one printed body.
You will recognise one instantly. Look at a printed phone stand, a small electronics case or a cable tidy: there is a narrow, usually perforated strip of plastic running between two thicker sections. That strip is the living hinge.
The difference from a mechanical hinge is the whole point. A mechanical hinge has a pin and knuckles that take the load in steel or brass. A living hinge takes the load in the plastic itself, and it works because the material can flex and recover many times over.
That recovery is what makes the design possible. The hinge is built from a chain of repeating cells, each one thin and flexible. No single cell has to do much work, so the whole assembly survives far more folding than one solid strip of the same thickness would.
How Does a Living Hinge Work?
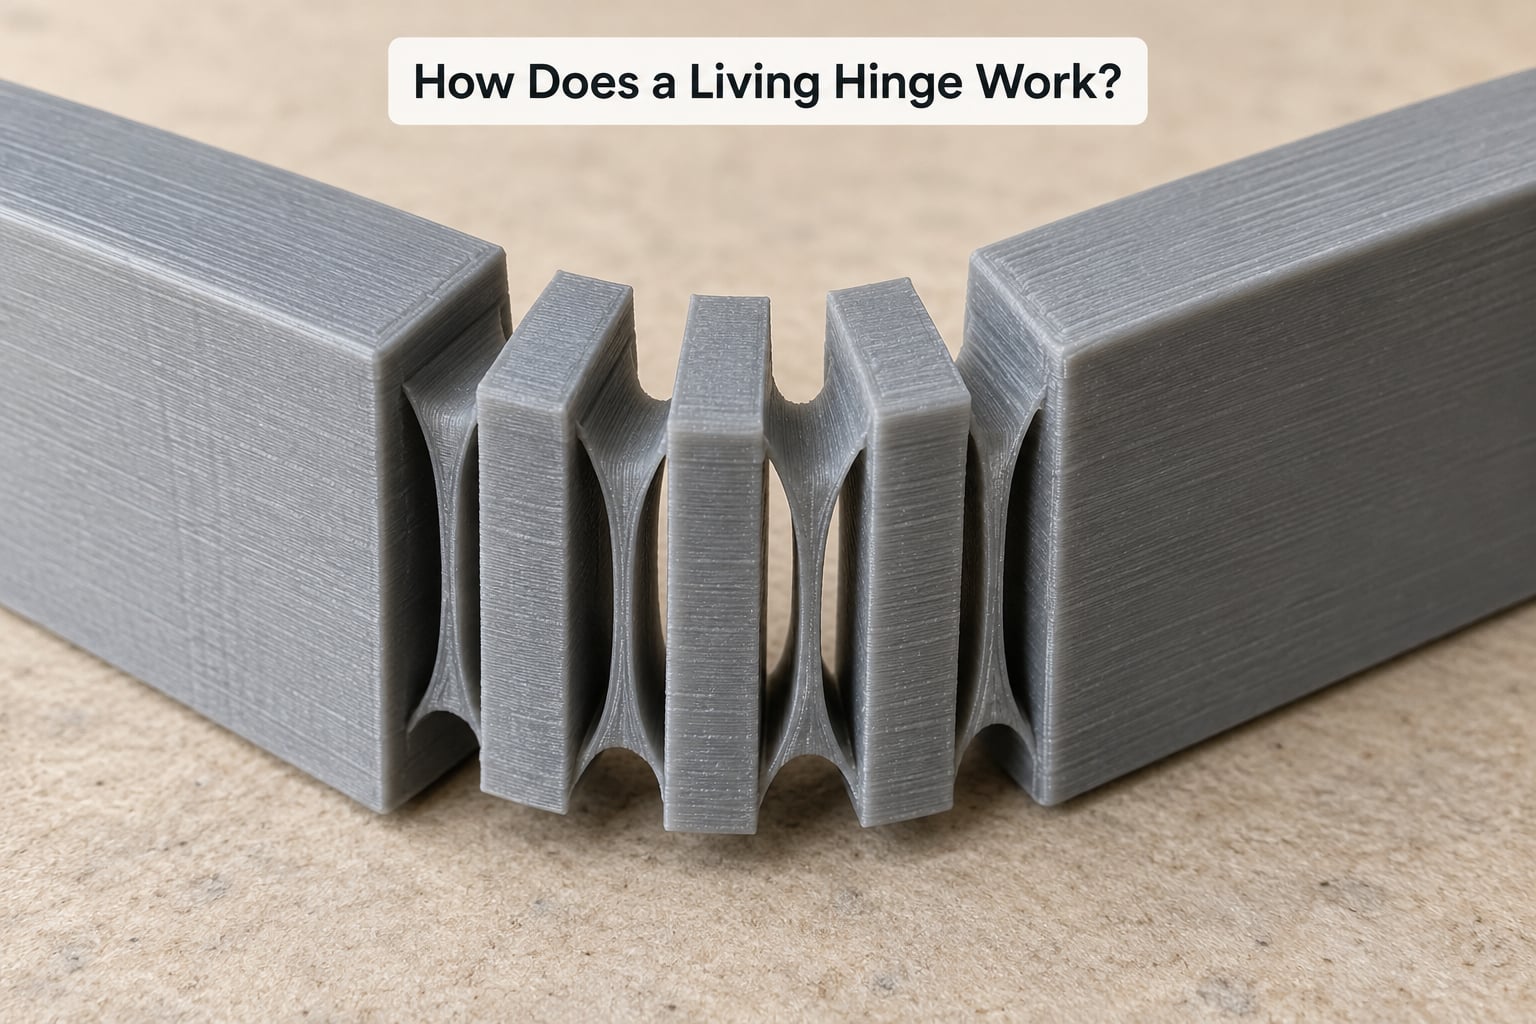
A living hinge works by alternating rigid and flexible sections along a single bend axis, then repeating that flexible section as a row of small cells. Bending happens in the thin cells. The thick sections on either side are designed not to flex at all.
Each cell flexes a small amount. A row of them adds up to a large motion, which is why a hinge only 15 mm long can swing a lid through 120 degrees. The local strain in every cell stays low enough for the plastic to return to its original shape rather than take a permanent set.
Two things decide whether that works. The first is geometry: a thin web of consistent thickness, a generous transition radius into the rigid body, and enough cells that the strain per cell stays small.
The second is material. A living hinge needs a plastic that tolerates repeated strain below its elastic limit. A brittle plastic will crack at the first cell boundary even if the geometry is perfect, and a soft rubbery plastic will deflect forever without ever snapping back.
Bend direction, cells and the flex zone
The bend axis is the line the part rotates around. Every cell in the hinge must be able to stretch or compress along that axis, and nothing else in the part should be loaded sideways across the bend. Get the axis right and the rest of the design falls into place.
The flex zone is simply the region the designer reserved for movement. Treat it as a keep-out area: no ribs, no bosses, no text embossing, no infill changes that stiffen it, and no hardware passing through it.
Living Hinges in 3D Printing Explained: Common Hinge Patterns
There are three living hinge patterns you will meet in almost every model, and they differ mainly in which direction the part folds relative to the layers.
Parallel flexure
The parallel pattern is a thin rectangular web with cut lines running across it, splitting the web into a row of square or rectangular cells side by side. It bends in the plane of the print, folding two flat sections toward each other like a book closing.
It is the easiest pattern to model and the easiest to print on a normal desktop machine. The weakness is that the cell walls are thin vertical posts, and on FDM they are only as strong as the layer bonding between them.
Perpendicular or offset pattern
The perpendicular pattern rotates the cells 90 degrees relative to the web, so the part folds out of the print plane. It swings a lid upward instead of sideways, which suits enclosures and handheld devices where the open position needs to stand proud of the body.
Because the flexing happens across layer boundaries rather than along them, the failure mode is different: the cells can separate at the layer interfaces if adhesion is weak.
Serpentine and wave patterns
A serpentine hinge uses a continuous S-curve rather than discrete cells. It gives a smoother, more progressive motion with no hard stop, and it can be softer or stiffer than a cell pattern of the same width just by adjusting the curve.
It asks more of your printer because the curve has to be reproduced accurately at every layer. On a machine with noticeable ringing, a tight serpentine will look rippled and feel inconsistent.
Which Hinge Pattern Should You Use?
Choose the pattern from four questions: which direction must the part fold, how many cycles it has to survive, how much room the hinge path has, and how the part has to sit on the build plate. A lid that must open upward on a flat-printed enclosure points to the perpendicular pattern. A one-off lid or clip that folds flat points to parallel. A soft-touch cover that should ease open without a hard stop points to serpentine.
Cycle count matters as much as direction. A box opened twice a day for a year needs roughly 700 cycles and a cell pattern at a moderate thickness. A cover snapped shut in a pocket all day can see tens of thousands of cycles, and that wants more cells, a thinner web, a tougher material and a bigger transition radius than you would think necessary.
What Materials Work Best for Living Hinges?
The best material is whichever one bends consistently and survives the number of cycles your part needs. All the common FDM thermoplastics can make a working hinge, and they differ far more in toughness and layer adhesion than in whether they flex at all.
| Material | Hinge consistency | Fatigue resistance | Layer adhesion | Watch out for |
|---|---|---|---|---|
| PLA | Excellent, very repeatable | Low, cracks after limited cycles | Good | Brittle, softens in a hot car |
| PETG | Very good | Good, far better than PLA | Excellent | Stringy, can bridge the cell gaps |
| ABS | Good | Moderate | Fair to good | Warping, fumes, needs an enclosure |
| ASA | Good | Moderate | Good | Warps like ABS, UV stable |
| TPU | Good, softer return | Very high | Excellent, almost isotropic | Slow prints, stringing, oozing |
| Nylon | Fair, humidity sensitive | High | Excellent | Absorbs moisture, warps, needs a heated chamber |
PLA is the easy choice and the wrong one for anything that opens and closes repeatedly. Its layer bonds are strong but the plastic itself has little tolerance for strain, so a hinge will run for a while and then fail suddenly at a cell wall.
PETG is the default for FDM living hinges. It stretches before it yields, adheres well to itself between layers, and prints on almost any machine without an enclosure. Where I have seen people complain about a hinge, the cause is nearly always PLA or a geometry fault rather than the filament itself.
TPU takes more effort but tolerates far more cycles. Because it is soft and almost isotropic, the hinge does not depend on layer bonding as much as a rigid filament does. Print it slowly, keep the nozzle clean and expect stringing around the thin cells.
Nylon behaves like TPU for fatigue but is stiffer and stronger around the rigid sections. It needs a dried spool and often a heated chamber, which puts it outside many home setups.
Resin printing is a different story. A photopolymer hinge will usually look beautiful and fail immediately, because standard resins are glassy and brittle, and stress concentrates at the base of every cell wall. Flexible or toughened resins exist and can work, but they are a specialist route rather than a first attempt.
How Do You Design a Printable Living Hinge?
Design the hinge as a deliberate feature, not as the gap left between two bodies. The workflow is short and each step has one job.
- Fix the bend axis. Decide which way the part folds and mark that axis on the model. Everything else follows from it.
- Set the web thickness. For FDM, most working hinges land between 0.4 and 0.6 mm for a single-perimeter web, roughly one to two layer heights. Powder-bed processes allow thicker webs because there are no layer interfaces to worry about.
- Set the cell length. Keep the cell pitch near the web thickness. A 1 mm web with 4 mm cells flexes unevenly and cracks early.
- Add transition radii. Blend the web into the rigid body with a generous fillet. A hard 90 degree corner at the hinge root is the single most common crack site.
- Count the cells. More cells means lower strain per cell and a longer life. Add cells before you add thickness.
- Check the folded state. Model the part fully closed and look for interference. Two rigid faces touching under load will scrape, crack or bind.
Keep the hinge length proportional to the part. A 20 mm hinge on a 15 mm lid looks strange and flexes too easily; a 5 mm hinge on a 200 mm panel will not open at all.
Avoid abrupt thickness changes anywhere near the flex zone. A step from 1.2 mm body straight to 0.4 mm web concentrates stress in one place. A smooth blend over several millimetres spreads that load out.
How Do You Orient a Living Hinge for 3D Printing?
Orient the hinge so the part folds within the layers, flat on the build plate, whenever the pattern allows it. Flat is best on FDM because the layer lines run continuously through the web and the cell walls print as clean vertical posts.
When the fold has to go out of the plate, you are printing a perpendicular or offset pattern. The cells then flex across the layer interfaces, so layer adhesion becomes the limiting factor. Slower speeds, well-tuned temperatures and a solid first layer matter more in this orientation than any other setting.
You do not always get to choose. A part with a flat base and a lid that opens upward has a natural conflict: printing it flat gives a good hinge but puts the lid in an awkward position, and rotating it for a better hinge costs support material. When that happens, split the design into two pieces and use a printed pin hinge instead of fighting the orientation.
Resin printers have a related trap. The flex zone needs a peel direction that will not rip the cell walls off the build plate, which usually means printing at an angle with support under the rigid sections. Plan the support before you model the hinge.
Which Printer Settings Improve Living Hinge Reliability?
There is no universal living hinge profile, and anyone who hands you one without knowing your printer and material is guessing. What matters is that the settings are stable and the wall thickness matches the layer height.
Wall thickness versus layer height. A single-perimeter web only works if the web thickness is close to the nozzle width. Setting a 0.4 mm nozzle to 0.15 mm layers and a 0.4 mm web gives a predictable single line of plastic. Anything much thinner and the hinge becomes a string of blobs.
Temperature. Print hot enough that the layers fuse properly rather than sitting on top of each other. For PETG and TPU, that usually means the upper end of the material’s range. Cold layers give a hinge that peels apart at the first hard fold.
Cooling. Heavy part cooling stiffens thin walls and can make a TPU hinge too rigid. A low fan or a longer minimum layer time on the hinge region usually helps more than it costs in detail elsewhere.
Speed. Slow down for the hinge. A slower toolpath gives each thin cell time to settle, which improves consistency between cells and reduces the ringing that makes a serpentine pattern uneven.
Infill and walls. Keep infill out of the flex zone entirely. A part with 40 percent infill flowing into the web will behave like a rigid insert, and the hinge will either not bend or break at the boundary.
Calibrate temperature and flow before you design anything. Print a thin-wall test block, bend it repeatedly by hand, and only then start on the real part.
How Do You Test a Living Hinge?
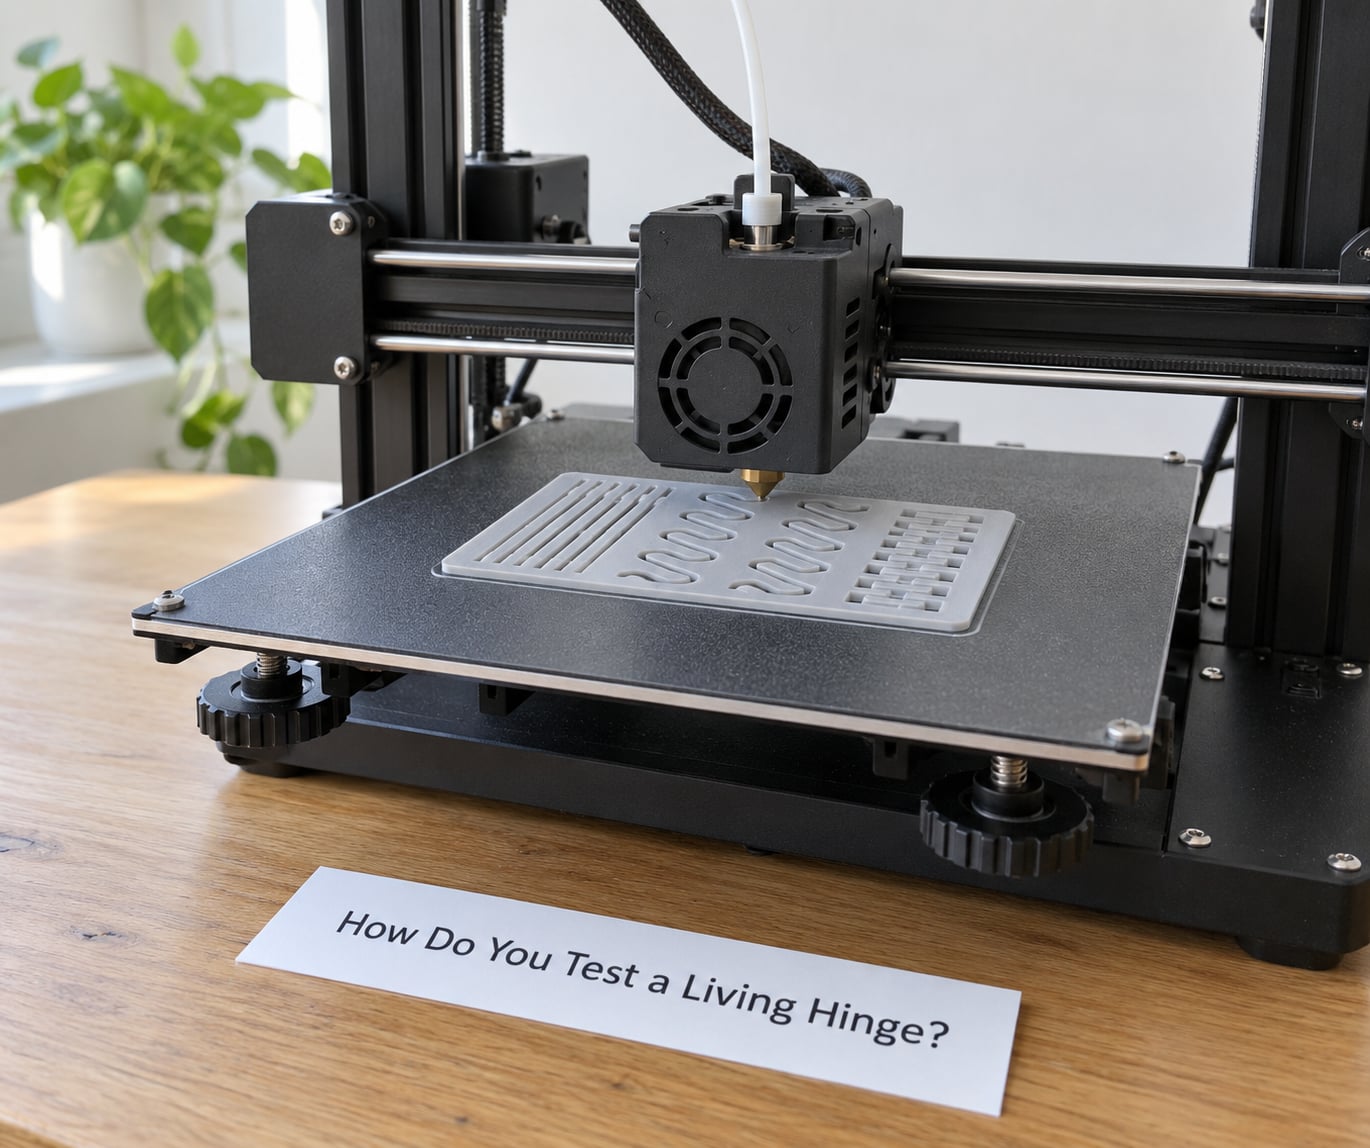
Test the hinge before you test the product. A small coupon carrying three or four patterns at different thicknesses takes fifteen minutes to print and tells you more than an hour of guessing.
Lay the coupon flat and check three things on the first fold. It should fold along the intended axis and nowhere else, every cell should move at the same time rather than one cell folding first, and the plastic should feel springy rather than rubbery.
Then run a cycle count. Fold and unfold it ten times slowly, watching the root fillets for the first hairline crack. A hairline crack that appears at cycle ten and grows is a geometry or temperature problem, not a patience problem.
Measure spring-back: fold it fully closed, hold for ten seconds, release, and see how far it opens on its own. A hinge that stays closed and needs a fingernail to open is too stiff or too short, and it will fatigue faster under repeated use.
For a rough fatigue check without lab equipment, cycle it by hand a few hundred times and count where it fails. That is not a certified cycle life figure, but it separates a good hinge from a bad one in about ten minutes and costs nothing.
Why Is My Living Hinge Not Bending?
If the hinge does not bend, work down this list in order. The first two account for most cases.
- Wrong orientation. The part is folding in an axis you did not intend because the bend axis is not aligned with the print.
- The flex zone is filled. Infill, ribs or a solid block reach into the web and act as a rigid insert.
- The web is too thick for the layer height. A 1 mm web on a 0.4 mm nozzle prints as two or three thick lines that barely flex.
- Too much cooling. The part fan is blasting the thin cells as they are laid down.
- Poor layer adhesion. The plastic is too cold for the speed, and the hinge separates between layers instead of bending.
- Inconsistent extrusion. The web width varies cell to cell, so one cell is stiffer and carries all the load.
- The material is wrong. PLA, or a glass-filled filament where the flexibility is in the resin rather than the matrix.
- No clearance in the closed state. Rigid faces touch and block the fold before the hinge is asked to do anything.
Fix one variable at a time. Changing material, temperature, layer height and orientation together tells you nothing about which one worked.
How Durable Are 3D Printed Living Hinges?
A well-designed FDM living hinge in PETG handles hundreds to a few thousand open-and-close cycles before the root fillet shows a visible crack. TPU pushes into the tens of thousands. Powder-bed nylon routinely runs into the thousands of cycles because it has no layer interfaces to separate.
The honest expectation for a hobby part is a lid, a clip or a cover that gets opened dozens of times a day, not a mechanism that runs for years of industrial cycles. Cycle life is set by the weakest cell, the material’s fatigue limit and the load on the hinge, so a heavy rigid section hanging off a short hinge will fail long before the plastic runs out of stretch.
Environment matters more than most people expect. Heat above a material’s glass transition softens the hinge and lets it take a permanent set. UV exposure degrades ABS and ASA. Cold makes PLA and PETG progressively stiffer and more crack-prone.
Raster direction is the quiet factor. A hinge loaded across the layer direction rather than within it can lose most of its life compared with the same hinge printed the other way up, with identical material and identical geometry.
If you need guaranteed cycle counts rather than an occasional flex, use a living hinge for the cover and a printed pin or a small metal hinge for the load-bearing joint. Splitting the two jobs is the standard engineering answer.
Living Hinges vs. Traditional Hinges
A living hinge wins on simplicity and loses on strength and repeatability. The table below is the short version of that trade.
| Criterion | Living hinge | Traditional hinge |
|---|---|---|
| Part count | One piece, no hardware | Two or more parts plus a pin |
| Weight | Almost nothing | Adds metal mass |
| Movement | Limited angle, set by cell geometry | Wide range, often past 180 degrees |
| Repeatability | Same position each time, no play | Free play until the knuckles wear |
| Load capacity | Low to moderate | High |
| Assembly | None | Fasteners, press fit or welding |
| Maintenance | None | Lubrication, loose hardware |
| Best used for | Lids, covers, clips, battery doors, guards | Doors, panels, mechanisms under load |
Ask what the joint has to do. If it needs to open, close and stay put without hardware, a living hinge is the better answer. If it carries weight, holds a rigid angle under load or has to open past 90 degrees repeatedly, a printed pin hinge or a small off-the-shelf metal hinge will outlast it every time.
Print-in-place, where the mechanism is one solid body with no assembly at all, works well for a living hinge and badly for a pin hinge. Clearances that hold on a two-piece print can fuse solid in one piece, so leave a little more room than feels comfortable and check it on a small model first.
Frequently Asked Questions
Can living hinges be printed in PLA?
Yes. PLA prints a living hinge cleanly and it bends smoothly, which makes it a good material for learning the design. The limitation is fatigue: PLA has limited tolerance for repeated strain, so a hinge in PLA typically works for tens to a few hundred cycles before a cell wall or root fillet cracks. Use PLA for lids and one-off prototypes, and move to PETG or TPU for anything that opens repeatedly.
Are living hinges stronger in PETG or PLA?
PETG is stronger for living hinges in practice, mainly because it stretches before it yields and bonds well to itself between layers. PLA has higher stiffness, so a PLA hinge feels crisper at first, but that same rigidity concentrates stress at the cell walls and the root fillet. For cycle life, thickness consistency and the ability to recover from an over-bend, PETG is the better choice.
Should a living hinge bend with or across the layers?
Bend within the layers whenever your pattern allows it, which on FDM usually means printing the part flat on the build plate. Bending across the layer interfaces makes the hinge depend entirely on interlayer adhesion, so weak bonding causes the cells to separate instead of flexing. When you must fold out of the plane, slow the print down, print hot and use a material with strong layer adhesion such as PETG, TPU or nylon.
What layer height is best for a flexible living hinge?
Match the layer height to your nozzle so the hinge web prints as a predictable number of lines. With a 0.4 mm nozzle, a 0.2 mm layer height and a single-perimeter web gives you a web roughly 0.4 mm thick that repeats predictably down the hinge. A much finer layer height makes the web thin and blobby rather than flexible, and a coarse layer height with a thin web leaves gaps between cells.
Can resin 3D printing make functioning living hinges?
Standard photopolymer resin is a poor choice because it is glassy and brittle, and stress concentrates at the base of every cell wall. Flexible or toughened resins can produce a working hinge, and the smooth surface and fine detail help with small features. Expect to design in thicker cells and generous root fillets, and plan support under the rigid sections. FDM is easier for a first hinge.
Conclusion
A living hinge works when every cell shares the strain: keep the web thin and consistent, keep it long, blend it into the rigid body with a generous fillet, and print it in a material that can take repeated flexing. That is the whole principle behind living hinges in 3D printing explained in this guide.
Start with a small flat test coupon carrying a few patterns at different thicknesses, print it in PETG, and fold it a hundred times. Change one thing at a time until it behaves, then port that pattern and that wall thickness into the real part.