How to print with abrasive filaments safely comes down to four things in place before you power the machine: a wear-resistant nozzle, a closed print chamber, a dry spool, and air moving away from your face. Get those right and carbon fibre, glass fibre, glow-in-the-dark and nylon CF prints go from a cloggy gamble to routine work.
Budget about 30 minutes for setup the first time and 20 minutes afterwards, mostly drying and nozzle checks. The physical difficulty is low. The learning curve sits in knowing which filament is abrasive, how hard your nozzle gets eaten, and what the fumes are doing to the room you are standing in.
Table of Contents
- 1What You Need
- 2Wear-resistant nozzles and spares
- 3An enclosure plus a way to move air
- 4A filament dryer and dry storage
- 5Personal protective equipment and cleaning kit
- 6Step-by-Step: How to Print with Abrasive Filaments Safely
- 71. Confirm That Your Printer Can Handle Abrasive Filament
- 82. Set Up an Enclosed Print Area and Ventilation
- 93. Wear Appropriate Protection and Work Cleanly
- 104. Install and Inspect the Correct Nozzle
- 115. Dry the Filament and Load It Safely
- 126. Use Conservative Temperature and Speed Settings
- 137. Monitor the First Layers and Print
- 148. Finish, Cool, Unload, and Clean the Workspace
- 15Common Mistakes
- 16Leaving the standard brass nozzle installed
- 17Printing on an open frame with no extraction
- 18Loading damp filament from a cold shelf
- 19Printing nylon CF in a cold chamber
- 20Treating a 0.4 mm nozzle as a permanent answer
- 21Raising the nozzle temperature to clear a clog
- 22Cleaning abrasive dust with compressed air
- 23Prevention checklist
- 24Frequently Asked Questions
- 25Do I need a hardened nozzle to print abrasive filament?
- 26Does PETG-CF need an enclosure?
- 27Is abrasive filament safe to print indoors?
- 28Which nozzle diameter should I use for carbon fiber?
- 29How do I know if my nozzle is worn out or just clogged?
- 30How do I keep carbon fiber nylon dry while printing?
- 31Conclusion
What You Need
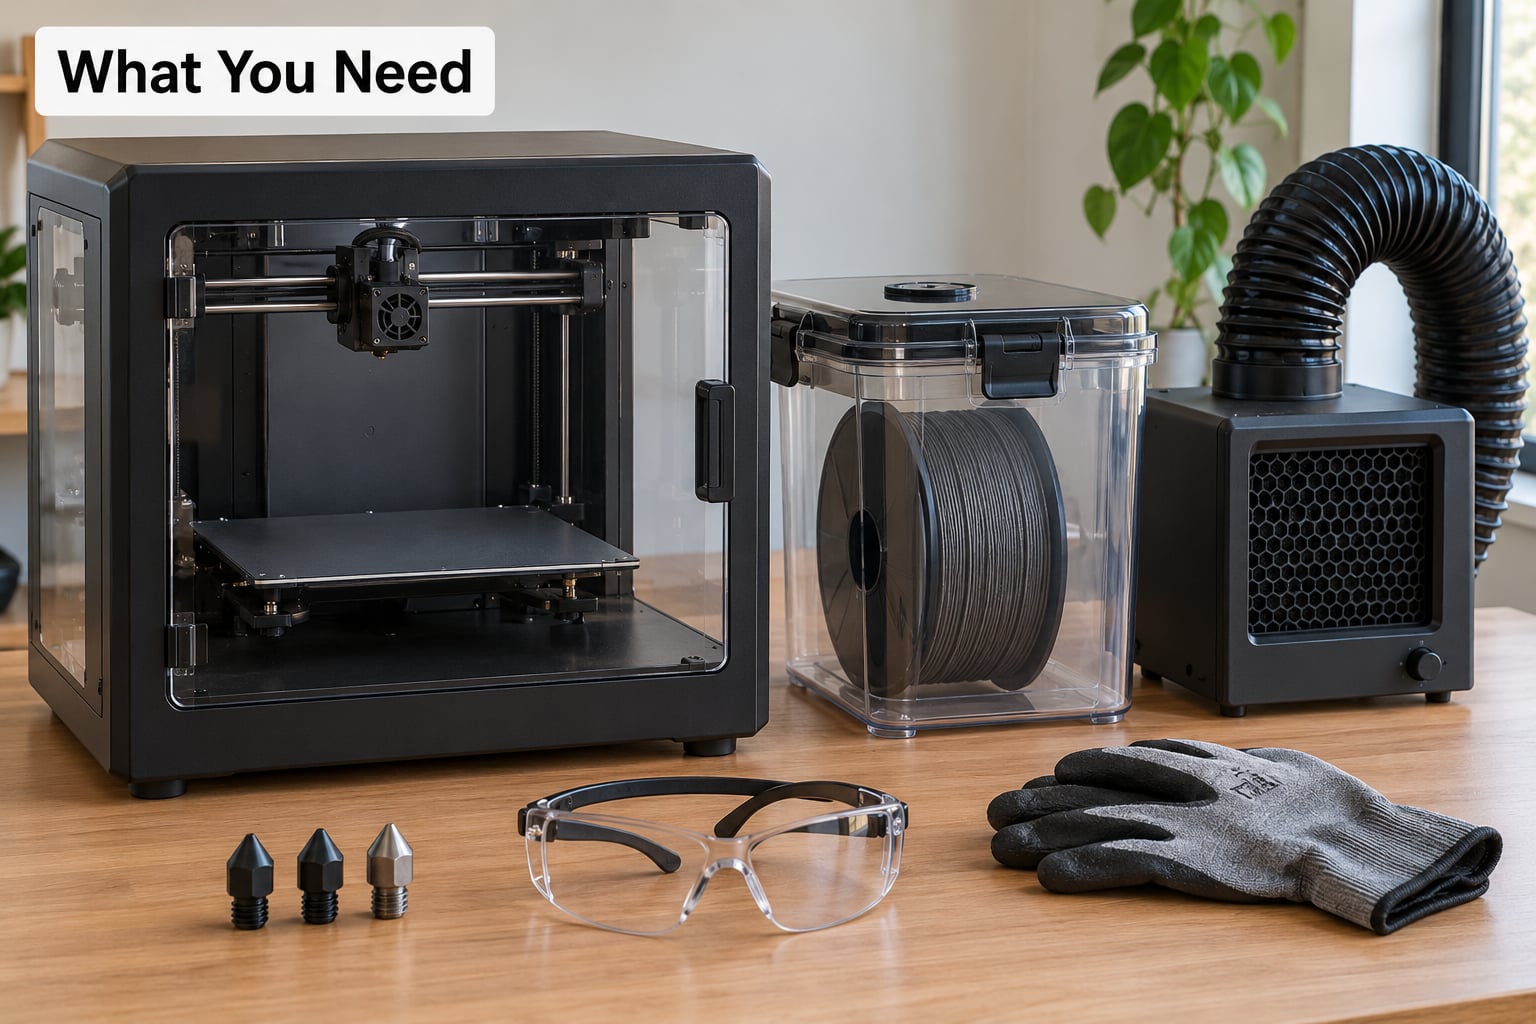
You need a wear-resistant nozzle, a sealed chamber, a way to move air, and dry filament. Everything else on the list is supporting equipment.
Wear-resistant nozzles and spares
Buy a hardened steel, ruby or tungsten carbide nozzle before the first spool, and keep two on hand. Replacement is not a failure, it is maintenance, and doing it in advance means you are never mid-job with a clogged machine and no spare.
| Nozzle material | How it handles abrasive filament | Notes |
|---|---|---|
| Brass | Poor. Wears visibly after roughly 500 g of carbon fibre and the bore reams wider. | Fine for plain PLA and PETG. Replace as soon as you start printing fills. |
| Stainless steel | Marginal. Harder than brass, so it lasts longer, but fibres still cut the bore. | Better than brass, still not a choice for regular fibre work. |
| Hardened steel | Good. The standard upgrade and the reason most CF prints finish. | Available in 0.4, 0.6 and 0.8 mm. Plan on replacing it periodically. |
| Ruby-tipped | Very good. Sapphire insert resists fibre abrasion and shrugs off small particles. | Costs more and is brittle, so seat it carefully. |
| Tungsten carbide | Best of the common options. Longest life of the nozzles listed here. | Reserved for heavy abrasive use and print farms. |
On a Prusa forum thread about nozzle durability, the consensus was blunt: any abrasive material will slowly destroy any nozzle, and stainless steel outlasts brass but will not last forever. That principle still holds, even though the available nozzle options are far better than they were in that discussion.
An enclosure plus a way to move air
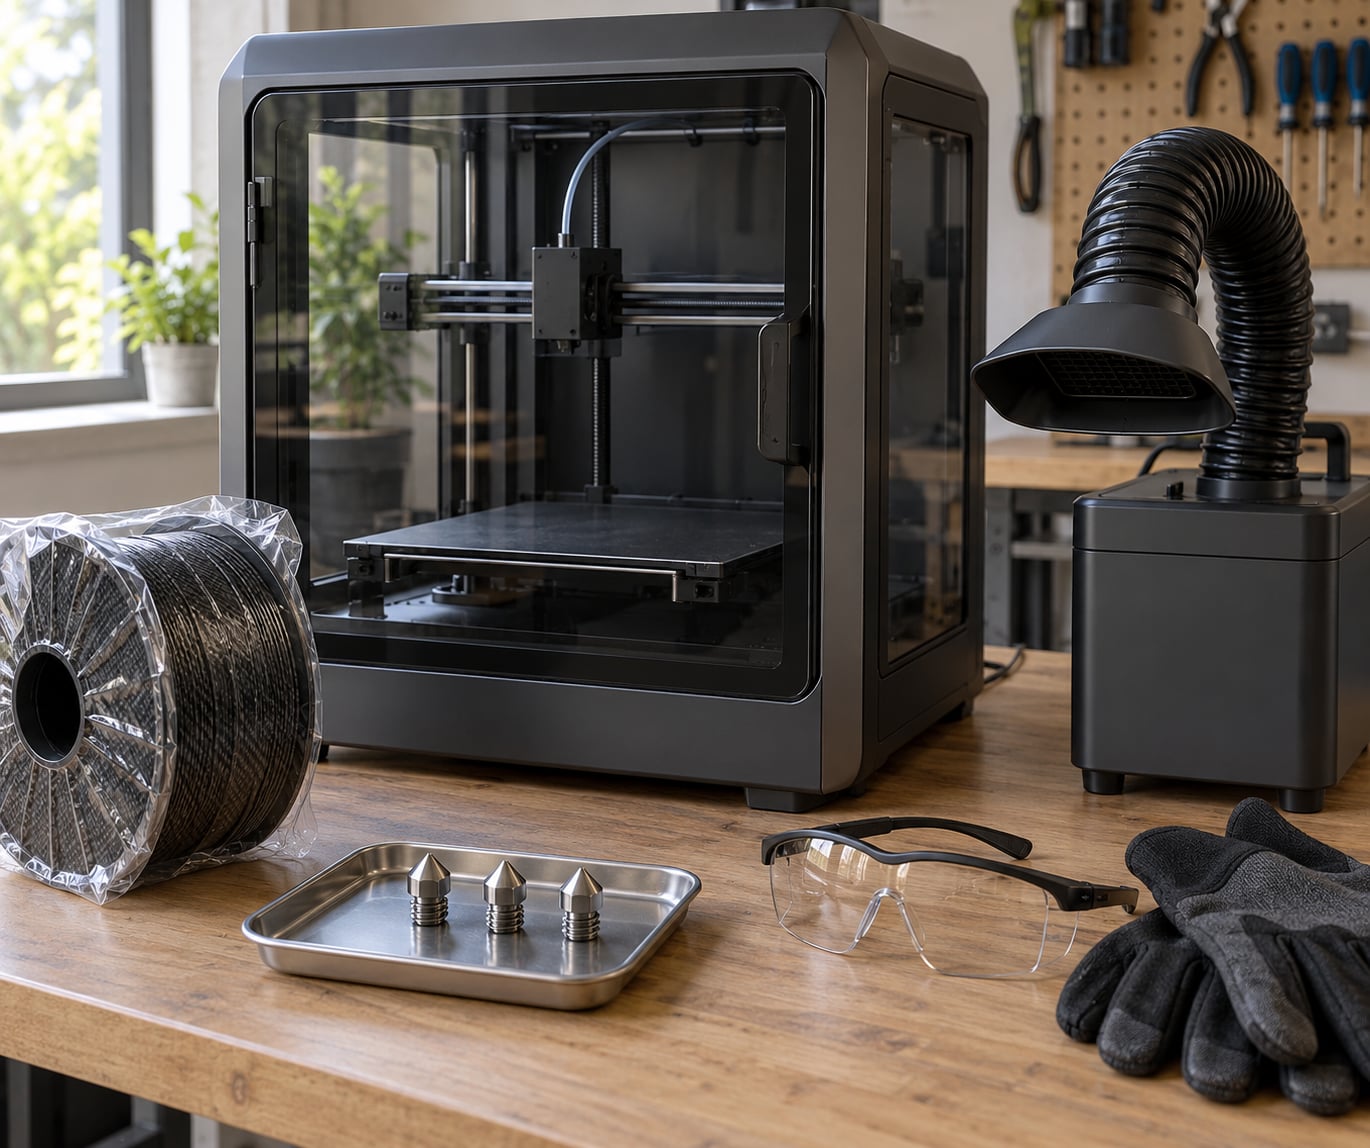
A closed chamber is a prerequisite for nylon CF and a strong recommendation for everything else. Alongside it you want either a local exhaust unit that pulls air out of the chamber, or a recirculating filter unit that passes chamber air through a HEPA and activated carbon stack.
A filament dryer and dry storage
Nylon CF, PA12-CF and PETG-CF are hygroscopic, meaning they pull moisture out of the air and break down as a result. A dryer or dry box with fresh desiccant and a hygrometer solves a problem most people meet as an unexplained failed print.
Personal protective equipment and cleaning kit
Safety glasses, nitrile gloves, a brush and nozzle wrench, cleaning needles, and a brass brush for the melt zone. Never blow abrasive dust off a spool with compressed air. Lift it into a bin bag instead.
One rule outranks everything else in this guide: the filament manufacturer’s datasheet beats any generic setting here. If the spool says 260 C and 80 C chamber, that is the number to use.
Step-by-Step: How to Print with Abrasive Filaments Safely
1. Confirm That Your Printer Can Handle Abrasive Filament
Most modern machines can, but you have to check rather than assume. Start with the manufacturer’s material compatibility list and the extruder type.
Look at four things: the extruder style, the maximum nozzle temperature, the motion system, and whether the chamber closes. A direct drive extruder feeding a short, steep path is friendlier to filled filament than a Bowden tube run, because fibres have less distance to snag and bridge in. An enclosed chamber with an all-metal hotend rated above the material’s temperature is what nylon CF requires.
That all-metal detail catches people. An all-metal hotend keeps the melt zone above the softening point of the filament, which stops heat creep. It is a thermal feature, not a wear feature, and it does not protect your nozzle from fibre abrasion. Those are two separate problems needing two separate parts.
Also check the filament path itself. Any PTFE-lined section upstream of the hot zone, including in a Bowden tube or a filament path tube, is a consumable you will replace on a schedule once you start printing fills.
How to tell it worked: the manufacturer’s documentation names your material, or the spool supplier lists the printer as supported. If neither does, email the printer maker before you order anything.
2. Set Up an Enclosed Print Area and Ventilation
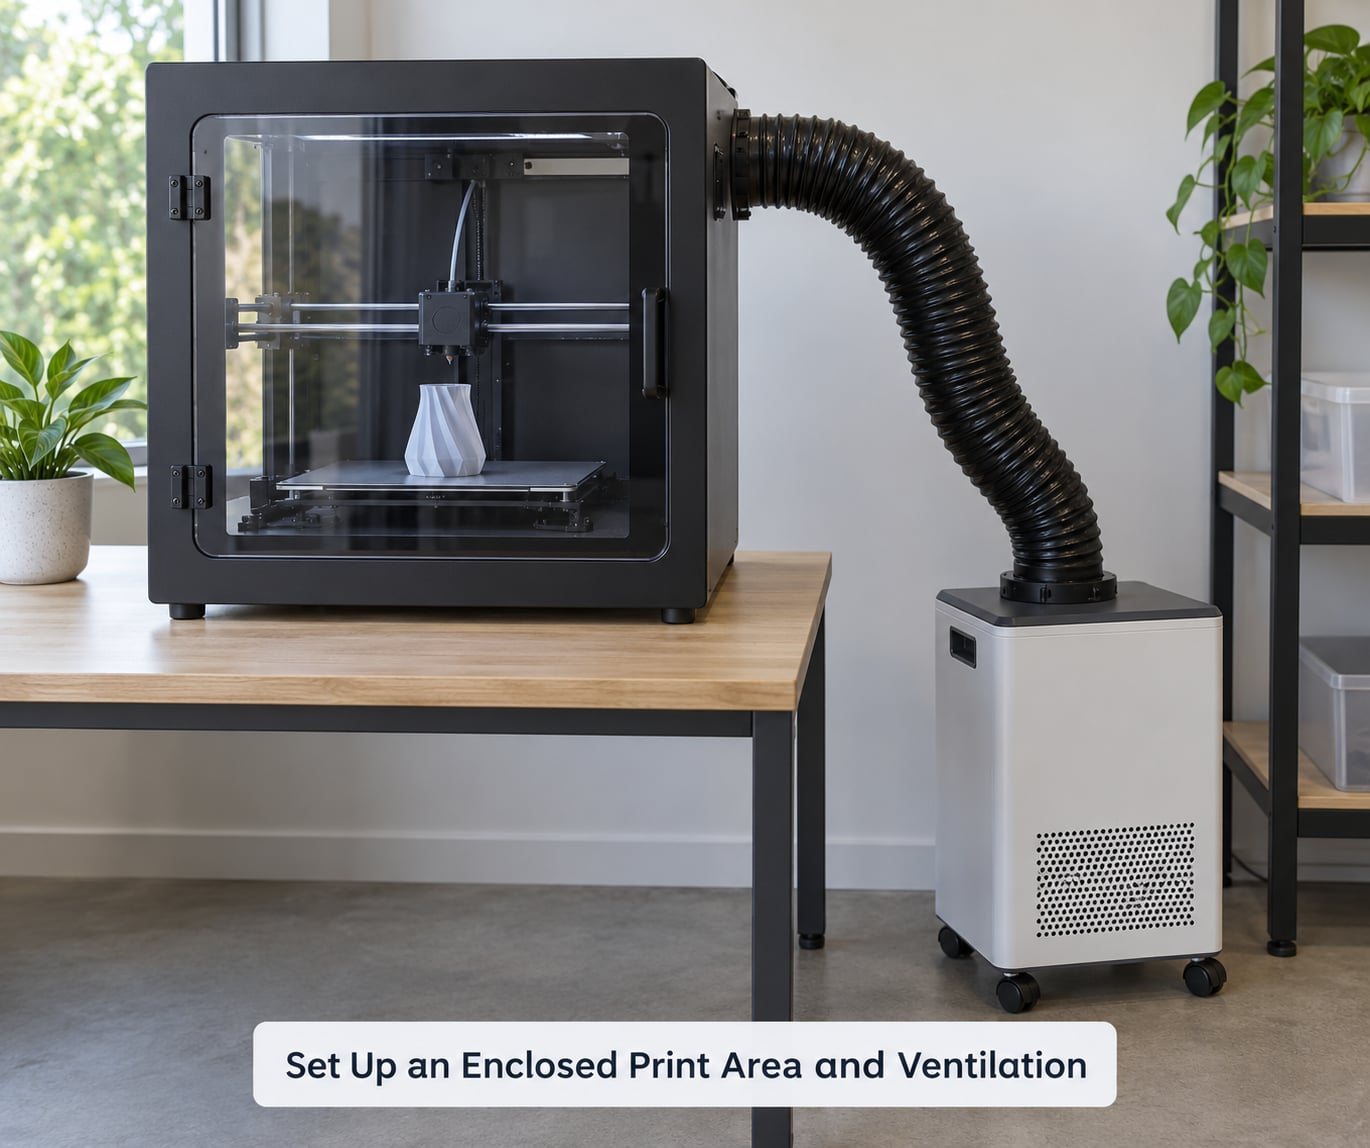
Close the chamber and make sure the air inside the chamber goes somewhere other than into your room. Filtration handles particles, ventilation handles vapors, and you generally need both.
Getting this right is the single biggest reason to know how to print with abrasive filaments safely before you buy a spool. Particulate emissions are a different problem from harmful vapors, and it is worth keeping them apart in your head. Fibres and mineral powders are particles, and a HEPA filter catches them. The thermal degradation of nylon and other engineering polymers produces volatile organic compounds, and only activated carbon does much about those. A unit with a HEPA filter and an activated carbon stage handles both. A unit with one or the other handles half the problem.
Local exhaust pulls contaminated air out and away, which is the stronger option if you can position the outlet outdoors or into a separate space. Recirculating filtration cleans air and returns it to the chamber, which is fine for an enclosed machine but wrong as your only plan in a shared room. A unit recirculating into the room you sit in is not ventilation.
The honest limitation here matters. One user in r/QidiTech3D built a 3D-printed duct adapter for a 120 mm PC fan on a PWM controller, ran it at full output, and reported the headaches after a day of PA6-CF printing stopped. He also said plainly that fumes still leaked from the machine. A fan helps. It is not a sealed containment system, and anyone selling you one as a complete solution is overselling it.
If your setup cannot capture emissions properly, move the job. Plenty of makers print abrasive filament in a spare room or a garage with the door open rather than spending on a proper extraction path.
How to tell it worked: run a short print, then stand at your normal working position for five minutes. No heat on your face, no smell, no headache. If you notice any of those, fix the air before you print again.
3. Wear Appropriate Protection and Work Cleanly
Wear safety glasses, nitrile gloves and long sleeves when handling opened abrasive spools, and treat the loading area as a dusty space.
Filament dust is fine enough to stay airborne. When you unload a spool that has been sitting open, hold it over a bin rather than letting it drop onto a bench. Wipe the spool rim and the printer’s filament path with a damp cloth, and wash your hands before you touch a keyboard, a mug or food.
Keep abrasive filament physically separate from food, from pets and from children. A vacuum with a HEPA filter is the right tool for loose dust on the floor; a damp wipe handles the rest. Compressed air is the wrong tool, because it just relaunches the particles you were cleaning up.
Store spools in a sealed bag with fresh desiccant once they are open. Filled filament degrades faster than unfilled because the filler gives the polymer matrix more places for water to sit.
How to tell it worked: your bench is clean, your hands are clean, and no loose dust is sitting around the spool. That is a low bar and most people fail it.
4. Install and Inspect the Correct Nozzle
Install a wear-resistant nozzle at the widest bore your parts can tolerate, and replace it whenever the bore is scored or deformed.
The diameter choice matters more than people expect. A 0.4 mm nozzle gives the best detail but the narrowest path for fibres to bridge in, which shows up as under-extrusion, gaps and rough surfaces. A 0.6 mm bore handles most carbon fibre work and is a sensible first move. A 0.8 mm bore is what some users deliberately fit for CF nylon because the clogging resistance outweighs the loss of detail on functional parts. One CF nylon user reported that the nozzles that never clogged were the ones widened out to 2 mm, which is an extreme of the same idea.
Fit the nozzle while the hotend is cold. Thread it in, then heat to printing temperature and tighten again, because heat expands the assembly and a nozzle tightened cold will loosen. Seat a ruby insert gently; it chips if you overtighten it.
Replace on condition rather than on a schedule. A scored bore, a deformed tip, a flattened or smeared tip, or a nozzle you are repeatedly pushing filament through all mean the same thing. Do not rescue a worn nozzle by raising the temperature. That makes a partial clog permanent and adds fumes to the room.
How to tell it worked: the first layer lays down as a continuous line with no gaps in the extrusion path, and extrusion feels smooth with no grinding or skipping.
5. Dry the Filament and Load It Safely
Dry hygroscopic abrasive filament before it goes near the extruder, and keep it dry until the print ends.
Moisture in nylon CF turns into steam inside the melt zone, which bubbles through the extrusion and turns into the stringy, rough surface everyone recognises. Ranges below are typical for the material families, not substitutes for the spool datasheet.
| Filament family | Typical dry temperature | Typical duration | Notes |
|---|---|---|---|
| PA6-CF | 70-80 C | 8-12 hours | Among the most moisture-sensitive fills. Dry before first use. |
| PA12-CF | 80 C | 8-12 hours | Better tolerance than PA6 but still hygroscopic. |
| PETG-CF | 60-65 C | 4-6 hours | Forgiving once dry, noisy once damp. |
| PLA-CF and PLA-GF | 45-55 C | 4-6 hours | PLA is only mildly hygroscopic but the fill changes the balance. |
| Wood and mineral-filled PLA | 45-50 C | 4 hours | Overdrying makes some cellulose fills brittle. |
| Glow-in-the-dark PLA | 45-50 C | 4 hours | Pigment-heavy and more abrasive than plain PLA. |
While the filament sits in the dryer, dry the spool and the filament path too, if your dryer is large enough. A damp spool in a dry machine reintroduces the problem in an hour.
Load without touching the drive gear or the extruder idler surface, because skin oil and fingerprints on the gear compound into the feed path over time. Seal the bag with desiccant straight after the print. For a long print, use a dry box or feed the spool straight from the dryer, because you will consume moisture out of an open bag faster than most people expect.
How to tell it worked: the first layers look slightly glossy and dense rather than chalky, and the extruder does not bubble or spit.
6. Use Conservative Temperature and Speed Settings
Start from the supplier’s profile, then slow everything down by 25-50 percent and check the result with a small test print.
Filled filament behaves differently from the base polymer. Fibres and particles raise viscosity unpredictably, and a profile that looks fine in a preview can starve the extruder in reality. So: take the supplier’s temperature, then drop the speed. Where the profile says 200 mm/s, try 100-150 mm/s and see whether the surface improves. It usually does.
Print the first few layers slower still, around 10-20 mm/s. Fibre-laden layers that land fast often shift, since filled materials have lower layer adhesion than unfilled ones. Check retraction against the new melt behaviour too; filled filament packs differently and a retraction tuned for pure PLA can cause a jam at the drive gear.
Brim helps on high-shrinkage nylons such as PA6-CF. Clean glass or a proper textured PEI sheet matters more than usual because high chamber temperatures and warping go together, and a first layer that releases halfway through is a lost print.
For bright or structural parts, remember that filled filaments are anisotropic. Layers weaker than the material looks, so orient the part so the load runs within the layer lines, not across them.
How to tell it worked: your test print has no gaps, no under-extrusion, and a surface you would accept on the final part. Once that test passes, scale up.
7. Monitor the First Layers and Print
Watch the first hour closely, because abrasive failures announce themselves early and get expensive late.
Under-extrusion with gaps and missing material means fibres are bridging in the bore. A grinding noise from the extruder means particles are being crushed in the drive gear. Both respond to a wider nozzle, not more heat.
A rough, sandy surface finish usually means a worn bore is cutting the flow width down. Visible lumping or a crust forming around the nozzle tip is buildup from particles. Layer splitting where one layer separates from the next is an adhesion problem, and the fix is slower speed, more part cooling, and often a hotter chamber rather than a hotter nozzle.
When something is wrong, stop and let the nozzle cool before you touch it. Then work through the escalation path in order, stopping the moment the clog clears: pull the filament by hand at a low hotend temperature, then try a cleaning needle, then a cold pull with the filament stuck in the melt zone, then a soak, and only then remove the nozzle for a soak or a replacement. Never force filament through a blocked nozzle, and never clear a clog by pushing the temperature well above the material’s rated range.
If a clog keeps coming back within a few hours of clearing, the bore is almost certainly worn. That is a replacement, not another round of unclogging.
How to tell it worked: extrusion sounds consistent, the first five layers are solid, and the surface has no sandy texture.
8. Finish, Cool, Unload, and Clean the Workspace
Let the machine cool fully before unloading, then clean abrasive residue out of the melt zone while the ventilation is still running.
Heat the nozzle to printing temperature and push out a short length of filament, so you are clearing fresh material rather than baked residue. Wipe the nozzle and the heater block with a damp cloth, avoiding moisture near the heater block itself. Use the brass brush on the melt zone while it is still warm, and use a needle for the bore only while the nozzle is cold, because a hot nozzle plus a needle means a broken needle and a blocked nozzle.
Keep ventilation running through cleanup. Cutting off extraction while abrasive residue is still in the machine puts the particles back where they started.
Run a purge filament for a minute to clear the path if you are switching to a non-filled material, then reseal your abrasive spool with its desiccant and return it to dry storage. Wipe the chamber and the bed, and check the filament path and extruder gears for dust and packed material before you close the machine up.
How to tell it worked: the next print, ideally in plain PLA, behaves exactly as it did before you introduced abrasive filament. If it does not, you left residue somewhere.
Common Mistakes
The mistakes below come up in almost every discussion I have read on carbon fibre and filled filament printing, and they all share one cause: doing the cheap thing first and paying for it later.
Leaving the standard brass nozzle installed
A brass nozzle can show wear after roughly 500 g of carbon fibre, and hardening steel or ruby nozzles last several times longer. If you print abrasive filament more than occasionally, swapping the nozzle is cheaper than replacing a heater block or chasing clogs all year.
Printing on an open frame with no extraction
Users report headaches and dizziness after a day of printing PA6-CF on an unenclosed machine. An enclosure plus extraction is the fix. Moving the printer to a separate ventilated room is a valid fix too. Ignoring it is not.
Loading damp filament from a cold shelf
Nylon CF, PA12-CF and PETG-CF all need drying first. The symptoms are popcorn noise, stringing, rough surfaces and a part that looks nothing like the preview. Dry the spool, and dry the spool again every time you open the bag.
Printing nylon CF in a cold chamber
Nylon CF is hygroscopic and shrinks noticeably as it cools, which warps a part right off the bed. Chamber temperature in the region of 30-40 C is commonly recommended for PA6-CF and PA12-CF, subject to what your printer supports. PETG-CF is closer to standard PETG behaviour and prints near ambient temperature. If your printer cannot hold chamber heat, choose a different material.
Treating a 0.4 mm nozzle as a permanent answer
Narrow bores clog. A 0.6 mm bore solves most of the problem at a modest cost in detail, and users who fight constant clogs on CF nylon have had success deliberately stepping up to 0.8 mm.
Raising the nozzle temperature to clear a clog
That overheats the polymer, produces more fumes, and often bakes the blockage in place permanently. Work the escalation path upward from a cold pull instead.
Cleaning abrasive dust with compressed air
It relaunches the particles into the air you were trying to clean. Use a damp cloth, a vacuum with a HEPA filter, and a bin bag for the spool.
Prevention checklist
- Fit a wear-resistant nozzle before the first abrasive spool, and keep a spare.
- Close the chamber and run extraction whenever you print fills.
- Dry hygroscopic fills before loading, and reseal the bag with desiccant after.
- Start from the supplier profile and cut speed by 25-50 percent.
- Check the nozzle on a cold pull every few hours on a long abrasive print.
- Clean the melt zone and the bench before you shut the machine down.
One question I see repeatedly: can you run abrasive filament through a multi-material unit or AMS-style device? The feed mechanism is usually the weak point, since fibres pack into drive gears and the cutter. Most community guidance is to run abrasive filament straight from the spool or out of a dryer and treat the multi-material unit as a no-go for fills.
Frequently Asked Questions
Do I need a hardened nozzle to print abrasive filament?
Yes, if you print it regularly. Abrasive filaments carry hard particles that cut into the nozzle bore and widen it, which shows up as under-extrusion and clogs. Brass can show wear after roughly 500 g of carbon fibre, so treat it as a temporary part. Hardened steel is the standard upgrade, ruby and tungsten carbide last longer for heavy use, and stainless steel is better than brass but still not ideal.
Does PETG-CF need an enclosure?
Not strictly for temperature reasons, because PETG-CF prints close to standard PETG conditions. You still want an enclosed chamber for filtration, since the point is capturing particulate emissions and fumes rather than holding heat. An enclosure with a HEPA and activated carbon filter keeps fibres and degradation byproducts out of the room. Without one, print it in a separate ventilated space.
Is abrasive filament safe to print indoors?
It is manageable indoors with proper air control, but not casually. Filled filaments emit fine particles when the fibre breaks down, and engineering polymers give off volatile compounds when heated. Users report headaches and dizziness after a day of PA6-CF printing on an open machine. An enclosed printer with extraction, safety glasses when handling spools, and moving the job to a separate room if you cannot capture emissions will keep it safe.
Which nozzle diameter should I use for carbon fiber?
Step up to 0.6 mm for most carbon fibre work. A 0.4 mm bore gives better detail but lets fibres bridge and cause gaps, and some users fighting constant clogs on CF nylon have deliberately moved to 0.8 mm. Whichever you choose, pair the wider bore with a wear-resistant material, since a 0.4 mm hardened nozzle still clogs faster than a 0.6 mm one.
How do I know if my nozzle is worn out or just clogged?
A clog clears. Worn does not. If the clog returns within a few hours after a full clean or cold pull, the bore is worn. A sandy or rough surface finish, lines that look thinner than they should, and a visibly scored or deformed tip all point the same way. Worn nozzles get replaced, not unclogged, and raising the temperature to compensate only bakes the blockage in and adds fumes.
How do I keep carbon fiber nylon dry while printing?
Dry the spool first, then keep it dry during the job. PA6-CF typically wants 70-80 C for 8-12 hours and PA12-CF around 80 C for a similar duration, always deferring to the spool datasheet. For long prints, feed straight from the dryer or use a dry box with desiccant, and reseal the bag immediately afterwards. Moisture shows up as bubbling, stringing and a rough surface.
Conclusion
Start here: confirm your printer is rated for the material, fit a wear-resistant nozzle at 0.6 mm, get the enclosure closed with extraction running, and dry the spool. Then print a small test before committing to a full roll of carbon fibre nylon.
Once you know how to print with abrasive filaments safely, the material stops being frightening. Filled filaments produce parts that unfilled plastics cannot, and the safety side of it is a short list of habits rather than a specialist setup.