Anti aliasing settings for resin printing explained in plain terms: the slicer gives the pixels along a layer’s edge a partial grey exposure instead of full on or full off, so curves and diagonals print as a smooth gradient rather than a staircase. Updated for October 2026 against current Lychee Slicer and ChiTuBox builds.
It is the cheapest surface-finish upgrade most resin printers never get. The catch is that the settings all do slightly different jobs, the numbers do not translate between slicers, and pushing them too far quietly eats fine detail. That last part is why the same preset that makes one person’s helmet look cast-smooth makes another person’s sword hilt look melted.
So this walkthrough covers what each control actually does, what to start with, and how to test changes without wasting a bottle of resin on a coin-sized mistake.
Table of Contents
- 1What Is Anti Aliasing in Resin Printing?
- 2Anti Aliasing Settings for Resin Printing Explained
- 3How Anti Aliasing Works in a Resin Slicer
- 4Which Anti Aliasing Setting Should You Use?
- 5How to Adjust Anti Aliasing in Lychee and ChiTuBox
- 6How to Test Anti Aliasing Without Wasting Resin
- 7Anti Aliasing vs Other Print Quality Settings
- 8Common Anti Aliasing Problems and Fixes
- 9Frequently Asked Questions
- 10Is anti aliasing good for resin printing?
- 11What anti aliasing setting is best for miniatures?
- 12Does anti aliasing reduce print resolution?
- 13Why does anti aliasing make fine details disappear?
- 14Should I use anti aliasing for functional resin parts?
What Is Anti Aliasing in Resin Printing?
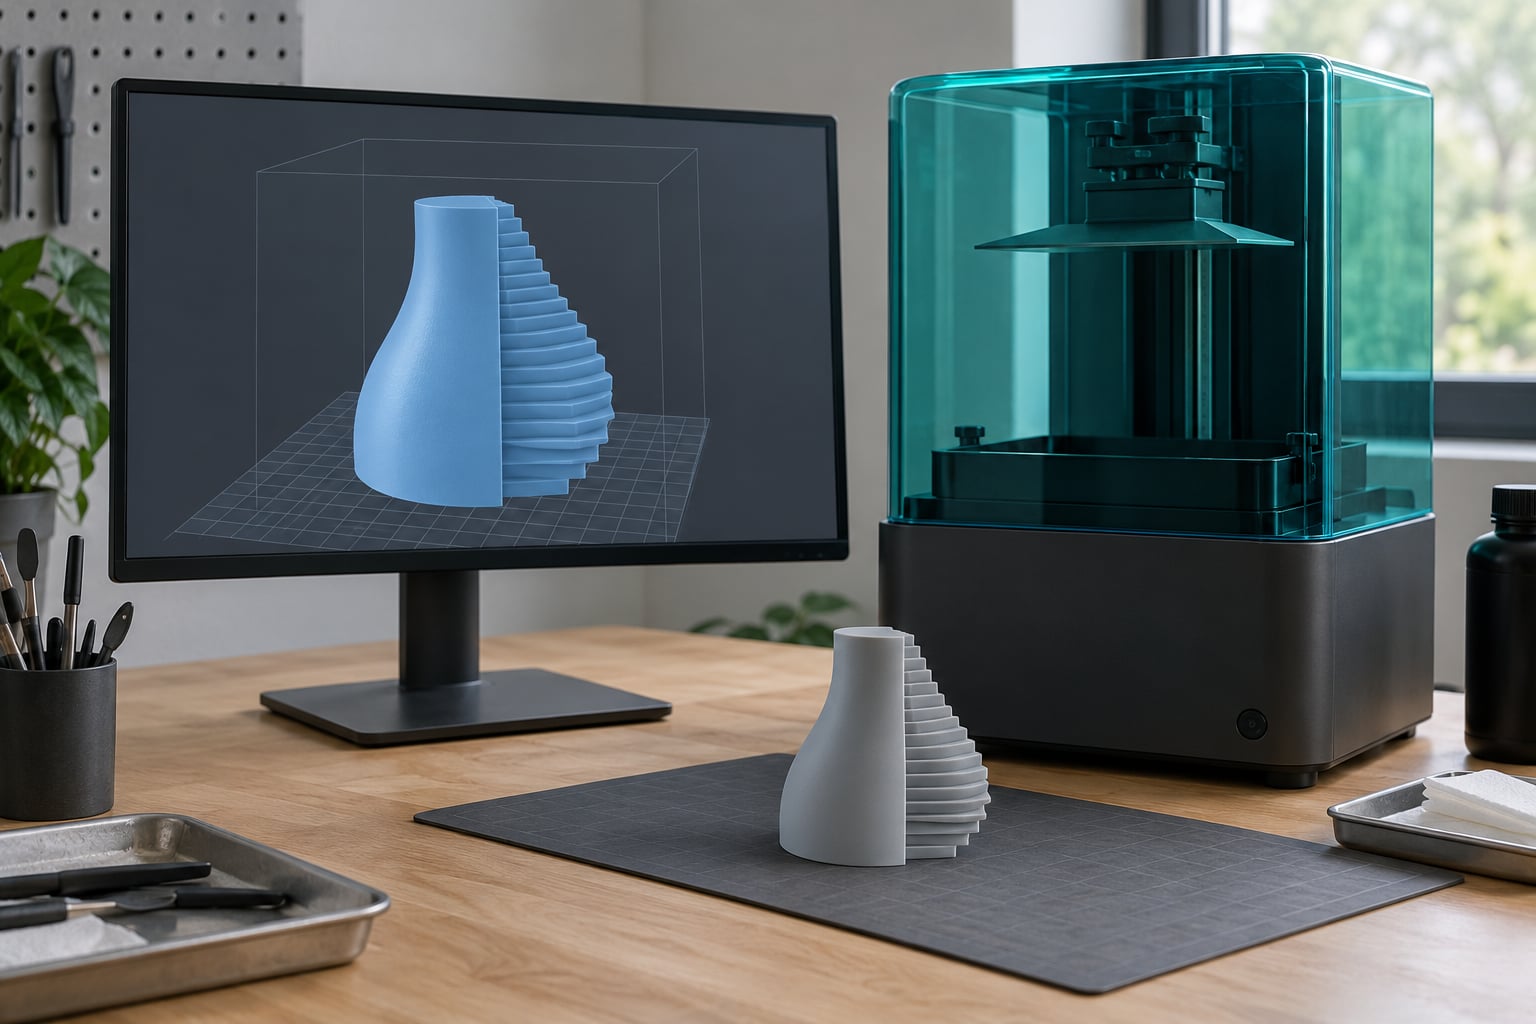
An MSLA printer exposes each layer through an LCD mask, and every pixel on that mask is normally binary: fully on or fully off. A curve sliced at that resolution has to be approximated by whole square pixels, so you get stair-stepping. Anti-aliasing replaces the hard on/off boundary with a band of intermediate grey pixels, and those pixels partially cure the resin, so the edge cures over a slightly wider area and reads as smoother once the part is off the plate.
It is not sharpening, and it is not a substitute for a sharper image. It adds no detail that was never in the model, it changes no exposure time on its own, and it does nothing for the horizontal ridges between layers. Those come from the Z axis, and you fix them with layer height and orientation.
Worth separating from three similar-sounding things: image blur softens the whole layer image slightly after anti-aliasing runs, grey level controls how dark those edge pixels are, and ringing or wobble correction compensates for the way a printer’s pixels actually wobble, which a real LCD never does perfectly.
Anti Aliasing Settings for Resin Printing Explained
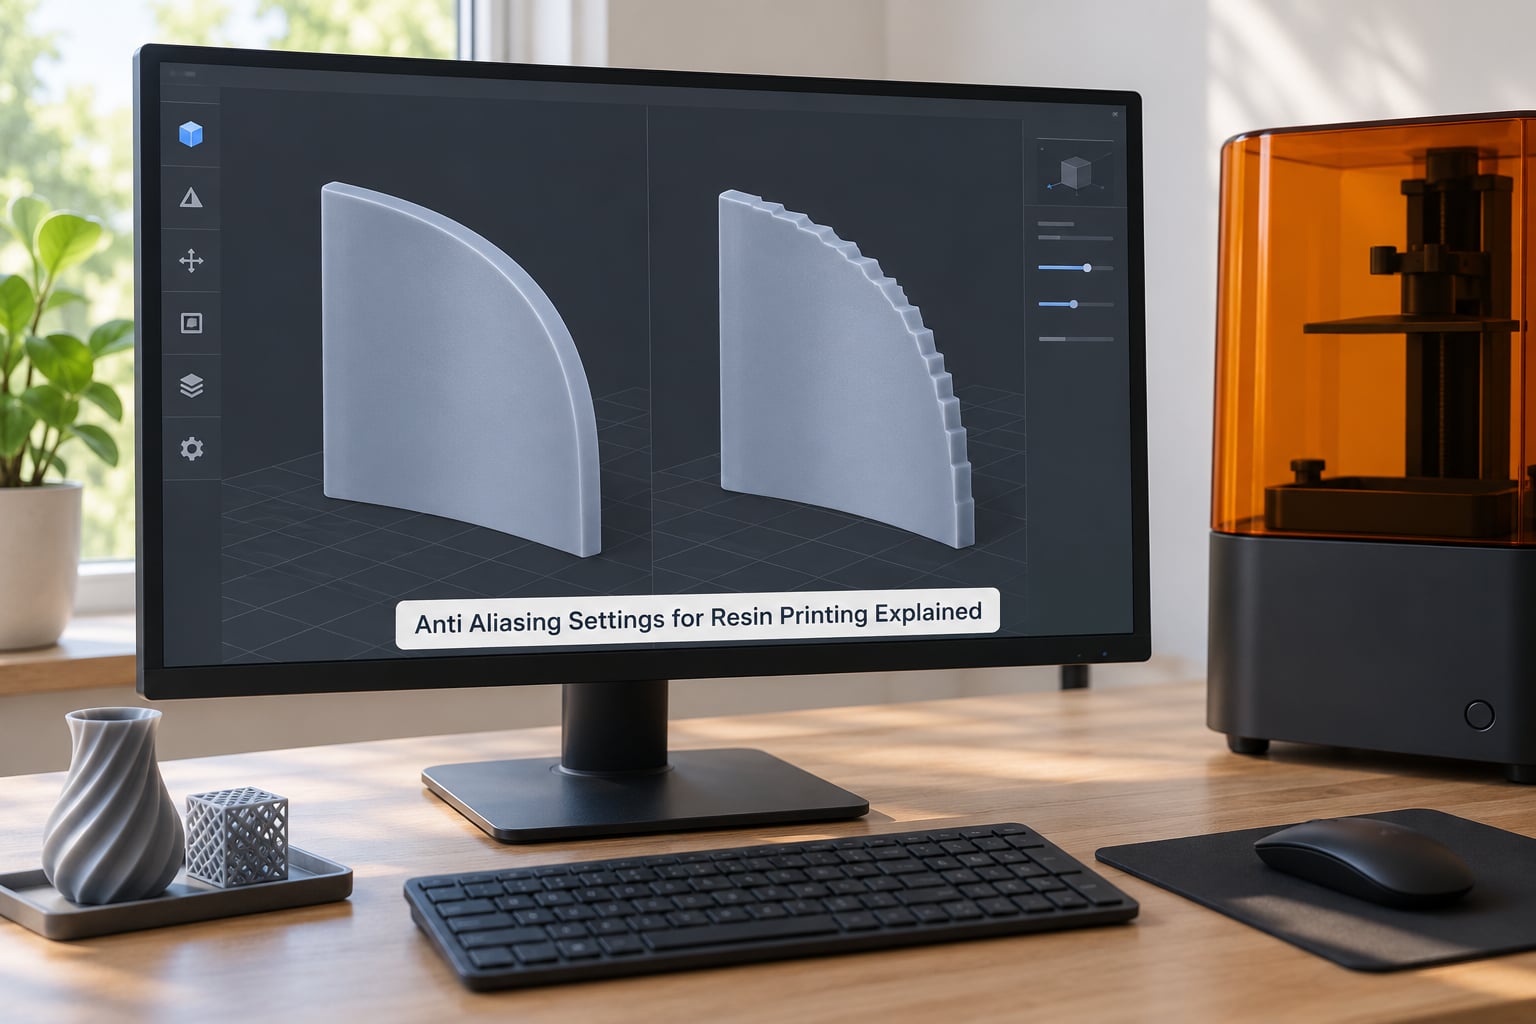
The direct answer: anti aliasing smooths diagonal and curved edges by blending neighbouring pixels, and the right value depends on your slicer, your grey mode, how much detail you want to keep, and how finished the surface needs to look. Turn it on, keep the radius small, and start moderate. The controls below are the ones that matter in Lychee Slicer 5 and above and in ChiTuBox.
| Control | What it does | Where it lives | Start here |
|---|---|---|---|
| Anti-aliasing level or samples | How many sub-samples per edge pixel are computed; more samples means finer gradation and a longer slice | Lychee: Smooth Surfaces. ChiTuBox: Enable anti-aliasing, Level | 4x |
| Radius | Width in pixels of the grey band along the edge | Lychee only | 2 px |
| Grey offset | Percentage that scales how dark the edge pixels are | Lychee only | 30% |
| Grey level | Greyscale value of edge pixels, usually expressed out of 16 | ChiTuBox | 1 |
| Image blur | Softens the whole layer image on top of the anti-aliased edges | ChiTuBox | 2 |
| High definition anti-aliasing | Recomputes the edge band against the underlying model rather than the pixel grid | Lychee only | On |
| Anti-aliasing on supports | Applies the same grey treatment to support pixels | Lychee only | Off |
Two rules keep most people out of trouble. Keep radius and grey offset modest, because a wide dark band is what softens small features. And keep anti-aliasing off for supports, because support pixels are already thin and greying them either weakens them or blurs them into the model.
How Anti Aliasing Works in a Resin Slicer
Your layer image lives on a fixed XY pixel grid, usually 47 to 55 micrometres per pixel on a mainstream machine. The slicer walks the model outline, and wherever that outline crosses a pixel boundary it has a decision to make. Without anti-aliasing the pixel is simply on or off, and the outline becomes a set of steps.
With anti-aliasing, the slicer calculates how much of that boundary pixel actually sits inside the model, then scales the exposure accordingly. A pixel half-covered gets roughly half the light. The printer has no idea it is being subtle, it just projects a dimmer pixel, and dimmer light means partial cure, which means a small chamfer instead of a hard corner.
Here is why cranking the strength is not automatically better. The strength setting controls how far that gradient reaches, and a wide gradient spreads a tiny cure across a wider band. On a sphere that reads as smooth. On a small rivet, a raised shield detail, or thin hair, that same band can merge two features into one soft lump. Sampling more times improves how finely the gradient is computed, which costs slice time and file size, not accuracy of the underlying geometry.
And none of this touches Z. The step you see between layers is a separate artefact with a separate cause, and a greyed edge will not touch it.
Which Anti Aliasing Setting Should You Use?
Match the setting to the model. Off is right for pre-supported files, thin detail work, and anything where a failed print costs more than a rough surface. Low keeps edges acceptable while preserving definition. Medium suits display pieces and organic shapes. High is for large, smooth, curved surfaces where finish matters more than a crisp edge.
| What you are printing | Anti aliasing | Notes |
|---|---|---|
| 28 mm wargaming miniatures, self-supported | Low to medium, radius 2 px, grey offset around 30% | Detail loss shows up fastest on faces, shields, and weapon edges |
| Pre-supported miniature STLs | Off | Anti-aliasing blurs the support pixels the file depends on |
| Large surface details, statue busts, helmets | Medium, high definition on | This is where the setting earns its keep |
| Sharp mechanical parts, adapters, gears | Off or lowest setting | Dimensional accuracy beats cosmetics on a mating surface |
| Cosplay props and hollow shells | Medium to high | Big curved panels show stair-stepping worst |
| Jewellery rings and fine chains | Off | Feature size is the whole design |
| Functional prototypes and fit checks | Off | A softened edge becomes an interference fit |
Exact control names and ranges shift between software versions, so treat the numbers as a starting point rather than a rule set. If your slicer’s anti-aliasing options look nothing like this, you are probably on an older build and the software’s own documentation will say which controls that version exposes.
How to Adjust Anti Aliasing in Lychee and ChiTuBox
Lychee Slicer 5 and above. Open the print settings panel and look for the Smooth Surfaces group. Set the anti-aliasing radius in pixels, adjust the grey offset percentage, and switch High Definition Anti Aliasing on. Below that, the Anti-aliasing on Supports toggle should be off for almost every model. The J3D-Tech guide for Lychee suggests radius 2 px, grey offset 30%, high definition on and supports off as a good baseline, and it is the preset most Lychee users start from.
ChiTuBox. In the print settings, open the anti-aliasing group, tick Enable anti-aliasing, and set the Level, Gray Level and Image Blur values. The widely cited community starting point is anti-aliasing level 2 with gray level 1 and image blur 2. Other long-standing community presets go further, with level 8 and a higher gray level, or a 50% grey offset on the standard profile.
Those community numbers are not arbitrary, and the spread is worth understanding rather than copying blindly. A higher grey level means darker edge pixels, which smooths more aggressively and cures more deeply, so it can compensate when exposure sits at the lower end. A grey level of zero effectively disables the darkening while leaving the edge sampling in place, which is a middle ground some people prefer on normal-gray resins. Image blur adds softness across the entire image rather than just at edges, so it costs more detail per step than raising grey level does.
Check your installed version before following any path exactly. Slicer interfaces get reorganised, and a menu that moved between major releases is the most common reason a tutorial seems to be wrong.
How to Test Anti Aliasing Without Wasting Resin
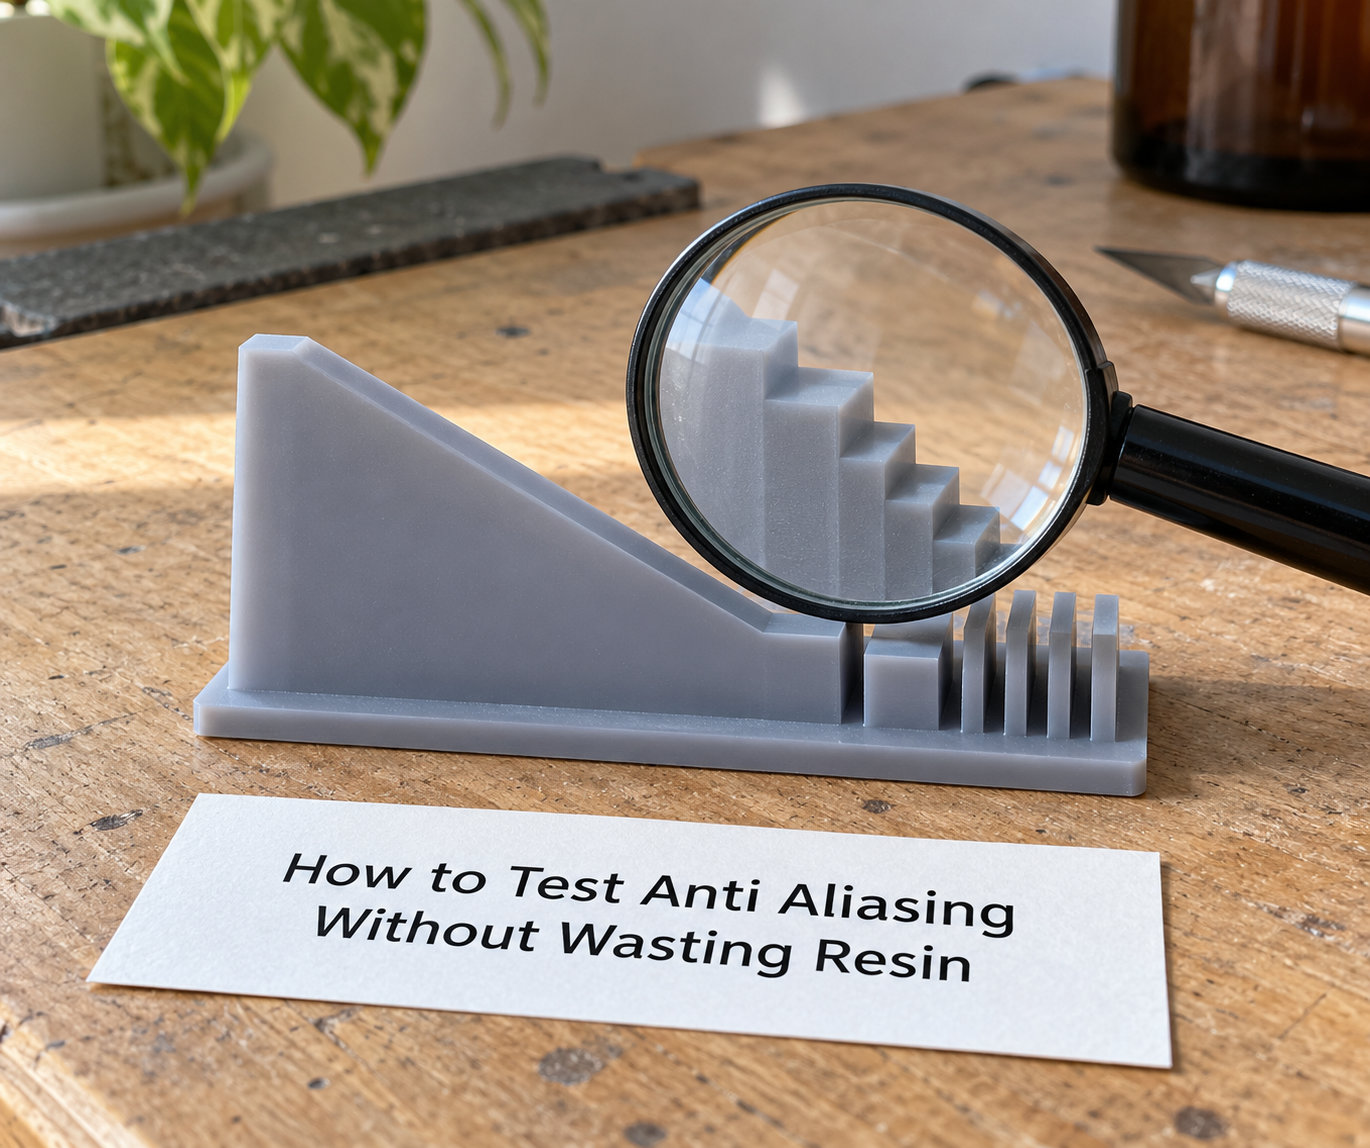
Testing anti aliasing is slow and dull if you do it on a full model. A coupon takes a fraction of the resin and gives you a cleaner answer, because everything on it is the same feature type.
- Slice one coupon twice. Same model, same orientation, same exposure, same layer height. Change only the anti-aliasing setting. Slice time climbs sharply with heavy settings, so pick something small.
- Print both and finish them the same way. Wash, cure, and sand identically. Handling differences will fool you more often than the setting will.
- Compare the diagonal wall under angled light. Raking light from a desk lamp makes stair-stepping obvious in a way that flat overhead light hides. This is the single most useful check.
- Check the fine-feature pattern next. A stepped set of thin bars, small holes or ridges tells you immediately whether the setting merged or rounded anything.
- Change one variable at a time. Move grey offset, then radius, then image blur. Changing all three at once tells you nothing about which one did the work.
- Re-run exposure calibration if you change grey values substantially. Edge pixels that now receive more or less light than the rest of the layer shift your effective exposure on those features. Treat a big grey change as a new exposure state, not a free tweak.
If the coupon test says the smoother version also lost detail, step the setting back rather than accepting the trade. Most models prefer a modest setting that keeps their edges readable.
Anti Aliasing vs Other Print Quality Settings
Anti-aliasing is one control in a chain, and most disappointing results come from expecting it to do another control’s job. Match the symptom to the setting that actually owns it.
| What you see | What actually causes it | What to change |
|---|---|---|
| Jagged silhouette on a curve | XY pixel grid | Anti-aliasing, or a printer with a finer pixel pitch |
| Ridges between layers | Z layer height and orientation | Lower layer height, re-angle the model |
| Blown-out, fat details | Over-exposure, or too much grey level | Exposure calibration, lower grey offset |
| Rounded corners that should be sharp | Anti-aliasing radius and grey offset too high | Reduce radius, lower grey offset |
| Wavy lines on straight walls | Ringing or wobble, plus mechanical alignment | Wobble correction, rail tension, screen check |
| Missing fine detail overall | Over-exposure or pixel-level undersampling | Exposure time, XY resolution, orientation |
The sentence worth remembering: anti-aliasing fixes stair-stepping in XY and nothing else. Horizontal layer lines need layer height and orientation. Surface problems that follow the shape of a light source need exposure. Problems that look like a shaky hand need mechanics.
Common Anti Aliasing Problems and Fixes
Details look soft or merged. Too much grey, too wide a radius, or image blur doing work it should not. Drop grey offset first, then radius, and set image blur to 1 or 0. If a raised detail disappears entirely, anti-aliasing is the reason, and the fix is a lower setting rather than more exposure.
Thin features fail to print at all. Grey edge pixels on a thin feature reduce the effective light, and the feature may not cross the cure threshold. Turn anti-aliasing off for that model, or reorient it so the thin feature runs along the build plate rather than across it.
Slice time jumped. Sampling level, high definition anti-aliasing and large radii all add computation. Drop to 4x sampling and a 2 px radius before blaming your machine. A heavy setting that adds minutes per plate rarely earns its keep on small prints.
Streaking or uneven vertical walls. Some printer and firmware combinations produce streaking with anti-aliasing enabled, and users have reported this on Sonic Mini models in particular. Test with anti-aliasing off on a flat wall. If the streaking disappears, you have a hardware or firmware interaction, not a settings mistake, and switching slicer is a reasonable workaround.
The setting appears to do nothing. Check three things in order. First, that you are on a printer whose LCD supports greyscale projection, since some older hardware and firmware cannot do grey at all. Second, that the slicer preview actually re-renders when you change the value, because a stale preview is a common false negative. Third, that you are looking at a curved surface, since anti-aliasing on a flat panel is genuinely invisible.
Your LCD screen is older. Masks lose contrast as they age, and a degraded screen turns intended dim edge pixels into either no exposure or full exposure. If fine detail has been fading over months rather than weeks, test a fresh layer before touching anti-aliasing again. Users on older FEP films and worn screens often blame a software setting for a hardware problem.
Frequently Asked Questions
Is anti aliasing good for resin printing?
Yes, for most models it is the cheapest surface-finish improvement available. It softens the stair-stepping you get on curved and diagonal surfaces by giving edge pixels partial exposure instead of full on or off. It does nothing for horizontal layer lines, and it can cost you fine detail if pushed too far, so moderate values suit most prints.
What anti aliasing setting is best for miniatures?
For 28 mm wargaming miniatures you slice yourself, use a low to medium anti-aliasing level, a 2 px radius and a grey offset near 30%, then check the face and weapon edges closely. If you are using a pre-supported file, turn anti-aliasing off entirely, because it blurs the small support pixels the model depends on.
Does anti aliasing reduce print resolution?
It does not reduce the printer’s real resolution, since no new pixels appear. It changes how the edge pixels are exposed, which effectively rounds off features smaller than the grey band you choose. A wide radius behaves like a small loss of detail at edges, which is why keeping the radius at 1 to 2 px preserves more definition.
Why does anti aliasing make fine details disappear?
Edge pixels only receive partial light, so a feature that sits between full and dim exposure may never cross the cure threshold at all. Higher grey levels, wider radii and image blur all widen that soft band further, merging nearby details into one rounded shape. Fix it by lowering grey offset and radius, and reorienting the model if the feature is thin.
Should I use anti aliasing for functional resin parts?
Usually not. Functional parts depend on accurate dimensions and sharp mating surfaces, and a greyed edge behaves like a small chamfer, which can turn a snug fit into an interference or a loose one. Turn anti aliasing off for adapters, gear blanks, threaded features and anything that has to fit another part, and keep it for display pieces.
Start here: enable anti aliasing at 4x sampling with a 2 px radius and a 30% grey offset, keep it off for supports, then print a small coupon and look at a curved surface under angled light. Change one value at a time, and remember that the trade is always a smoother curve against a sharper detail. If the edges still look wrong, the cause is more often layer height, orientation or exposure than the anti aliasing settings themselves.