How to weld 3D printed parts with a soldering iron comes down to four things: a flat, clean overlap joint, a temperature-controlled iron, lead-free filler metal fed into the seam, and a cooling period nobody touches. Done on PLA, PETG, ABS or ASA, a small repair takes about fifteen minutes and leaves you with a joint that will not snap along the layer lines.
The honest part first. This is not metal soldering. The iron softens the printed plastic until polymer chains from both parts interdiffuse across the boundary, and that new interface is as strong as the layers around it. Printed detail and surface prep matter more than the tool brand, and a cheap fixed-temperature iron will make you doubt the whole technique.
Ventilation is not optional either. Heated thermoplastics give off fumes, and ABS and ASA release styrene while they go. Set up a fume extractor and safety glasses before the iron heats up, and treat a respirator as mandatory for ABS or ASA.
Table of Contents
- 1What You Need
- 2The tool and consumables
- 3Temperature reference by material
- 4Step-by-Step: How to Weld 3D Printed Parts with a Soldering Iron
- 5Step 1 – Check Material Compatibility and Prepare the Parts
- 6Step 2 – Choose and Fit the Joint
- 7Step 3 – Tin the Iron and Apply Flux
- 8Step 4 – Heat the Joint and Add Filler Metal
- 9Step 5 – Cool, Clean, and Inspect the Repair
- 10Common Mistakes
- 11Frequently Asked Questions
- 12What 3D printing materials can be joined with a soldering iron?
- 13Can you use regular solder to join PLA or PETG parts?
- 14Is soldering 3D printed parts as strong as welding?
- 15What temperature should a soldering iron use for 3D printed parts?
- 16How long should the joined part cool before handling?
- 17Is this repair method safe for load-bearing or safety-critical parts?
- 18Conclusion
What You Need
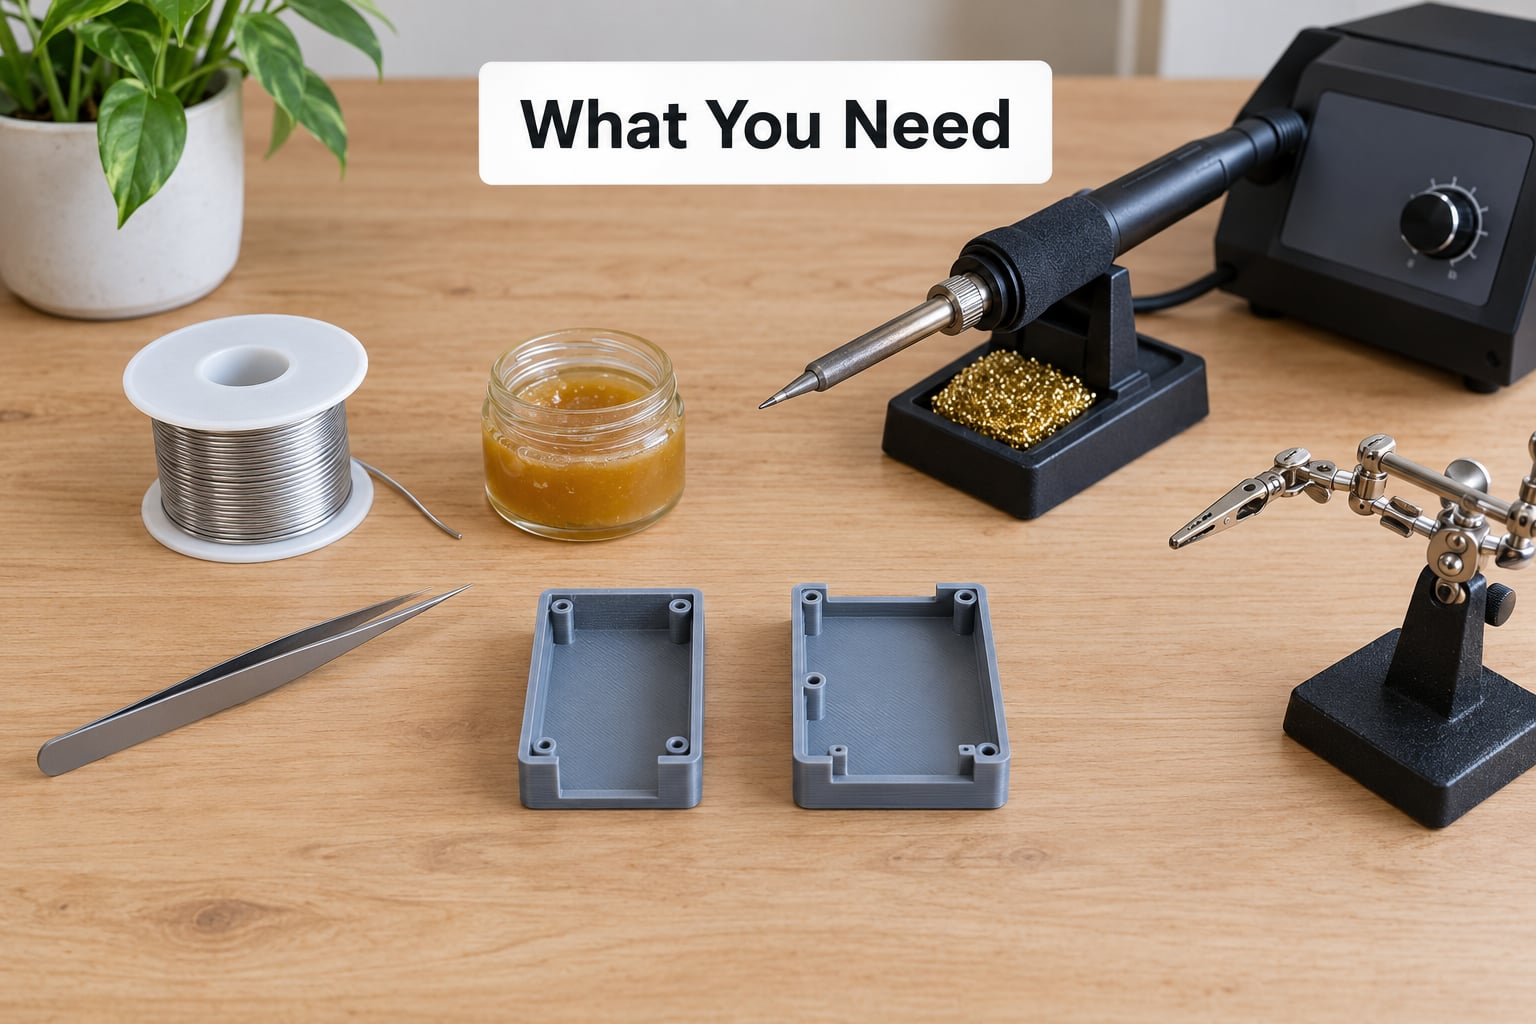
Start with the parts themselves, because material choice decides whether the rest of the kit is worth buying.
Solid, unfilled PLA, PETG, ABS and ASA are the workable ones. Blends with rubber or fibre, filled filaments with glow pigment, and anything you cannot identify should be set aside. TPU is a soft elastomer that will simply gum up a tip, so treat it as unsuitable for this method.
The tool and consumables
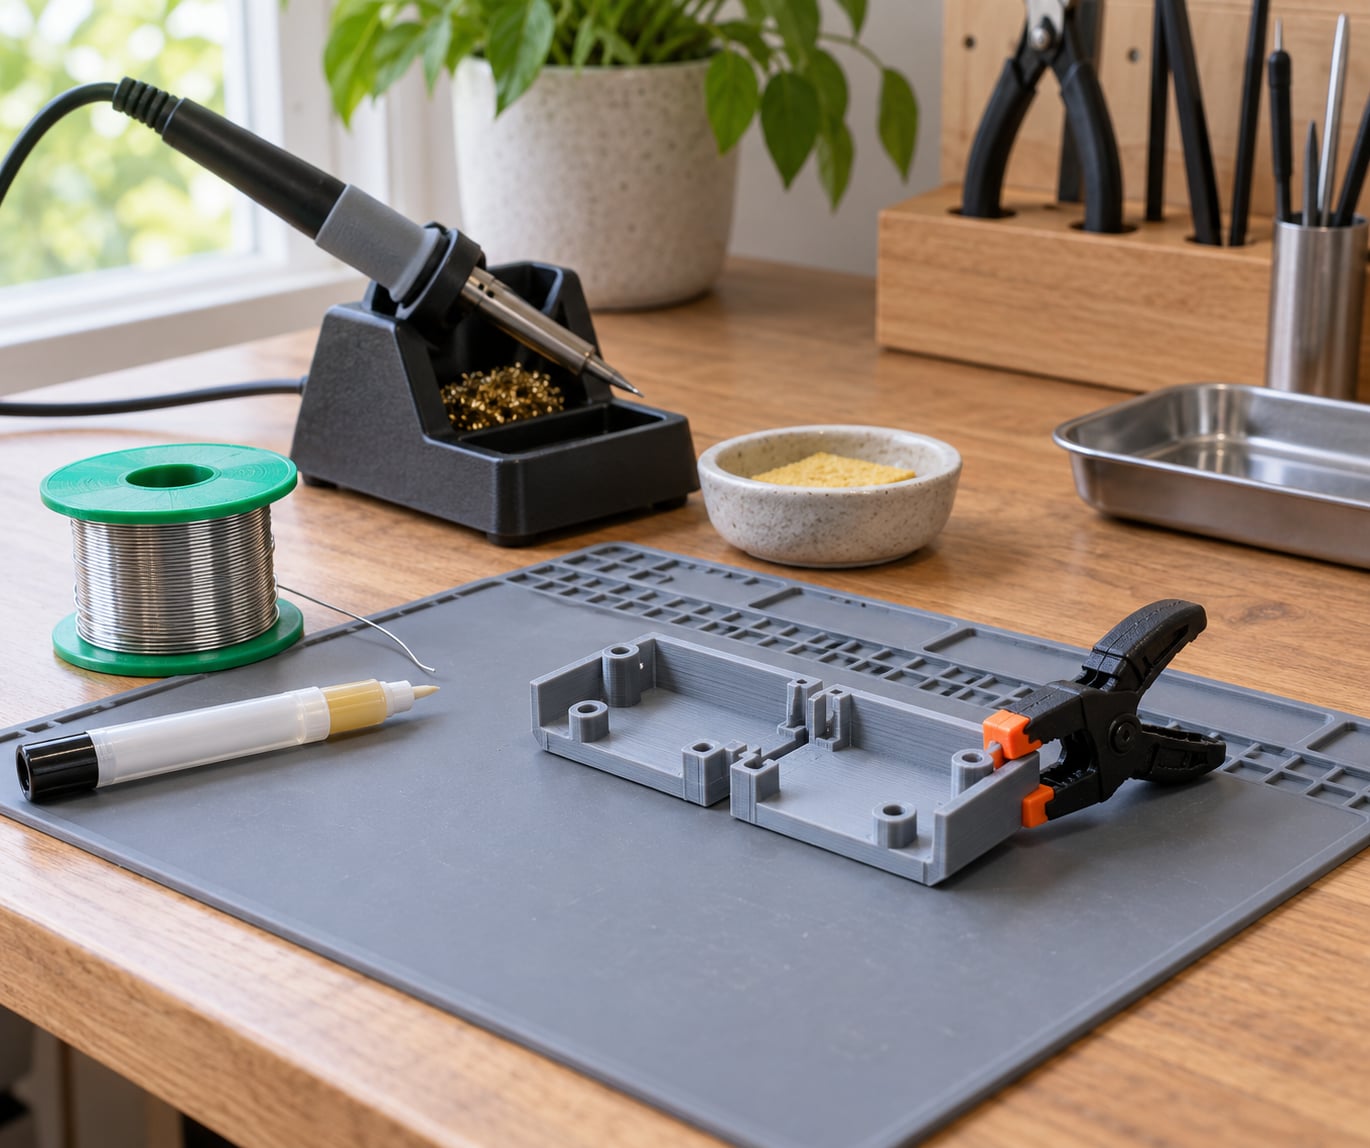
- A temperature-controlled soldering station with a dial you can actually set. Fixed-temperature irons run hot by default and scorch thin walls in seconds.
- A small chisel or pointed tip. A fine point reaches into tight seams, a small chisel spreads heat across a flat joint. Wide chisel tips just overshoot the seam.
- Lead-free filler metal in wire form. Match the alloy family loosely to the plastic, not perfectly, since the filler mainly carries heat and fills the gap.
- Electronics-grade flux in pen or liquid form. It wets the molten plastic so the filler flows instead of balling up.
- Fine metal file, craft scraper and flush cutters for cleanup.
- Isopropyl alcohol and a lint-free cloth for degreasing the joint faces.
- A small clamp or a printed jig to hold alignment while the plastic softens.
- Fume extraction, safety glasses and a heat-resistant mat. The first two are non-negotiable for ABS and ASA.
Temperature reference by material
Community-vetted ranges for a temperature-controlled iron, using the same ranges printers use for extrusion:
| Material | Iron setting | What it looks like when right |
|---|---|---|
| PLA | 170-190 C | Clear glossy melt, slight flow, no darkening |
| PETG | 210-230 C | Softening and a small bead of filler, steady and glossy |
| ABS | 220-250 C | Strong flow, surface stays light in colour |
| ASA | 220-250 C | Similar to ABS, slightly less odour on cooling |
Start at the bottom of the range and raise it. Underheating gives you a cold joint that peels apart; overheating gives you dark, brittle plastic and a warped part.
Step-by-Step: How to Weld 3D Printed Parts with a Soldering Iron
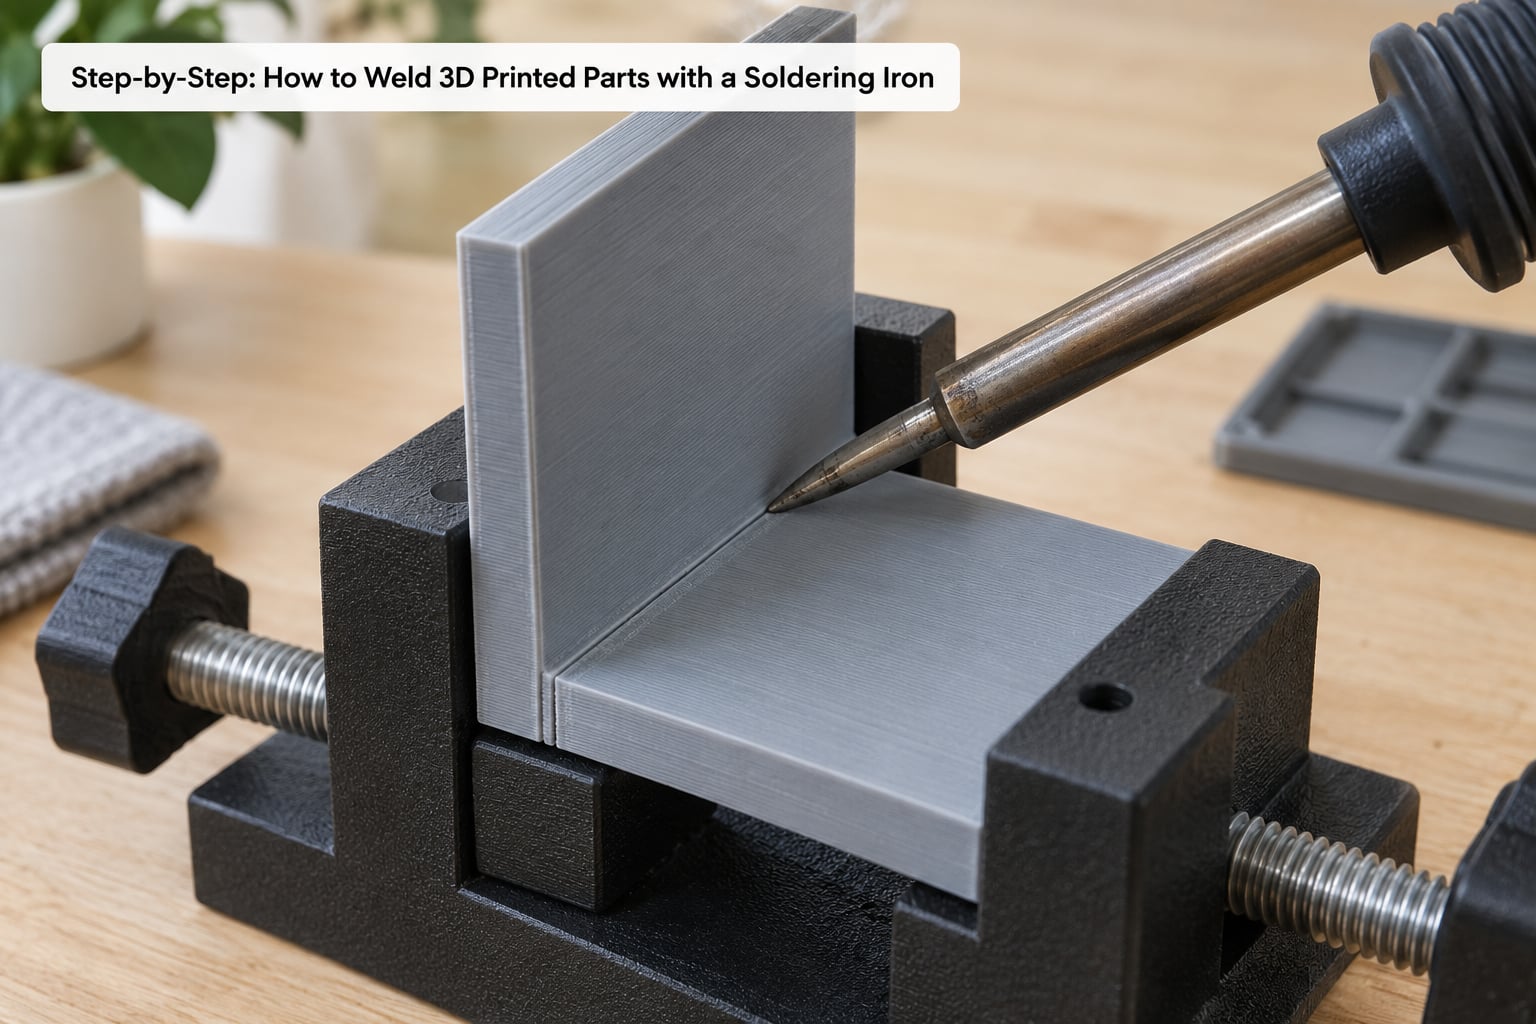
Step 1 – Check Material Compatibility and Prepare the Parts
Confirm both parts are the same unfilled thermoplastic before anything else. Mismatched polymers will not interdiffuse properly, and a joint between two different materials will fail at the seam no matter how well you heat it.
Remove every support, brim and raft, then degrease the joint faces with isopropyl alcohol. Wipe away fingerprints and any oily handling residue; plastic will not fuse to a greasy surface.
Now look at the parts honestly. A badly warped or contaminated piece will not weld into shape, so scrap it and reprint rather than fighting it. Discard anything with a visible crack that runs deep into the wall.
Step 2 – Choose and Fit the Joint
A small flat overlap or a scarf joint beats butting two complicated printed surfaces together. Overlap gives the iron two faces to heat at once and adds surface area for the bond, and printed parts usually have flat perimeters that sit against each other cleanly.
Give the overlap a couple of millimetres of depth, run a dry fit without heat, and check the seam line. Then clamp lightly or slot the parts into a printed jig. Light is the operative word, since a hard clamp on softened plastic pushes the part out of alignment.
Step 3 – Tin the Iron and Apply Flux
Wipe the tip on a brass wool pad or a damp sponge, then touch it into a little filler metal so a thin silver coat sits on the point. A tinned tip transfers heat into the joint instead of soaking heat into itself and the plastic around it.
Apply a small amount of electronics-grade flux to the seam. If it runs or puddles, you have used too much, and excess flux will smoke and spit. Work over a heat-resistant mat so no liquid lands on a finished surface or your bench.
Step 4 – Heat the Joint and Add Filler Metal
Rest the iron against the joint so the tip bridges both printed faces. Heat slowly and stay there, letting the plastic soften rather than searing it. You want a glossy, slightly flowing melt a millimetre or two wide along the seam.
As soon as the plastic moves, feed filler metal into the heated area, not onto the iron first. The filler should melt into the joint and spread. Stop the moment the seam is filled.
Pull the heat early when the plastic darkens, smokes, bubbles heavily or slumps out of shape. Those four signs mean the polymer has started to break down, and a browned joint will be brittle no matter how tidy it looks.
Step 5 – Cool, Clean, and Inspect the Repair
Let the part cool without moving it. Interference fits and clamps come off after the joint is solid to the touch, which takes a minute or two on a small repair, and longer on a thick section.
Clean off residue as the flux or solder surface directs, then inspect the seam in good light. You want filler visible through the melt with no gaps, and the join should resist a firm twist in your hands. A weak joint flexes or peels at the seam rather than snapping in the bulk of the plastic.
Trim excess material with a scraper and file the bead flush only after everything is cool. Finish with a light functional load test, using the part the way you actually intend to before putting it into service.
Common Mistakes
Nearly every bad joint traces back to one of a handful of errors.
- Overheating. Brown or blackened plastic means the polymer chain has degraded. Use a lower setting, hold less time, and keep the filler moving so the heat spreads.
- Moving the parts before solidification. Any nudge while the joint is soft ruins the alignment permanently. Clamp first, wait second.
- Too little or too much filler. Underfill leaves a hollow seam that fails under load, and overfill spreads a heat sink across the whole joint. Aim for a bead that fills the line and stops.
- A dirty or untinned tip. Carbonised plastic on the point insulates it and drags across the surface. Stop, re-tin, and file the tip back to bright metal.
- Joining incompatible plastics. Different polymers, filled filaments and TPU will not form a reliable bond. Print the joint in the same material as the weakest part.
- Poor ventilation. Always work with extraction running, and use a respirator when welding ABS or ASA.
- Expecting the solder to fix lost layer adhesion. If a crack is in the print itself, a soldered joint does not restore interlayer strength in the surrounding material. Redesign the joint or reprint the part.
A few habits prevent most of these. Print the mating parts from the same spool, orient the layers so they run across the joint, keep the seam area free of supports, and reheating slowly is more controllable than cranking the wattage.
Frequently Asked Questions
What 3D printing materials can be joined with a soldering iron?
Unfilled PLA, PETG, ABS and ASA are the practical choices. Each softens cleanly in the 170 to 250 C range and fuses to an identical material across the joint. Filled filaments, blends with rubber or fibre, and unidentified plastics will not interdiffuse reliably, and TPU melts too softly and gums the tip. Matching the two parts matters more than picking a premium material.
Can you use regular solder to join PLA or PETG parts?
You can, and it is the normal approach. Lead-free filler metal melts into the softened plastic and holds the parts in shape while they bond. Use an electronics-grade solder, feed it into the heated seam rather than onto the iron, and keep the amount small. A leaded solder is worth avoiding at a hot iron because of the vapour it produces.
Is soldering 3D printed parts as strong as welding?
A well-made fused joint can approach the strength of the surrounding printed material, because the same polymer chains interdiffuse across the boundary. That is only true when both printed faces heat evenly, the material matches and the joint is not overheated. A browned or underfilled seam is weaker than the layers beside it, so always test a repair before trusting it with a load.
What temperature should a soldering iron use for 3D printed parts?
Set the iron to the range printers use for extrusion: roughly 170 to 190 C for PLA, 210 to 230 C for PETG, and 220 to 250 C for ABS and ASA. Start at the low end and work up slowly, watching for a glossy melt rather than smoke. A fixed-temperature iron has no dial, which is the most common reason first attempts scorch thin walls.
How long should the joined part cool before handling?
Give it a minute or two for a small repair, and longer for a thick section, until the seam feels solid to the touch and the filler has fully solidified. Do not clamp down, flex or test the joint while it is still soft, because plastic remembers the movement and the seam will stay crooked. Cool in place on a heat-resistant mat, away from drafts.
Is this repair method safe for load-bearing or safety-critical parts?
Treat it as a prototype and hobby technique, not a certified repair. A fused joint is fine for props, enclosures, jigs, models and non-structural assembly, but do not rely on it for anything holding weight, pressure or a person. For load-bearing work, print the part as one piece, redesign it with more wall thickness, or use a mechanical fastener or professional fabrication instead.
Conclusion
The safest first move is boring: confirm both parts are the same unfilled thermoplastic, build a simple aligned overlap joint, clamp it, and reheat it slowly with ventilation running and filler metal going into the seam. Do one test coupon before the part you actually care about, because a failed joint costs less time than a reprinted one.
For anything structural, safety-critical or under real load, redesign the part to print in one piece or take it to a professional fabricator. Keep the soldering iron for props, enclosures, prototypes and repairs where the worst case is a snapped seam.