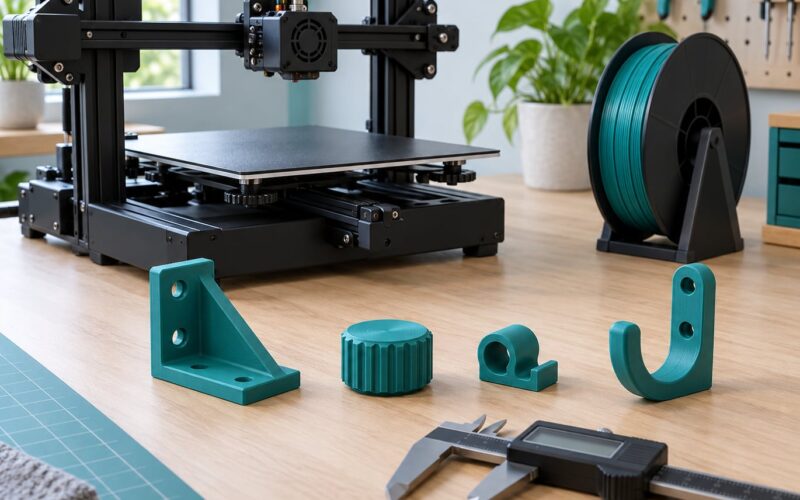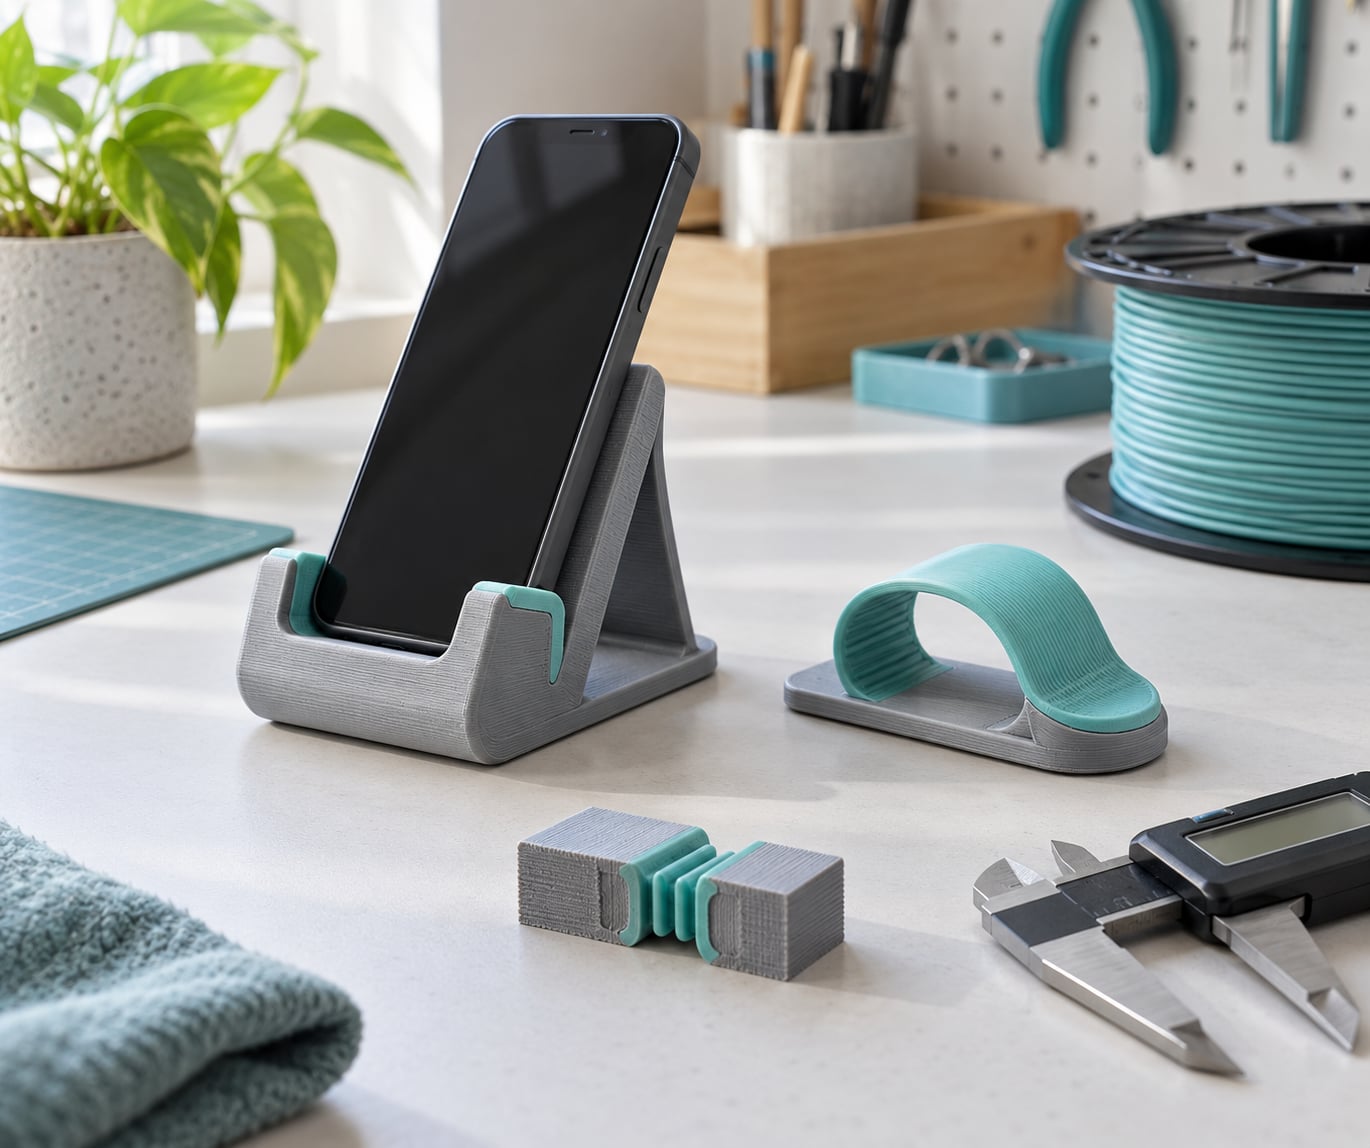
You print a custom phone grip or stand by measuring your phone, modelling or downloading a part that matches those measurements, slicing it in your slicer software, and printing it in the right filament for the job. A rigid desk stand takes PLA or PETG. A grip that has to flex, pop or collapse takes TPU 95A and a direct drive extruder. Most first prints land at two to four hours.
I’ve printed a lot of small functional parts, and phone stands are one of the best first projects because a failed print costs you an evening and a few grams of filament. The failures almost always come from the same three places: a model sized for a bare phone when you use a case, a stand that tips over because the footprint is too narrow, and a TPU hinge that cracks at the fold line. Fix those three and this is an easy print.
If you have not printed anything before, start with the stand rather than the collapsible grip. A stand is a rigid part with no moving pieces, so layer adhesion barely matters and a printer error is obvious the moment the part leaves the bed.
Table of Contents
- 1What You Need
- 2Hardware and tools
- 3Software
- 4Materials and optional extras
- 5Step-by-Step: How to Print Custom Phone Grips and Stands
- 61. Measure Your Phone and Choose the Design
- 72. Prepare or Create a Printable Model
- 83. Select the Right Filament
- 94. Set Slicer Profile and Supports
- 105. Print the Part and Check It
- 116. Remove Supports and Finish the Part
- 127. Test the Phone Grip or Stand
- 13Common Mistakes
- 14Frequently Asked Questions
- 15Can you 3D print a phone stand?
- 16What material should I use for a 3D printed phone grip?
- 17What are the best print settings for TPU?
- 18Do I need a direct drive extruder to print TPU?
- 19Is TPU toxic to print compared to PLA?
- 20Is there anything illegal to 3D print?
- 21Conclusion
What You Need
The short answer: a printer that can hold its temperatures, a slicer, calipers, and the right filament. Everything past that is optional.
Hardware and tools
- A 3D printer with a heated bed. PLA works on almost anything, but a heated bed is what keeps the first layer stuck through a tall stand printing over several hours.
- A caliper, ideally digital. Phone dimensions vary by a few millimetres between models, and a caliper is the difference between a snug cradle and a wobbly one.
- A filament dryer or a warm oven. PETG and TPU both absorb moisture, and wet filament shows up as blistered surfaces, stringing and poor layer bonding.
- Flush cutters, a craft knife or scraper, and files or sandpaper for cleaning up supports and the first layer line.
- A soft cloth so you can wipe glue residue off a phone case without scratching it.
Software
You need a slicer, which turns the model into toolpaths the printer follows. PrusaSlicer, Cura, OrcaSlicer and Bambu Studio all do the job and all read the same STL files. OpenSCAD, FreeCAD, Fusion 360 and Tinkercad handle the modelling side if you want a part made to your exact phone.
Materials and optional extras
PLA, PETG and TPU 95A cover almost every use. ABS works if you need heat resistance, but it warps and fumes, so it is not a beginner material. For finishing, keep a sheet of silicone or rubber matting, a strong double-sided foam tape, and a small tin of superglue within reach.
Safety-wise, an enclosed printer or a fume filter matters once you move past PLA. PLA itself is the least troublesome filament to print, and TPU is comparable to it, but both still produce ultrafine particles you do not want to breathe at close range for hours.
Step-by-Step: How to Print Custom Phone Grips and Stands
This is the whole process in order. Seven steps, and steps one through three decide whether the part works at all.
1. Measure Your Phone and Choose the Design
Measure these four things before you open any CAD software, because every dimension feeds straight into the model:
- Width across the phone, measured at the widest point of the screen, not the body.
- Depth from the back of the phone to the front of the screen.
- Case thickness added on top of both, plus whatever the case adds to the width at the corners.
- Camera bump height and how far it sits from the top edge.
Most printed stands fail at the camera bump. If your phone lies flat against the back panel of the cradle, the bump takes the load instead of the cradle, and the phone rocks. Most makers solve this by tilting the cradle a few degrees and adding a lip at the bottom edge so the phone cannot slide out.
Now pick the form factor. A grip attaches to the back of the phone and gives you one-handed purchase, usually with a collapsible stem. A stand sits on a desk and holds the phone up for video calls or watching. A hybrid does both, which is the harder build and the one most people actually want.
Also decide the charging question now. If the stand lives on a bedside table, model a cable cutout before printing rather than after, because adding one later means reprinting. If you use wireless charging or a magnetic mount, leave a flat region clear of steel or dense infill near the charging coil, or the grip will heat the phone in patches.
2. Prepare or Create a Printable Model
If a free phone grip STL already matches your measurements, use it. Thingiverse, Printables and MakerWorld are where makers share this kind of part, and checking the licence matters if you plan to sell what you make.
Before slicing, do three checks on any file you download. Open it in your slicer and look at it in wireframe to confirm the model is a single connected solid, not a collection of loose shells. Then confirm the units: most slicers read millimetres, and a model exported in centimetres arrives 10 times too small. Finally, measure the model in the slicer against the phone width you took in step one.
To make your own, a parametric model is the least frustrating route. In OpenSCAD or a FreeCAD spreadsheet you set phone width, phone depth, case thickness, lip height and viewing angle once at the top of the file, and every other measurement follows. Change a number, re-render, and the cradle updates itself. Tinkercad works too, with more manual measurement and less automation.
Two design choices pay off immediately. Chamfer the top edge where the phone lands, so it drops in without fighting a sharp corner. And add small anti-slip pads to the back of the base so the stand does not walk across a glass desk when you tap the screen.
3. Select the Right Filament
Ask one question first: does this part need to flex or collapse? Everything else follows from the answer. A rigid stand wants PLA or PETG. Anything that bends, pops in and out, or takes a shock load wants TPU 95A.
| Material | Flexes? | Layer adhesion | Ease of printing | Best for |
|---|---|---|---|---|
| PLA | No | Good | Easiest | Rigid desk stands, wall-mounted holders |
| PETG | No | Excellent | Easy with care | Stands that take knocks, bedside docks, warm car interiors |
| ABS | No | Very good | Hard (warping, fumes) | Parts left in a hot car |
| TPU 95A | Slightly | Moderate | Picky | Grips, clips, drop protection, living hinges |
| TPU 87A | Yes | Moderate | Picky | Soft grips and skin-contact pads |
TPU comes in shore hardness ratings, which describe how soft or rigid the material feels. 95A is firm and holds a shape, 87A is noticeably softer, and 98A is rigid enough for hard-wearing clips. For a phone grip that gets collapsed a few hundred times, 95A is the right starting point. Softer 87A feels nice in the hand but creeps and stretches with use.
TPU needs a direct drive extruder. On a Bowden setup, the flexible filament buckles in the tube before it reaches the hot end, and that failure is the single most common complaint across maker forums. There are workarounds, but they involve modifying the machine, and a first TPU print is not the time to learn them.
One more hardware note if you own a Bambu Lab: the manufacturer advises against routing TPU through the AMS or AMS Lite. Feed it from an external spool.
Is TPU harder to print than PLA? Yes, considerably. It runs cool, slow and with almost no retraction, and it punishes an extruder that feeds faster than the hot end can melt it.
4. Set Slicer Profile and Supports
Start from the filament manufacturer’s profile rather than a generic one, then adjust for your printer. These are the numbers worth checking before you hit print.
| Material | Nozzle | Bed | Print speed | Retraction | Part fan |
|---|---|---|---|---|---|
| PLA | 200-215C | 55-60C | 150-250 mm/s | 1-2 mm | 100% |
| PETG | 230-250C | 75-85C | 40-80 mm/s | 1-2 mm | 30-50% |
| ABS | 240-260C | 100-110C | 40-70 mm/s | 1-2 mm | 10-20% |
| TPU 95A | 220-240C | 30-60C | 20-40 mm/s | 0-1 mm | 30-50% |
For a stand, use 0.2 mm layers, at least three perimeters, and around 20 percent gyroid or cubic infill in the body. Three walls matter more than infill here, because the strength you feel when you pick the stand up comes from the walls, not the lattice inside. Drop the infill to 10 percent and add walls if you are trying to save filament.
Add a brim on any stand with a small footprint. A 5 mm brim costs almost nothing and it saves the print when the base starts to lift at hour three.
Supports are the part people get wrong. Tree or branch supports leave far less scarring than standard supports because they touch the surface at a small point, and they come off cleanly. A stand with a 60-degree back panel needs almost no support at all if the panel is steep enough, which is the real answer to support-free phone stands: design the lean past the angle where bridging fails, rather than printing supports. Sixty degrees is a good number to design around, and steeper is safer.
For a TPU living hinge, the fold line is a specific thickness. Too thick and it will not collapse; too thin and it tears. Somewhere around 0.4 to 0.6 mm works for most nozzles, and it is worth printing a small test strip of five different thicknesses before committing to a full grip.
5. Print the Part and Check It
Load the filament and let the nozzle reach temperature. Watch the first three layers, because almost every failure announces itself there.
On a rigid filament you are looking for a single continuous line with no gaps and no curling at the leading edge. If the line looks like two beads sitting side by side, the nozzle is too high. If it looks like one squashed bead, the nozzle is too low. Adjust the Z offset a fraction and print the first layer again on its own.
On TPU, watch the first ten minutes. A steady, quiet feed means the filament is being pushed gently into the hot end. If you hear clicking, the extruder is pushing harder than the hot end can melt, and the fix is to slow the print speed or raise the nozzle temperature by five degrees. Most TPU feed problems are solved in that order, and most people start at the wrong end of it.
Let the print finish, then remove the part while the bed is still warm. A cold part popped off a PEI sheet can snap a thin lip, and a stand that breaks at the base before you ever test it is a miserable way to lose an evening.
6. Remove Supports and Finish the Part
Take tree supports off while the plastic is still slightly warm, with flush cutters pushed down to the surface rather than pulled sideways. Pulling is what tears chunks out of a flat panel.
Work over a tray. The little nubs of tree support come off as small spheres, and they end up on the desk, in the bed of the printer and eventually inside a keyboard.
For finish, sand the first layer line down with 180 grit, then 400 grit if the part is visible on a desk. Rigid PLA parts can be vapour smoothed or coated, but keep coatings away from any surface that touches the phone, since a glossy layer is a scratch layer.
For grip parts, glue a thin disc of silicone matting or a neoprene pad to the face that sits against the phone or the case. It stops the printed surface from being a wear item and it adds a little compliance. Use superglue sparingly, and let it cure fully before you fit the phone.
If the grip attaches with adhesive, use 3M VHB style tape rather than a thin double-sided foam tape. A grip gets pulled on every time you pick the phone up, and cheap foam adhesive lets go in a week.
7. Test the Phone Grip or Stand
Fit the phone in. A stand should hold the phone at the angle you designed for with a light push at the back of the screen, and it should not slide down when you tap the top of the display.
Press harder than feels sensible. Push the phone back and see if the stand rocks. Grab the stand and tip it sideways, because a stand that feels solid straight on can still be useless if the base footprint is narrower than the phone is tall.
For a grip, slide your middle finger into the stem and close your hand around it. Then test the collapse. If it cycles twenty or thirty times without a crack forming at the fold, the layer adhesion is holding and the hinge thickness is right. A crack that appears at the hinge within a few cycles means the hinge is too thin, or the print orientation put the fold line perpendicular to the layers instead of across them.
If the fit is tight, do not force it. Print a shim or re-slice with a slightly wider cradle. If it is loose, the phone will rock and eventually fall out in a bag, so fix it now rather than carrying a cradle that only works on a desk.
Before you reorder for another phone, check the two easy wins: a cable cutout if the stand sits at a bedside table, and a clear flat zone if you charge wirelessly. Both cost nothing to model and everything to retrofit.
Common Mistakes
Almost every failed phone grip or stand is one of these, and each has a fix you can apply without redesigning the whole model.
| Symptom | Likely cause | Fix |
|---|---|---|
| Phone rocks or falls out | Model sized for a bare phone, not a phone in a case | Add case thickness to every cradle dimension, then reprint |
| Stand tips over backwards | Base footprint too narrow for the phone’s height | Widen and deepen the base, or add weight low and behind the lean |
| Phone will not sit flat | Camera bump taking the load | Tilt the cradle a few degrees and add a bottom lip |
| Layers separate or the part snaps | Bed too cold, fan too high, or the layer height too tall | Raise bed temperature, lower the part fan, drop layer height to 0.16 mm |
| Constant stringing | Wet filament, or retraction too aggressive on TPU | Dry the filament; set TPU retraction to 0-1 mm |
| Clicking from the extruder mid-print | Extruder feeding faster than the hot end melts | Lower print speed or add 5C to the nozzle temperature |
| Hinge cracks within a few cycles | Fold line too thin, or the hinge printed across the layers | Thicken the hinge to 0.4-0.6 mm and re-orient the part |
| Rough, dimpled surface | Supports left too long, or the part was pulled off cold | Remove tree supports warm, cut rather than pull, sand the scars |
| TPU tangled or buckled | Bowden tube, or an AMS multi-gear feed path | Use a direct drive extruder and an external spool |
One habit prevents most of this: print a small test first. A 20 mm cube checks flow and first layer, and a strip of five hinge thicknesses checks the mechanism. Both together take fifteen minutes and save hours.
Print time is the other thing that surprises people. A plain PLA stand is usually two to three hours, and a dense or heavily supported design can run past six. Makers report much longer figures for ambitious designs, so build a small version first and scale up once the design works.
Frequently Asked Questions
Can you 3D print a phone stand?
Yes, and it is one of the easiest functional prints there is. A rigid desk stand in PLA or PETG needs no special hardware, prints flat on the bed in two to three hours, and only fails if the cradle is sized for a bare phone instead of a phone in a case.
What material should I use for a 3D printed phone grip?
TPU 95A for anything that flexes, pops in and out, or absorbs a shock, and PLA or PETG for a rigid part that never moves. 95A is firm enough to hold its shape, soft enough to survive repeated collapsing, and it needs a direct drive extruder to print reliably.
What are the best print settings for TPU?
Run TPU at 220-240C on the nozzle, 30-60C on the bed, and 20-40 mm/s, with retraction at 0-1 mm and the part fan at 30-50 percent. If the extruder clicks, slow the print down or add 5C before touching anything else. Dry the filament first.
Do I need a direct drive extruder to print TPU?
Yes, practically speaking. TPU buckles in a Bowden tube, which is the most common failure reported for this material. Feed it from an external spool too, since multi-gear feeder paths can snag it. Modern fast TPU formulations are also far easier to feed on a direct drive machine.
Is TPU toxic to print compared to PLA?
Neither material is acutely harmful in normal use, and both are fine in a well-ventilated room. PLA gives off a mildly sweet odour at high temperatures, while TPU can be more irritating for some people. An enclosed printer or a fume filter is worthwhile either way.
Is there anything illegal to 3D print?
Printing your own phone grip or stand is not an issue. Copying someone else’s model without the licence, or printing logos and copyrighted characters for sale or distribution, is. Check the licence on any file you download, and keep commercial artwork off your prints.
Conclusion
Start with the measurement, not the model. Get your phone width, depth and case thickness with a caliper, then choose between a rigid PLA or PETG stand and a TPU 95A grip that collapses. Print the small test pieces first, and only commit to the full part once the fit and the hinge both behave.
Once the first one works, the same workflow scales to anything else that has to fit a specific object precisely.