Metal filled filament printing and polishing is a two-stage job: you print an ordinary plastic part loaded with fine metal powder, then you grind and buff that part until the powder turns into a convincing cast-metal sheen. Most of the shine happens after the printer stops, so the workflow matters more than the profile.
Budget roughly an hour per part for hand finishing, less if you own a rotary tool, and a couple of hours of unattended time if you tumble batches. Beginner-friendly in difficulty, but the abrasive filler punishes cheap hardware and any shortcut you take around ventilation.
Here is the order I work in, from checking the spool’s data sheet to sealing the finished surface. It assumes a desktop FDM machine, not an industrial metal system.
Table of Contents
- 1What You Need for Metal Filled Filament Printing and Polishing
- 2Materials and hardware
- 3Safety and finishing kit
- 4Step-by-Step
- 51. Check Printer and Filament Compatibility
- 62. Prepare the Printer and Work Area
- 73. Dry, Load, and Test-Flow the Filament
- 84. Print the Composite-Filled Part With Metal Filled Filament Settings
- 95. Cool, Remove, and Inspect the Part
- 106. Polish the Printed Surface
- 117. Clean, Evaluate, and Protect the Finish
- 12Common Mistakes
- 13Frequently Asked Questions
- 14Is metal-filled filament the same as solid metal?
- 15What printer can print metal-filled filament?
- 16Can you polish a metal-filled 3D print?
- 17Is metal-filled filament printing safe?
- 18How much does it cost to polish a metal-filled print?
- 19Do metal-filled prints need a clear coat?
- 20Conclusion
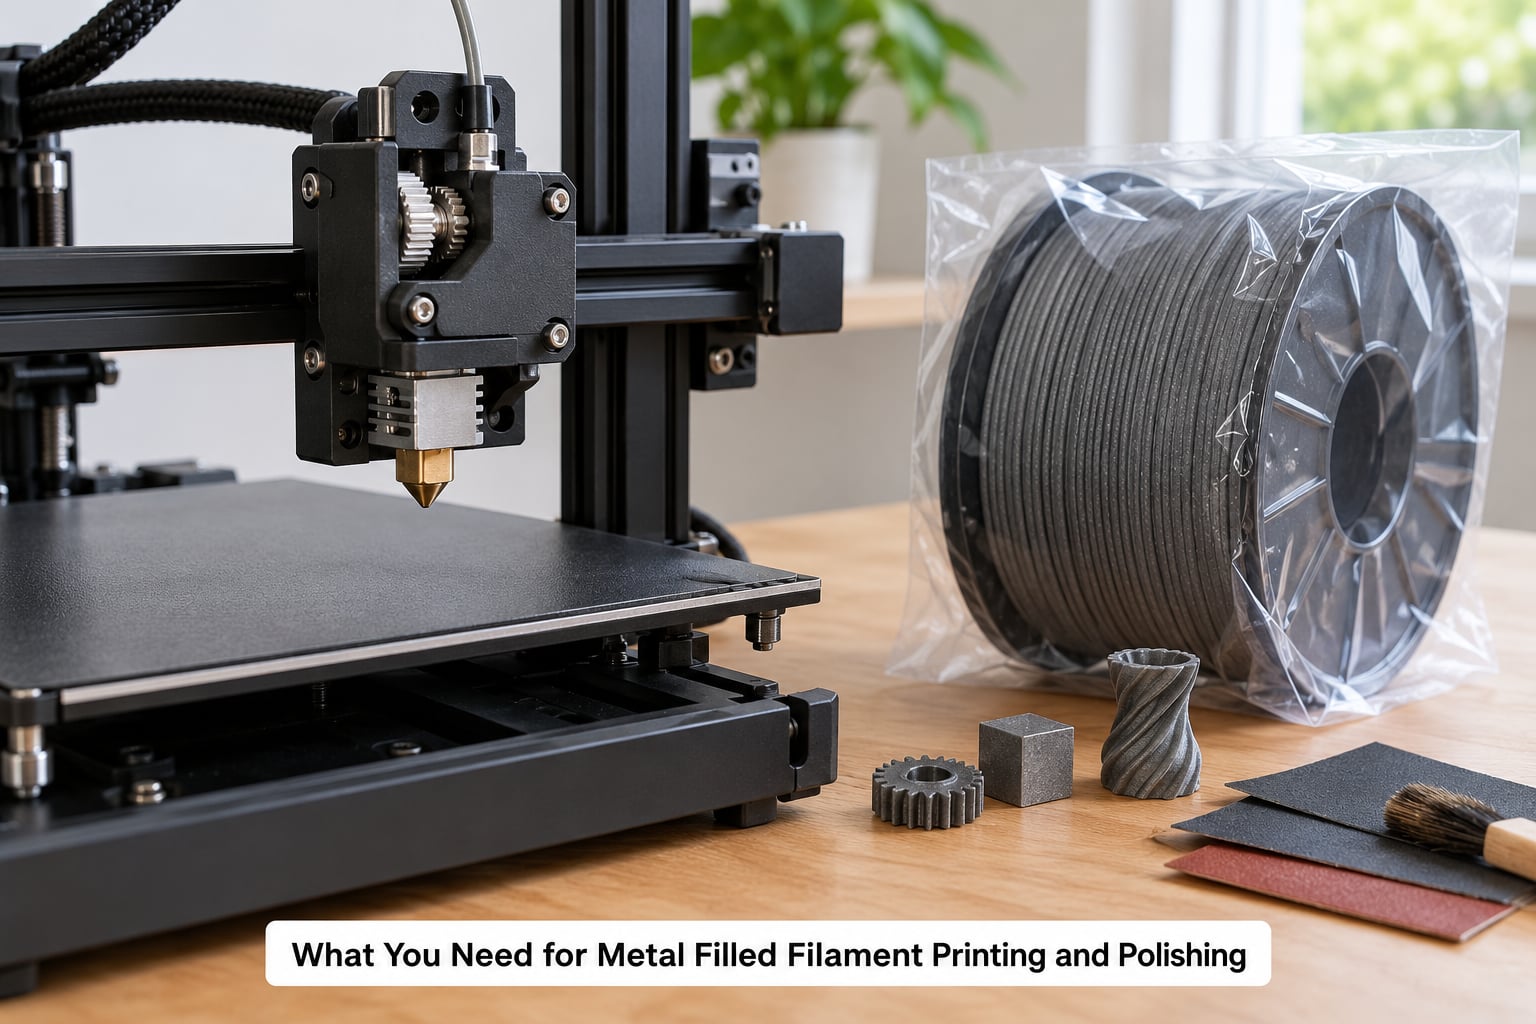
What You Need for Metal Filled Filament Printing and Polishing
Metal-filled filament is not metal. It is a polymer binder, usually PLA or PETG, mixed with finely ground bronze, copper, brass or steel powder, and it behaves like a plastic composite on every count that matters: it softens at plastic temperatures, it layers like plastic, and its strength is the strength of the binder plus a filler that mostly adds weight and sparkle. The metal look arrives at the bench, not in the hotend.
That distinction matters because it changes what you buy and how you handle it.
Materials and hardware
- The filament itself. Decorative composites such as bronzeFill, copperFill, brassFill and steelFill print on a normal desktop machine. Metal-filled PETG variants exist too and tolerate heat better, but they are less common.
- A wear-resistant nozzle. Hardened steel or hardened brass. A stock brass nozzle works for light decorative work and abrades quickly against the metal powder.
- A capable hotend and extruder path. All-metal hotends with a plated or hardened drive gear handle the filler better than cheap PTFE-lined tubes, which score and clog.
- An enclosed or filtered machine if the filament supplier recommends one, plus local exhaust at the machine and a clean air change where you sit.
- A heated bed with a suitable adhesive. Filled filaments stick aggressively, so plan for release as well as adhesion.
Safety and finishing kit
- Safety glasses with a sealed gasket, nitrile gloves, and a respirator or dust mask rated for fine particulate if you grind or tumble.
- Abrasive sheets and pads, a scraper or craft knife for supports, a deburring file.
- A rotary tool with polishing wheels and cutting discs, plus a dust-control attachment, if you want a faster cut than sandpaper gives.
- A vibratory tumbler or rock tumbler, stainless steel shot, water and detergent, for batches of small parts.
Read the filament supplier’s instructions before anything else. Temperature range, drying guidance and nozzle recommendations all vary between formulations, and the supplier’s numbers beat any generic profile.
Step-by-Step
The checkpoints below all ask the same question: is the composite flowing evenly and safely right now? A small test that passes costs you a few minutes of filament. A full part that fails costs you the whole spool’s worth of material.
1. Check Printer and Filament Compatibility
Start from the filament’s spec sheet, not from a profile you already have open. Note the recommended nozzle temperature range, whether the material should be dried, whether an enclosure is recommended, and which nozzle type the manufacturer specifies.
Then look at your machine with fresh eyes. Metal-filled filament is roughly three times the density of normal plastic, so the feed mechanism carries noticeably more load, and the abrasive filler works against the nozzle bore and the drive gear teeth. A rigid frame and a direct-drive or well-supported extruder handle that better than a cantilevered setup.
2. Prepare the Printer and Work Area
Install the nozzle your supplier recommends. Heat the hotend to the midpoint of the material’s range, fit the new nozzle, and let the hotend come back up to temperature so the heat creep grips the threads properly before you tighten it. A nozzle that seizes mid-print because it was tightened cold is an expensive afternoon.
Level the bed, clear old debris off the build plate, and check that the part will be reachable for removal. Set up local exhaust or the ventilation option your filament supplier approves, and move food, pets and your own face out of the printing area.
Metal powder dust is the reason. It is fine, it is heavy, and it settles into whatever surface is nearby.
3. Dry, Load, and Test-Flow the Filament
Dry the spool using only the supplier’s recommended device, temperature and duration. A food dehydrator or a purpose-built filament dryer works; a heated oven runs the risk of cooking the spool and warping it, and a warm cupboard in a humid room does very little.
Load it the way your printer’s manual describes, then run a short extrusion test or a single-layer calibration print. Look for three things: steady flow without pulsing, lines that bond to each other and to the bed, and no crumbs of material coming out of the nozzle.
Stringing on the test is normal for a filled filament. Missing material in the middle of a line is not.
4. Print the Composite-Filled Part With Metal Filled Filament Settings
The single most useful trick for metal filled filament printing and polishing is to stop treating this as a new material. Clone your working PLA profile, then add roughly 4% to 8% flow and leave almost everything else alone. Printer communities have converged on that number, and it works because the metal powder raises the melt viscosity without changing the polymer’s chemistry.
| Setting | Metal-filled PLA | Metal-filled PETG | Notes |
|---|---|---|---|
| Nozzle temperature | Use the supplier range, usually a little above plain PLA | Higher than PLA, closer to PETG | If you can only remember one number, use the spec sheet midpoint |
| Bed temperature | Raise 5 to 10 degrees above your PLA bed setting | As normal for PETG | Filled material likes a warmer first layer |
| Flow multiplier | 104% to 108% of your PLA profile | Try 103% to 106% first | The 4 to 8 percent extra flow is the community standard |
| Layer height | 0.15 to 0.2 mm for parts that will be polished | 0.2 mm or coarser | Finer layers mean less material for you to remove later |
| Print speed | Reduce 20% to 30% from your normal PLA speed | Reduce 20% from PETG speed | Slower moves let the abrasive filler flow instead of grinding |
| Part cooling | Normal PLA fan settings | Normal PETG fan settings | Do not switch cooling off; adhesion is already adequate |
| Infill | 15% to 20% for decorative parts | 10% to 15% | Fillers add weight, so low infill keeps parts manageable |
Correct under-extrusion by nudging flow up a point at a time rather than by dropping speed. Stringing comes from a wet spool and a hot nozzle, so fix it with drying and a lower nozzle temperature before you touch retraction. Poor layer adhesion means the bed was cool, the fan was too strong, or the speed was too high at the first layers.
Watch the nozzle as a consumable. When it develops a lumpy bore, extrusion stops being consistent, and that is a swap, not a setting.
5. Cool, Remove, and Inspect the Part
Let the part cool fully on the bed before you flex the plate to release it. Filled material sticks harder than plain PLA, and pulling a warm part off can snap a thin wall or curl the surface permanently.
Score the support interface with a sharp knife and peel supports away slowly rather than levering them. Pause the whole job if a bristle or a thin wire feature breaks, because those are exactly the details polishing will thin further.
Before choosing a finish, inspect the part under good light. Run a finger along a layer line to find the high spots. Check the seam area, the first layer and any sharp corners for cracks or delamination. A part with a lifted corner is a reprint; grinding it just spreads the failure.
6. Polish the Printed Surface
The raw surface of a metal-filled print is dull and speckled, and that speckle is what catches the light once it is smoothed. Your job is to flatten the layer lines without erasing the part’s edges and fine detail.
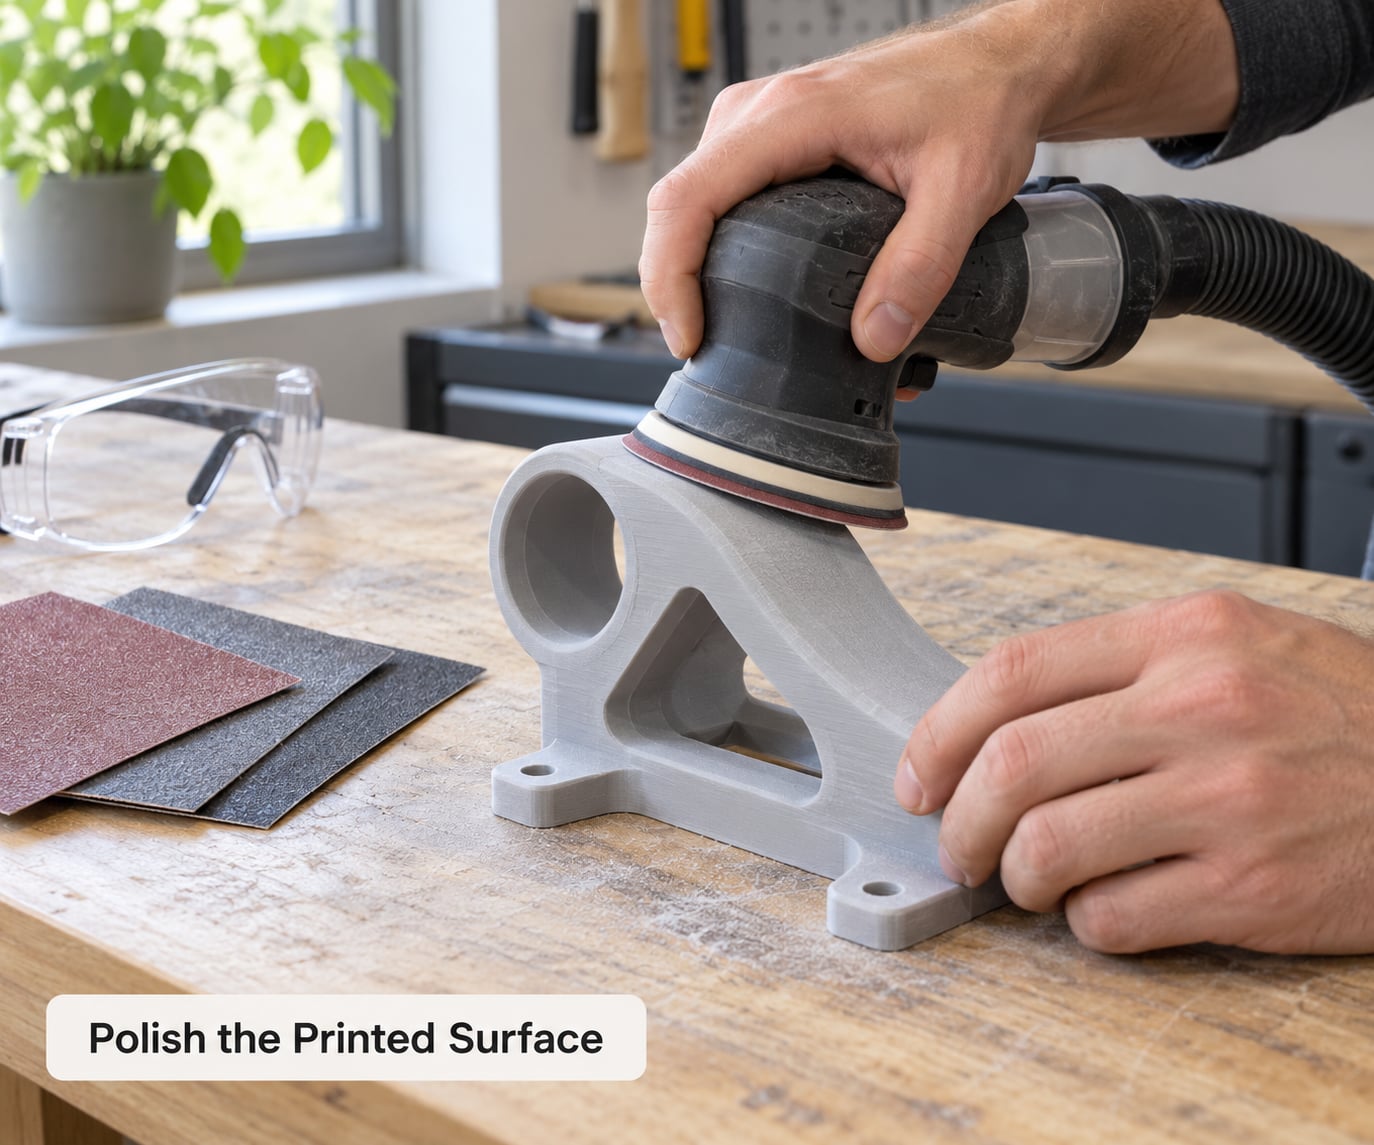
Work in progressive grit steps and never skip ahead. Start around 200 to 400 grit to knock down the ridges, move to 600, then to 1200 for the final surface. Use circular or back-and-forth motions with light, even pressure and let the abrasive do the work; heavy pressure flattens detail and heats the binder.
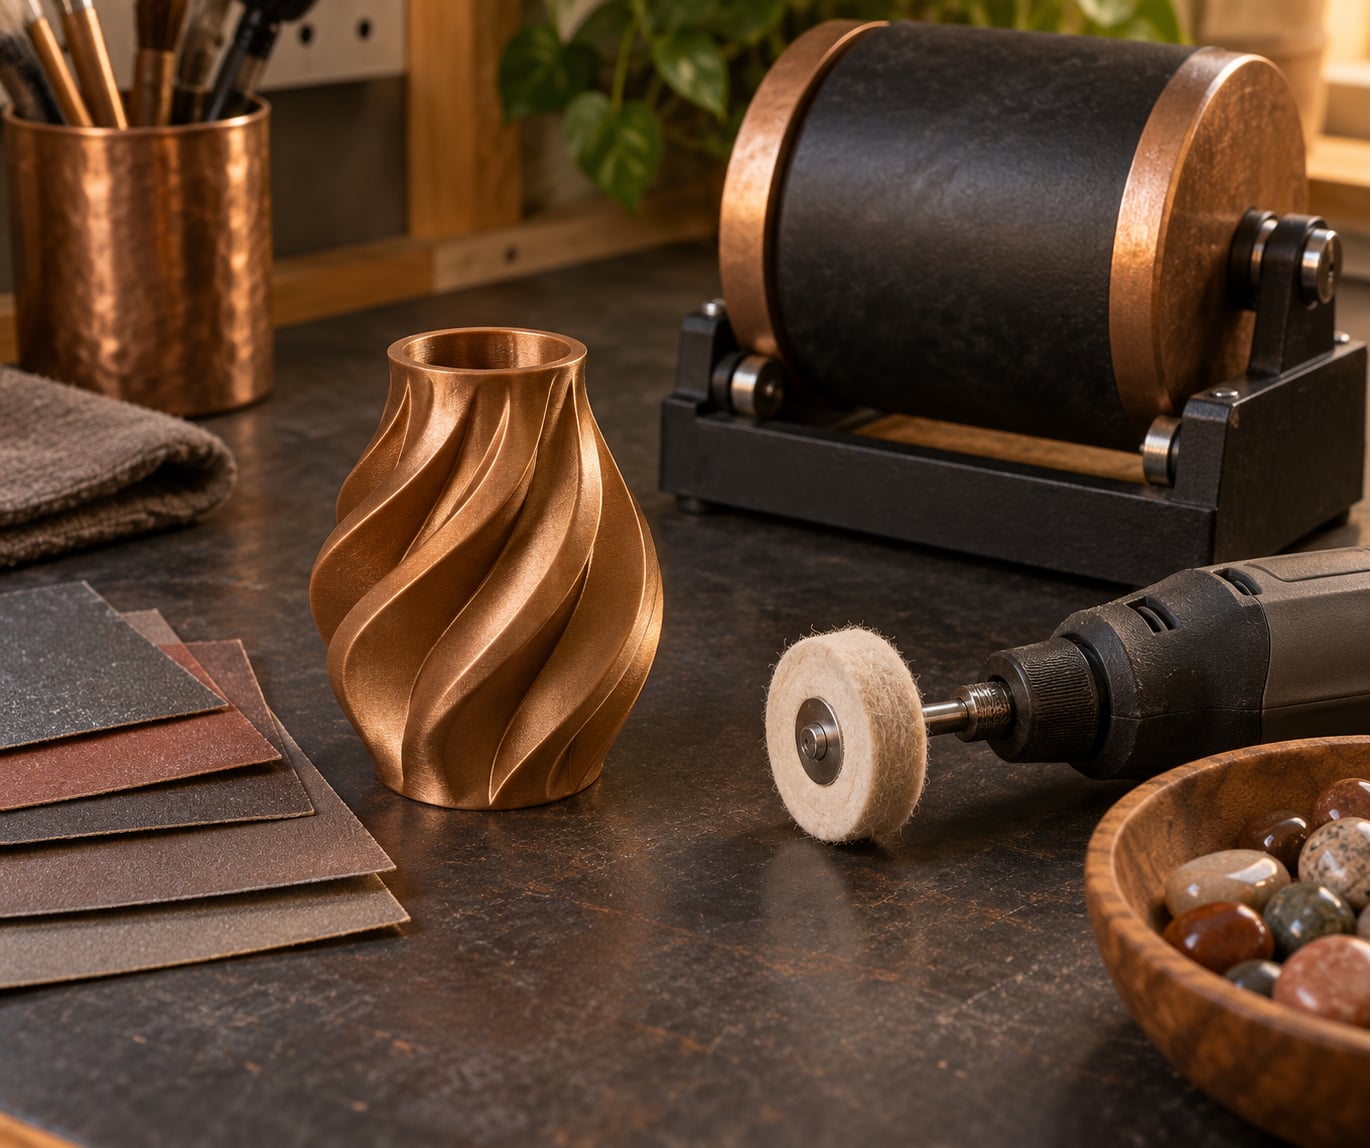
A rotary tool with a cutting disc handles bulk removal far faster than sandpaper, and polishing wheels with a compound handle the final shine. Keep the speed low, around 900 rpm, because the binder in the composite will melt, smear and glaze the surface if you push it.
For batches, a vibratory or rock tumbler with stainless steel shot, water and detergent does in a few hours what hand polishing takes all afternoon. Sharp edges and fine features are what you give up in exchange, so dice and jewelry makers often run a final hand pass afterwards.
7. Clean, Evaluate, and Protect the Finish
Clear the abrasive dust before you do anything else. Rinse the part, brush it out, or use an ultrasonic cleaner if the geometry allows it. Leftover grit under a coating will scratch the surface the first time someone touches it.
Clean the part using only what your filament supplier approves. Isopropanol works on many unfilled prints but is not universally approved for composites, so check first rather than assuming.
Decide whether the surface is ready for paint, a metallic base coat, or a clear protective finish. Only apply a clear coat if the supplier approves the pairing, because a coating can stay tacky, fog the shine, or peel. Many people stop at the polished finish and re-polish later instead.
Common Mistakes
Almost every failure on this list traces back to ignoring one of three things: the nozzle spec, the ventilation spec, or a skipped checkpoint.
Nozzle wear. Brass nozzles erode, widen, and start producing inconsistent lines. Fit a hardened nozzle before your first print and keep a spare, because the failure mode is a clog rather than a warning.
Inconsistent extrusion. Pumping lines and gaps mean a partly blocked or worn bore. Change the nozzle before you re-tune anything.
Stringing. Almost always moisture. Dry the spool to the supplier’s spec and lower the nozzle temperature slightly.
Poor layer adhesion. The part will snap across a layer line, usually between the first few layers. Reduce fan, raise bed temperature, slow the first layers, and raise flow a point.
Delamination and cracked corners. Over-correction with flow causes buckling, and sudden cooling causes cracking. Drop flow back one point at a time and keep the chamber draught-free.
Clogged nozzles. Heat to the material’s range, purge slowly by hand with the extruder disengaged, then re-seat. Repeat the test extrusion afterwards.
Warped parts. Filled material carries a lot of heat. A brim, a raised bed temperature and an enclosure usually solve it.
Over-sanding. Metal-filled prints are soft underneath the powder, so aggressive sanding rounds corners and erases detail. Stop while the part still looks right under raking light.
Polishing dust and spray. Wear the eye protection, use the dust attachment, and never point a rotary tool at your face. Grinder sparks and hot dust cause more injuries than the machines do.
One more warning: do not use solvent-based coatings, cleaners or adhesives unless the filament supplier approves them. Solvents can craze the binder, dull the shine or make the part brittle.
Frequently Asked Questions
Is metal-filled filament the same as solid metal?
No. Metal-filled filament is a polymer composite: a PLA or PETG binder mixed with finely ground bronze, copper, brass or steel powder. It prints and behaves like plastic, and the metal powder adds weight and surface sparkle rather than strength. Parts made this way are decorative. For load-bearing metal you need sintered metal filament or a real metal process.
What printer can print metal-filled filament?
A standard desktop FDM printer with an all-metal hotend, a rigid frame and a wear-resistant nozzle can print metal-filled filament reliably. An enclosure helps with temperature stability but is not mandatory if your supplier does not require one. The parts that actually matter are the hardened nozzle, a healthy extruder path and a heated bed you can level.
Can you polish a metal-filled 3D print?
Yes, and polishing is the whole point of the material. Start with 200 to 400 grit, move through 600 and finish around 1200, then buff with a rotary tool and compound, or tumble a batch with stainless steel shot, water and detergent. The surface underneath is soft plastic, so use light pressure and stop before you round off corners.
Is metal-filled filament printing safe?
Treat it like any fine-powder material. Print with local exhaust or the ventilation your supplier recommends, wear sealed safety glasses and gloves, and keep the printing area away from food and pets. During finishing, wear a particulate-rated respirator whenever you grind or tumble, and expect to clean metal-rich dust off every surface afterwards.
How much does it cost to polish a metal-filled print?
Hand polishing needs only abrasives you may already own. A rotary tool route adds a tool and a set of wheels plus compounds. Tumbling needs a barrel, stainless steel shot, distilled water and a burnishing detergent, but the consumables are cheap and one batch can hold dozens of parts. The expensive part of the process is always the filament, not the finishing.
Do metal-filled prints need a clear coat?
Not usually. A good polish stands on its own, and a clear coat can stay tacky, fog the shine or peel later. Apply one only if the filament supplier approves the pairing, such as when you want paint or a colour on top. If a polished bronze or copper part dulls over time, a light re-polish usually beats recoating.
Conclusion
Check your filament’s spec sheet against your printer, fit the wear-resistant nozzle it asks for, and print a small test before committing a spool. Then pick the least aggressive finishing method that gives you the surface you need: hand sanding for small details, a rotary tool for speed, a tumbler for batches.
Metal filled filament printing and polishing works because the print gets the shape and the finishing gets the shine. Treat the two as separate jobs and the second one stops being frustrating.