Splicing filament means cutting two strands clean, heating the cut ends until they soften, and pressing them into one continuous round strand that feeds through your extruder without breaking. Learning how to splice filament for continuous printing lets you finish off partial spools, use up short offcuts, and keep a long batch print running past a spool change. The whole job takes about five minutes per joint on a proper jig, and the difficulty is low if the two strands are the same material and diameter.
The part that catches people out is not the heat. It is the cut, the diameter, and pairing filament that should never be mixed. Get those three right and the joint is indistinguishable from factory filament once it has run through a layer or two of extrusion.
Table of Contents
- 1What You Need
- 2Step-by-Step: How to Splice Filament for Continuous Printing
- 31. Match the Filament Material and Diameter
- 42. Prepare and Square the Filament Ends
- 53. Heat and Form a Compatible Joint
- 64. Cool, Inspect, and Test the Splice
- 7Install the Splice Without Causing a Jam
- 8Common Mistakes
- 9Tips for More Reliable Continuous Printing
- 10Frequently Asked Questions
- 11Can I splice two different types of filament together?
- 12Will a filament splice work with an automatic filament sensor?
- 13Should I use a heat splice or a filament connector?
- 14Do I still need to prepare filament for an infinite-feed system?
- 15What should I do if a spliced filament strand jams the printer?
- 16Conclusion
What You Need
You need very little. A sharp tool, a steady heat source, and a jig that holds the joint round while it cools cover almost every home setup.
- Two strands of the same filament in the same polymer family, same diameter, same colour behaviour if you care about colour consistency.
- A filament cutter or sharp flush cutters. A sharp pair of scissors works, but a guillotine-style cutter gives a flatter, more square face.
- A heat source: a heat gun on low, a butane torch, a small lighter, or a tealight candle in a tube jig.
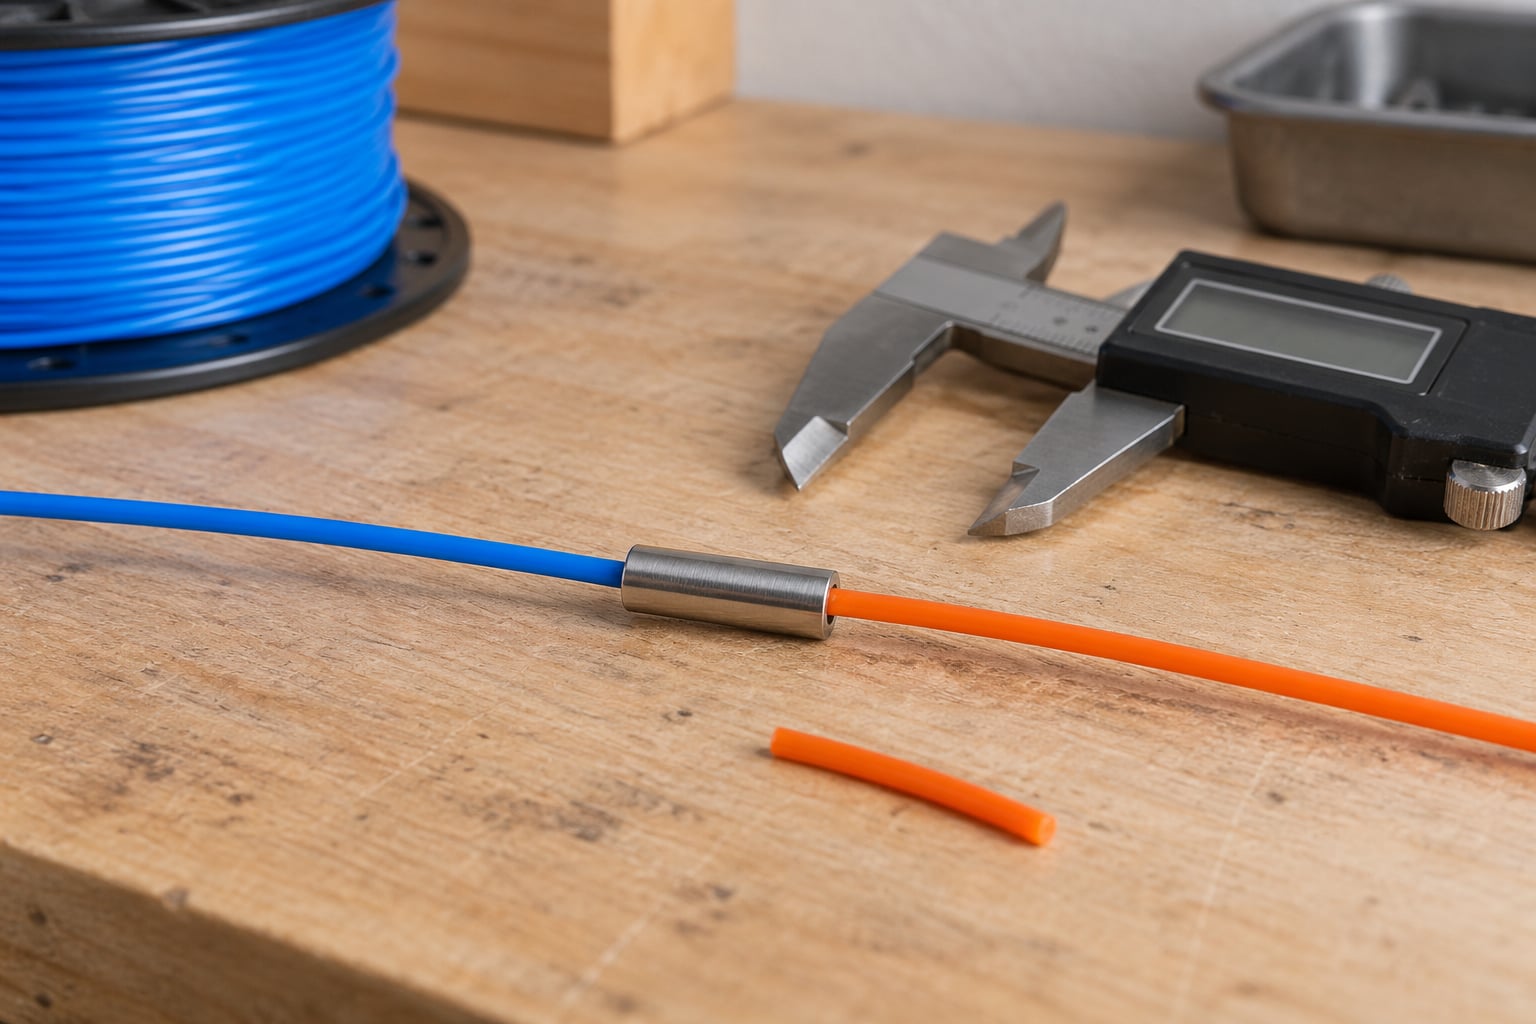
- A splice jig: a metal tube with an internal bore close to your filament diameter works well. Printed jigs for both 1.75 mm and 3 mm filament have been around for more than a decade and still print cleanly.
- A lighter or a heat gun — pick one, and note that butane leaves far less soot than a standard lighter flame.
- A ruler or calipers to check the finished diameter.
- Optional: a heat-shrink tube butt joint, or a mechanical connector, if you want to skip heat entirely.
This procedure applies to common 1.75 mm and 2.85/3.00 mm FDM/FFF filament. It does not apply automatically to composites such as carbon fibre or glass fibre nylon, soluble support filaments like PVA, or specialty blends — fillers and additives change how the material melts, so follow the supplier’s guidance or skip the splice and use a fresh spool.
If your heat source is the bottleneck, compare options before you commit.
| Method | Precision | Handles 1.75 mm | Handles 3 mm | Notes |
|---|---|---|---|---|
| Candle in a tube jig | Low | Yes | Yes, with a wider tube | Cheapest, slowest, soot-free |
| Butane torch | Medium | Yes | Yes | Preferred over a lighter because it avoids soot |
| Lighter | Low | Yes | Marginal | Deposits soot on the joint |
| Heat gun on low | Medium | Yes | Yes | Widest heat, easiest to control |
| Printed splice jig | High | Yes | Yes | Cheap once printed, repeatable |
| Commercial splicer | High | Model dependent | Model dependent | Built-in heat control, no soot |
| Multi-spool system | Automatic | Yes | Model dependent | Handles the swap mid-print, hardware cost is high |
Step-by-Step: How to Splice Filament for Continuous Printing
The method below is the tube-and-heat butt joint, which is how most DIY and commercial splicers work. Follow these steps in order and check the result after each stage before moving on.
1. Match the Filament Material and Diameter
Only splice two strands that share a polymer family, a diameter, and a colour behaviour. Mixing PLA with PETG, ABS, or ASA produces a joint with no useful bond, because the two melts cool at different rates and neither fully fuses. The same goes for colour: a clear strand fused to a bright one gives you a visible transition layer every time, which is fine for a purge tower and annoying on a finished surface.
PLA, PETG, ABS, and ASA all splice cleanly on their own. TPU is flexible, so it needs a gentler heat and a longer hold or the surface skins over before it fuses. Polycarbonate and nylon need the most heat and a dry joint — nylon in particular is hygroscopic, so splice it dry or you will print bubbles straight from the seam.
Use these ranges as a starting point, not as gospel. Manufacturer data for your specific spool always wins over any generic number, including the ones below.
| Material | Approximate splice range | Watch for |
|---|---|---|
| PLA | About 190-220 C | Bubbles if overheated; brittle at the joint if rushed |
| PETG | About 220-250 C | Stringy and sticky if pushed too hot |
| ABS | About 230-260 C | Fumes; work ventilated |
| ASA | About 240-270 C | Same as ABS, better UV stability |
| TPU | About 200-230 C | Soft ends, needs a longer hold to wet out |
| Polycarbonate | About 260-290 C | Very high heat needed; moisture sensitive |
| Nylon / PA | About 250-280 C | Must be dry before and during splicing |
Success check: the two spools carry the same diameter label, and the manufacturer temperature ranges overlap.
2. Prepare and Square the Filament Ends
Straighten both strands first by hand or with a light pull through a guide, then mark the cut point about 150-200 mm from the end. Make the cut square to the strand — a 90-degree cut. A burr, an oval face, or a kink becomes a stress riser that either snaps at the extruder or jams the guide.
The stronger geometry uses an angle. Cut one end at 45 degrees, then push it into the jig so it sits slightly proud, and bring the second straight-cut end straight down onto it. The angled face gives the two molten surfaces far more contact area than a flat butt, which is why printed jig designs and the DIY tube methods both use it.
Success check: both cut faces are flat, bright, and free of visible burrs. Hold the strand up and look along it — any kink should be straightened before you heat anything.
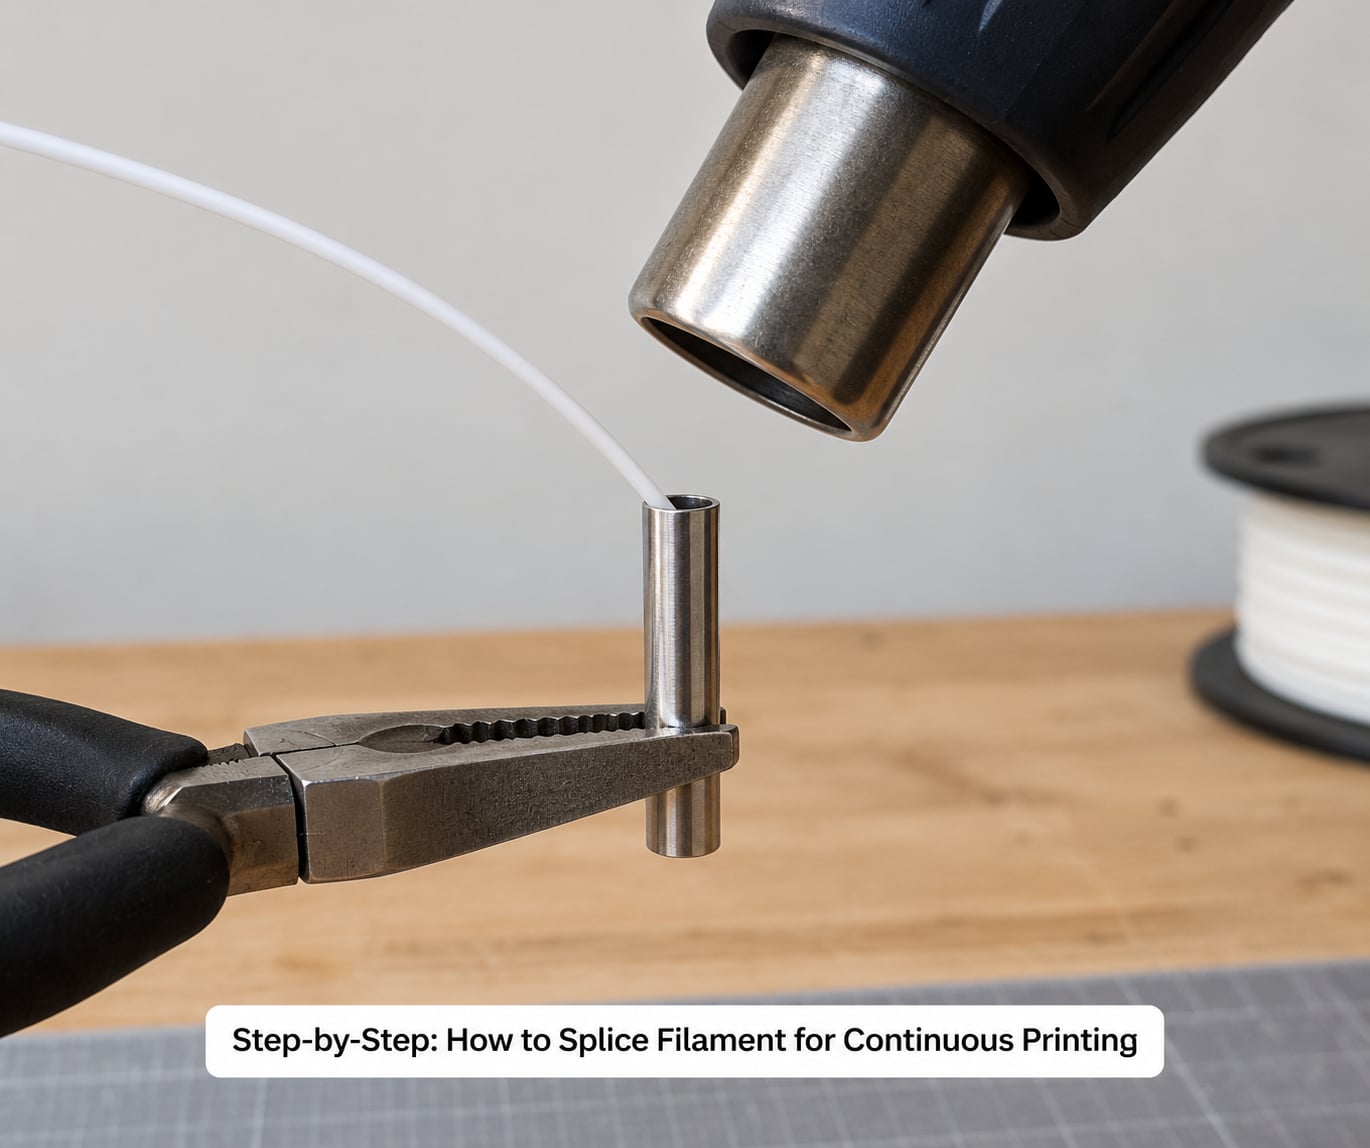
3. Heat and Form a Compatible Joint
Seat the angled end in the jig so the tube holds it round. Apply heat to the protruding filament while it sits in the bore, moving the heat source constantly so you soften rather than scorch. When the end slumps and starts to gloss, stop heating and press the second strand straight down into it, holding pressure for a few seconds. This is the step where most attempts at how to splice filament for continuous printing go wrong, and it is almost always a heat control problem rather than a material one.
Keep the filament moving slowly as you pull the joint into the tube if your method withdraws it. Motion is what makes the profile round; a joint left still tends to set oval. Stop the heat as soon as the two pieces merge and flow together.
Work on a non-flammable surface away from your printer, and never heat filament inside the machine. Vapourised plastic is unpleasant to inhale, and an open flame near a heated printer or spool holder is a bad idea. If ABS or ASA smoke smells sharp or acrid, stop and ventilate.
Success check: the two pieces have visibly become one strand with no gap between them.
4. Cool, Inspect, and Test the Splice
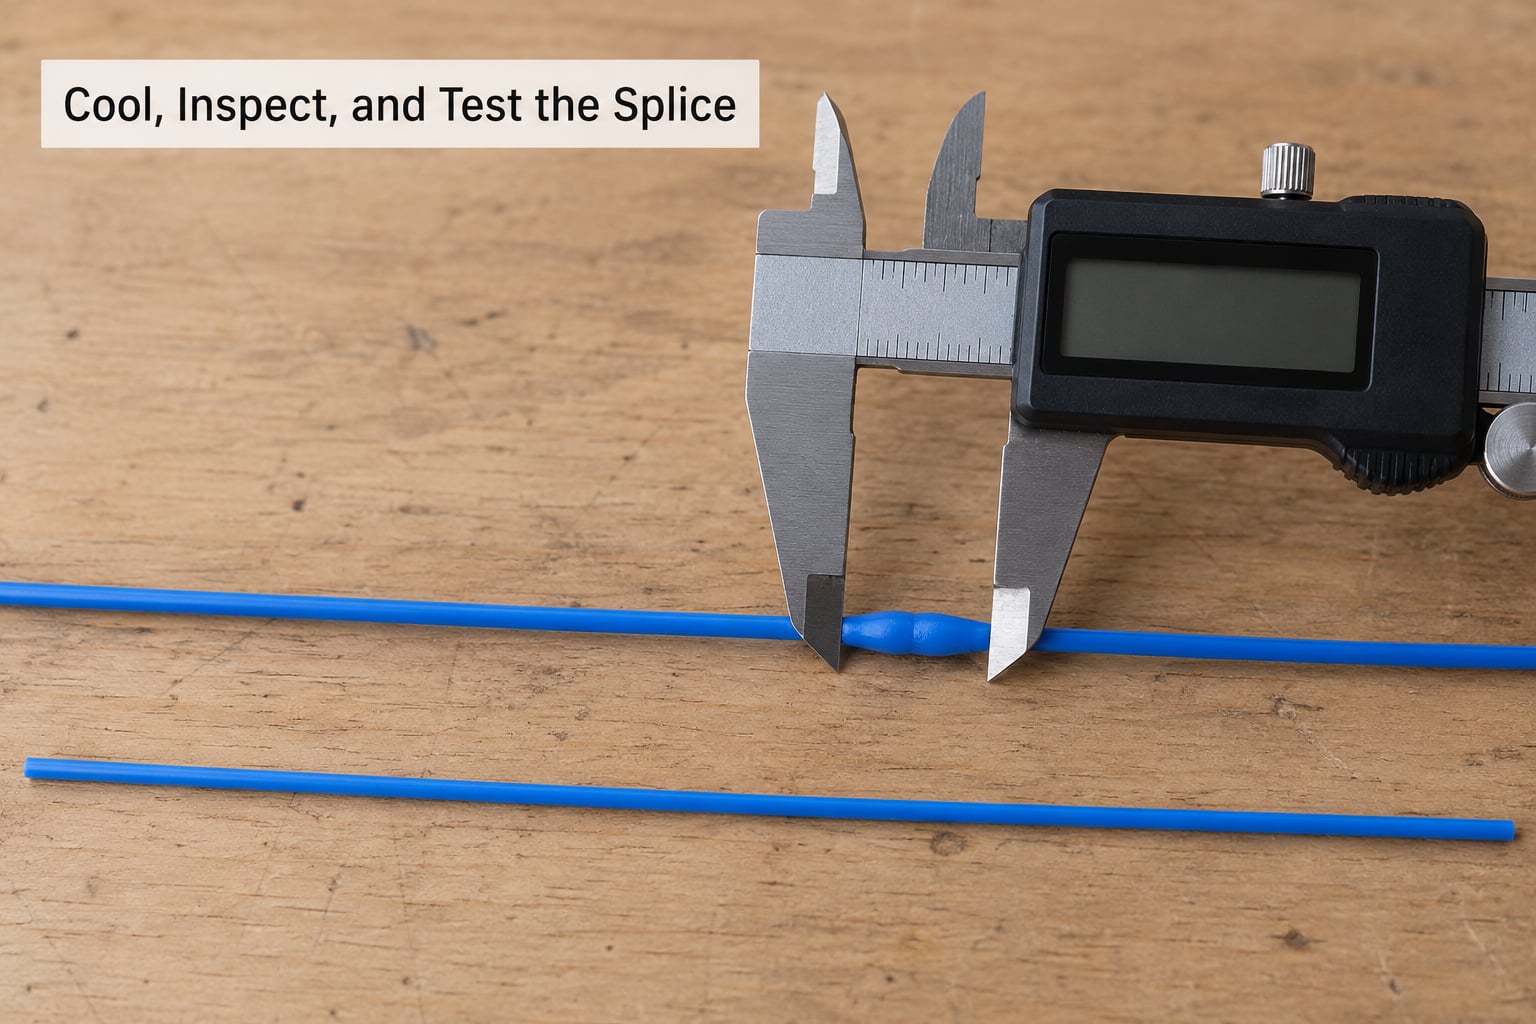
Let the joint cool completely without pulling it sideways. Cooling under tension is the most common reason a splice separates in the feeder. Then measure the diameter with calipers at three points along the joint and at least 50 mm on either side of it.
Compare the numbers to the nominal diameter. A 1.75 mm filament that measures 1.80 mm at the joint is asking for trouble — that extra material has to pass through the drive gear, the extruder entry, and the PTFE or Bowden tube. Most printers tolerate a small variation but punish an abrupt step. A joint that measures 1.70 mm after cooling is under-extruded rather than jammed, which is a different fix.
Pull the joint with firm hand pressure, far more than the extruder will ever apply, and bend it back and forth several times at the joint. If it feels weak, if the surface shows bubbles or pinholes, or if it catches on a fingernail, cut it off and do it again. Better to lose 150 mm than to lose a 20-hour print.
Success check: diameter is consistent within a few hundredths of a millimetre, and the pull test produces no give and no crackling.
Install the Splice Without Causing a Jam
Unload the printer according to its own procedure rather than yanking cold filament backwards through a hot end — most manufacturers describe how to heat and retract the old strand out. Thread the spliced strand in the normal way and feed it forward by hand until the joint reaches the first guide.
Pay attention to where the joint sits. Keep it clear of sharp PTFE entry edges, any drive gear teeth, and the extruder entry itself. If your setup has a minimum bend radius, respect it: printed filament in particular is brittle and will crack if you force it through a tight curve. Guide the spliced strand in a gentle arc, and if you can, position the joint in a straight run of Bowden tube rather than at the bend closest to the extruder.
Then print something short. A 20 mm calibration cube or a single-layer test takes five minutes and tells you far more about the splice than any offline check. Watch the first layers for a consistent line width across the joint, and listen for the drive gear skipping, which is the sound of a joint that is too thick.
Success check: the strand feeds through every guide without force, the joint passes through the extruder without resistance, and the short test print shows no gap or blob where the splice sat.
Common Mistakes
Almost every failed splice comes down to one of a handful of causes. Match your symptom to the fix below before you try again.
| Symptom | Likely cause | Fix |
|---|---|---|
| Joint separates inside the feeder | Not enough contact area, or the ends cooled before fusing | Use the 45 degree face, heat to a full gloss, press hard, and hold until cool |
| Extruder grinds or skips | Joint diameter too large, or an abrupt step | Re-cut and re-form inside the bore; check with calipers before installing |
| Bubbles or crackling at the seam | Trapped air or moisture in the joint | Dry the filament first, heat slowly, and press the molten ends together to expel air |
| Under-extrusion after the joint | Diameter too small or oval | Pull the joint back through the jig while still warm, then measure again |
| Brittle break at the seam | Cold joint from insufficient heat, or a rushed splice | Cut it off and redo at the higher end of the material range |
| Filament frays or kinks | Burrs, or minimum bend radius exceeded | Deburr the cut and route the strand in a wider arc |
| Print fails minutes after a change | Incompatible materials joined | Never splice across polymer families; load two spools instead |
| Colour line or blob in the print | Extruder tension on an over-thick joint | Trim the joint back slightly and re-test with a short print |
Tips for More Reliable Continuous Printing
Dry the filament before you splice it, not after. Moisture hides in the joint and shows up as bubbles weeks later, when you no longer remember making the connection. A filament dryer or a dry box with desiccant does more for splice reliability than any jig.
Label paired spools with tape so a matched pair goes into the same run. Mixing two lots that turn out to be different brands is how you end up with a joint that prints fine but delaminates on the seam.
Keep the joint out of the sharpest guide and out of the extruder entry, and secure it so it cannot be pulled into the feed path by tension. A small printed clip or a guide block that holds the splice straight along the Bowden tube helps more than people expect.
Check your extruder type before you start. A dual-drive extruder grips harder and forgives a slightly thick joint, while a single-drive setup with a PTFE-lined path is more likely to struggle. Firmware multi-spool or infinite-feed modes on hybrid printers still expect well-formed filament entering the feed, so preparation still happens even when the swap is automated.
Watch the seam during the first layers of the next print. A change in line width, a repeating scratch, or a faint colour band tells you the joint needs trimming. Catching it in minute three costs nothing; catching it in hour twenty costs the whole job.
And be honest about whether you need to splice at all. Plenty of makers on Maker Forums have said plainly they have never once run a spool dry, let alone needed a joint. Splicing earns its keep when you have a bin of offcuts, two half-spooled rolls of the same material, or a colour change that would otherwise mean a purge tower of waste.
Frequently Asked Questions
Can I splice two different types of filament together?
No. A joint between different polymer families will not hold, because the two melts solidify at different rates and never fully interlock. PLA fused to PETG, ABS, or ASA usually separates at the seam inside the feeder. The same applies to colour if you want a consistent surface. Use a multi-spool or multi-input setup, or simply reload between prints.
Will a filament splice work with an automatic filament sensor?
Yes, as long as the joint measures true to diameter and feeds smoothly. Run-out sensors measure movement or force rather than looking for a joint, so a good splice passes without detection. A joint that measures noticeably oversize will stall the sensor or trip a jam, and one that is undersize can read as a false run-out.
Should I use a heat splice or a filament connector?
A heat splice costs almost nothing and produces a permanent joint with no mechanical step in the feed path. A connector is faster and needs no heat, but it adds a part that can snag and it will not hold a sharp bend well. For continuous printing, most people choose the heat splice and keep the connector as a backup.
Do I still need to prepare filament for an infinite-feed system?
Yes. An automatic system replaces the manual change, not the material preparation. The strand still has to enter the feed path at true diameter, stay dry, and hold a gentle bend radius. Systems such as multi-spool modes may leave a short unusable tail after each spool ends, so have some spare filament ready for the manual cleanup.
What should I do if a spliced filament strand jams the printer?
Stop the print and do not force it. Heat the nozzle to the material’s usual temperature, then back the filament out by hand once it is soft. Cut off the joint with flush cutters, trim the strand square, and reload. Run a short test print before resuming. If the jam repeats, the joint was likely oversize or not round.
Conclusion
Start with material. Same polymer, same diameter, same colour behaviour, or do not bother. Cut one end at 45 degrees and the other square, use a jig that holds the joint round, and work in the lower half of your material’s temperature range until you have the feel for it.
Then test before you trust it. Measure with calipers, pull the joint hard, run a five-minute print, and only then commit to the long batch job. That is how to splice filament for continuous printing without losing a multi-day print to a seam that was never checked.