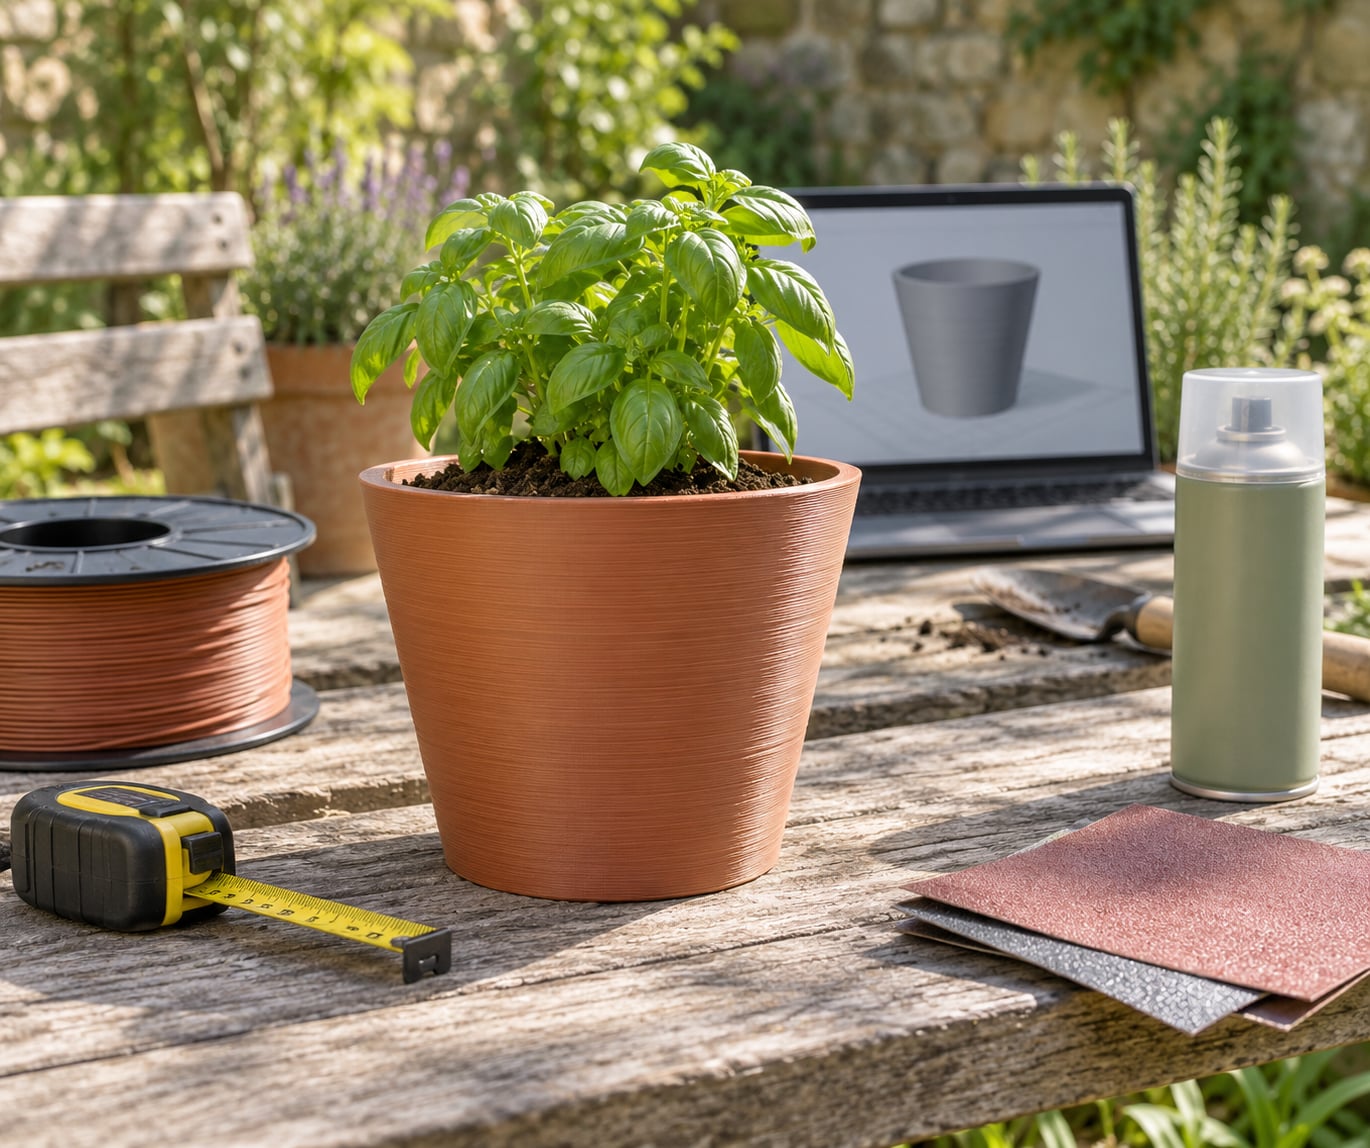
If you want a reliable answer to how to 3D print garden and planter projects, start with a model, a material choice and a drainage plan, then move through slicing, printing, sealing and planting. Print in PETG or ASA rather than PLA, cut drainage holes before the pot goes outside, and seal the interior so it does not grow algae. A first windowsill pot takes an evening of printing and an hour of design work.
The reason to print rather than buy is fit. A windowsill that is 14 inches wide, a railing with an odd spacing, a shelf shaped for one specific herb pot — store-bought containers do not come in those sizes. Printed ones do, and they can carry features a moulded pot cannot, like a wicking reservoir underneath the soil line.
Most of the popular garden prints are not the big decorative pots. On the permies forum, a gardener running a Bambu printer reported that plant markers were an instant hit while a PLA dibble tool snapped its tip, and that a simple mulch classifier became the most used print of an entire season. Functional, repeated-use pieces beat showy pots. That is the pattern worth copying.
Table of Contents
- 1What You Need
- 2Design software
- 3Printer and build volume
- 4Filament
- 5Tools and finishing supplies
- 6Step-by-Step
- 7How to 3D Print Garden and Planter Projects: Choose the Design
- 8How to 3D Print Garden and Planter Projects: Model Drainage and Wall Thickness
- 9How to 3D Print Garden and Planter Projects: Test the Fit
- 10How to 3D Print Garden and Planter Projects: Slice and Print
- 11How to 3D Print Garden and Planter Projects: Dry and Smooth the Parts
- 12How to 3D Print Garden and Planter Projects: Seal for Outdoor Use
- 13How to 3D Print Garden and Planter Projects: Add Soil and Plants
- 14Choosing the Right Filament for Outdoor Garden Prints
- 15Printer and Slicer Settings That Work Outdoors
- 16Planter Design Basics: Drainage Holes, Reservoir Volume and Sizing
- 17Common Mistakes
- 18Frequently Asked Questions
- 19What filament is best for outdoor planters?
- 20How do you waterproof a 3D printed planter?
- 21How large can a 3D printed planter be?
- 22Do 3D printed planters need drainage holes?
- 23Can I put a 3D printed planter indoors?
- 24What soil mix should I use in a printed planter?
- 25Start With a Small Drainage Test
What You Need
You need four groups of things: something to design in, something to print with, hand tools for finishing, and supplies for sealing and drainage. The only two that really constrain your project are the design software and your printer’s build volume.
Design software
Tinkercad is free, browser-based and about ten minutes to learn, which makes it the right starting point for a tapered pot or a simple tool. Fusion 360 and Onshape are free for hobby use and handle parametric models, so a planter can take a diameter input and rebuild at any size. Use whichever you can model a revolved shape in without fighting the interface.
Printer and build volume
Measure the build volume before you design, not after. A typical enclosed or open printer gives you roughly 200 by 200 by 200 mm of usable space, so a planter wider than that has to print in sections or in halves joined by printed pins. A five-inch pot is comfortably inside the limit; a twelve-inch trough usually is not.
Enclosed printers with a heated chamber earn their keep here. Big flat planters put a lot of material down in one layer, and a stable chamber is the difference between a clean print and one that delaminates halfway up the wall.
Filament
Pick a material based on heat and sun, not on ease. PLA softens around 55 to 60 C, which a south-facing patio in summer can reach, and it fades to a chalky white after a season of UV. PETG handles moisture and heat far better. ASA is the one to reach for when a pot sits in full sun year round.
Tools and finishing supplies
- A 6 mm and an 8 mm drill or hole saw for drainage, plus a scrap of wood to drill into
- 220, 400 and 800 grit sandpaper, or a small orbital sander for larger flat walls
- A clean brush and warm soapy water for washing prints
- An exterior-grade spray primer and a UV-resistant acrylic topcoat for sealing
- Silicone caulk or a pond-safe liner if you plan to use a self-watering pot indoors
- Potting mix, a trowel and a saucer for the finished planter
Step-by-Step
The full workflow runs from measuring the planting site through modelling, test printing, slicing, finishing, sealing and planting. Seven steps, and the first two decide whether the last five are easy.
How to 3D Print Garden and Planter Projects: Choose the Design
Choose the design by matching the pot to the space it lives in, the plant that goes in it, and the sun it sits in. A windowsill herb pot wants to be shallow and wide to stay stable. A balcony railing planter wants a back that mounts flat to a bracket. A full-sun patio pot needs deep walls and a material that will not go soft in July.
Get the three dimensions before opening any CAD software: the maximum width, depth and height available at the site. Leave an inch of clearance on each side for air movement and for your hands when you lift it. Then pick the plant, because the root depth decides the pot depth. A full-grown basil root ball wants eight inches of soil; a succulent wants three.
Check the printer’s build volume last and treat it as a hard ceiling. If the pot will not fit, the fix is a segmented design — two halves with keyed sockets and short printed pins — not scaling it down past the point where the walls become fragile.
How to 3D Print Garden and Planter Projects: Model Drainage and Wall Thickness
Model drainage before anything else, because you cannot add a hole to a pot after the plant is in it. Cut drainage holes of 6 to 8 mm in the base, raise an inner tray 10 to 15 mm above the floor so water sits below the soil line, and set walls at 2.4 to 3 mm — three or four perimeters at a 0.4 mm nozzle.
Walls thinner than 1.6 mm print brittle and split at the rim after a season of watering. Walls thicker than about 4 mm on a large pot add hours of print time and use more filament than the extra strength is worth. Three perimeters at 0.4 mm lands in the sweet spot, and it keeps overhangs short enough to bridge without support.
The rest of the geometry follows the same support-free rule. Keep every overhang at 45 degrees or shallower. Add a rim that flares slightly so the pot is easier to grip and the top edge is not a sharp lip. Add feet or a recessed base if the pot will sit on a surface that must stay dry — a pot that leaves a wet ring on a shelf is the fast way to lose a household vote for printing.
For self-watering designs, model the reservoir as a separate chamber with a fill port large enough to pour through, plus a wicking column or a strip of capillary mat that reaches from the chamber into the soil. Get the reservoir volume wrong and the pot either floods or starves the roots. A common ratio is roughly one litre of stored water per litre of soil volume.
How to 3D Print Garden and Planter Projects: Test the Fit
Test the fit by printing one corner or a 40 mm cross-section of the pot before committing to the full build. It costs about fifteen minutes and it tells you three things at once: whether the drainage hole lands where you expect, whether the rim feels comfortable to grip, and whether your slicer’s overhang handling will need help on the walls.
Hold the test section next to your plant pot or your railing bracket and check clearance. Fit a nut or bolt through any printed hole — if the thread turns stiff, the hole is undersized and you should model it 0.3 mm wider before the real print.
Check the cross-section for layer lines that will end up on a visible face. If they land there, rotate the print 90 degrees on the bed rather than sanding a tall wall smooth later. Fix any problem found here, then save the corrected model and stop tweaking it.
How to 3D Print Garden and Planter Projects: Slice and Print
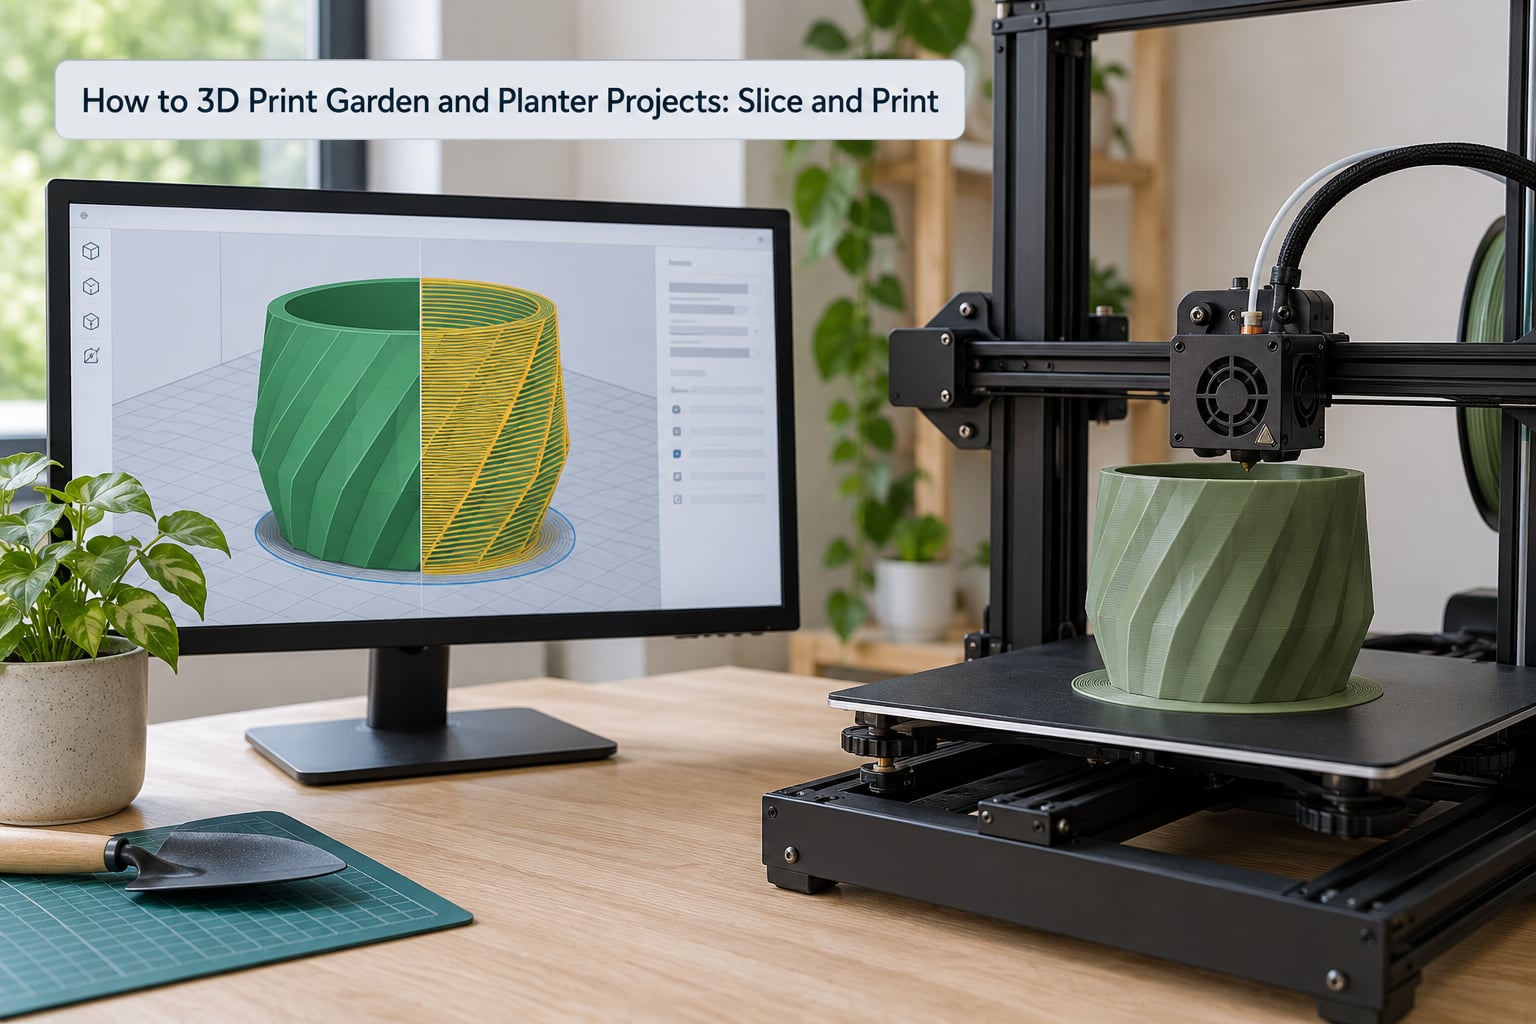
Slice large planters at a 0.2 mm layer height with three or four perimeters and about 15 percent infill in the walls only. Keep the bottom solid with at least five perimeters so it does not flex and crack under wet soil. Do not push infill higher in a pot; the strength comes from the walls, and extra infill just adds weight that makes the pot harder to move.
Bed adhesion is the failure point on big flat footprints. Add a brim rather than a raft — a raft wastes material and makes the underside harder to clean. On a heated bed, a clean PEI or glass sheet with no fingerprints is worth more than any amount of glue stick.
Get the nozzle temperature right for the material and stay inside the manufacturer’s range. PETG generally prints around 235 to 250 C, ASA higher, and neither likes being rushed. Watch the first three centimetres: if the lines separate or the part lifts at the corners, stop, clean the bed, raise the nozzle a few degrees, and restart. Do not print a nine-hour pot around a problem you could see in the first ten minutes.
Print pots big-side-down on the bed whenever the design allows it. That puts the visible surface on the bed, where layer lines print tight, and turns the awkward overhang into a flat first layer.
How to 3D Print Garden and Planter Projects: Dry and Smooth the Parts
Wash prints in warm soapy water and dry them fully — 24 hours in a warm room is not excessive for PETG or ASA. Washing removes oils from the bed that would otherwise sit under your primer, and any moisture left inside a sealed pot becomes a mold problem later.
Remove supports while the part is still slightly warm and break supports off along the natural layer boundary rather than twisting against it. Sand only the surfaces a hand will rest on: the rim, the feet, the grip. Sanding a tall wall flat is hours of work for a finish that a matte topcoat hides anyway.
Round the sharp outer edges of the rim with a file or a sanding roll. It takes two minutes and it is the difference between a pot that feels finished and one that feels like a prototype. Dry-fit any hardware without forcing it — printed threads strip easily, and a screw that will not go in is a design tolerance problem, not a tightening problem.
How to 3D Print Garden and Planter Projects: Seal for Outdoor Use
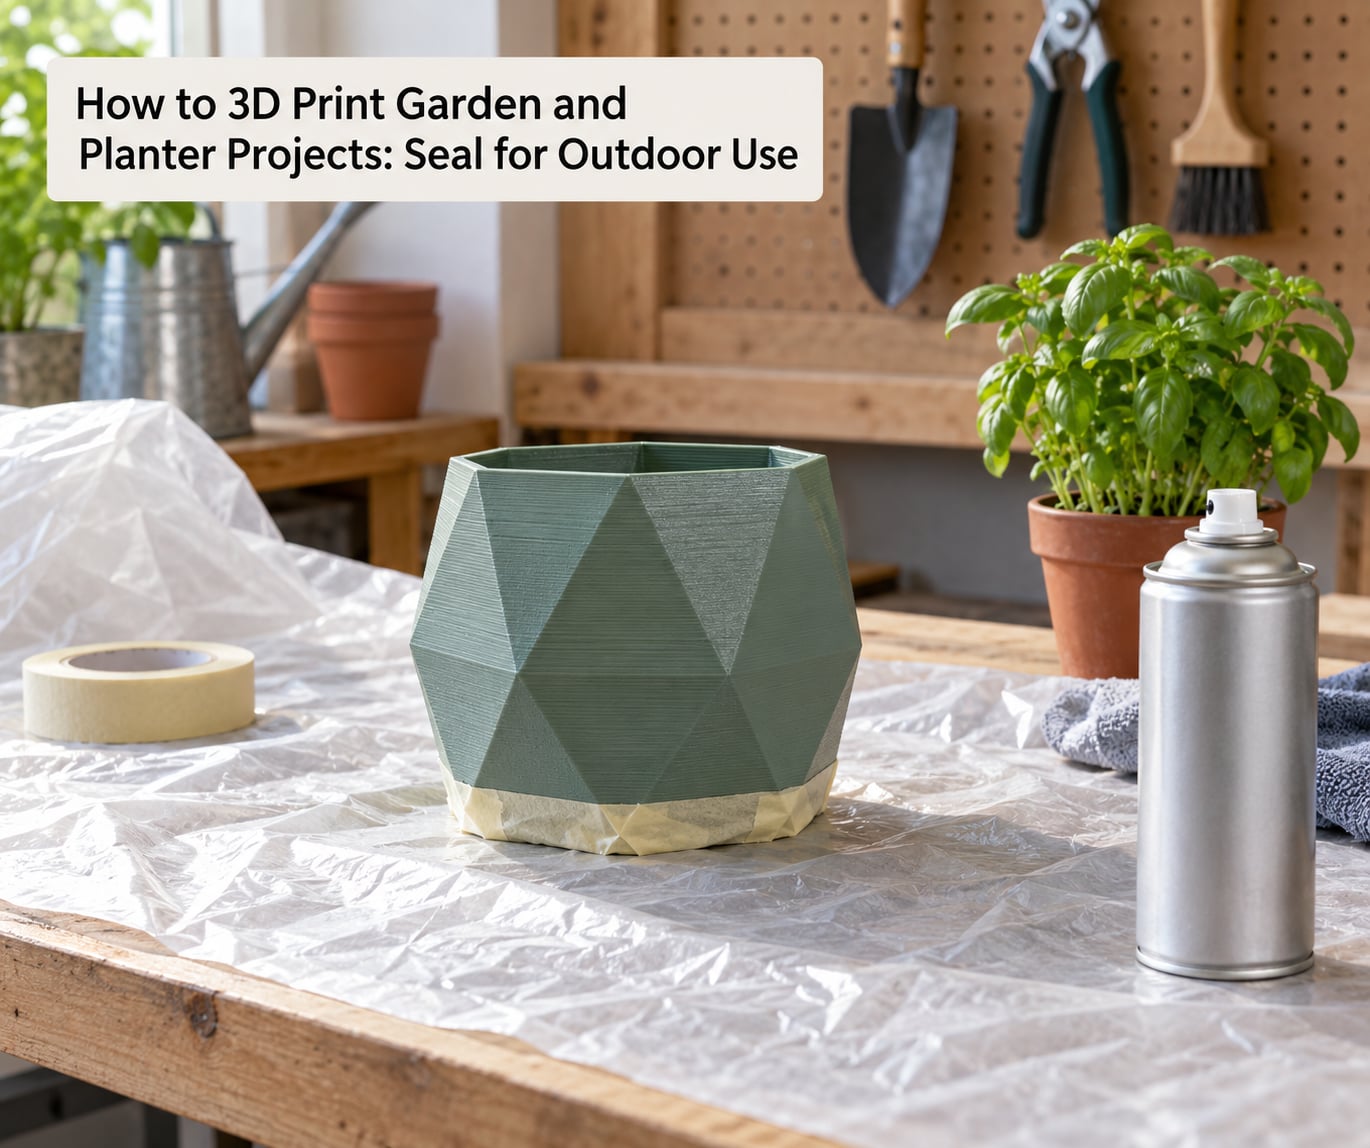
Seal for outdoor use by cleaning the part, applying an exterior spray primer, then two to three thin coats of UV-resistant acrylic topcoat, allowing full cure between them. The primer grips the layer lines and the topcoat blocks water and sunlight. This is the single step that decides whether a pot looks new in six months or chalky by August.
Mask the drainage holes before spraying and check they are still open afterwards. A sealed pot that cannot drain is a pot that kills the plant inside it. Mask any area you want to stay matte, because a satin topcoat over a matte part looks uneven.
Work in shade with moderate ventilation, and follow the can’s cure time rather than your impatience. A pot sealed and planted the same hour will trap solvent and go soft at the first contact with wet soil.
How to 3D Print Garden and Planter Projects: Add Soil and Plants
Add soil by testing drainage first: pour a litre of water into the finished pot over a sink and confirm it runs out the base within a minute rather than sitting. Then use a mix matched to the plant, not a generic fill. A succulent wants a gritty, low-peat mix; a herb wants a light loam-based mix that drains but holds moisture. A liner bag is worth adding only for a pot on a windowsill where you cannot afford a single overflow.
Establish a watering rhythm in the first two weeks and adjust from the soil rather than the calendar. Check two centimetres down before you water. For a self-watering pot, fill the reservoir once, keep the wick in contact with both the chamber and the soil, and top it up weekly.
Place the planter where runoff cannot reach a surface you care about, and set it on feet or a saucer if it sits on wood or painted decking. Full-sun spots need a lighter mix and more frequent water than shade; a pot in shade can stay wet a week and pick up algae.
Choosing the Right Filament for Outdoor Garden Prints
PETG is the best all-round filament for 3D printed planters, and ASA is the best when the pot sits in direct sun. PLA is fine for indoor windowsills and seed trays but goes soft above about 55 C and chalks under UV, which is why forum gardeners keep reporting broken tips and faded prints after a season.
| Filament | UV resistance | Water resistance | Heat tolerance | Best garden use |
|---|---|---|---|---|
| PLA | Poor | Good when sealed | Low, softens near 55 to 60 C | Seed trays, markers, indoor pots |
| PETG | Fair | Good | Good | General planters, tool holders, self-watering inserts |
| ASA | Excellent | Excellent | Good | Full-sun patio pots, permanent fixtures |
| TPU | Fair | Good | Fair | Flexible liners, pot feet, grip parts |
| Nylon | Good | Excellent | Excellent | Heavy-duty tools and hinges, needs drying |
Nylon absorbs moisture from the air and must be dried before printing, so it is a harder starting material than PETG. TPU is flexible, which makes it useful for grommets and pot feet but awkward for vertical walls and layer adhesion on large parts.
Printer and Slicer Settings That Work Outdoors
Large planter prints succeed on four settings: 0.2 mm layers, three to four perimeters, a brim on big flat footprints, and an enclosed chamber if your printer has one. Everything else is secondary. These four solve the layer shifts and bed failures that ruin big garden prints.
| Project geometry | Layer height | Walls | Infill | Orientation |
|---|---|---|---|---|
| Windowsill herb pot | 0.2 mm | 3 perimeters | 15 percent | Rim up, flat base on bed |
| Self-watering planter | 0.2 mm | 4 perimeters | 20 percent | Base down, channels vertical |
| Seed starter tray | 0.16 to 0.2 mm | 3 perimeters | 15 percent | Flat, tray upright |
| Tool hook or wall bracket | 0.2 mm | 4 perimeters | 30 percent | Back face on bed |
| Large outdoor planter over 200 mm | 0.24 to 0.28 mm | 4 perimeters | 15 percent | Segmented into printable halves |
Support material should be a last resort on planters. Where you cannot avoid it, use a slicer organic supports interface so the material breaks away at the surface, and place the interface on a face that will be inside the pot or against a wall.
Planter Design Basics: Drainage Holes, Reservoir Volume and Sizing
Drainage holes of 6 to 8 mm suit most houseplants and herbs, and a saucer is not a substitute for them — it just catches what already leaked. Match pot diameter to root ball loosely: a pot one to two inches wider than the root ball gives roots room without leaving a ring of wet soil that never dries.
Reservoir volume in a self-watering pot is the number most free models get wrong. Too much and the soil stays saturated and roots rot; too little and you are watering on schedule anyway, which defeats the purpose. A workable ratio is about one litre of reservoir per litre of soil, with the water line sitting a few centimetres below the top of the soil chamber.
Depth matters more than style. A shallow wide pot suits succulents, herbs and bonsai, and a bonsai pot that is too deep keeps the roots sitting wet. A deep pot suits peppers, tomatoes and anything with a taproot. A tall decorative cylinder full of soil is also very heavy — check that you can lift it when full, because wet soil weighs more than the planter’s volume suggests.
Common Mistakes
The failures below come up repeatedly in maker forums, and each has a specific correction. Most of them are design or material problems rather than printer problems.
- No drainage. Water sits in the base and roots rot. Cut holes before sealing, and mask them during priming.
- Walls too thin. Pots crack at the rim after a season. Go to three or four perimeters rather than adding infill.
- Layer shifts on large footprints. Clean the bed, add a brim, print inside an enclosure, and raise nozzle temperature a few degrees within the material’s range.
- PLA in summer heat. Softening and brittle tips are the usual report. Switch that pot to PETG or ASA.
- UV fade. Surfaces go chalky within months without a topcoat. Prime and finish anything in full sun.
- Algae inside the pot. Permanent damp and light on smooth plastic. Sand lightly inside, seal with an opaque coat, and empty standing water after rain.
- Trapped moisture. A sealed pot printed straight from the bed can hold water between layers. Wash and dry for a full day before sealing.
- Support marks. Ugly scars where supports met a visible face. Restructure overhangs to 45 degrees instead of supporting them.
- Too big for the bed. A pot that would need 40 hours and a warped mid-layer print. Segment the model or scale it down.
- Standing water rings. Wet footprints on decking. Add feet or a recessed base.
One more habit pays off more than any setting tweak: dry the print after every wash and keep finished planters out of puddles when you can move them. A printed planter that drains freely and dries between waterings will outlast one that looks better but stays wet.
Frequently Asked Questions
What filament is best for outdoor planters?
PETG is the best general choice because it handles water and heat far better than PLA, and ASA is better still for pots in direct sun because it resists UV and does not chalk. PLA works indoors and for seed trays, but it softens above roughly 55 to 60 C and fades after a season of sunlight. Seal any outdoor pot with a UV-resistant topcoat regardless of the filament.
How do you waterproof a 3D printed planter?
Wash and fully dry the print, apply an exterior spray primer, then two to three thin coats of UV-resistant acrylic topcoat with full cure time between them. The primer grips the layer lines and the topcoat blocks water and sunlight. Mask the drainage holes before spraying and check they remain open. Sealing a pot and planting it the same hour traps solvent and softens the walls.
How large can a 3D printed planter be?
A planter as wide and deep as your printer’s build volume, which for most home printers is around 200 mm square. Taller is easier, since there is no ceiling limit on height. Anything wider than the bed needs to be printed as two halves with keyed sockets and short printed pins, or scaled down. Check the weight too: wet soil in a large pot is heavier than the volume suggests.
Do 3D printed planters need drainage holes?
Yes. Cut 6 to 8 mm holes in the base and keep them clear through sealing, or the soil stays saturated and the roots rot. Raising an inner tray 10 to 15 mm above the floor lets excess water sit below the soil line, which extends the time between waterings. A saucer catches what leaks out; it does not replace the holes.
Can I put a 3D printed planter indoors?
Yes, and indoor planters are easier because there is no UV or temperature swing. Use PLA or PETG and leave the pot unsealed if you prefer, though a light coat still helps with staining. A liner bag inside the pot protects the surface if the planter sits on a shelf or sill where a single overflow would be a problem.
What soil mix should I use in a printed planter?
Match the mix to the plant. Succulents need a gritty, low-peat mix that drains fast. Herbs and vegetables want a light loam-based mix that holds moisture without staying waterlogged. Avoid straight garden soil, which compacts inside a container and holds far more water than roots in a small pot can use. Check two centimetres down before watering rather than following a fixed schedule.
Start With a Small Drainage Test
Start small. Model one tapered pot sized to your windowsill, cut three 6 mm drainage holes, print a 40 mm cross-section first, and check the fit before committing to the full pot. Once that one works, the same settings and workflow scale to seed trays, self-watering planters, tool hooks and markers without any new decisions.